Connect your Raspberry Pi 3 to the remote monitoring solution and send simulated telemetry using Node.js
This tutorial shows you how to use the Raspberry Pi 3 to simulate temperature and humidity data to send to the cloud. The tutorial uses:
- Raspbian OS, the Node.js programming language, and the Microsoft Azure IoT SDK for Node.js to implement a sample device.
- The IoT Suite remote monitoring preconfigured solution as the cloud-based back end.
Overview
In this tutorial, you complete the following steps:
- Deploy an instance of the remote monitoring preconfigured solution to your Azure subscription. This step automatically deploys and configures multiple Azure services.
- Set up your device to communicate with your computer and the remote monitoring solution.
- Update the sample device code to connect to the remote monitoring solution, and send simulated telemetry that you can view on the solution dashboard.
Prerequisites
To complete this tutorial, you need an active Azure subscription.
Note
If you don’t have an account, you can create a free trial account in just a couple of minutes. For details, see Azure Free Trial.
Required software
You need SSH client on your desktop machine to enable you to remotely access the command line on the Raspberry Pi.
- Windows does not include an SSH client. We recommend using PuTTY.
- Most Linux distributions and Mac OS include the command-line SSH utility. For more information, see SSH Using Linux or Mac OS.
Required hardware
A desktop computer to enable you to connect remotely to the command line on the Raspberry Pi.
Microsoft IoT Starter Kit for Raspberry Pi 3 or equivalent components. This tutorial uses the following items from the kit:
- Raspberry Pi 3
- MicroSD Card (with NOOBS)
- A USB Mini cable
- An Ethernet cable
Provision the solution
If you haven't already provisioned the remote monitoring preconfigured solution in your account:
- Sign in to azureiotsuite.com using your Azure account credentials, and click + to create a solution.
- Click Select on the Remote monitoring tile.
- Enter a Solution name for your remote monitoring preconfigured solution.
- Select the Region and Subscription you want to use to provision the solution.
- Click Create Solution to begin the provisioning process. This process typically takes several minutes to run.
Wait for the provisioning process to complete
- Click the tile for your solution with Provisioning status.
- Notice the Provisioning states as Azure services are deployed in your Azure subscription.
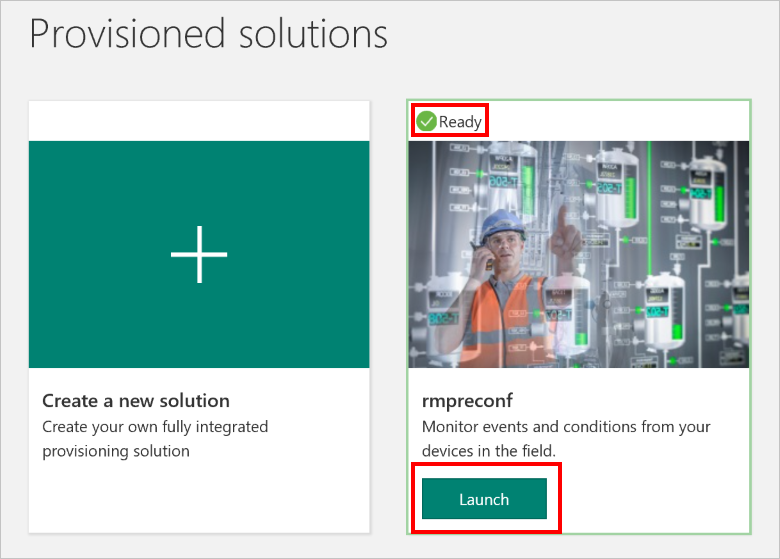
- Once provisioning completes, the status changes to Ready.
- Click the tile to see the details of your solution in the right-hand pane.
Note
If you are encountering issues deploying the pre-configured solution, review Permissions on the azureiotsuite.com site and the FAQ. If the issues persist, create a service ticket on the portal.
Are there details you'd expect to see that aren't listed for your solution? Give us feature suggestions on User Voice.
Warning
The remote monitoring solution provisions a set of Azure services in your Azure subscription. The deployment reflects a real enterprise architecture. To avoid unnecessary Azure consumption charges, delete your instance of the preconfigured solution at azureiotsuite.com when you have finished with it. If you need the preconfigured solution again, you can easily recreate it. For more information about reducing consumption while the remote monitoring solution runs, see Configuring Azure IoT Suite preconfigured solutions for demo purposes.
View the solution dashboard
The solution dashboard enables you to manage the deployed solution. For example, you can view telemetry, add devices, and invoke methods.
When the provisioning is complete and the tile for your preconfigured solution indicates Ready, choose Launch to open your remote monitoring solution portal in a new tab.
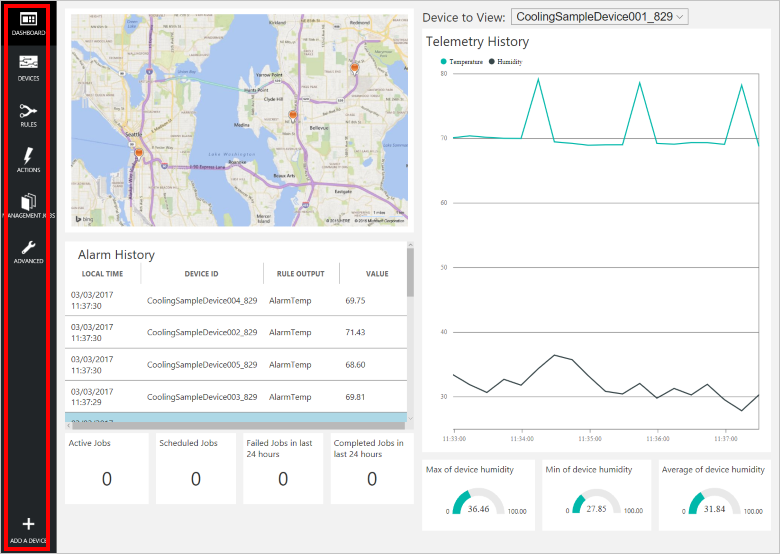
By default, the solution portal shows the dashboard. You can navigate to other areas of the solution portal using the menu on the left-hand side of the page.
Add a device
For a device to connect to the preconfigured solution, it must identify itself to IoT Hub using valid credentials. You can retrieve the device credentials from the solution dashboard. You include the device credentials in your client application later in this tutorial.
If you haven't already done so, add a custom device to your remote monitoring solution. Complete the following steps in the solution dashboard:
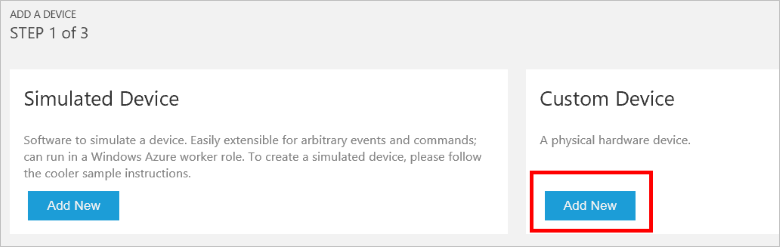
In the lower left-hand corner of the dashboard, click Add a device.

In the Custom Device panel, click Add new.
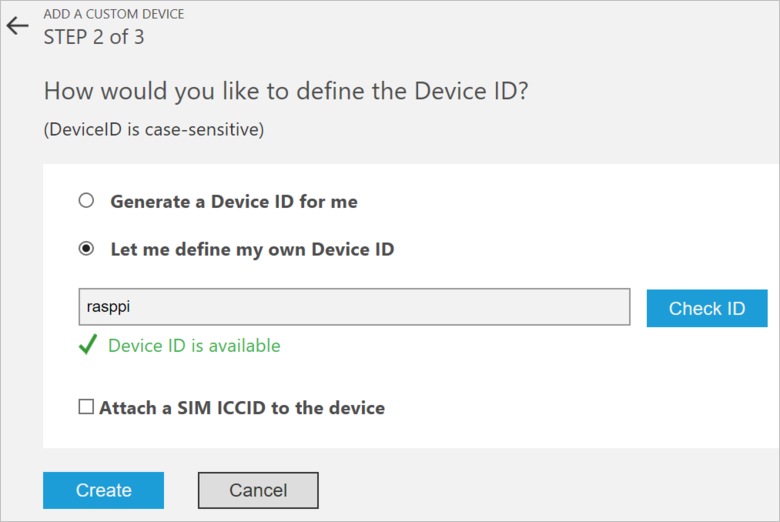
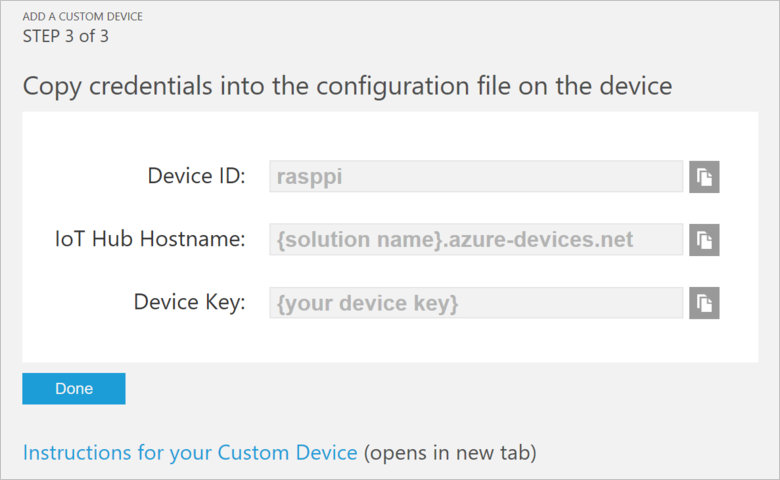
Choose Let me define my own Device ID. Enter a Device ID such as rasppi, click Check ID to verify you haven't already used the name in your solution, and then click Create to provision the device.
Make a note the device credentials (Device ID, IoT Hub Hostname, and Device Key). Your client application on the Raspberry Pi needs these values to connect to the remote monitoring solution. Then click Done.
Select your device in the device list in the solution dashboard. Then, in the Device Details panel, click Enable Device. The status of your device is now Running. The remote monitoring solution can now receive telemetry from your device and invoke methods on the device.
Prepare your Raspberry Pi
Install Raspbian
If this is the first time you are using your Raspberry Pi, you need to install the Raspbian operating system using NOOBS on the SD card included in the kit. The Raspberry Pi Software Guide describes how to install an operating system on your Raspberry Pi. This tutorial assumes you have installed the Raspbian operating system on your Raspberry Pi.
Note
The SD card included in the Microsoft Azure IoT Starter Kit for Raspberry Pi 3 already has NOOBS installed. You can boot the Raspberry Pi from this card and choose to install the Raspbian OS.
To complete the hardware setup, you need to:
- Connect your Raspberry Pi to the power supply included in the kit.
- Connect your Raspberry Pi to your network using the Ethernet cable included in your kit. Alternatively, you can set up Wireless Connectivity for your Raspberry Pi.
You have now completed the hardware setup of your Raspberry Pi.
Sign in and access the terminal
You have two options to access a terminal environment on your Raspberry Pi:
If you have a keyboard and monitor connected to your Raspberry Pi, you can use the Raspbian GUI to access a terminal window.
Access the command line on your Raspberry Pi using SSH from your desktop machine.
Use a terminal Window in the GUI
The default credentials for Raspbian are username pi and password raspberry. In the task bar in the GUI, you can launch the Terminal utility using the icon that looks like a monitor.
Sign in with SSH
You can use SSH for command-line access to your Raspberry Pi. The article SSH (Secure Shell) describes how to configure SSH on your Raspberry Pi, and how to connect from Windows or Linux & Mac OS.
Sign in with username pi and password raspberry.
Optional: Share a folder on your Raspberry Pi
Optionally, you may want to share a folder on your Raspberry Pi with your desktop environment. Sharing a folder enables you to use your preferred desktop text editor (such as Visual Studio Code or Sublime Text) to edit files on your Raspberry Pi instead of using nano or vi.
To share a folder with Windows, configure a Samba server on the Raspberry Pi. Alternatively, use the built-in SFTP server with an SFTP client on your desktop.
Download and configure the sample
You can now download and configure the remote monitoring client application on your Raspberry Pi.
Install Node.js
If you haven't done so already, install Node.js on your Raspberry Pi. The IoT SDK for Node.js requires version 0.11.5 of Node.js or later. The following steps show you how to install Node.js v6.10.2 on your Raspberry Pi:
Use the following command to update your Raspberry Pi:
sudo apt-get updateUse the following command to download the Node.js binaries to your Raspberry Pi:
wget https://nodejs.org/dist/v6.10.2/node-v6.10.2-linux-armv7l.tar.gzUse the following command to install the binaries:
sudo tar -C /usr/local --strip-components 1 -xzf node-v6.10.2-linux-armv7l.tar.gzUse the following command to verify you have installed Node.js v6.10.2 successfully:
node --version
Clone the repositories
If you haven't already done so, clone the required repositories by running the following commands in a terminal on your Pi:
cd ~
git clone --recursive https://github.com/Azure-Samples/iot-remote-monitoring-node-raspberrypi-getstartedkit.git
Update the device connection string
Open the sample source file in the nano editor using the following command:
nano ~/iot-remote-monitoring-node-raspberrypi-getstartedkit/simulator/remote_monitoring.js
Find the line:
var connectionString = 'HostName=[Your IoT hub name].azure-devices.net;DeviceId=[Your device id];SharedAccessKey=[Your device key]';
Replace the placeholder values with the device and IoT Hub information you created and saved at the start of this tutorial. Save your changes (Ctrl-O, Enter) and exit the editor (Ctrl-X).
Run the sample
Run the following commands to install the prerequisite packages for the sample:
cd ~/iot-remote-monitoring-node-raspberrypi-getstartedkit/simulator
npm install
You can now run the sample program on the Raspberry Pi. Enter the command:
sudo node ~/iot-remote-monitoring-node-raspberrypi-getstartedkit/simulator/remote_monitoring.js
The following sample output is an example of the output you see at the command prompt on the Raspberry Pi:
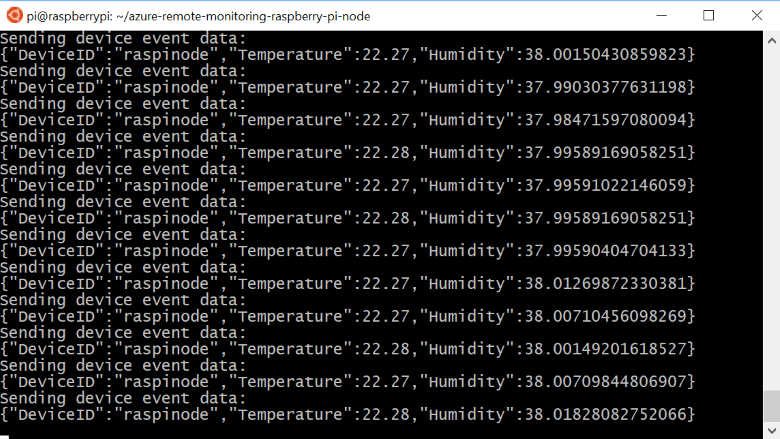
Press Ctrl-C to exit the program at any time.
View the telemetry
The Raspberry Pi is now sending telemetry to the remote monitoring solution. You can view the telemetry on the solution dashboard. You can also send messages to your Raspberry Pi from the solution dashboard.
- Navigate to the solution dashboard.
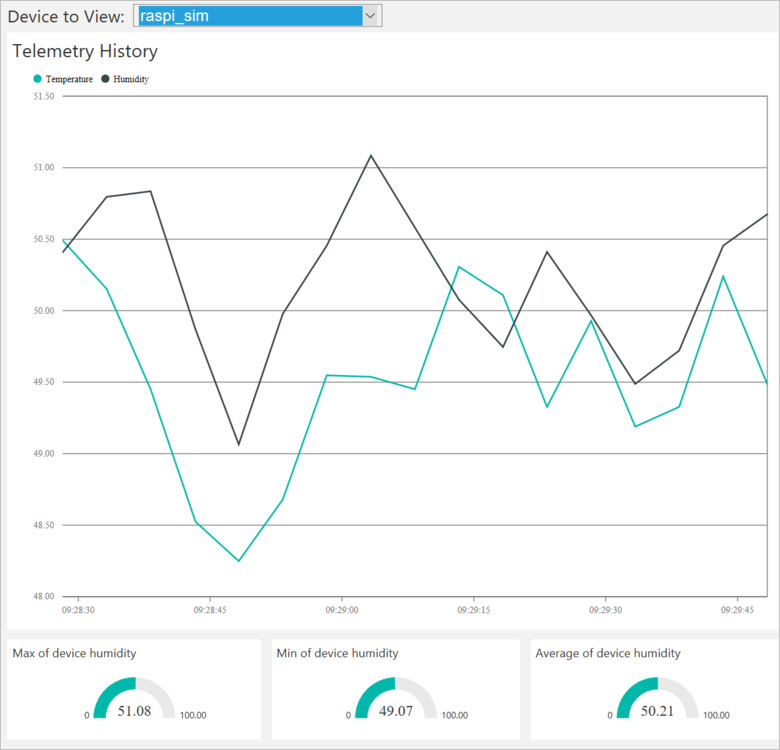
- Select your device in the Device to View dropdown.
- The telemetry from the Raspberry Pi displays on the dashboard.
Act on the device
From the solution dashboard, you can invoke methods on your Raspberry Pi. When the Raspberry Pi connects to the remote monitoring solution, it sends information about the methods it supports.
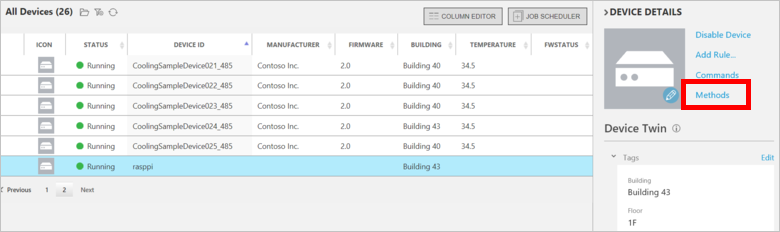
In the solution dashboard, click Devices to visit the Devices page. Select your Raspberry Pi in the Device List. Then choose Methods:
On the Invoke Method page, choose LightBlink in the Method dropdown.
Choose InvokeMethod. The simulator prints a message in the console on the Raspberry Pi. The app on the Raspberry Pi sends an acknowledgment back to the solution dashboard:
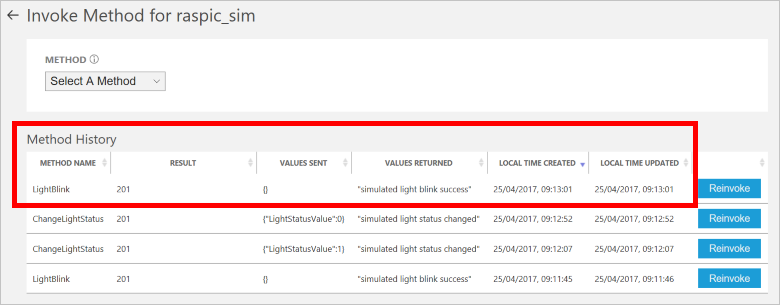
You can switch the LED on and off using the ChangeLightStatus method with a LightStatusValue set to 1 for on or 0 for off.
Warning
If you leave the remote monitoring solution running in your Azure account, you are billed for the time it runs. For more information about reducing consumption while the remote monitoring solution runs, see Configuring Azure IoT Suite preconfigured solutions for demo purposes. Delete the preconfigured solution from your Azure account when you have finished using it.
Next steps
Visit the Azure IoT Dev Center for more samples and documentation on Azure IoT.