Features in Configuration Manager technical preview version 1912
Applies to: Configuration Manager (technical preview branch)
This article introduces the features that are available in the technical preview for Configuration Manager, version 1912. Install this version to update and add new features to your technical preview site.
Review the technical preview article before installing this update. That article familiarizes you with the general requirements and limitations for using a technical preview, how to update between versions, and how to provide feedback.
The following sections describe the new features to try out in this version:
Bootstrap a task sequence immediately after client registration
When you install and register a new Configuration Manager client, and also deploy a task sequence to it, it's difficult to determine how soon after registration it will run the task sequence. This release introduces a new client setup property that you can use to start a task sequence on a client after it successfully registers with the site.
For example, you provision a new Windows 10 device with Windows Autopilot, auto-enroll it to Microsoft Intune, and then install the Configuration Manager client for co-management. If you specify this new option, the newly provisioned client then runs a task sequence. This process gives you additional flexibility to install applications and software updates, or configure settings.
Try it out!
Try to complete the tasks. Then send Feedback with your thoughts on the feature.
Create a non-OS deployment task sequence) to install apps, install software updates, and configure settings.
Deploy this task sequence to the new built-in collection, All Provisioning Devices. Note the task sequence deployment ID, for example
PRI20001.Install the Configuration Manager client on a device, and include the following property:
PROVISIONTS=PRI20001. Set the value of this property as the task sequence deployment ID.If you're installing the client from Intune during co-management enrollment, see How to prepare internet-based devices for co-management.
Note
This method may have additional prerequisites. For example, enrolling the site to Microsoft Entra ID, or creating a content-enabled cloud management gateway.
After the client installs and properly registers with the site, it starts the referenced task sequence. If client registration fails, the task sequence won't start.
Expand Microsoft Defender for Endpoint onboarding
In this technical preview, we've expanded Microsoft Defender for Endpoint onboarding support to machines with the following operating systems:
- Windows 7 SP1
- Windows 8.1
- Windows 10, version 1607 or later
- Already supported for onboarding
- Windows Server 2008 R2 SP1
- Windows Server 2012 R2
- Windows Server 2016
- Windows Server 2016, version 1803
- Windows Server 2019
Prerequisites
You'll need a subscription to the Microsoft Defender for Endpoint online service. For more information, see Licensing Requirements for Microsoft Defender for Endpoint.
Try it out!
Try to complete the tasks. Then send Feedback with your thoughts on the feature.
Create an onboarding configuration file in Microsoft Defender for Endpoint online service
- Go to the Microsoft Defender Security Center and sign in.
- Click on the Machine Management item under Settings, then select Onboarding.
- Select the operating systems you'd like to onboard from the list. For example, choose either Windows 7 and 8.1 or Windows Server 2012 R2 and 2016.
- Copy the values for the Workspace key and Workspace ID from the Configure connection section once the process completes.
Onboard devices for Microsoft Defender for Endpoint with Configuration Manager
- In the Assets and Compliance workspace, expand Endpoint Protection and chose the Microsoft Defender ATP Policies node.
- Click Create Microsoft Defender ATP Policy in the ribbon.
- Give your policy a name and set the Policy Type to Onboarding. Click Next.
- Browse to the configuration file you created for onboarding these devices.
- Fill in the Workspace key and Workspace ID fields with the values you copied when creating the configuration file in the Microsoft Defender for Endpoint online service.
- Complete the rest of the Create Microsoft Defender ATP Policy Wizard.
New management insight rules from Microsoft Services
This release includes additional management insight rules courtesy of Microsoft Premier Field Engineering. These rules are a sample of the many more checks that Microsoft Premier provides in the Services Hub.
Reduce the number of applications and packages on distribution points: Microsoft officially supports a combined total of up to 10,000 packages and applications on a distribution point. Exceeding this total can lead to operational problems. For more information, see Size and scale numbers - distribution point.
Update all sites to the same version: Use the same version of Configuration Manager in a hierarchy. This configuration makes sure all sites provide the same functionality. Sites of different versions in the same hierarchy introduce interoperability scenarios. Later versions of Configuration Manager include new features and resolve known issues. For more information, see Interoperability between different versions.
Heartbeat Discovery is disabled: Heartbeat discovery requires that you install the Configuration Manager client on devices. It's the only discovery method that clients start. All other methods occur on site servers. Heartbeat discovery is essential to keep client activity status current. It makes sure that the site doesn't accidentally age out the resource records from the site database. For more information, see Heartbeat discovery.
Long running collection queries enabled for incremental updates: Collections with a last incremental refresh time higher than 30 seconds use site server and database resources, which could potentially impact overall Configuration Manager performance. For more information, see Best practices for collections.
Secondary site installation issues: The installation status of some secondary sites is Pending or Failed. These states mean that you started the install but it didn't complete successfully. Until the secondary site install finishes, clients may not communicate properly with the primary site. Check the Monitoring workspace, and retry the installation. For more information, see Retry installation of a failed update.
Active Directory System Discovery is configured to run too frequently: You typically don't need to configure Active Directory System Discovery to occur more frequently than every three hours. A more frequent configuration can have a negative performance impact on Active Directory, the network, and Configuration Manager. Enable incremental synchronization instead of using a full sync schedule. For more information, see Active Directory system discovery.
Active Directory Security Group Discovery is configured to run too frequently: You typically don't need to configure Active Directory Security Group Discovery to occur more frequently than every three hours. A more frequent configuration can have a negative performance impact on Active Directory, the network, and Configuration Manager. Enable incremental synchronization instead of using a full sync schedule. For more information, see Active Directory group discovery.
Active Directory User Discovery is configured to run too frequently: You typically don't need to configure Active Directory User Discovery to occur more frequently than every three hours. A more frequent configuration can have a negative performance impact on Active Directory, the network, and Configuration Manager. Enable incremental synchronization instead of using a full sync schedule. For more information, see Active Directory user discovery.
Collections limited to All Systems or All Users: Review any collections that use the All Systems or All Users collections as the limiting collection. Configuration Manager updates the membership of these default collections with data from the Active Directory discovery methods. This data may not be valid information for Configuration Manager clients.
For more information on these rules, see Remediation steps for Configuration Manager management insights.
If you're already a customer of Microsoft Unified or Microsoft Premier, sign in to the Services Hub for additional on-demand assessments. For more information about Microsoft Services, see Support Solutions.
Client Log Collection
You can now trigger a client device to upload its client logs to the site server by sending a client notification action from the Configuration Manager console.
Permissions for client log collection
To collect client logs, your administrative user needs:
- Notify resource permission on the Collection
- The Full Administrator and Operations Administrator built-in roles have this permission by default.
Log files
- Diagnostics.log
Try it out!
Try to complete the tasks. Then send Feedback with your thoughts on the feature.
Collect client logs
In the Assets and Compliance workspace, go to either the Devices or Device Collections node.
Right-click on a device, or a device collection.
Select Client Diagnostics, then select Collect Client Logs.

A client notification message is sent to the selected clients to gather the CCM logs. The logs are returned using software inventory file collection. You can also select Collect Client Logs under Client Diagnostics from either the Device Collections or Devices node using the ribbon.
View client logs
- From the Devices node, right-click on the device you want to view logs for.
- Select Start, then Resource Explorer.
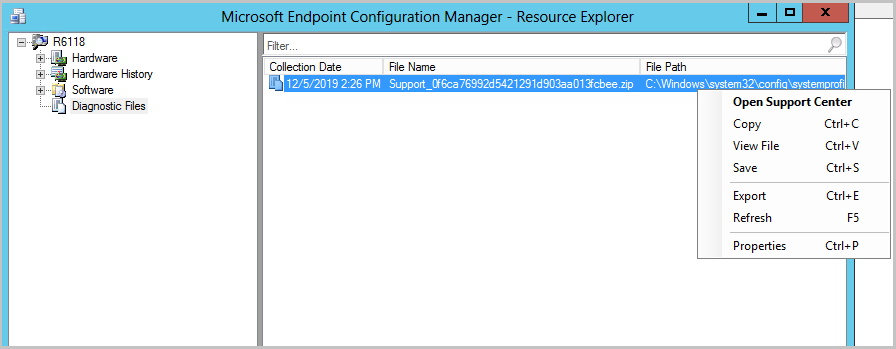
- From Resource Explorer, click on Diagnostic Files.
- In the Diagnostic Files list, you can see the collection date for the files. The name format of the client logs is
Support_<guid>.zip. - Right-click on the zip file and select one of the following options:
- Open Support Center: Launches Support Center.
- Copy: Copies the row information from Resource Explorer.
- View file: Opens the folder where the zip file is located with File Explorer.
- Save: Opens a Save File dialog for the selected file.
- Export: Saves the Resource Explorer columns shown in Diagnostic Files.
- Refresh: Refreshes the file list.
- Properties: Returns the properties on the selected file.
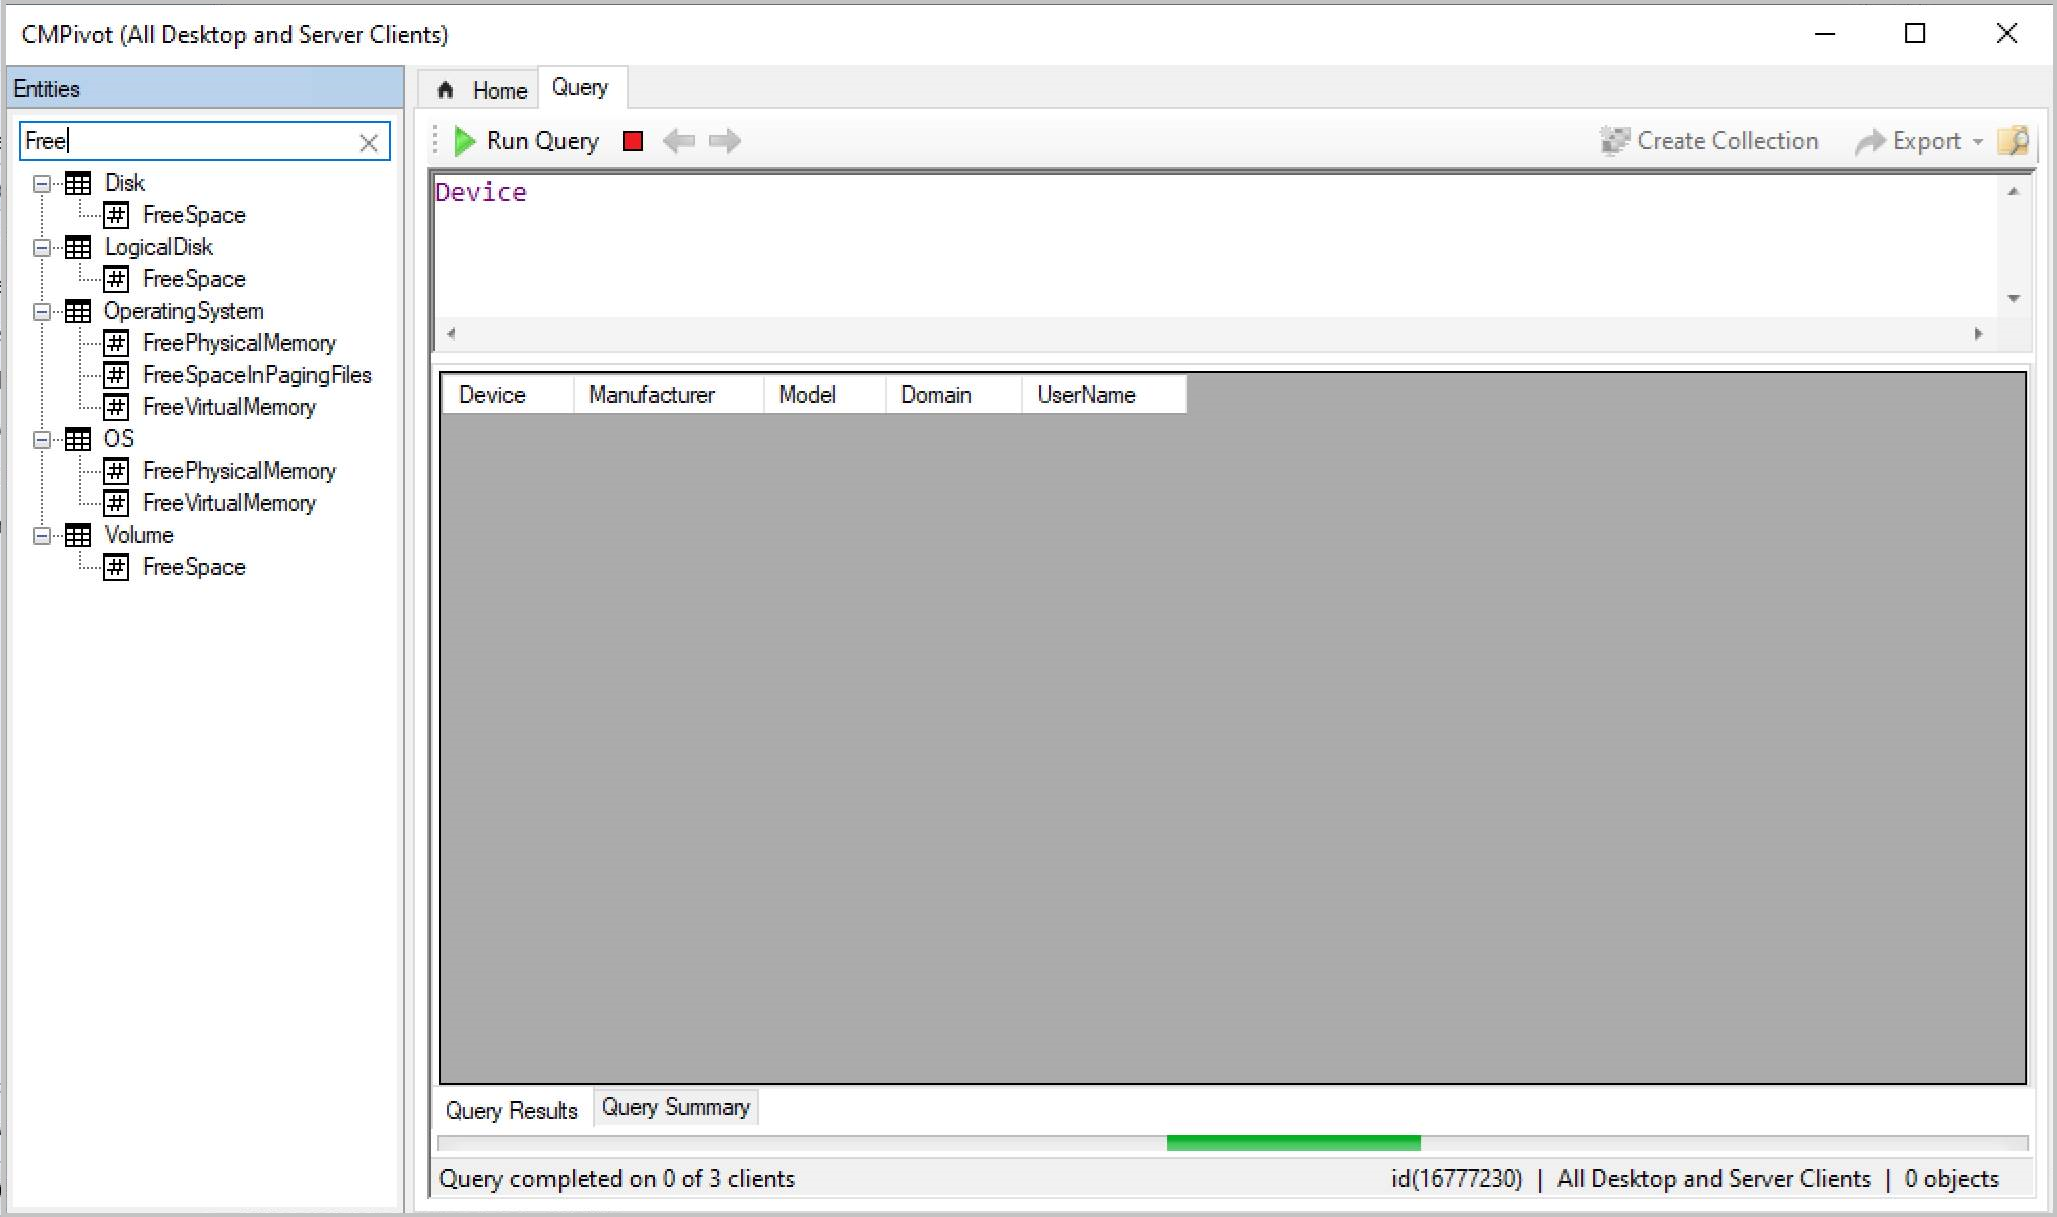
Improvements to CMPivot
We've made it easier to navigate CMPivot entities. Starting in this technical preview, you can search CMPivot entities and see entity properties.
Improvements to OS deployment
This release includes the following improvements to OS deployment:
Based on your feedback, the task sequence environment includes a new read-only variable,
_TSSecureBoot. Use this variable to determine the state of secure boot on a UEFI-enabled device. The variable can have one of the following values:NA: The associated registry value doesn't exist, which means the device doesn't support secure boot.Enabled: The device has secure boot enabled.Disabled: The device has secure boot disabled.
You can now set task sequence variables to configure the user context that the Run Command Line and Run PowerShell Script steps use. For example, now you don't need to configure the Run Command Line step with a placeholder account to use the SMSTSRunCommandLineUserName and SMSTSRunCommandLineUserPassword variables.
Configure
SMSTSRunCommandLineAsUserwith one of the following values:true: Any further Run Command Line steps run in the context of the user specified inSMSTSRunCommandLineUserName.false: Any further Run Command Line steps run in the context that you configured on the step.
Configure
SMSTSRunPowerShellAsUserwith the same values to apply to Run PowerShell Script steps.Based on your feedback, you can now set the Run PowerShell Script Parameters property to a variable. For example, if you specify
%MyScriptVariable%, when the task sequence runs the script, it adds the value of this custom variable to the PowerShell command line.
Next steps
For more information about installing or updating the technical preview branch, see Technical preview.
For more information about the different branches of Configuration Manager, see Which branch of Configuration Manager should I use?
Feedback
Coming soon: Throughout 2024 we will be phasing out GitHub Issues as the feedback mechanism for content and replacing it with a new feedback system. For more information see: https://aka.ms/ContentUserFeedback.
Submit and view feedback for