How to install an Audit Collection Services (ACS) collector and database
Important
This version of Operations Manager has reached the end of support. We recommend you to upgrade to Operations Manager 2022.
Use the following procedures to install an Audit Collection Services (ACS) collector and database and to start the service for the ACS collector computer. Both the procedures are performed on the computer that is designated as your ACS collector.
Note
Operations Manager 2019 UR1 and later supports a single installer for all supported languages, instead of language-specific installers. The installer automatically selects the language based on the computer's language settings where you're installing it.
Note
Operations Manager supports a single installer for all supported languages, instead of language-specific installers. The installer automatically selects the language based on the computer's language settings where you're installing it.
The ACS database runs on a supported version of Microsoft SQL Server. The Audit Collection Services Collector Setup wizard creates the ACS database on an existing installation of Microsoft SQL Server. To complete the installation procedure, you must be a member of the local Administrators group on both the ACS collector and the ACS database computers, and a database administrator on the ACS database. As a best practice for security, consider using Run As to perform this procedure.
Install an ACS collector and an ACS database
Follow these steps to install an ACS collector and an ACS database:
Sign in to the server by using an account that has local administrative credentials.
On the Operations Manager installation media, run Setup.exe, and select Audit collection services.
For monitoring UNIX and Linux computers, select Audit collection services for UNIX/Linux.
The Audit Collection Services Collector Setup wizard opens.
On the Welcome page, select Next.
On the License Agreement page, read the licensing terms, select I accept the agreement, and select Next.
On the Database Installation Options page, select Create a new database, and select Next.
On the Data Source page, in the Data source name box, enter a name that you want to use as the Open Database Connectivity (ODBC) data source name for your ACS database. By default, this name is OpsMgrAC. Select Next.
On the Database page, if the database is on a separate server than the ACS collector, select Remote Database Server, and then enter the computer name of the database server that will host the database for this installation of ACS. Otherwise, select Database server running locally.
In the Database server instance name field, enter the name of the server and the name of the SQL Server instance, if not the default instance, for the database server that will host the ACS database. In the Database name field, the default database name of OperationsManagerAC is automatically entered. You can select the text and enter a different name or leave the default name. Select Next.
Note
Database name can't contain the
-character.On the Database Authentication page, select one of the authentication methods. If the ACS collector and the ACS database are members of the same domain, you can select Windows authentication, otherwise select SQL authentication, and select Next.
Note
If you select SQL authentication and select Next, the Database Credentials page displays. In the SQL login name box, enter the name of the user account that has access to the SQL Server and the password for that account in the SQL password box, and select Next.
On the Database Creation Options page, select Use SQL Server's default data and log file directories to use SQL Server's default folders. Otherwise, select Specify directories and enter the full path, including drive letter, to the location you want for the ACS database and log file; for example
C:\Program Files\Microsoft SQL Server\MSSQL.1\MSSQL\Data. Select Next.On the Event Retention Schedule page, select Local hour of day to perform daily database maintenance. Choose a time when the number of expected security events is low. During the database maintenance period, database performance will be impacted. In the Number of days to retain events box, enter the number of days ACS should keep events in the ACS database before the events are removed during database grooming. The default value is 14 days. Select Next.
On the ACS Stored Timestamp Format page, choose Local or Universal Coordinated Time, formerly known as Greenwich Mean Time, and select Next
The Summary page displays a list of actions that the installation program will perform to install ACS. Review the list, and select Next to begin the installation.
Note
If a SQL server login dialog displays and the database authentication is set to Windows authentication, select the correct database and verify that the Use Trusted Connection checkbox is checked. Otherwise click to remove the check and enter the SQL sign-in name and password. Select OK.
When the installation is complete, select Finish.
Verify ACS collector performance
You can verify the ACS collector performance using Performance monitor and PowerShell. See the following sections for detailed information.
Monitor ACS collector performance data with Performance monitor
Follow these steps to monitor ACS collector performance data with Performance monitor:
Sign in to the computer that has Performance monitor installed.
Enter perfmon.msc on the Run page and select OK.
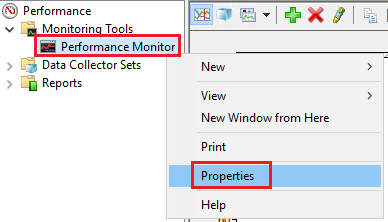
Under Performance > Monitoring Tools, right-click Performance Monitor > Properties. The Performance Monitor Properties page opens.
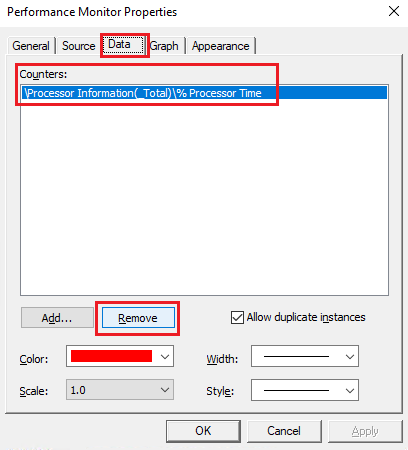
Under Data, select the available counters and select Remove.
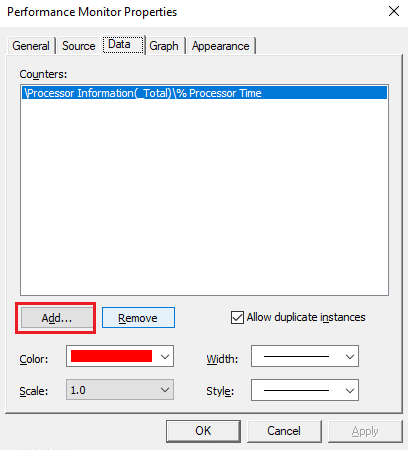
Select Add.
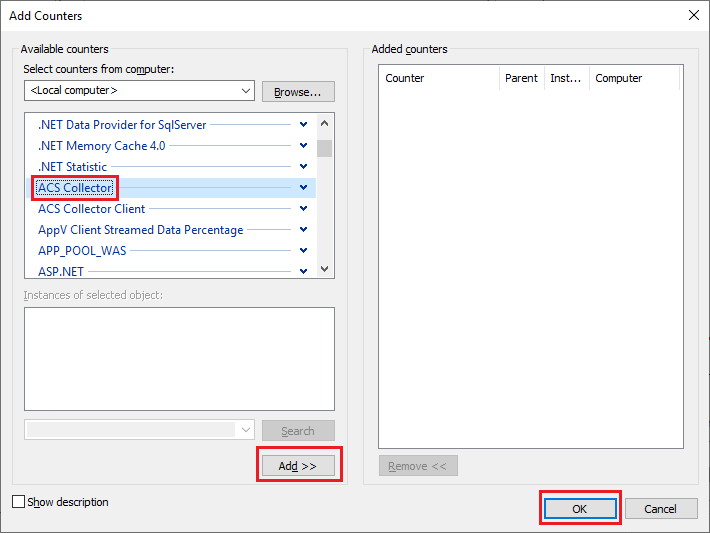
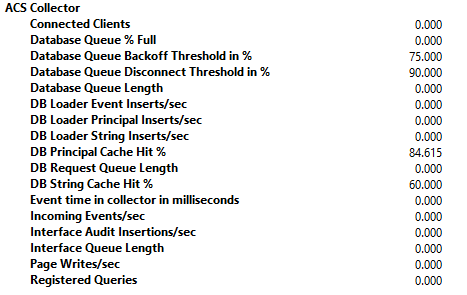
Add Counters page opens. Locate the ACS Collector counter and select Add >> and select OK to confirm the properties.
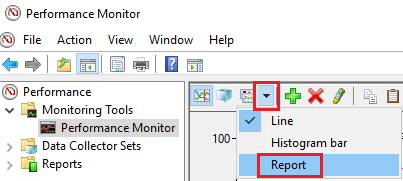
On the Performance Monitor wizard, select the dropdown and select Report to change the view of the report.
ACS performance data is displayed as follows:
Monitor ACS collector performance data with PowerShell
Use the below PowerShell commands to view the ACS collector performance data:
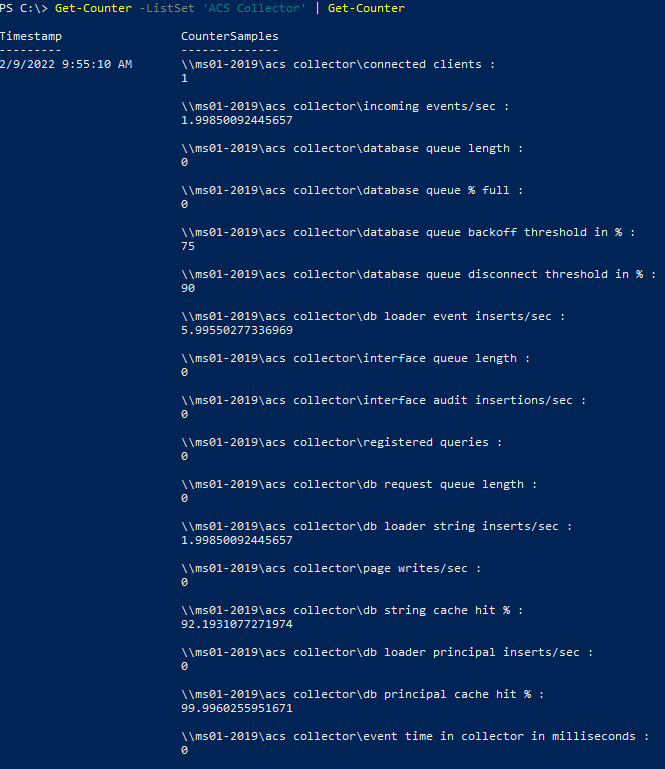
Example 1: Get a single sample of ACS collector performance counters
This example shows how to get a single sample of ACS collector performance counter values.
Get-Counter -ListSet 'ACS Collector' | Get-Counter
Example 2: Get continuous samples of ACS collector performance counters
This example shows how to get continuous samples of ACS collector performance counter values via PowerShell.
To stop the command, press CTRL+C.
To specify a longer interval (in seconds) between samples, use the -SampleInterval parameter.
Get-Counter -ListSet 'ACS Collector' | Get-Counter -Continuous
Example Output
Deploy ACS reporting
Follow these steps to deploy ACS reporting:
Sign in to the server that will be used to host ACS reporting as a user that is an administrator of the SSRS instance.
Create a temporary folder, such as C:\acs.
On your installation media, go to \ReportModels\acs and copy the directory contents to the temporary installation folder.
There are two folders (Models and Reports) and a file named UploadAuditReports.cmd.
On your installation media, go to \SupportTools and copy the file ReportingConfig.exe into the temporary acs folder.
Open a Command Prompt window by using the Run as Administrator option, and then change directories to the temporary acs folder.
Run the following command.
UploadAuditReports "<AuditDBServer\Instance>" "<Reporting Server URL>" "<path of the copied acs folder>"For example:UploadAuditReports "myAuditDbServer\Instance1" "http://myReportServer/ReportServer$instance1" "C:\acs"This example creates a new data source called Db Audit, uploads the reporting models Audit.smdl and Audit5.smdl, and uploads all reports in the acs\reports directory.
Note
The reporting server URL needs the reporting server virtual directory (
ReportingServer_<InstanceName>) instead of the reporting manager directory (Reports_<InstanceName>).Open Internet Explorer, and enter the following address to view the SQL Reporting Services Home page.
http://<yourReportingServerName>/Reports_<InstanceName>Select Audit Reports in the body of the page, and select Show Details on the upper right part of the page.
Select the Db Audit data source.
In the Connect Using section, select Windows Integrated Security, and select Apply.
Next steps
To understand the sequence and steps for installing the Operations Manager server roles across multiple servers in your management group, see Distributed Deployment of Operations Manager.
Feedback
Coming soon: Throughout 2024 we will be phasing out GitHub Issues as the feedback mechanism for content and replacing it with a new feedback system. For more information see: https://aka.ms/ContentUserFeedback.
Submit and view feedback for