Use Serial Console to access GRUB and single-user mode
Note
CentOS referenced in this article is a Linux distribution and will reach End Of Life (EOL). Consider your use and plan accordingly. For more information, see CentOS End Of Life guidance.
GRand Unified Bootloader (GRUB) is likely the first thing you see when you boot a virtual machine (VM). Because it's displayed before the operating system has started, GRUB isn't accessible via SSH. In GRUB, you can modify your boot configuration to boot into single-user mode, among other things.
Single-user mode is a minimal environment with minimal functionality. It can be useful for investigating boot issues, file system issues, or network issues. Fewer services can run in the background and, depending on the runlevel, a file system might not even be automatically mounted.
Single-user mode is also useful in situations where your VM might be configured to accept only SSH keys for sign-in. In this case, you might be able to use single-user mode to create an account with password authentication.
Note
The Serial Console service allows only users with contributor level or higher permissions to access the serial console of a VM.
To enter single-user mode, enter GRUB when your VM is booting, and modify the boot configuration in GRUB. See detailed instructions for entering GRUB in the next section. In general, if your VM has been configured to display GRUB, you can use the restart button within your VM's serial console to restart the VM and display GRUB.
General GRUB access
To access GRUB, reboot your VM while the Serial Console pane is open. Some distributions require keyboard input to show GRUB, and others automatically show GRUB for a few seconds to allow user keyboard input to cancel the timeout.
To be able to access single-user mode, you want to ensure that GRUB is enabled on your VM. Depending on your distribution, some setup work might be necessary to ensure that GRUB is enabled. For distribution-specific information, see the next section.
Restart your VM to access GRUB in Serial Console
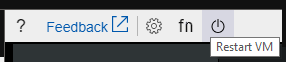
You can restart your VM within Serial Console by hovering over the Restart button and then selecting Restart VM. A notification about the restart is displayed at the bottom of the pane.
You can also restart your VM by running a SysRq "b" command if SysRq is enabled. To learn what to expect from GRUB when you reboot, see the distribution-specific instructions in the next sections.
General single-user mode access
You might need manual access to single-user mode when you haven't configured an account with password authentication. Modify the GRUB configuration to manually enter single-user mode. After you've done this, see the "Use single-user mode to reset or add a password" section for further instructions.
If the VM is unable to boot, distributions often automatically drop you into single-user mode or emergency mode. Other distributions, however, require additional setup, such as setting up a root password, before they can drop you into single-user or emergency mode automatically.
Use single-user mode to reset or add a password
After you're in single-user mode, add a new user with sudo privileges by doing the following:
- Run
useradd <username>to add a user. - Run
sudo usermod -a -G sudo <username>to grant the new user root privileges. - Use
passwd <username>to set the password for the new user. You can then sign in as the new user.
Access for Red Hat Enterprise Linux (RHEL)
If RHEL can't boot normally, it drops you into single-user mode automatically. However, if you haven't set up root access for single-user mode, you don't have a root password and can't sign in. There is a workaround (see the "Manually enter single-user mode in RHEL" section), but we suggest that you set up root access initially.
GRUB access in RHEL
RHEL comes with GRUB enabled out of the box. To enter GRUB, reboot your VM by running sudo reboot, and then press any key. The GRUB pane should be displayed. If it isn't, ensure that the following lines are present in your GRUB file (/etc/default/grub):
For RHEL 8
Note
Red Hat recommends using Grubby to configure kernel command line parameters in RHEL 8+. It is currently not possible to update the grub timeout and terminal parameters using grubby. To modify update the GRUB_CMDLINE_LINUX argument for all boot entries, run grubby --update-kernel=ALL --args="console=ttyS0,115200 console=tty1 console=ttyS0 earlyprintk=ttyS0". More details are available here.
GRUB_TIMEOUT=5
GRUB_TERMINAL="serial console"
GRUB_CMDLINE_LINUX="console=tty1 console=ttyS0 earlyprintk=ttyS0"
For RHEL 7
GRUB_TIMEOUT=5
GRUB_TERMINAL_OUTPUT="serial console"
GRUB_CMDLINE_LINUX="console=tty1 console=ttyS0,115200n8 earlyprintk=ttyS0,115200 net.ifnames=0"
Note
Red Hat also provides documentation for booting into Rescue Mode, Emergency Mode, or Debug Mode, and for resetting the root password. For instructions, see Terminal menu editing during boot.
Set up root access for single-user mode in RHEL
The root user is disabled by default. Single-user mode in RHEL requires the root user to be enabled. If you need to enable single-user mode, use the following instructions:
- Sign in to the Red Hat system via SSH.
- Switch to root.
- Enable the password for the root user by doing the following:
- Run
passwd root(set a strong root password).
- Run
- Ensure that the root user can sign in only via ttyS0 by doing the following:
a. Run
vi /etc/ssh/sshd_config, and ensure that PermitRootLogIn is set tono. b. Runvi /etc/securetty fileto allow sign-in only via ttyS0.
Now, if the system boots into single-user mode, you can sign in with the root password.
Alternatively, for RHEL 7.4+ or 6.9+, to enable single-user mode in the GRUB prompts, see Booting into single-user mode.
Manually enter single-user mode in RHEL
If you've set up GRUB and root access by using the preceding instructions, you can enter single-user mode by doing the following:
To enter GRUB, press Esc as you restart the VM.
In GRUB, press E to edit the OS that you want to boot into. The OS is usually listed on the first line.
Find the kernel line. In Azure, it starts with linux or linux16.
Press Ctrl+E to go to the end of the line.
At the end of the line, add systemd.unit=rescue.target.
This action boots you into single-user mode. If you want to use emergency mode, add systemd.unit=emergency.target to the end of the line (instead of systemd.unit=rescue.target).
Press Ctrl+X to exit and reboot with the applied settings.
You'll be prompted for the administrator password before you can enter single-user mode. This password is the one you created in the previous instructions.
Enter single-user mode without root account enabled in RHEL
If you didn't enable the root user by following the earlier instructions, you can still reset your root password by doing the following:
Note
If you're using SELinux, when you reset the root password, be sure to follow the additional steps that are described in the Red Hat documentation.
To enter GRUB, press Esc as you restart the VM.
In GRUB, press E to edit the OS that you want to boot into. The OS is usually listed on the first line.
Find the kernel line. In Azure, it starts with linux16.
At the end of the line, add rd.break to the end of the line. Leave a space between the kernel line and rd.break.
This action interrupts the boot process before control is passed from
initramfstosystemd, as described in the Red Hat documentation.Press Ctrl+X to exit and reboot with the applied settings.
After you've rebooted, you're dropped into emergency mode with a read-only file system.
In the shell, enter
mount -o remount,rw /sysrootto remount the root file system with read/write permissions.After you boot into single-user mode, enter
chroot /sysrootto switch into thesysrootjail.You're now at root, and you can start troubleshooting the system issues.
In RHEL, SELinux enforcing mode protects the OS from any changes. You can run
touch /.autorelabelto relabel the file system after the password is changed.After you're done, enter
reboot -fto reboot.
Note
Running through the preceding instructions drops you into the emergency shell so that you can also perform tasks such as editing fstab. However, we ordinarily suggest that you reset your root password and use it to enter single-user mode.
Access for CentOS
Much like Red Hat Enterprise Linux, single-user mode in CentOS requires GRUB and the root user to be enabled.
GRUB access in CentOS
CentOS comes with GRUB enabled out of the box. To enter GRUB, reboot your VM by entering sudo reboot, and then press any key. This action displays the GRUB pane.
Single-user mode in CentOS
To enable single-user mode in CentOS, follow the earlier instructions for RHEL.
Access for Ubuntu
Ubuntu images don't require a root password. If the system boots into single-user mode, you can use it without additional credentials.
GRUB access in Ubuntu
To access GRUB, press and hold Esc while the VM is booting.
By default, Ubuntu images might not automatically display the GRUB pane. You can change the setting by doing the following:
In a text editor, open the /etc/default/grub.d/50-cloudimg-settings.cfg file.
Change the
GRUB_TIMEOUTvalue to a non-zero value.In a text editor, open /etc/default/grub.
Comment out the
GRUB_HIDDEN_TIMEOUT=1line.Ensure that there's a
GRUB_TIMEOUT_STYLE=menuline.Run
sudo update-grub.
Single-user mode in Ubuntu
If Ubuntu can't boot normally, it drops you into single-user mode automatically. To enter single-user mode manually, do the following:
- In GRUB, press E to edit your boot entry (the Ubuntu entry).
- Look for the line that starts with linux, and then look for ro.
- Add single after ro, ensuring there is a space before and after single.
- Press Ctrl+X to reboot with these settings and enter single-user mode.
Use GRUB to invoke bash in Ubuntu
After you've tried the preceding instructions, there might be a situation (such as a forgotten root password) where you're still unable to access single-user mode in your Ubuntu VM. You can also tell the kernel to run /bin/bash as init, rather than the system init. This action gives you a bash shell and allows for system maintenance. Use the following instructions:
In GRUB, press E to edit your boot entry (the Ubuntu entry).
Look for the line that starts with linux, and then look for ro.
Replace ro with rw init=/bin/bash.
This action mounts your file system as read-write and uses
/bin/bashas the init process.Press Ctrl+X to reboot with these settings.
Access for CoreOS
Single-user mode in CoreOS requires GRUB to be enabled.
GRUB access in CoreOS
To access GRUB, press any key while your VM is booting.
Single-user mode in CoreOS
If CoreOS can't boot normally, it drops you into single-user mode automatically. To enter single-user mode manually, do the following:
In GRUB, press E to edit your boot entry.
Look for the line that starts with linux$. There should be two instances of the line, each encapsulated in a different if...else clause.
Append coreos.autologin=ttyS0 to the end of each linux$ line.
Press Ctrl+X to reboot with these settings and enter single-user mode.
Access for SUSE SLES
Newer images of SLES 12 SP3+ allow access via the serial console if the system boots into emergency mode.
GRUB access in SUSE SLES
GRUB access in SLES requires a bootloader configuration via YaST. To create the configuration, do the following:
Use SSH to sign in to your SLES VM, and then run
sudo yast bootloader. Press Tab, press Enter, and then use the arrow keys to navigate through the menu.Go to Kernel Parameters, and then select the Use serial console check box.
Add
serial --unit=0 --speed=9600 --parity=noto the Console arguments.Press F10 to save your settings and exit.
To enter GRUB, reboot your VM, and press any key during the boot sequence to keep the GRUB pane displayed.
The default timeout for GRUB is 1s. You can modify this setting by changing the
GRUB_TIMEOUTvariable in the /etc/default/grub file.

Single-user mode in SUSE SLES
If SLES can't boot normally, you're automatically dropped into the emergency shell. To enter the emergency shell manually, do the following:
In GRUB, press E to edit your boot entry (the SLES entry).
Look for the kernel line that starts with linux.
Append systemd.unit=emergency.target to the end of the kernel line.
Press Ctrl+X to reboot with these settings and enter the emergency shell.
Note
This action drops you into the emergency shell with a read-only file system. To edit any files, remount the file system with read-write permissions. To do so, enter
mount -o remount,rw /in the shell.
Access for Oracle Linux
Much like Red Hat Enterprise Linux, single-user mode in Oracle Linux requires GRUB and the root user to be enabled.
GRUB access in Oracle Linux
Oracle Linux comes with GRUB enabled out of the box. To enter GRUB, reboot your VM by running sudo reboot, and then press Esc. This action displays the GRUB pane. If the GRUB pane isn't displayed, ensure that the value of the GRUB_TERMINAL line contains serial console (that is, GRUB_TERMINAL="serial console"). Rebuild GRUB with grub2-mkconfig -o /boot/grub/grub.cfg.
Single-user mode in Oracle Linux
To enable single-user mode in Oracle Linux, follow the earlier instructions for RHEL.
Next steps
To learn more about Serial Console, see:
- Linux Serial Console documentation
- Use Serial Console to enable GRUB in various distributions
- Use Serial Console for NMI and SysRq calls
- Serial Console for Windows VMs
- Boot diagnostics
Contact us for help
If you have questions or need help, create a support request, or ask Azure community support. You can also submit product feedback to Azure feedback community.
Feedback
Coming soon: Throughout 2024 we will be phasing out GitHub Issues as the feedback mechanism for content and replacing it with a new feedback system. For more information see: https://aka.ms/ContentUserFeedback.
Submit and view feedback for