Getting started with Ionic 2 apps in Visual Studio 2017
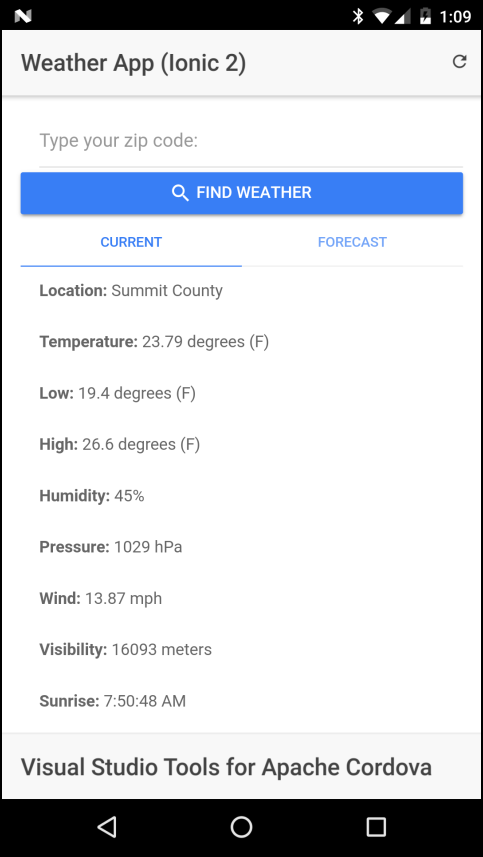
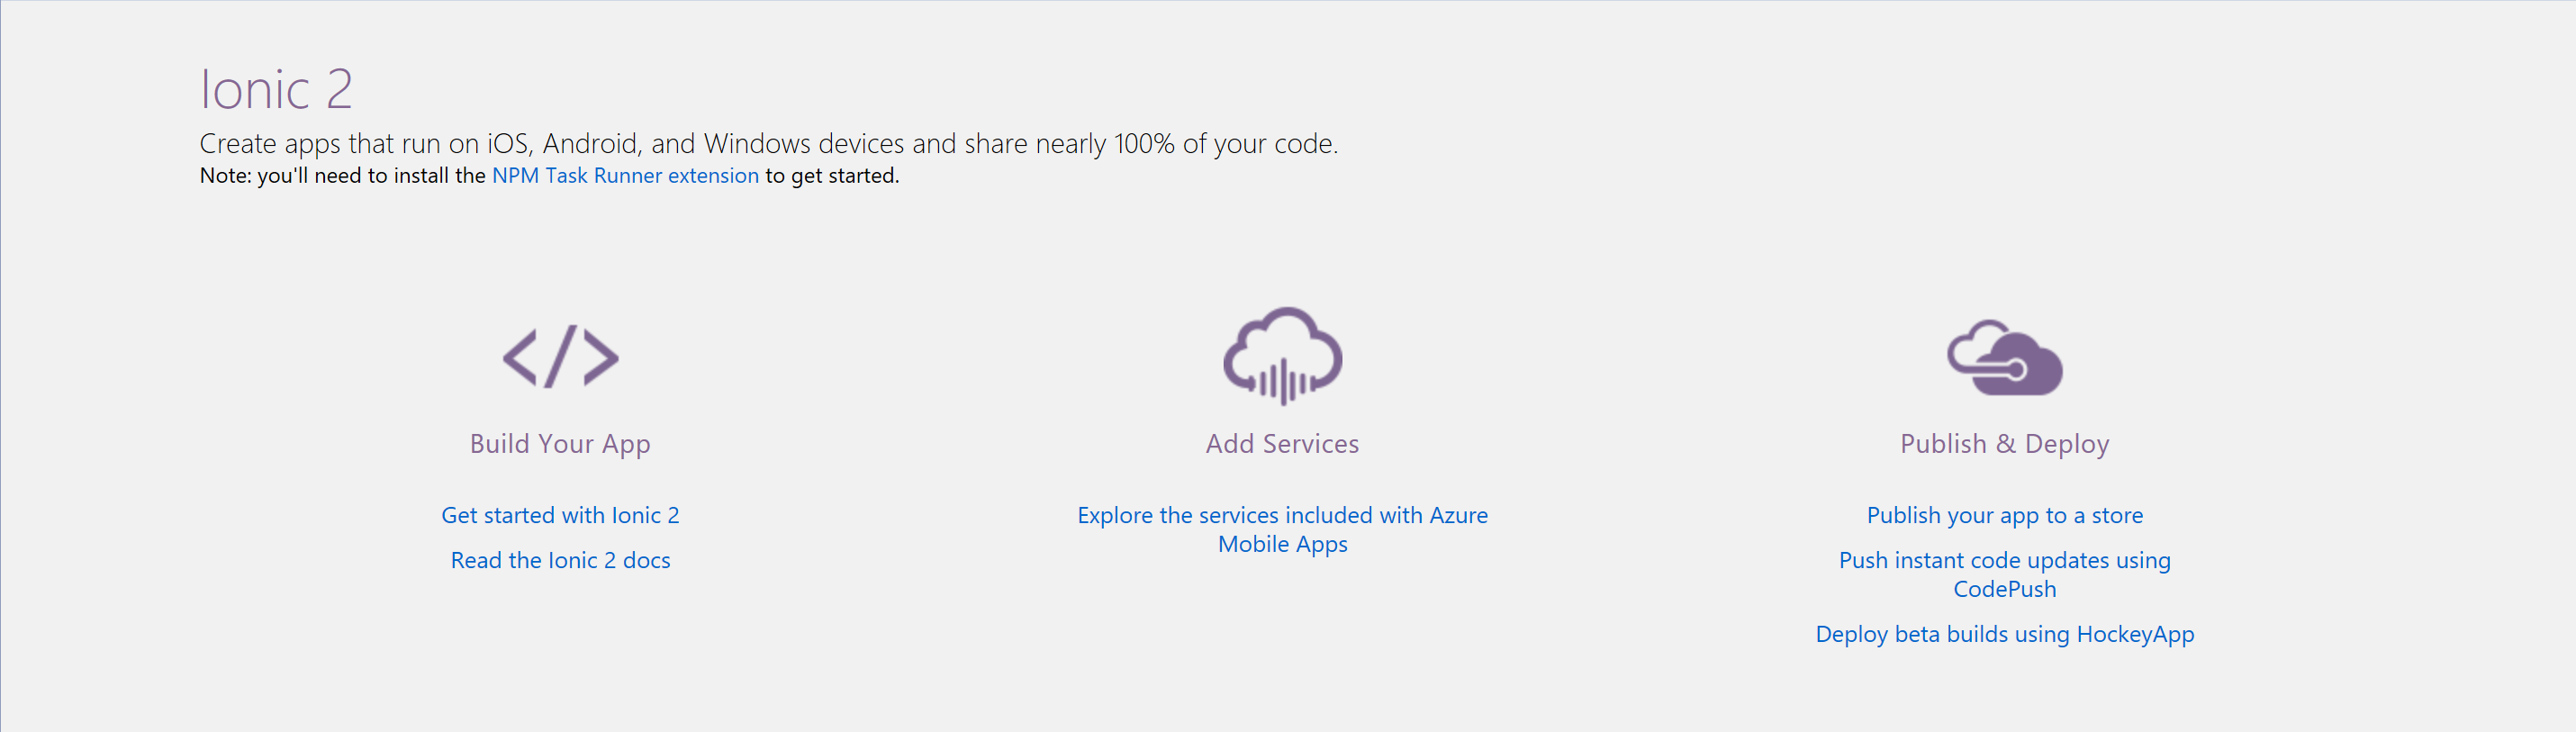
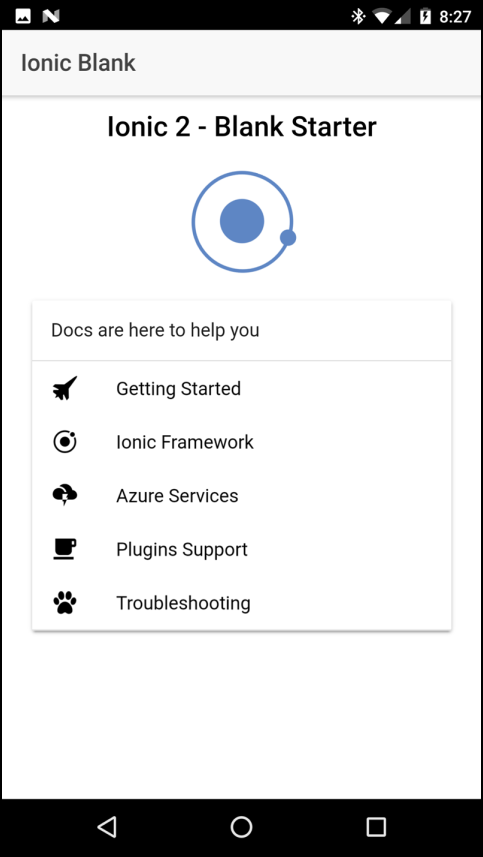
Ionic is a popular front-end JavaScript framework for developing cross-platform mobile apps using Apache Cordova. The Ionic Framework gives Cordova applications a native look and feel, and automatically adjusts that look across platforms. You can use Visual Studio 2017 and Visual Studio Tools for Apache Cordova (TACO) to easily create and debug cross-platform Ionic apps. The Getting Started With Visual Studio Tools For Apache Cordova guide showed how to create a simple Weather app using the Ionic Framework. In this article, you'll learn how to configure a Visual Studio 2017 development environment for Ionic 2, and create the Ionic 2 version of the Weather App shown below:
Requirements
To manage, code, run and debug Ionic 2 applications using Visual Studio, you must install the following:
- Visual Studio 2017
- Visual Studio Tools For Apache Cordova
- Visual Studio Ionic 2 Templates
- Ionic Template dependencies (described below)
Installing the Ionic 2 templates
If you haven't already, install Visual Studio 2017 and TACO.
Under the covers, Ionic apps are Apache Cordova apps, you'll need a functional Cordova development environment before you can develop apps using Ionic.
Verify that you can create and run the default Cordova Blank App. In Visual Studio, open the File menu, select New, then Project. In the new project dialog, expand the JavaScript templates section, select Mobile Apps, then pick the Blank App (Apache Cordova) template. Give the new project a Name and Location then click the OK button. Press F5 to build and run the new project using the new Simulate in Browser option. The Chrome browser should open and render the app's content. If you have any issues running the application, see these troubleshooting steps.
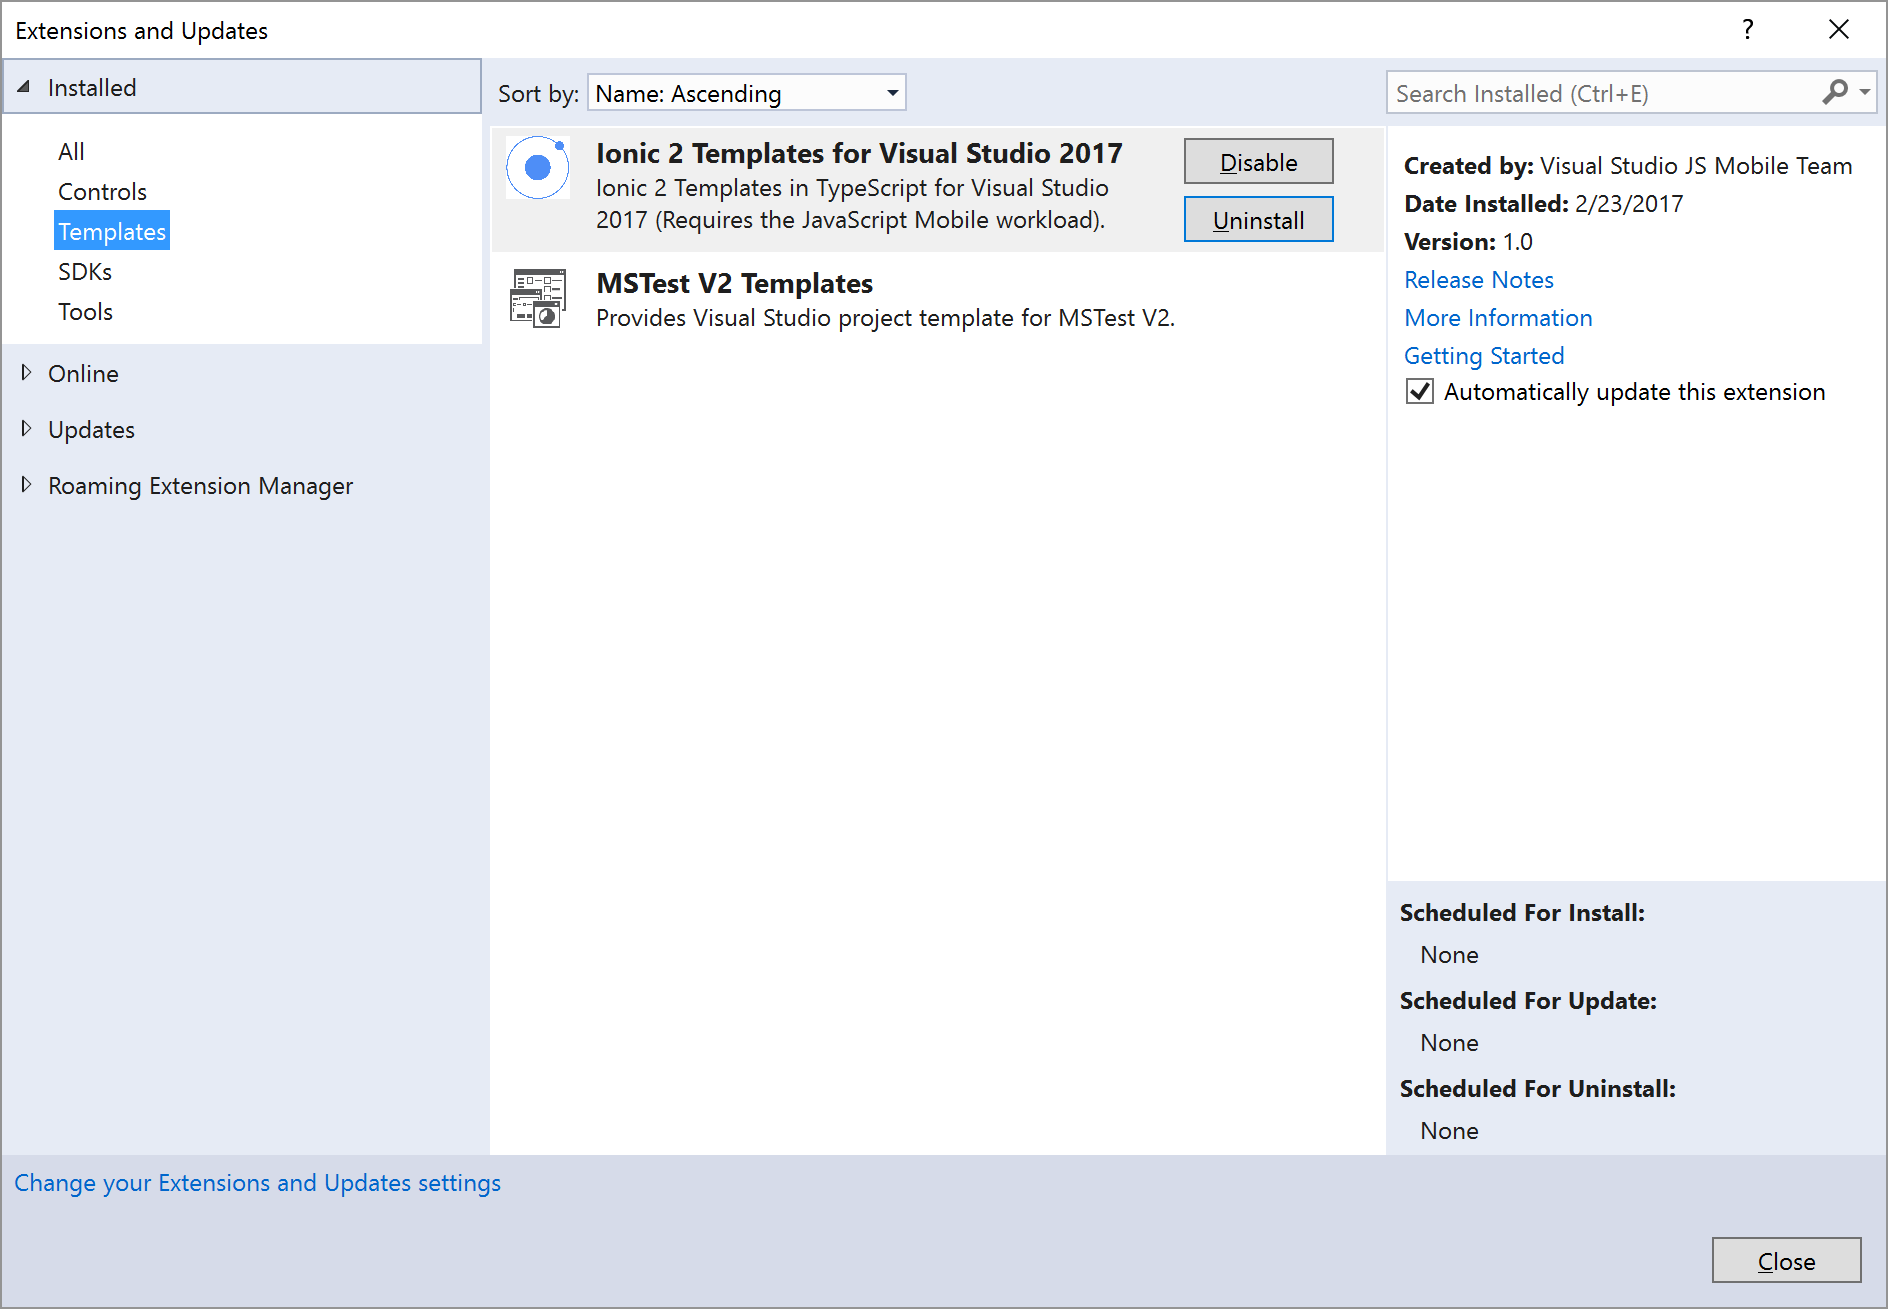
Install the Ionic template in Visual Studio by selecting the Tools menu, then Extensions and Updates.... In the Extensions and Updates dialog box, select Online. In the search box located in the upper-right corner of the dialog, type Ionic 2. Select the Ionic 2 Templates option in the list. Click the Download button to start the installation.
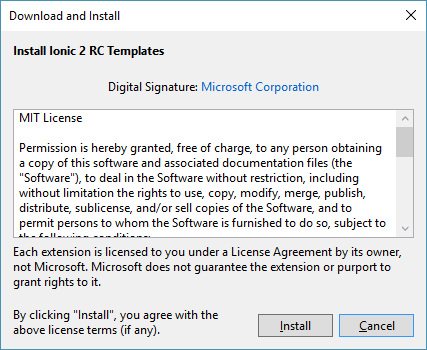
The template files will download, then Visual Studio will automatically launch the installation process. When prompted, click the Install button to begin the installation.
Note
The Ionic templates may not appear in Visual Studio until it's restarted. Close, then re-open Visual Studio before continuing.
Creating an Ionic Project in Visual Studio
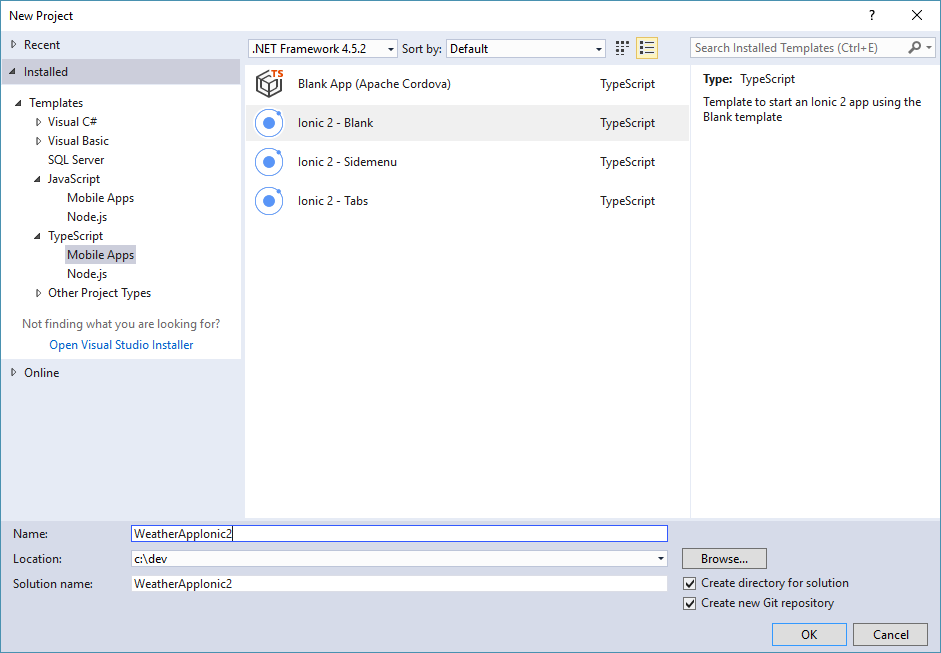
Create a new Ionic project. Open the File menu, select New, then Project. In the new project dialog, expand the TypeScript templates section, and then select Apache Cordova Apps. Ionic offers three app styles by default (other templates are available online): Blank, Sidemenu, and Tabs; this is a simple project, so select the Blank template.
Give the new project a Name and Location, and then click the OK button. This app will later become our Weather App project, so you should probably call it Weather App or Weather App Ionic 2 to save work later.
Check the new Ionic project's readme file for any additional tools that must be installed to use the template.
At the time of this writing, you'll only need to install the NPM Task Runner extension.
The requirements may change as updates are made to the templates. To install the required extensions, open the Tools menu, and select Extensions and Updates. Use search to locate and install the required extension(s).
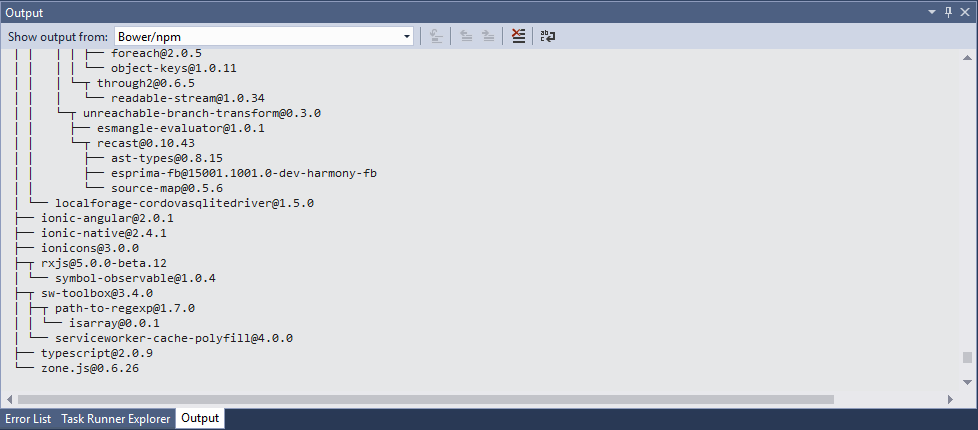
Ionic is a heavy framework, it requires a lot of tools and libraries to operate. Once Visual Studio creates the new project, it kicks off a process to download and install the required components using the Node Package Manager (npm). Wait a few minutes as Ionic's npm packages are installed.
Note
This process will take several minutes depending on your system and internet connection speeds.
To check progress, open Solution Explorer and look for the Dependencies node. You should see Restoring..., if you don't, expand the Dependencies node in Solution Manager then right-click on the npm folder and select Restore Packages.

You can monitor the package installation process through Visual Studio's Output window. Open the View menu, then select Output or use the keyboard shortcut Ctrl-W + O:
At this point, you have a complete Ionic application project ready to go. To test and debug the application in Visual Studio, select a target platform in the Standard Toolbar, select a target device, then pres F5 to run the application on the selected target. Developing iOS applications requires some extra configuration; refer to the Visual Studio Tools for Apache Cordova: iOS Guide for additional information.
Creating the Weather App
Now, lets do something with this app you created. You'll take the blank application project and turn it into the Weather App shown earlier. In the following sections, you'll start by adding a Current Conditions page, then wire in a Search Box, and finally add an area to display Forecast data. Lets get started.
The app uses the free OpenWeatherMap service to retrieve weather conditions for a location. Before you can use the service, you must setup an account and request an API key for their Current Conditions API. Point your browser to OpenWeatherMap and setup an account. Once you have a valid login, go to the service's API page and subscribe to the Current Weather data service, and then generate an API key.
Note
Make note of the API key as you'll need it later in the app's TypeScript code.
Configuring the Application Project
Start by setting some configuration options for the application. In Visual Studio Solution Explorer, double-click the project's
config.xmlfile. Visual Studio will open a custom editor like the one shown in the following figure: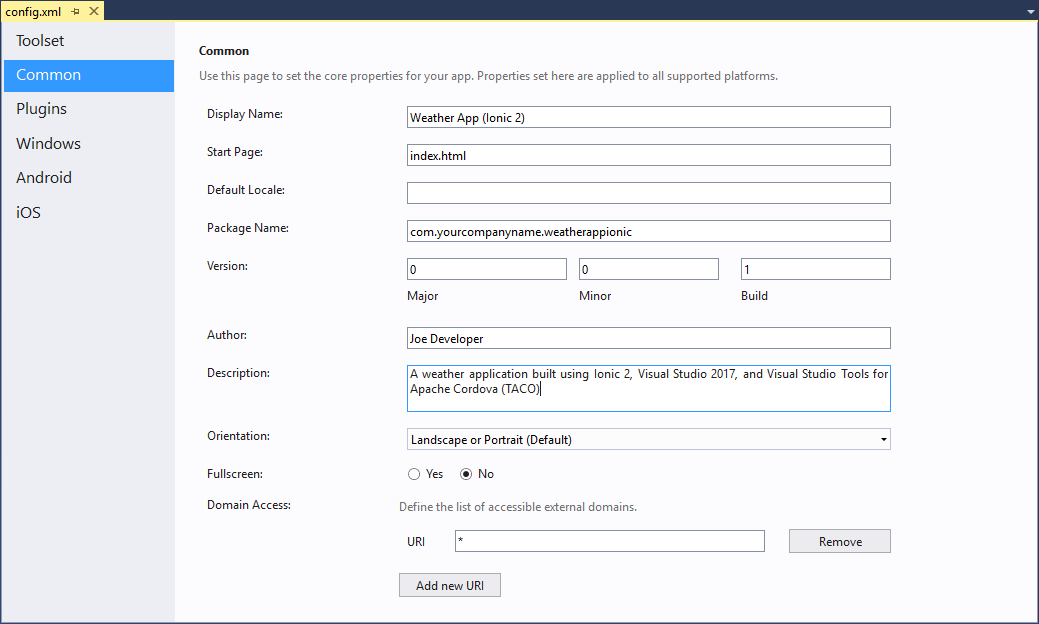
At a minimum, set the project's Display Name and Package Name values; you may want to update the Author and Description fields as well.
By default, the application displays weather data based on the device's current location, so we'll need to use the Cordova Geolocation plugin to add that capability to our application. You could use the browser's built-in geolocation capabilities, but Cordova and Ionic both provide special capabilities that make using geolocation in an Ionic app a little easier.
Switch to the editor's Plugins tab and select the Geolocation plugin in the list. Click the Add button to add the plugin to the project.

Press the keyboard's Ctrl+S key to save your changes, then close the editor file.
Open the project's
src\index.htmlfile and change the application's Title. This isn't a required step, but if you're later testing the app in the browser, the app title will be correct.<title>Weather App Ionic</title>
Generating a Weather Provider
Now, lets start working on the application's code. By convention, Ionic applications segregate data sources from other types of application code using a special Providers component type. Since the weather data is coming from an external source, and we don't want the application code to call the service directly, we'll make a Weather provider and put all of the application's weather access code there.
In Solution Explorer, right-click on the project's
srcfolder and select Add -> New Folder. Name the folderprovidersand press the Enter key. This creates a folder for all of the providers the application will use (we'll only have one, but many Ionic apps will have several).Right-click on the new
providersfolder and select Add -> New Item. In the dialog that appears, select Ionic 2 Provider, and in the Name field typeWeather.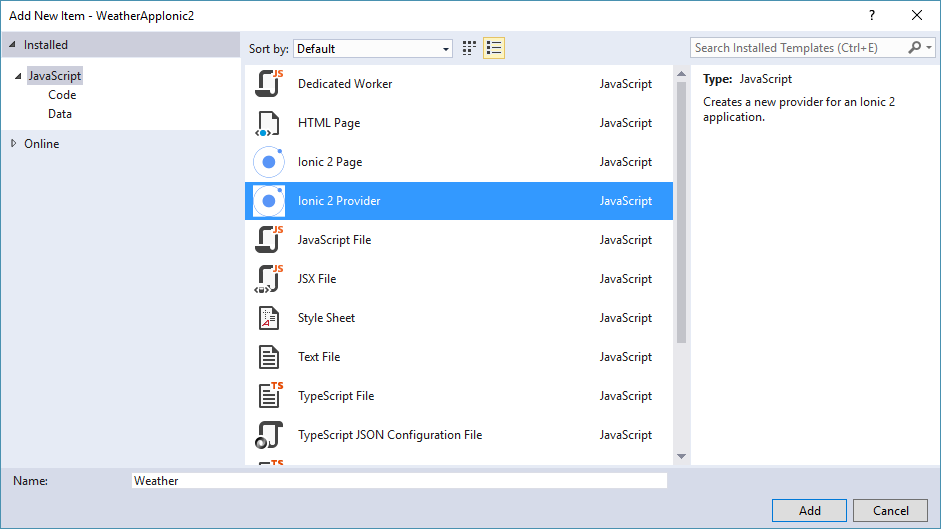
The Ionic CLI will create the provider in
src\providers\Weather.tsNow that you have the
Weatherprovider, you have to tell Ionic about it. Open the project'ssrc\app\app.module.tsfile and add the following line to the imports section at the top of the file:import { WeatherProvider } from '../providers/weather';Next, add a reference to the Weather provider in the file's
providersarray:providers: [WeatherProvider, {provide: ErrorHandler, useClass: IonicErrorHandler}]Save your changes before continuing.
Coding the Weather Provider
In this section, we'll add code the Weather Provider to connect with the external weather API and deliver data to the application.
Open the newly created
src\providers\Weather.tsfile, and modify the@angular/httpimport at the top of the file so it looks like the following:import { Http, Response } from '@angular/http';The HTTP component is loaded by default in any provider, what you're doing here is adding the Response component we'll use in the provider's code later.
Still at the top of the file, add an import that loads the
toPromisemodule:import 'rxjs/add/operator/toPromise';When you're done, the imports section at the top of the file will look like this:
import { Injectable } from '@angular/core';
import { Http, Response } from '@angular/http';
import 'rxjs/add/operator/map';
import 'rxjs/add/operator/toPromise';
At the top of the
Weatherclass, add the following variable declarations:private weatherEndpoint = 'http://api.openweathermap.org/data/2.5/'; private weatherKey = '';Populate the
weatherKeyvariable with the API key you obtained from the weather service earlier.After the
weatherclass constructor, add the following code:getCurrent(loc: any): Promise<any> { let url: string = this.makeDataURL(loc, 'weather'); return this.http.get(url) .toPromise() .then(this.extractData) .catch(this.handleError); } private makeDataURL(loc: any, command: string): string { //Build a weather service URL using the command string and //location data that we have. let uri = this.weatherEndpoint + command; //Do we have a location? if (loc.long) { //then use the 'geographical coordinates' version of the API uri += '?lat=' + loc.lat + '&lon=' + loc.long; } else { //Otherwise, use the zip code uri += '?zip=' + loc.zip; } //Configure output for imperial (English) measurements uri += '&units=imperial'; //Use the following instead for metric //uri += '&units=metric'; //Append the API Key to the end of the URI uri += '&APPID=' + this.weatherKey; //Return the value return uri; } //'Borrowed' from //https://angular.io/docs/ts/latest/guide/server-communication.html private extractData(res: Response) { //Convert the response to JSON format let body = res.json(); //Return the data (or nothing) return body || {}; } //'Borrowed' from //https://angular.io/docs/ts/latest/guide/server-communication.html private handleError(res: Response | any) { console.error('Entering handleError'); console.dir(res); return Promise.reject(res.message || res); }On start up, the application passes the current location (longitude and latitude) to the
getCurrentfunction. When searching for a location using a US Zip Code, the Zip Code is passed instead.getCurrentcalls the appropriate API to get the current weather data, but usesmakeDataURLto format the request URL correctly depending on whether it has a location or a Zip Code value.The
extractDatafunction formats the data returned by the API call as JSON. This code could easily be included directly into thegetCurrentmethod, but as you'll see later, this code is used more than once by the application, so it made sense to move it a separate function.
Building the Current Conditions Page
Open the project's
src\pages\home\home.htmlfile, and replace the file's contents with the following:<ion-header> <ion-toolbar> <ion-buttons right> <button ion-button (click)="refreshPage()"> <ion-icon name="refresh"></ion-icon> </button> </ion-buttons> <ion-title> Weather App (Ionic 2) </ion-title> </ion-toolbar> </ion-header> <ion-content padding> <ion-list no-lines> <!--show this if there are no items in the list--> <ion-item [hidden]="c_items.length > 0"> <p><strong>Weather data is not available</strong></p> </ion-item> <!--Display the current conditions data we have --> <ion-item *ngFor="let c_item of c_items"> <p><strong>{{c_item.name}}:</strong> {{c_item.value}}</p> </ion-item> </ion-list> </ion-content> <ion-footer> <ion-toolbar> <ion-title>Visual Studio Tools for Apache Cordova</ion-title> </ion-toolbar> </ion-footer>What you see in the file is references to ionic components as well as some Angular code as well. This markup is a subset of the page's HTML, the rest of it is found in the project's
src\index.htmlandsrc\app\app.htmlfiles. At start up, the Ionic framework replaces the contents of the project'ssrc\index.htmlfile's<ion-app></ion-app>tag with thesrc\app\app.htmlfile's<ion-nav [root]="rootPage"></ion-nav>then subsequently passes HTML content in and out of that tag as the user uses the application. In this case, when the app starts up, the content of thesrc\pages\home\home.htmlpage is parsed and rendered.The header contains a toolbar displaying the application title and a refresh button the user can tap to refresh the weather data displayed on the page.
The
ion-contenttag defines the part of the content that comprises the dynamic content of the page. In this example, it displays an<ion-list>of items; basically a listview. In this case, it renders the contents of thec_itemsarray as a list using an Angular directive:*ngFor="let c_item of c_items"which loops through each element in the array. As the code loops, it assigns each array element toc_item, then the template code that follows displays thenameandvalueproperties of thec_itemobject. You'll see how thec_itemsarray is populated soon.Open the project's
src\pages\home\home.tsfile. At the top of the file, add imports for the Geolocation plugin and the Weather provider:import { Geolocation, Keyboard } from 'ionic-native'; import { WeatherProvider } from '../../providers/weather';Also at the top of the file, modify the
ionic-angularimport so it looks like this:import { AlertController, LoadingController, NavController, Platform } from 'ionic-angular';This loads some additional components used by the page's code:
AlertControllermanages the display of alert dialogs.LoadingControllermanages the display of a loading spinner.NavControllermanages navigation between pages.Platformprovides platform-related utilities.
Inside the
HomePageclass, add the following variable declarations:degreeStr: string = ' degrees (F)'; //an empty object (for now) to store our location data passed to the API currentLoc: any = {}; //current weather items array c_items: Array<any> = [];Add the following parameters to the
HomePageclass constructor:public alertController: AlertController, public loadingCtrl: LoadingController, public platform: Platform, public weather: WeatherProvider,When you're done, it should look like this:
constructor(
  public alertController: AlertController,
  public loadingCtrl: LoadingController,
  public nav: NavController,
  public platform: Platform,
  public weather: WeatherProvider
) {

}
Replace the
openLinkfunction in the body of theHomePageclass with the following (theopenLinkfunction is part of the Ionic blank template and is not used by the Weather App):ionViewDidLoad() { //Once the main view loads //and after the platform is ready... this.platform.ready().then(() => { //Setup a resume event listener document.addEventListener('resume', () => { //Get the local weather when the app resumes this.getLocalWeather(); }); //Populate the form with the current location data this.getLocalWeather(); }); } refreshPage() { this.showCurrent(); } getLocalWeather() { let locOptions = { 'maximumAge': 3000, 'timeout': 5000, 'enableHighAccuracy': true }; Geolocation.getCurrentPosition(locOptions).then(pos => { //Store our location object for later use this.currentLoc = { 'lat': pos.coords.latitude, 'long': pos.coords.longitude }; //and ask for the weather for the current location this.showCurrent(); }).catch(e => { console.error('Unable to determine current location'); if (e) { console.log('%s: %s', e.code, e.message); console.dir(e); } }) } showCurrent() { //clear out the previous array contents this.c_items = []; //Create the loading indicator let loader = this.loadingCtrl.create({ content: "Retrieving current conditions..." }); //Show the loading indicator loader.present(); this.weather.getCurrent(this.currentLoc).then( data => { //Hide the loading indicator loader.dismiss(); //Now, populate the array with data from the weather service if (data) { //We have data, so lets do something with it this.c_items = this.formatWeatherData(data); } else { //This really should never happen console.error('Error retrieving weather data: Data object is empty'); } }, error => { //Hide the loading indicator loader.dismiss(); console.error('Error retrieving weather data'); console.dir(error); this.showAlert(error); } ); } private formatWeatherData(data): any { //create a blank array to hold our results let tmpArray = []; //Add the weather data values to the array if (data.name) { //Location name will only be available for current conditions tmpArray.push({ 'name': 'Location', 'value': data.name }); } tmpArray.push({ 'name': 'Temperature', 'value': data.main.temp + this.degreeStr }); tmpArray.push({ 'name': 'Low', 'value': data.main.temp_min + this.degreeStr }); tmpArray.push({ 'name': 'High', 'value': data.main.temp_max + this.degreeStr }); tmpArray.push({ 'name': 'Humidity', 'value': data.main.humidity + '%' }); tmpArray.push({ 'name': 'Pressure', 'value': data.main.pressure + ' hPa' }); tmpArray.push({ 'name': 'Wind', 'value': data.wind.speed + ' mph' }); //Do we have visibility data? if (data.visibility) { tmpArray.push({ 'name': 'Visibility', 'value': data.visibility + ' meters' }); } //do we have sunrise/sunset data? if (data.sys.sunrise) { var sunriseDate = new Date(data.sys.sunrise * 1000); tmpArray.push({ 'name': 'Sunrise', 'value': sunriseDate.toLocaleTimeString() }); } if (data.sys.sunset) { var sunsetDate = new Date(data.sys.sunset * 1000); tmpArray.push({ 'name': 'Sunset', 'value': sunsetDate.toLocaleTimeString() }); } //Do we have a coordinates object? only if we passed it in on startup if (data.coord) { //Then grab long and lat tmpArray.push({ 'name': 'Latitude', 'value': data.coord.lat }); tmpArray.push({ 'name': 'Longitude', 'value': data.coord.lon }); } //Return the new array to the calling function return tmpArray; } showAlert(message: string) { let alert = this.alertController.create({ title: 'Error', subTitle: 'Source: Weather Service', message: message, buttons: [{ text: 'Sorry' }] }); alert.present(); }There's a lot of code there; take a few minutes and study it. Here's what it does:
ionViewDidLoad- Handles an event that fires when the page completes loading. In this case, the function calls thegetLocalWeatherfunction to start the process of getting weather data for the device's current location. It uses capabilities of the Platform component to make sure it doesn't do anything until it's certain that the native application container and the Ionic framework have completed initialization.refreshPage- Executes when the application user taps the Refresh button in the toolbar. Here, it refreshes the current weather data on the page. This function gets more responsibilities later.getLocalWeather- Determines the device's current location (using the Cordova Geolocation plugin), then callsshowCurrentto get the current weather data.showCurrent- Displays the loading indicator, then calls the Weather provider to get weather data for the specified location (either a geolocation, or, later, a Zip Code).formatWeatherData- The results the application gets from the Weather API differ depending on whether the application asks for current conditions or the forecast. We're not asking for forecast data (yet) but, but will later. This function builds a weather data object from the results and has special code that builds the appropriate object based on whether it's current conditions or a forecast.showAlert- Displays an error dialog if anything breaks.
Run the application in browser, an emulator, simulator or on a physical device connected to the computer. If you run the app in the browser, using the Cordova Simulate capabilities of Visual Studio 2017, you can tweak the simulated device's coordinates using the Geolocation panel; refer to the Cordova Simulate for details. When the application loads, you'll be prompted to authorize the application's access to the device's current location as shown below:

When you allow access (don't tap deny, as you won't be able to do much with the app if you do), you should see the current weather data for the current location as shown in the figure below:
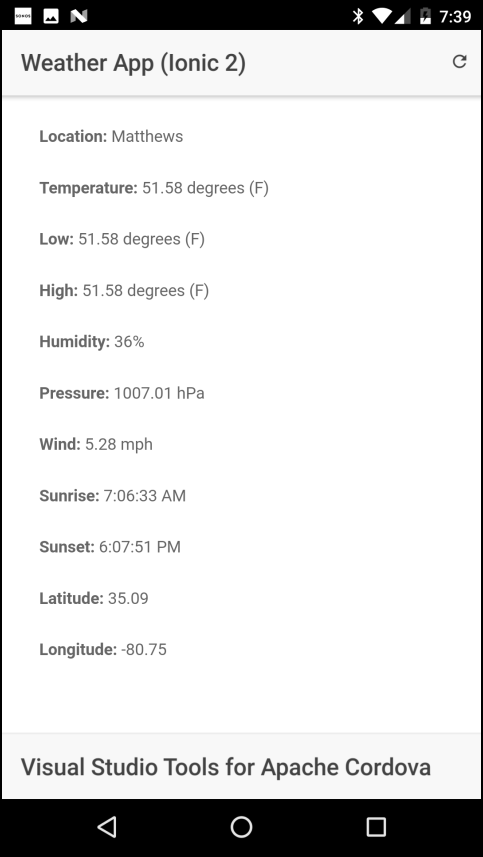
It's not the complete app UI, but at least you can see the weather results. In the next section, we'll add the Zip Code Search box so you can get weather data for a specific location.
Note
If you get a blank screen when the app starts, make sure you've added the Cordova Geolocation plugin to the project.
Adding Zip Code Search
It's useful to have weather data for the current location, but what if you're traveling somewhere and want to know what the weather will be like when you get there? In this section, you'll add a search box users can employ to get weather data for a specific US Zip Code.
Note
Using Zip Code as search criteria won't work outside of the US; if you would like to use City Name instead, you can make minor tweaks to the weather API call to change how the API searches. Take a look at the API docs for more information.
Open the project's
src\pages\home\home.htmlfile. Inside the beginning of the<ion-content>section, right before the<ion-list>tag, add the following markup:<form (ngSubmit)="setZipCode()"> <ion-item> <ion-label>Type your zip code:</ion-label> <ion-input type="text" [(ngModel)]="searchInput" name="ZipCode"></ion-input> </ion-item> <button ion-button icon-left block> <ion-icon name="search"></ion-icon> Find Weather </button> </form>This adds the search field at the top of the page, and directs that the
setZipCodefunction is executed when the user taps the Find Weather button. The reference to ngModel tells Ionic (actually Angular) to map the value in the search field to the application'ssearchInputvariable which you will see in a second.Open the project's
src\pages\home\home.tsfile and add the following variable declaration to the top of theHomePageclass (before theconstructor)://Mapped to the search field searchInput: string = '';This defines the variable that will be populated automatically with whatever string the user adds to the search field.
Finally, still in the project's
src\pages\home\home.tsfile, add the following function to theHomePageclass:setZipCode() { //whenever the user enters a zip code, replace the current location //with the entered value, then show current weather for the selected //location. //Hide the keyboard if it's open, just in case Keyboard.close(); //Populate the currentLoc variable with the city name this.currentLoc = { 'zip': this.searchInput }; //Clear the Zip Code input field this.searchInput = ''; //get the weather for the specified city this.showCurrent(); }This function responds to the user tapping the Find Weather button and creates a location object then calls the
showCurrentfunction to retrieve weather data for the specified Zip Code. TheKeyboard.close()code uses the Ionic Keyboard plugin to hide the keyboard before initiating the search. If the code didn't do this, it's possible that the keyboard would stay open, blocking part of the page, as the page updates with the new weather data.
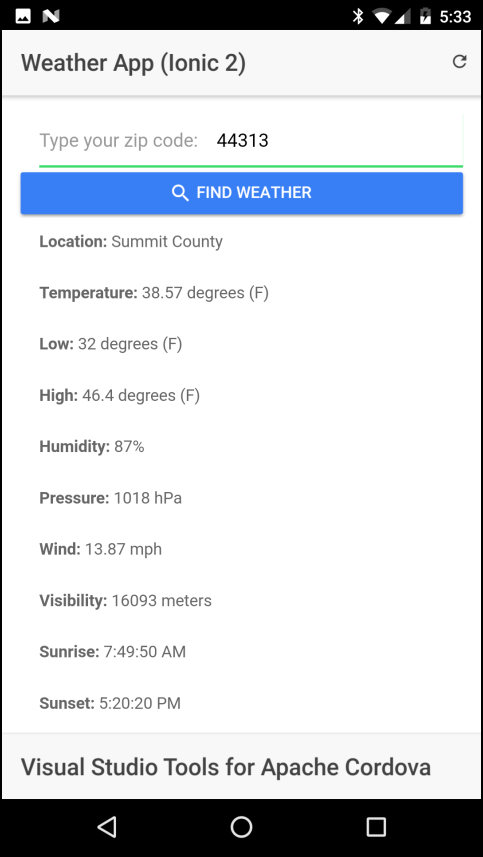
When you run the application, you should now see a search field at the top of the page. Enter a US Zip Code and tap the button to get weather data for the specified location.
Adding a Weather Forecast Page
The weather API the app uses has an API for retrieving forecast data, so lets display that in the application as well. You can add another page to the app, then use a menu or another navigation method to switch between views, but the search field complicates that approach. Instead, we'll use an Ionic Segment component to split the existing page into two parts: one for current conditions, and another for the forecast.
Start by updating the Weather provider to support getting the forecast from the weather service. Open the project's
src\providers\weather.tsfile and add the following code to theWeatherclass.getForecast(loc: any): Promise<any> { let url: string = this.makeDataURL(loc, 'forecast'); return this.http.get(url) .toPromise() .then(this.extractData) .catch(this.handleError); }To get the forecast, all the provider has to do is replace
weatherwithforecastin the API URL, otherwise the code is exactly the same.Next, open the project's
src\pages\home\home.htmlfile. Remove the current<ion-list>implementation:<ion-list no-lines> <!--show this if there are no items in the list--> <ion-item [hidden]="c_items.length > 0"> <p><strong>Weather data is not available</strong></p> </ion-item> <!--Display the current conditions data we have --> <ion-item *ngFor="let c_item of c_items"> <p><strong>{{c_item.name}}:</strong> {{c_item.value}}</p> </ion-item> </ion-list>and replace it with the following:
<ion-segment [(ngModel)]="displayMode">
  <ion-segment-button value="current" (ionSelect)="showCurrent()">
    Current
  </ion-segment-button>
  <ion-segment-button value="forecast" (ionSelect)="showForecast()">
    Forecast
  </ion-segment-button>
</ion-segment>
<div [ngSwitch]="displayMode">
  <ion-list no-lines *ngSwitchCase="'current'">
    <!--show this if there are no items in the list-->
    <ion-item [hidden]="c_items.length > 0">
      <p><strong>Weather data is not available</strong></p>
    </ion-item>
    <!--Display the current conditions data we have -->
    <ion-item *ngFor="let c_item of c_items">
      <p><strong>{{c_item.name}}:</strong> {{c_item.value}}</p>
    </ion-item>
  </ion-list>
  <ion-list inset *ngSwitchCase="'forecast'">
    <ion-item text-wrap>
      {{ f_items.length ? 'Tap an item to view the forecast for the selected period.': 'Forecast data is not available at this time.' }}
    </ion-item>
    <button detail-push ion-item *ngFor="let item of f_items" (click)="viewForecast(item)">
      <ion-icon name="time" item-left></ion-icon>
        {{item.period}}
    </button>
  </ion-list>
</div>
This adds a segment to the page using the
<ion-segment>component, and defines two segments:currentandforecast. The<div>with the[ngSwitch]="displayMode"attribute swaps in separate<ion-list>components based on the value assigned to the page'sdisplayModevariable.Now we'll add the TypeScript code that make all of this work. Open the project's
src\pages\home\home.tsfile and add the following variable declarations to the top of theHomePageclass.//This is used to set the Ionic Segment to the first segment currentMode: string = 'current'; // used to control which segment is displayed displayMode: string = this.currentMode; //holds forecast data, a separate row for each period f_items: Array<any> = []; //array of day strings used when displaying forecast data days: Array<string> = ['Sunday', 'Monday', 'Tuesday', 'Wednesday', 'Thursday', 'Friday', 'Saturday'];When the page loads, we want the app to default to displaying the current conditions, so add the following code to the
ionViewDidLoadfunction://Switch to the Current segment this.displayMode = this.currentModeThis sets
this.displayModetocurrent. Add the code to theresumeevent listener, the resulting code should look like this:document.addEventListener('resume', () => { //Get the local weather when the app resumes //Switch to the Current segment this.displayMode = this.currentMode //then update it with local weather conditions this.getLocalWeather(); });Now that the page displays two segments, the
refreshPagefunction needs to know which part of the page to refresh. Replace the currentrefreshPagefunction with the following code:refreshPage() { //Which page are we looking at now? if (this.displayMode === this.currentMode) { this.showCurrent(); } else { this.showForecast(); } }The
setZipCodefunction defaults to loading current conditions when a Zip Code is entered, so it must switch to the Current tab before getting results. Add the following lines to the function before the call tothis.showCurrent()://Switch to the 'current' tab this.displayMode = this.currentMode;The complete function should look like this:
setZipCode() {
  //whenever the user enters a zip code, replace the current location
  //with the entered value, then show current weather for the selected
  //location.
  //Hide the keyboard if it's open, just in case
  Keyboard.close();
  //Populate the currentLoc variable with the city name
  this.currentLoc = { 'zip': this.searchInput };
  //Clear the Zip Code input field
  this.searchInput = '';
  //Switch to the 'current' tab
  this.displayMode = this.currentMode;
  //get the weather for the specified city
  this.showCurrent();
}
Finally, add the
showForecastfunction to theHomePageclass:showForecast() { //clear out the previous array contents this.f_items = []; //Create the loading indicator let loader = this.loadingCtrl.create({ content: "Retrieving forecast..." }); //Show the loading indicator loader.present(); this.weather.getForecast(this.currentLoc).then( data => { //Hide the loading indicator loader.dismiss(); //Now, populate the array with data from the weather service //Do we have some data? if (data) { //Then lets build the results array we need //Process each forecast period in the array for (let period of data.list) { //Create a 'record' consisting of a time period's results let weatherValues: any = this.formatWeatherData(period); //Append this, along with the time period information, into the forecast //items array. //Get the forecast date as a date object let d = new Date(period.dt_txt); //Determe the day of the week let day = this.days[d.getDay()]; //And the time let tm = d.toLocaleTimeString(); //Create a new object in the results array for this period this.f_items.push({ 'period': day + ' at ' + tm, 'values': weatherValues }); } } else { //This really should never happen console.error('Error displaying weather data: Data object is empty'); } }, error => { //Hide the loading indicator loader.dismiss(); console.error("Error retrieving weather data"); console.dir(error); this.showAlert(error); } ); }This function gets the forecast data, then formats it for display on two pages. First, it builds an array of time periods that represent the different forecast periods. Then, for each period, it appends an object containing the forecast data for that period. The page's forecast segment displays the list of forecast periods, then, when you tap on an entry, the application will eventually (you'll see how in the next section) open a separate page to display the details.
At this point, if you run the application, you should see the following:
Tap the forecast tab, and you'll see the list of forecast periods shown in the following figure:

When you tap on a forecast item, nothing happens (for now); that's because we need a page to display the data, and you haven't added one yet.
Adding a Weather Details Page
To add a new page to the application, in Solution Explorer, right-click on the
src\pagesfolder, select Add -> New Item.... In the list of options that appears, select Ionic 2 Page, give it a Name ofWeatherDetail, and click the Add button.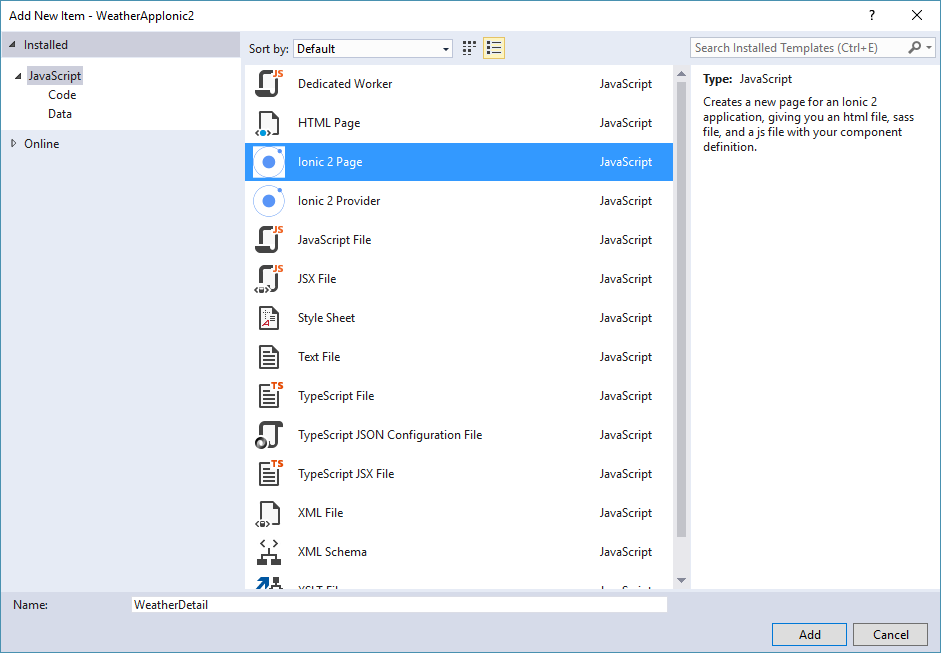
Visual Studio will create a new folder called
WeatherDetailinsrc\pages\and populates it with the source files for the new page:weather-detail.ts,weather-detail.html, andweather-detail.scss.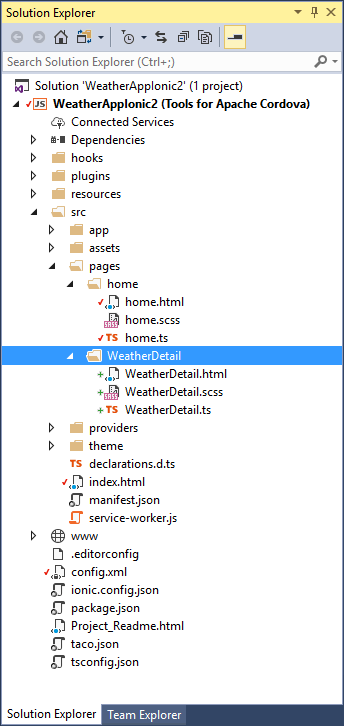
As when you added a provider to the application, when you add a page, you need to update the app's configuration to use it. Open the project's
src\app\app.module.tsfile, and add the followingimportstatement to the top of the file:import { WeatherDetailPage } from '../pages/weatherdetail/weatherdetail';Next, add a reference to the
WeatherDetailPagecomponent to thedeclarationsandentryComponentsarrays as shown below:@NgModule({ declarations: [ MyApp, HomePage, WeatherDetailPage ], imports: [ IonicModule.forRoot(MyApp) ], bootstrap: [IonicApp], entryComponents: [ MyApp, HomePage, WeatherDetailPage ], providers: [Weather, { provide: ErrorHandler, useClass: IonicErrorHandler }] }) export class AppModule { }Open the project's
src\pages\weatherdetail\weatherdetail.htmland replace its contents with the following markup:<ion-header> <ion-navbar> <ion-title>Forecast</ion-title> </ion-navbar> </ion-header> <ion-content padding> <ion-list> <!--show this if there are no items in the list--> <ion-item [hidden]="forecast.values.length > 0"> <p><strong>Weather data is not available</strong></p> </ion-item> <ion-item [hidden]="forecast.values.length < 1"> Period: {{forecast.period}} </ion-item> <ion-item *ngFor="let item of forecast.values"> <p><strong>{{item.name}}:</strong> {{item.value}}</p> </ion-item> </ion-list> </ion-content> <ion-footer> <ion-toolbar> <ion-title>Visual Studio Tools for Apache Cordova</ion-title> </ion-toolbar> </ion-footer>This creates a page that displays the selected forcast item as a list of
nameandvaluevalues.Open the project's
src\pages\weatherdetail\weatherdetail.tsfile and replace its contents with the following code:import { Component } from '@angular/core'; import { NavController, NavParams } from 'ionic-angular'; @Component({ selector: 'page-weather-detail', templateUrl: 'weatherdetail.html' }) export class WeatherDetailPage { forecast: any; constructor(public navCtrl: NavController, public navParams: NavParams) { //Pull the selected forecast off of navParams this.forecast = this.navParams.get('forecast'); } ionViewDidLoad() { console.log('Weather Detail page loaded'); } }Notice that there's no real code in the page, that's because the HTML template takes care of rendering the data and Ionic takes care of page navigation automatically. The three important changes are:
The addition of a
NavParamscomponent to the page, it's responsible for passing data between pages.The addition of a
forecastvariable:forecast: any;This variable is storage for the forecast object passed to the page when it opens. It holds data for the current forcast period. The HTML page references this variable as the source for the data it renders on the page.
The addition of a single line of code to the
constructor:this.forecast = this.navParams.get('forecast');This assigns the local
this.forecastobject to the data passed in theforecastobject sent through theNavParamscomponent
Now we need to tell the
forecastsegment how to open the forecast details page when the user taps on an item in the list. Open the project'ssrc\pages\home\home.tsand add the followingimportstatement to the top of the file:import { WeatherDetailPage } from '../weatherdetail/weatherdetail';Still in
src\pages\home\home.ts, add theviewForecastfunction to the class:viewForecast(item) { //When the user selects one of the Forecast periods, //open up the details page for the selected period. this.nav.push(WeatherDetailPage, { 'forecast': item }); }The page's HTML already has a reference to this function:
<button detail-push ion-item *ngFor="let item of f_items" (click)="viewForecast(item)">
  <ion-icon name="time" item-left></ion-icon>
  {{item.period}}
</button>
When you run the application now, you should be able to open the forecast by tapping on one of the forecast periods in the list:
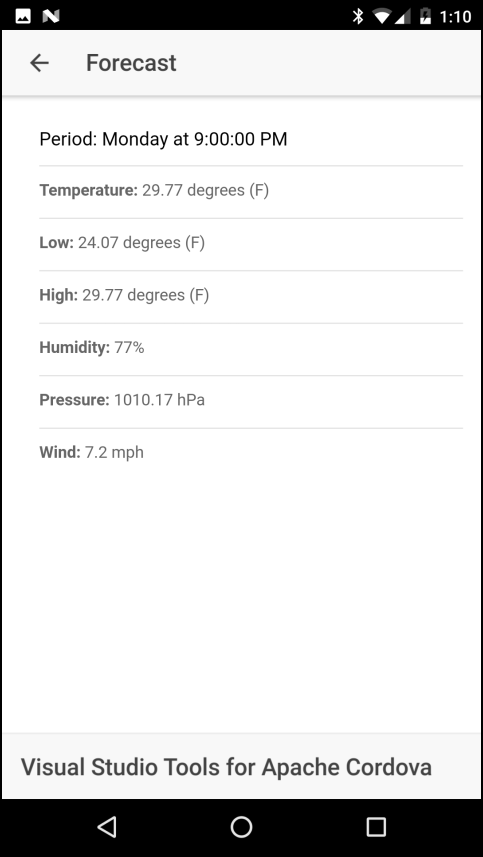
Page navigation is handled by Ionic and Angular, they take care of adding the back arrow in the left corner of the toolbar and closing the page when it's tapped.
That's it! You've completed the Ionic Weather App.
Troubleshooting: Let's fix it
A few errors are fairly common in the starter templates when debugging in Visual Studio.
I installed the Ionic templates, but they don't appear as an option in Visual Studio
Did you receive an error messaging indicating that the appxrecipe file is missing?
Did you receive an error message saying that the Content Security Policy is missing?
Did you receive a certificate error on Windows?
I installed the Ionic templates, but they don't appear as an option in Visual Studio
Did you close, then restart Visual Studio? After the installation, the templates aren't available until Visual Studio restarts.
Did you receive an error messaging indicating that the appxrecipe file is missing?
If you see this error when targeting Windows 10, make sure you set Windows 10.0 as the target in the Windows tab of the configuration editor (config.xml). Then delete the platforms\windows folder and rebuild the project.
Did you receive an error message saying that the Content Security Policy is missing?
Cordova projects automatically add the Whitelist plugin to every project, so you must add the following meta element to the project's index.html file:
<meta http-equiv="Content-Security-Policy" content="default-src 'self' data: gap: https://ssl.gstatic.com 'unsafe-eval'; style-src 'self' 'unsafe-inline'; media-src *">
Did you receive a certificate error on Windows?
Make sure your user credentials in Visual Studio are up to date. Check for any notifications or warning icons in the upper-right corner of the Visual Studio IDE:

You may need to re-enter your credentials. If the notifications indicate that you need to update Cordova tooling, please click on the notifications and follow the provided instructions.