Handle a concurrency exception in .NET Framework database applications
Note
Datasets and related classes are legacy .NET Framework technologies from the early 2000s that enable applications to work with data in memory while the applications are disconnected from the database. They are especially useful for applications that enable users to modify data and persist the changes back to the database. Although datasets have proven to be a very successful technology, we recommend that new .NET applications use Entity Framework Core. Entity Framework provides a more natural way to work with tabular data as object models, and it has a simpler programming interface.
Concurrency exceptions (System.Data.DBConcurrencyException) are raised when two users attempt to change the same data in a database at the same time. In this walkthrough, you create a Windows application that illustrates how to catch a DBConcurrencyException, locate the row that caused the error, and learn a strategy for how to handle it.
This walkthrough takes you through the following process:
Create a new Windows Forms App (.NET Framework) project.
Create a new dataset based on the Northwind Customers table.
Create a form with a DataGridView to display the data.
Fill a dataset with data from the Customers table in the Northwind database.
Use the Show Table Data feature in Server Explorer to access the Customers-table's data and change a record.
Change the same record to a different value, update the dataset, and attempt to write the changes to the database, which results in a concurrency error being raised.
Catch the error, then display the different versions of the record, allowing the user to determine whether to continue and update the database, or cancel the update.
Prerequisites
This walkthrough uses SQL Server Express LocalDB and the Northwind sample database.
If you don't have SQL Server Express LocalDB, install it either from the SQL Server Express download page, or through the Visual Studio Installer. In the Visual Studio Installer, you can install SQL Server Express LocalDB as part of the Data storage and processing workload, or as an individual component.
Install the Northwind sample database by following these steps:
In Visual Studio, open the SQL Server Object Explorer window. (SQL Server Object Explorer is installed as part of the Data storage and processing workload in the Visual Studio Installer.) Expand the SQL Server node. Right-click on your LocalDB instance and select New Query.
A query editor window opens.
Copy the Northwind Transact-SQL script to your clipboard. This T-SQL script creates the Northwind database from scratch and populates it with data.
Paste the T-SQL script into the query editor, and then choose the Execute button.
After a short time, the query finishes running and the Northwind database is created.
Create a new project
Begin by creating a new Windows Forms application:
In Visual Studio, on the File menu, select New > Project.
Expand either Visual C# or Visual Basic in the left-hand pane, then select Windows Desktop.
In the middle pane, select the Windows Forms App project type.
Name the project ConcurrencyWalkthrough, and then choose OK.
The ConcurrencyWalkthrough project is created and added to Solution Explorer, and a new form opens in the designer.
Create the Northwind dataset
Next, create a dataset named NorthwindDataSet:
On the Data menu, choose Add New Data source.
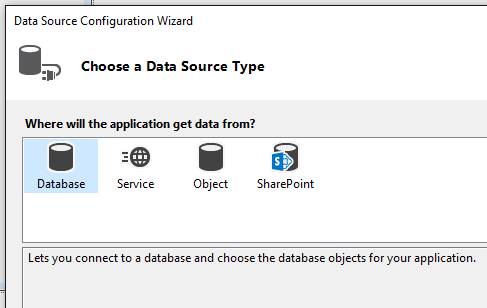
The Data Source Configuration Wizard opens.
On the Choose a Data Source Type screen, select Database.
Select a connection to the Northwind sample database from the list of available connections. If the connection is not available in the list of connections, select New Connection.
Note
If you're connecting to a local database file, select No when asked if you would you like to add the file to your project.
On the Save connection string to the application configuration file screen, select Next.
Expand the Tables node and select the Customers table. The default name for the dataset should be NorthwindDataSet.
Select Finish to add the dataset to the project.
Create a data-bound DataGridView control
In this section, you create a System.Windows.Forms.DataGridView by dragging the Customers item from the Data Sources window onto your Windows Form.
To open the Data Sources window, on the Data menu, choose Show Data Sources.
In the Data Sources window, expand the NorthwindDataSet node, and then select the Customers table.
Select the down arrow on the table node, and then select DataGridView in the dropdown list.
Drag the table onto an empty area of your form.
A DataGridView control named CustomersDataGridView, and a BindingNavigator named CustomersBindingNavigator, are added to the form that's bound to the BindingSource. This is, in turn, bound to the Customers table in the NorthwindDataSet.
Test the form
You can now test the form to make sure it behaves as expected up to this point:
Select F5 to run the application.
The form appears with a DataGridView control on it that's filled with data from the Customers table.
On the Debug menu, select Stop Debugging.
Handle concurrency errors
How you handle errors depends on the specific business rules that govern your application. For this walkthrough, we use the following strategy as an example for how to handle the concurrency error.
The application presents the user with three versions of the record:
The current record in the database
The original record that's loaded into the dataset
The proposed changes in the dataset
The user is then able to either overwrite the database with the proposed version, or cancel the update and refresh the dataset with the new values from the database.
To enable the handling of concurrency errors
Create a custom error handler.
Display choices to the user.
Process the user's response.
Resend the update, or reset the data in the dataset.
Add code to handle the concurrency exception
When you attempt to perform an update and an exception is raised, you generally want to do something with the information that's provided by the raised exception. In this section, you add code that attempts to update the database. You also handle any DBConcurrencyException that might be raised, as well as any other exceptions.
Note
The CreateMessage and ProcessDialogResults methods are added later in the walkthrough.
Add the following code below the
Form1_Loadmethod:private void UpdateDatabase() { try { this.customersTableAdapter.Update(this.northwindDataSet.Customers); MessageBox.Show("Update successful"); } catch (DBConcurrencyException dbcx) { DialogResult response = MessageBox.Show(CreateMessage((NorthwindDataSet.CustomersRow) (dbcx.Row)), "Concurrency Exception", MessageBoxButtons.YesNo); ProcessDialogResult(response); } catch (Exception ex) { MessageBox.Show("An error was thrown while attempting to update the database."); } }
Replace the
CustomersBindingNavigatorSaveItem_Clickmethod to call theUpdateDatabasemethod so it looks like the following:
Display choices to the user
The code you just wrote calls the CreateMessage procedure to display error information to the user. For this walkthrough, you use a message box to display the different versions of the record to the user. This enables the user to choose whether to overwrite the record with the changes or cancel the edit. Once the user selects an option (clicks a button) on the message box, the response is passed to the ProcessDialogResult method.
Create the message by adding the following code to the Code Editor. Enter this code below the UpdateDatabase method:
private string CreateMessage(NorthwindDataSet.CustomersRow cr)
{
    return
        "Database: " + GetRowData(GetCurrentRowInDB(cr), DataRowVersion.Default) + "\n" +
        "Original: " + GetRowData(cr, DataRowVersion.Original) + "\n" +
        "Proposed: " + GetRowData(cr, DataRowVersion.Current) + "\n" +
        "Do you still want to update the database with the proposed value?";
}


//--------------------------------------------------------------------------
// This method loads a temporary table with current records from the database
// and returns the current values from the row that caused the exception.
//--------------------------------------------------------------------------
private NorthwindDataSet.CustomersDataTable tempCustomersDataTable =
    new NorthwindDataSet.CustomersDataTable();

private NorthwindDataSet.CustomersRow GetCurrentRowInDB(NorthwindDataSet.CustomersRow RowWithError)
{
    this.customersTableAdapter.Fill(tempCustomersDataTable);

    NorthwindDataSet.CustomersRow currentRowInDb =
        tempCustomersDataTable.FindByCustomerID(RowWithError.CustomerID);

    return currentRowInDb;
}


//--------------------------------------------------------------------------
// This method takes a CustomersRow and RowVersion
// and returns a string of column values to display to the user.
//--------------------------------------------------------------------------
private string GetRowData(NorthwindDataSet.CustomersRow custRow, DataRowVersion RowVersion)
{
    string rowData = "";

    for (int i = 0; i < custRow.ItemArray.Length ; i++ )
    {
        rowData = rowData + custRow[i, RowVersion].ToString() + " ";
    }
    return rowData;
}
Process the user's response
You also need code to process the user's response to the message box. The options are either to overwrite the current record in the database with the proposed change, or abandon the local changes and refresh the data table with the record that's currently in the database. If the user chooses Yes, the Merge method is called with the preserveChanges argument set to true. This causes the update attempt to be successful, because the original version of the record now matches the record in the database.
Add the following code below the code that was added in the previous section:
// This method takes the DialogResult selected by the user and updates the database
// with the new values or cancels the update and resets the Customers table
// (in the dataset) with the values currently in the database.

private void ProcessDialogResult(DialogResult response)
{
    switch (response)
    {
        case DialogResult.Yes:
            northwindDataSet.Merge(tempCustomersDataTable, true, MissingSchemaAction.Ignore);
            UpdateDatabase();
            break;

        case DialogResult.No:
            northwindDataSet.Merge(tempCustomersDataTable);
            MessageBox.Show("Update cancelled");
            break;
    }
}
Test the form behavior
You can now test the form to make sure it behaves as expected. To simulate a concurrency violation, you change data in the database after filling the NorthwindDataSet.
Select F5 to run the application.
After the form appears, leave it running and switch to the Visual Studio IDE.
On the View menu, choose Server Explorer.
In Server Explorer, expand the connection your application is using, and then expand the Tables node.
Right-click the Customers table, and then select Show Table Data.
In the first record (ALFKI), change ContactName to Maria Anders2.
Note
Navigate to a different row to commit the change.
Switch to the ConcurrencyWalkthrough's running form.
In the first record on the form (ALFKI), change ContactName to Maria Anders1.
Select the Save button.
The concurrency error is raised, and the message box appears.
Selecting No cancels the update and updates the dataset with the values that are currently in the database. Selecting Yes writes the proposed value to the database.
Related content
Feedback
Coming soon: Throughout 2024 we will be phasing out GitHub Issues as the feedback mechanism for content and replacing it with a new feedback system. For more information see: https://aka.ms/ContentUserFeedback.
Submit and view feedback for