Tutorial: Create a simple application with C#
Applies to: ![]() Visual Studio
Visual Studio ![]() Visual Studio for Mac
Visual Studio for Mac
Note
This article applies to Visual Studio 2017. If you're looking for the latest Visual Studio documentation, see Visual Studio documentation. We recommend upgrading to the latest version of Visual Studio. Download it here
By completing this tutorial, you'll become familiar with many of the tools, dialog boxes, and designers that you can use when you develop applications with Visual Studio. You'll create a "Hello, World" application, design the UI, add code, and debug errors, while you learn about working in the integrated development environment (IDE).
Prerequisites
If you haven't already installed Visual Studio, go to the Visual Studio downloads page to install it for free.
Configure the IDE
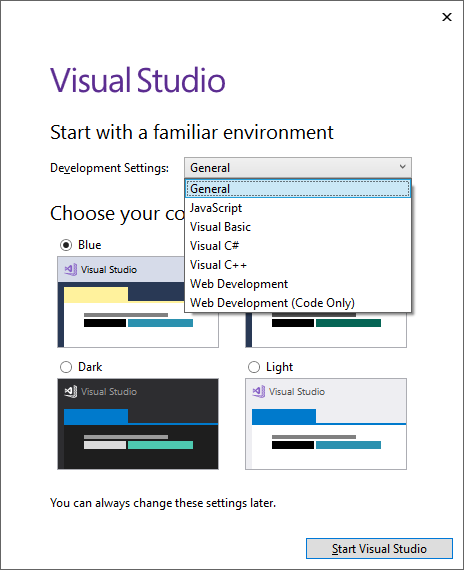
When you open Visual Studio for the first time, you'll be prompted to sign in. This step is optional for this tutorial. Next you may be shown a dialog box that asks you to choose your development settings and color theme. Keep the defaults and choose Start Visual Studio.
After Visual Studio launches, you'll see tool windows, the menus and toolbars, and the main window space. Tool windows are docked on the left and right sides of the application window, with Quick Launch, the menu bar, and the standard toolbar at the top. In the center of the application window is the Start Page. When you load a solution or project, editors and designers appear in the space where the Start Page is. When you develop an application, you'll spend most of your time in this central area.

Create the project
When you create an application in Visual Studio, you first create a project and a solution. For this example, you'll create a Windows Presentation Foundation (WPF) project.
Create a new project. On the menu bar, select File > New > Project.

In the New Project dialog, select the Installed > Visual C# > Windows Desktop category, and then select the WPF App (.NET Framework) template. Name the project HelloWPFApp, and select OK.

Design the user interface (UI)
If the designer is not open, select MainWindow.xaml and press Shift+F7 to open the designer.
We'll add three types of controls to this application: a TextBlock control, two RadioButton controls, and a Button control.
Add a TextBlock control
Customize the text in the text block
In the XAML view, locate the markup for TextBlock and change the Text attribute from
TextBoxtoSelect a message option and then choose the Display button.The XAML markup should look something like the following example:
<Grid>
    <TextBlock HorizontalAlignment="Left" Margin="387,60,0,0" TextWrapping="Wrap" Text="Select a message option and then choose the Display button." VerticalAlignment="Top"/>
</Grid>
Center the TextBlock again if you like, and then save your changes by pressing Ctrl+S or using the File menu item.
Next, you'll add two RadioButton controls to the form.
Add radio buttons
Add display text for each radio button
Update the Content attribute for the
HelloButtonandGoodbyeButtonto"Hello"and"Goodbye"in the XAML. The XAML markup should now look similar to the following example:<Grid> <TextBlock HorizontalAlignment="Left" Margin="252,47,0,0" TextWrapping="Wrap" Text="Select a message option and then choose the Display button." VerticalAlignment="Top"/> <RadioButton x:Name="HelloButton" Content="Hello" HorizontalAlignment="Left" Margin="297,161,0,0" VerticalAlignment="Top"/> <RadioButton x:Name="GoodbyeButton" Content="Goodbye" HorizontalAlignment="Left" Margin="488,161,0,0" VerticalAlignment="Top"/> </Grid>
Set a radio button to be checked by default
In this step, we'll set HelloButton to be checked by default so that one of the two radio buttons is always selected.
In the XAML view, locate the markup for HelloButton.
Add an IsChecked attribute and set it to True. Specifically, add
IsChecked="True".The XAML markup should now look similar to the following example:
<Grid>
     <TextBlock HorizontalAlignment="Left" Margin="252,47,0,0" TextWrapping="Wrap" Text="Select a message option and then choose the Display button." VerticalAlignment="Top"/>
     <RadioButton x:Name="HelloButton" Content="Hello" IsChecked="True" HorizontalAlignment="Left" Margin="297,161,0,0" VerticalAlignment="Top"/>
     <RadioButton x:Name="GoodbyeButton" Content="Goodbye" HorizontalAlignment="Left" Margin="488,161,0,0" VerticalAlignment="Top"/>
</Grid>
The final UI element that you'll add is a Button control.
Add the button control
Add code to the display button
Debug and test the application
Next, you'll debug the application to look for errors and test that both message boxes appear correctly. The following instructions tell you how to build and launch the debugger, but later you might read Build a WPF application (WPF) and Debug WPF for more information.
Change the name of MainWindow.xaml
Let's give MainWindow a more specific name. In Solution Explorer, right-click on MainWindow.xaml and choose Rename. Rename the file to Greetings.xaml.
Find and fix errors
In this step, you'll find the error that we caused earlier by changing the name of the MainWindow.xaml file.
Start debugging and find the error
Specify Greetings.xaml as the startup URI
In Solution Explorer, open the App.xaml file.
Change
StartupUri="MainWindow.xaml"toStartupUri="Greetings.xaml", and save the changes.
As an optional step, it will avoid confusion to change the title of your application window to match this new name.
In Solution Explorer, open the Greetings.xaml file that you just renamed.
Change the value of the Window.Title property from
Title="MainWindow"toTitle="Greetings", and save the changes.
Start the debugger again (press F5). You should now see the Greetings window of your application.

Now close the application window to stop debugging.
Debug with breakpoints
You can test the code during debugging by adding some breakpoints. You can add breakpoints by choosing Debug > Toggle Breakpoint, by clicking in the left margin of the editor next to the line of code where you want the break to occur, or by pressing F9.
Add breakpoints
View a representation of the UI elements
In the running app, you should see a widget that appears at the top of your window. The widget is a runtime helper that provides quick access to some helpful debugging features. Select the first button, Go to Live Visual Tree. You should see a window with a tree that contains all the visual elements of your page. Expand the nodes to find the buttons you added.
Build a release version of the application
Now that you've verified that everything works, you can prepare a release build of the application.
On the main menu, select Build > Clean solution to delete intermediate files and output files that were created during previous builds. This step isn't required, but it cleans up the debug build outputs.
Change the build configuration for HelloWPFApp from Debug to Release by using the dropdown control on the toolbar (it says "Debug" currently).
Build the solution by choosing Build > Build Solution.
Congratulations on completing this tutorial! You can find the .exe you built under your solution and project directory (...\HelloWPFApp\HelloWPFApp\bin\Release).
Next steps
Congratulations on completing this tutorial! To learn even more, continue with the following tutorials.