Quickstart: Collaborative coding with Visual Studio Live Share
Welcome to Visual Studio Live Share! Live Share lets you collaboratively edit and debug with others in real time, regardless of what programming languages you're using or app types you're building. Live Share lets you instantly and securely share your current project. Share debugging sessions, terminal instances, localhost web apps, voice calls, and more as needed.
Get started with Visual Studio Live Share and seamlessly begin sharing your work and ideas.
Tip
Did you know you can join your own collaboration session? This allows you to try Live Share on your own or to spin up an instance of Visual Studio or VS Code and connect to it remotely. You can even use the same identity in both instances.
Follow these steps to start sharing.
Prerequisites
Follow these steps to install the extension.
| Product | Installation steps |
|---|---|
 |
Visual Studio Code (1.22.0+) 1. Install Visual Studio Code for Windows (7, 8.1, or 10), macOS (High Sierra 10.13+), 64-bit Linux (details) 2. Download and install the Visual Studio Live Share extension from the marketplace.  |
 |
Visual Studio 2019 1. Install Visual Studio 2019. 2. Install a supported workload (e.g. ASP.NET, .NET Core, C++, Python, and/or Node.js). 3. Visual Studio Live Share is installed by default with these workloads. |
 |
Visual Studio 2017 15.6 or higher 1. Install the latest version of Visual Studio 2017 (15.6+) on Windows (7, 8.1, or 10). 2. Install a supported workload (e.g. ASP.NET, .NET Core, C++, and/or Node.js). 3. Download and install the Visual Studio Live Share extension from the marketplace.  |
By downloading and using Visual Studio Live Share, you agree to the license terms and privacy statement. See troubleshooting if you run into problems.
Sign in
After installing the Live Share extension, restarting, and waiting for dependencies to finish installing (VS Code), you'll want to sign in to let other participants know who you are. Simply click the "Live Share" status bar item (VS Code) or "Sign in" button (VS) to get started.
In Visual Studio Code:

In Visual Studio:

In VS Code, your browser will launch while a notification will appear launch asking you to sign in. Complete the sign in process in your browser, then simply close the browser when done.

In Visual Studio, Live Share automatically uses your personalization account. You can sign in as you would normally. However, if you prefer to use a different sign-in than your Visual Studio personalization account, go to Tools > Options > Live Share > User account and select different credentials.
See troubleshooting if you are still hitting problems.
Open a folder, project, or solution
Use your normal workflow to open a folder, project, or solution that you would like to share in Visual Studio or Visual Studio Code.
[Optional] Update hidden or excluded files
By default, Live Share hides any files/folders referenced in .gitignore files in your shared folders from guests. Hiding a file prevents it from appearing in the guest's file tree. Excluding a file applies a stricter rule that prevents Live Share from opening it for the guest in situations like go to definition or if you step into the file while debugging or being "followed". If you want to hide/exclude different files, a .vsls.json file can be added to your project with these settings. See controlling file access and visibility for details.
Start a collaboration session
Next, click "Live Share" within your tool and an invite link automatically copies to your clipboard.
In Visual Studio Code:

In Visual Studio:

Note
You may be asked by your desktop firewall software to allow the Live Share agent to open a port the first time you share. Accepting this is entirely optional but enables a secured "direct mode" to improve performance when the person you are working with is on the same network as you are. See change the connection mode for details.
[Optional] Enable read-only mode
Once you start your collaboration session, you can set the session to be read-only to prevent guests from making edits to the code being shared.
After sharing, you'll get a notification that the invite link has been copied to your clipboard. You can then select the option to make the session read-only.
In Visual Studio Code:

In Visual Studio:

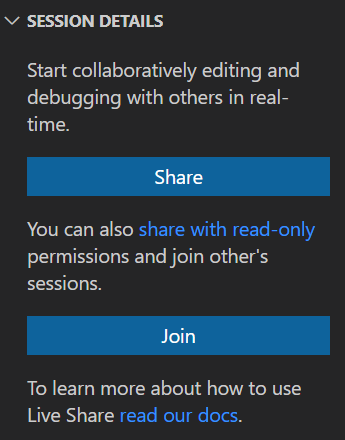
In VS Code, you can also start a read-only session from the Live Share viewlet tab.

Send someone the invite link
Send the link over e-mail, Teams, Slack, Skype, etc. to those you want to invite. Opening the link in a browser allows them to join the collaboration session that is sharing the contents of the folder, project, or solution that you opened. Note that, given the level of access Live Share sessions can provide to guests, you should only share with people you trust and think through the implications of what you are sharing.
Security Tip: Want to understand the security implications of some of Live Share's features? Check out the security article.
If the guest you invited has questions, the Quickstart: Join your first session article provides some more information on getting up and running as a guest.
[Optional] Approve the guest
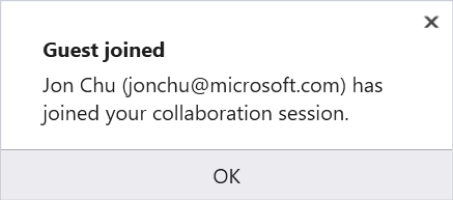
By default, guests automatically join your collaboration session and you are notified when they're ready to work with you.
In Visual Studio Code:

In Visual Studio:

You can opt to require an explicit "approval" for anyone joining instead. If you've this setting turned on, a notification prompts you to approve the guest when they try to join your session.
See requiring guest approval for details on how to turn this feature on.
Collaborate
Here are a few things to try out once a guest has joined you:
- Move around to different files in the project independently and make some edits
- Follow the guest and observe as they scroll, make edits, and navigate to different files
- Start up a co-debugging session with them
- Share a server so you can check out something like a web app running on their machine
- Share a terminal and run some commands
Check out the Visual Studio Code and Visual Studio extension docs for information on how to do these actions and more.
Having problems? See troubleshooting or provide feedback.
Next Steps
Try these articles to get started or dig deeper:
- Quickstart: Join your first collaboration session
- Install and sign in to Live Share in Visual Studio Code
- Install and sign in to Live Share in Visual Studio
Reference
Feedback
Coming soon: Throughout 2024 we will be phasing out GitHub Issues as the feedback mechanism for content and replacing it with a new feedback system. For more information see: https://aka.ms/ContentUserFeedback.
Submit and view feedback for