Tutorial: Create a Django app with views and page templates in Visual Studio
This article presents Step 2 in the tutorial series Work with the Django web framework in Visual Studio.
Visual Studio allows you to create Django applications from project templates that provide a more extensive starting point for your projects. Step 1 in the tutorial series describes how to create the site-level configuration files for a Django web project to support one or more Django web apps. In Step 2, you add content to your Django web project to create your first Django web app with a single page with multiple rendered views.
In Step 2 of the tutorial, you learn how to:
- Create a Django app with a single page
- Run the app from the Django project
- Render a view by using HTML
- Render a view by using a Django page template
Prerequisites
A Visual Studio solution and Django project created in Step 1: Create Visual Studio solution and Django project.
Review the Prerequisites section in Step 1 of this tutorial series for details about Django template versions, Visual Studio projects versus Django projects, and Python development on Mac.
Create Django app with default structure
A Django app is a separate Python package that contains a set of related files for a specific purpose. A Django project can contain many apps, which help a web host to serve many separate entry points (or routes) from a single domain name. For example, a Django project for a domain like contoso.com might contain one app for the www.contoso.com route, a second app for the support.contoso.com route, and a third app for the docs.contoso.com route. In this scenario, the Django project handles site-level URL routing and settings in the urls.py and settings.py files. Each app has its own distinct styling and behavior through its internal routing, views, models, static files, and administrative interface.
Development of a Django app usually begins with a standard set of files. Visual Studio provides templates to initialize a Django app with these files within a Django project. There's also an integrated menu command that serves the same purpose.
Use template to create app
Follow these steps to create the app from a template:
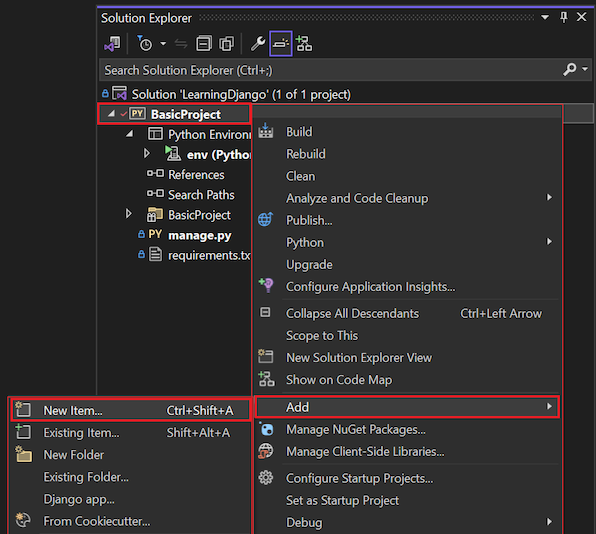
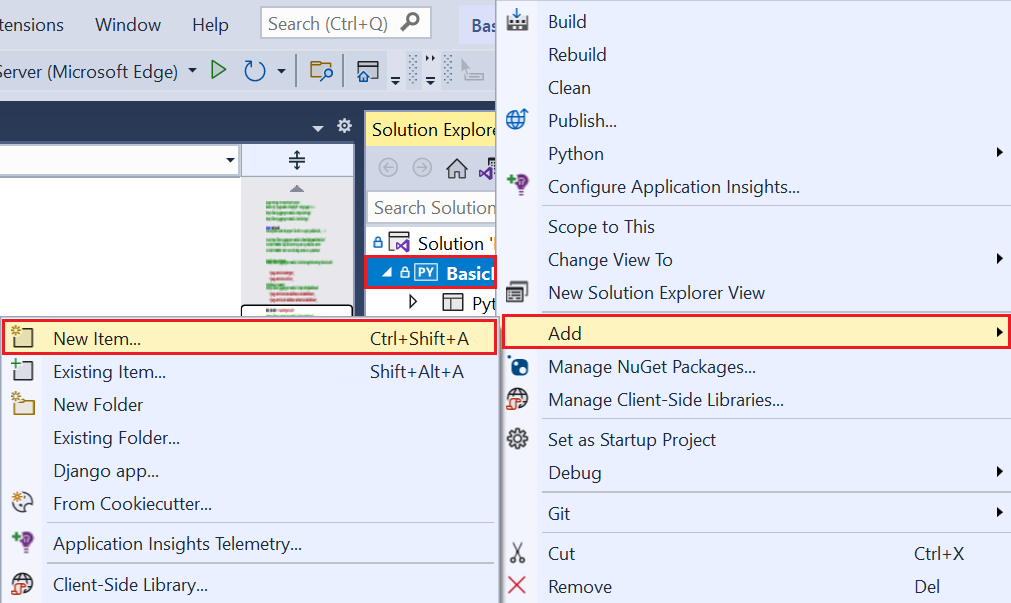
In Solution Explorer, right-click the Visual Studio project (BasicProject) and select Add > New Item.
In the Add New Item dialog, select the Django 1.9 App template:
Enter the app Name HelloDjangoApp.
Select Add.


Use integrated menu command to create app
Follow these steps to create the app by using the integrated Django menu command:
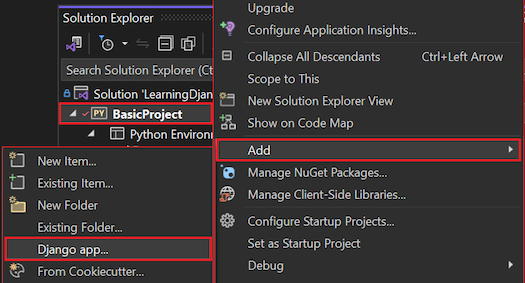
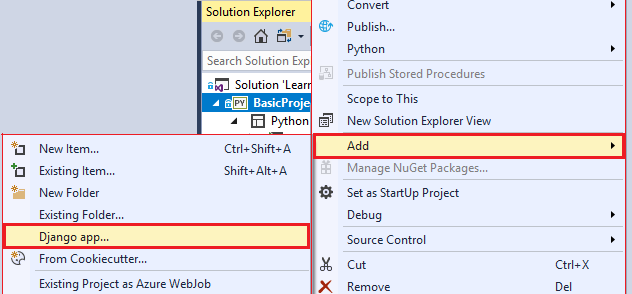
In Solution Explorer, right-click the Visual Studio project (BasicProject) and select Add > Django app.
In the Add Django App dialog, enter the app name HelloDjangoApp:
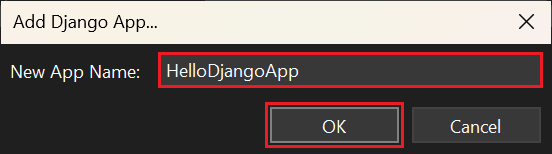
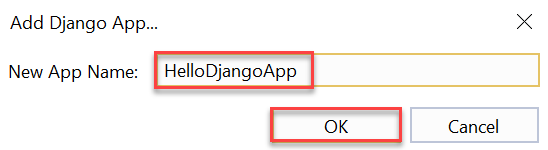
Select OK.


Explore Django app folder
When you create the HelloDjangoApp app, Visual Studio creates a folder with the same name in your Visual Studio project:


The folder contains the following items:
| Item | Description |
|---|---|
| migrations | A folder in which Django stores scripts that update the database to align with the changes to the models. Django's migration tools then apply the necessary changes to any previous version of the database to match the current models. When you use migrations, you keep your focus on your models and let Django handle the underlying database schema. For the exercises in this tutorial series, the folder contains an __init__.py file, which indicates that the folder defines its own Python package. For more information, see the Django documentation. |
| __init__.py | The presence of the init file identifies the Django app as a package. |
| templates | A folder for Django page templates that contains a single index.html file. The index.html file is placed in the folder that has the same name as the app name. Templates are blocks of HTML into which views can add information to dynamically render a page. Page template "variables," such as {{ content }} in the index.html file, are placeholders for dynamic values as explained later in this article. Usually, Django apps create a namespace for their templates by placing them in a subfolder that matches the app name. |
| admin.py | The Python file in which you extend the app's administrative interface, which is used to view and edit data in a database. Initially, this file contains only the statement, from django.contrib import admin. By default, Django includes a standard administrative interface through entries in the Django project's settings.py file. To turn on the interface, you can uncomment the existing entries in the urls.py file. |
| apps.py | A Python file that defines a configuration class for the app. (See the example that follows this table.) |
| models.py | Models are data objects, identified by functions, through which views interact with the app's underlying database. Django provides the database connection layer so that the apps don't concern themselves with the models details. The models.py file is a default place where you create your models. Initially, the models.py file contains only the statement, from django.db import models. |
| tests.py | A Python file that contains the basic structure of unit tests. |
| views.py | Views are similar to web pages, which take an HTTP request and returns an HTTP response. Usually, views render as HTML and the web browsers know how to display, but a view doesn't necessarily have to be visible (like an intermediate form). A Python function defines the view that renders the HTML to the browser. The views.py file is a default place where you create your views. Initially, the views.py file contains only the statement, from django.shortcuts import render. |
When you use the name "HelloDjangoApp," the contents of the apps.py file appears as follows:
from django.apps import AppConfig

class HelloDjangoAppConfig(AppConfig):
    name = 'HelloDjangoApp'
Create app in Visual Studio or from command line
The Add > Django app command and the Add > New Item command (combined with a Django application template) produce the same files as the Django CLI command manage.py startapp <app_name>. The benefit of creating the Django app in Visual Studio is that the app folder and all its files are automatically integrated in the project. You can use the same Visual Studio command to create any number of apps in your project.
Add app-specific page views
If you run your current project in Visual Studio by selecting Debug > Start Debugging (F5) or Web Server on the main toolbar, you see the default Django page. Web apps usually have multiple pages with different views. A unique route for the app URL address identifies each page in the app.
Follow these steps to define app-specific page views and add the app to the Django project:
In the HelloDjangoApp subfolder of your Visual Studio project, replace the contents of the views.py file with the following code:
from django.shortcuts import render
from django.http import HttpResponse

def index(request):
    return HttpResponse("Hello, Django!")
This code imports the necessary rendering and HTTP definitions and defines a view named
index.In the BasicProject subfolder of your Visual Studio project, modify the urls.py file to match the following code. You can keep the instructive comments in the current file, as you prefer.
from django.urls import include, re_path
import HelloDjangoApp.views

# Django processes URL patterns in the order they appear in the array
urlpatterns = [
    re_path(r'^$', HelloDjangoApp.views.index, name='index'),
    re_path(r'^home$', HelloDjangoApp.views.index, name='home')
]
Each URL pattern describes the views to which Django routes specific site-relative URLs (that is, the route portion that follows the URL address https://www.domain.com/):
- The first entry in the
urlPatternsdefinition that starts with the regular expression^$is the routing for the site root page,/. - The second entry,
^home$, routes to the application/homepage.
Notice that the definition in this example code demonstrates that you can have multiple routings to the same view.
Define raw route strings with (r) prefix
The r prefix in a route string in Python means "raw." This prefix instructs Python to not escape any characters within the route string. The regular expressions for route strings use many special characters. The r prefix in a route string is easier to read than the escape character \.
Use caret (^) and dollar ($) characters in routes
In regular expressions that define URL patterns, the caret symbol ^ means "start of line" and the dollar sign $ means "end of line." There are several uses for these characters in URLs relative to the site root (the part that follows the app address https://www.domain.com/):
- The regular expression
^$effectively means "blank" and matches the full URL address for the site root of the app,https://www.domain.com/. - The pattern
^home$matches exactlyhttps://www.domain.com/home/, which is the site route followed by/home. (Django doesn't use the trailing / in pattern matching.) - If you don't use a trailing dollar sign
$in a regular expression, such as for the^homeroute string, then URL pattern matching applies to any URL that begins withhomesuch ashome,homework,homestead,home192837, and so on.
To experiment with different regular expressions, try online tools such as regex101.com at pythex.org.
Run app from Django project
After you add app-specific content, run your app again and check the route views in the browser:
When the application opens in the browser, check the page views for both the
/(site root) and/homeURL routes in the browser. For both routes, the application displays the message Hello, Django! in the browser.When you're done, select Ctrl+C in the console window, followed by any key to stop the application. You can also select Debug > Stop Debugging.
Close any open browser windows for the application.
Commit changes to source control
After you update the Django app code and test the updates, you can review and commit your changes to source control:
Save the changes to your project files, such as with the Ctrl+S keyboard shortcut.
On the Git controls bar, select the uncommitted changes (pencil 11) to open the Git Changes window:

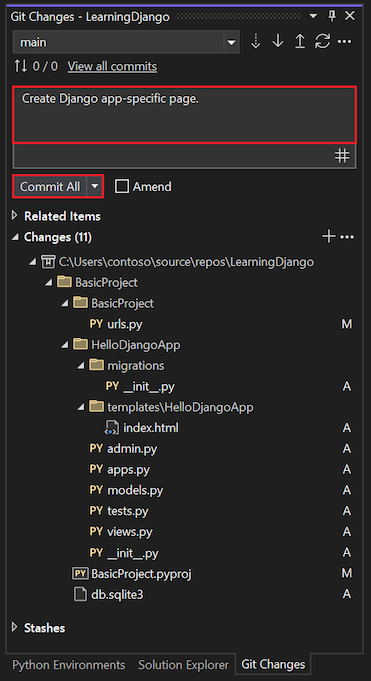
In the Git Changes window, enter a commit message, and select Commit All:
When the commit completes, Visual Studio displays the message Commit <hash> created locally.
(Optional) Push the committed changes to your remote repository:
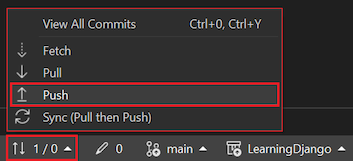
On the Git controls bar, select the outgoing/incoming commits (arrows 1/0).
Select Sync (Pull then Push) or Push.
You can also accumulate multiple local commits before you push them to the remote repository.


Save the changes to your project files, such as with the Ctrl+S keyboard shortcut.
Select the uncommitted changes (pencil 11) at the bottom right in Visual Studio, which opens Team Explorer:

In Team Explorer, enter a commit message like "Create Django app-specific page" and select Commit All.
When the commit completes, Visual Studio displays the message Commit <hash> created locally. Sync to share your changes with the server.
(Optional) Push the committed changes to your remote repository:
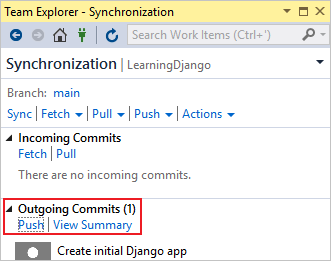
In Team Explorer, select Sync.
Expand the Outgoing Commits and select Push.
You can also accumulate multiple local commits before you push them to the remote repository.


For subsequent procedures in this tutorial series, you can refer to this section for the steps to commit changes to source control.
Use templates to render pages and views
The index function in the views.py file generates a plain-text HTTP response for the Django app page. Most real-world web pages respond with rich HTML pages that often incorporate live data. The primary reason developers define views by using a function is to generate content dynamically.
The argument to the HttpResponse method is just a string. You can build up any HTML within a string by using dynamic content. Because it's best to separate markup from data, it's better to place the markup in a template and keep the data in code.
Adjust views to use inline HTML
Convert the view processing to use inline HTML for the page with some dynamic content:
In the HelloDjangoApp subfolder of your Visual Studio project, open the views.py file.
Replace the
indexfunction with the following code (keep the existingfromstatements):from datetime import datetime def index(request): now = datetime.now() html_content = "<html><head><title>Hello, Django</title></head><body>" html_content += "<strong>Hello Django!</strong> on " + now.strftime("%A, %d %B, %Y at %X") html_content += "</body></html>" return HttpResponse(html_content)The revised
indexfunction generates an HTML response by using dynamic content that updates every time you refresh the page.Save your changes and run your app again. The page now shows the current date and time along with the "Hello Django! message.
Refresh the page a few times to confirm that the date and time updates. When you're done, stop the app.
Create HTML template for page views
Generating HTML in code works fine for small pages. However, as pages get more sophisticated you need to maintain the static HTML parts of your page (along with references to CSS and JavaScript files) as "page templates." You can then insert the dynamic, code-generated content to the page templates. In the previous section, only the date and time from the now.strftime call is dynamic, which means all the other content can be placed in a page template.
A Django page template is a block of HTML that contains multiple replacement tokens called "variables." Open and close curly parenthesis {{ and }} delineate the variables, such as {{ content }}. Django's template module then replaces variables with dynamic content that you provide in code.
Follow these steps to convert the page rendering process to use an HTML template:
In the HelloDjangoApp subfolder of your Visual Studio project, open the settings.py file.
Update the application references in the
INSTALLED_APPSdefinition to include the app nameHelloDjangoApp. Add the app name as the first entry in the list:INSTALLED_APPS = [ 'HelloDjangoApp', # Existing entries in the list ... ]Adding the app to the list informs the Django project that there's a folder named HelloDjangoApp that contains an app.
Confirm the
TEMPLATESobject configuration setsAPP_DIRStoTrue:'APP_DIRS': True,This statement instructs Django to look for templates in the templates folder for an installed application. (This statement should be included in the definition by default.)
In the HelloDjangoApp subfolder, open the templates/HelloDjangoApp/index.html page template file.
Confirm the file contains only one variable,
{{ content }}:<html> <head> <title></title> </head> <body> {{ content }} </body> </html>The
{{ content }}statement is a placeholder or replacement token (also called a template variable) for which you supply a value in the code.In the HelloDjangoApp subfolder of your Visual Studio project, open the views.py file.
Replace the
indexfunction with the following code that uses thedjango.shortcuts.renderhelper function (keep the existingfromstatements):def index(request): now = datetime.now() return render( request, "HelloDjangoApp/index.html", # Relative path from the 'templates' folder to the template file { 'content': "<strong>Hello Django!</strong> on " + now.strftime("%A, %d %B, %Y at %X") } )The
renderhelper function provides a simplified interface for working with page templates. This function has three arguments:- The request object.
- The relative path to the template file within the app's templates folder. A template file is named for the view it supports, if appropriate.
- A dictionary of variables that the template refers to. You can include objects in the dictionary, where a variable in the template can refer to
{{ object.property }}.
Save your project changes and run the app again.
Notice that the inline HTML syntax (
\<strong>...) within thecontentvalue doesn't render as HTML because the templating engine (Jinja) automatically escapes HTML content. Automatic escaping prevents accidental vulnerabilities to injection attacks.Developers often gather input from one page and use it as a value in another by using a template placeholder. Escaping also serves as a reminder that it's best to keep HTML out of the code.
When you're done, stop the app.
Use distinct placeholders
You can use distinct placeholders for each piece of data within the HTML markup. Then, adjust your index function again to supply the specific placeholder values:
Replace the contents of the templates/HelloDjangoApp/index.html page template file with the following markup:
<html>
  <head>
    <title>{{ title }}</title>
  </head>
  <body>
    <strong>{{ message }}</strong>{{ content }}
  </body>
</html>
This HTML markup adds a page title and keeps all the formatting in the page template.
In the HelloDjangoApp/views.py file, replace the
indexfunction with the following code:def index(request): now = datetime.now() return render( request, "HelloDjangoApp/index.html", # Relative path from the 'templates' folder to the template file # "index.html", # Use this code for VS 2017 15.7 and earlier { 'title' : "Hello Django", 'message' : "Hello Django!", 'content' : " on " + now.strftime("%A, %d %B, %Y at %X") } )This code provides values for all the variables in the page template.
Save your changes and run your app again. This time you should see the properly rendered output:

You can commit your changes to source control and update your remote repository. For more information, see Commit changes to source control.

Separate page templates
Templates are usually maintained in separate HTML files, but you can also use an inline template. Separate files are recommended to maintain a clean separation between markup and code.
Use .html extension for templates
The .html extension for page template files is entirely optional. You can always identify the exact relative path to the file in the first argument to the render_template function. However, Visual Studio (and other editors) typically provide features like code completion and syntax coloration with .html files, which outweighs the fact that page templates aren't HTML.
When you work with a Django project, Visual Studio automatically detects if the HTML file you're editing is actually a Django template, and provides certain auto-complete features. If you start to enter a Django page template comment ({#), Visual Studio automatically supplies the closing #} characters. The Comment Selection and Uncomment Selection commands (on the Edit > Advanced menu) also use template comments instead of HTML comments.
Troubleshoot issues
When you run your app, you might encounter issues related to the template file for your app. Review the following points and ensure your Django project configuration is correct.
Template not found
If Django or Visual Studio displays a Template not found error, ensure your app is on the INSTALLED_APPS list. This list is in the settings.py file under the app subfolder of your Visual Studio project (such as HelloDjangoApp). If the list doesn't have an entry for your app, Django doesn't know to look in the app's templates folder.
Duplicate template structure
When Django looks for a template referred to in the render function, it uses the first file that matches the relative path. If you have multiple Django apps in the same project with same folder structures for templates, it's likely that one app can unintentionally use a template from another app. To avoid such errors, always create a subfolder under an app's templates folder that matches the name of the app to avoid any duplication.
Next step
Feedback
Coming soon: Throughout 2024 we will be phasing out GitHub Issues as the feedback mechanism for content and replacing it with a new feedback system. For more information see: https://aka.ms/ContentUserFeedback.
Submit and view feedback for