Write unit tests for Python with Test Explorer in Visual Studio
Unit tests are pieces of code that test other code units in an application, typically isolated functions, classes, and so on. When an application passes all its unit tests, you can be confident that at least the low-level program functionality is correct.
Python uses unit tests extensively to validate scenarios while designing a program. Python support in Visual Studio includes discovering, executing, and debugging unit tests within the context of your development process, without needing to run tests separately.
This article provides a brief outline of unit testing capabilities in Visual Studio with Python. For more on unit testing in general, see Unit test your code.
Prerequisites
Visual Studio on Windows installed with support for Python workloads. For more information, see Install Python support in Visual Studio.
A Python project with code or a folder with Python code.
Visual Studio for Mac isn't supported. For more information, see What's happening to Visual Studio for Mac? Visual Studio Code on Windows, Mac, and Linux works well with Python through available extensions.
Select test framework for a Python project
Visual Studio supports two testing frameworks for Python, unittest and pytest (available in Visual Studio 2019 version 16.3 and later). By default, no framework is selected when you create a Python project.
Follow these steps to select the test framework for your Python project:
In Solution Explorer, right-click the project name and select Properties.
In the project Properties pane, select the Test tab and choose your Test framework type:
For the unittest framework, Visual Studio assigns the project's Root directory for test discovery. The default value is
., but you can specify a different location when you configure the project settings. You can also specify one or more strings for the test filename Pattern, such astest*.py, test_*.py.For the pytest framework, testing options like test location and filename patterns are specified by using the standard pytest .ini configuration file. By default, the workspace/project folder is used for the location. The default filename pattern includes
test_*pyand*_test.py. For more information, see the pytest reference documentation.
Note
When you define the filename pattern, keep in mind that special characters like the underscore (
_) aren't matched by the wildcard (*). If you want to use special characters in the filename, specify these characters in the pattern definition, such astest_*.py.To save your framework selection and settings, you can use the Ctrl+S keyboard shortcut.
After you configure the framework, Visual Studio initiates test discovery and opens Test Explorer.
Configure testing for Python without a project
Visual Studio allows you to run and test existing Python code without a project, by opening a folder with Python code. In this scenario, you need to use a PythonSettings.json file to configure testing.
Open your existing Python code by using the Open a Local Folder option:


When you open a Python folder, Visual Studio creates several hidden folders to manage settings related to the program. To see these folders (and any other hidden files and folders, such as the .git folder) in Solution Explorer, select the Show All Files option:


In Solution Explorer, expand the Local Settings folder, and double-click the PythonSettings.json file to open the file in the editor.
Note
Most configurations show two settings files: PythonSettings.json and ProjectSettings.json. For this exercise, you need to modify the PythonSettings.json file.
If you don't see the PythonSettings.json file in the Local Settings folder, you can create it manually:
Right-click the Local Settings folder and select Add > New File.
Name the file PythonSettings.json, and select Enter to save your changes.
Visual Studio automatically opens the new file in the editor.
In the PythonSettings.json file, add the following code to define the
TestFramework. Set the framework value to pytest or unittest depending on your desired testing framework:{ "TestFramework": "unittest", "UnitTestRootDirectory": "testing", "UnitTestPattern": "test_*.py" }For the unittest framework, if you don't define specific values for the
UnitTestRootDirectoryandUnitTestPatternsettings in the PythonSettings.json file, Visual Studio automatically adds these fields with the default values of.andtest*.py, respectively.For the pytest framework, configuration options are always specified in the pytest .ini configuration file rather than through Visual Studio settings.
If your Python program contains a src folder separate from the folder that contains your tests, specify the path to the src folder with the
SearchPathssetting in the PythonSettings.json file:"SearchPaths": [".\\src"]Save your changes to the PythonSettings.json file.


After you configure the framework, Visual Studio initiates test discovery for the specified framework. You can access the test in Test Explorer.
Add and discover tests
By default, Visual Studio identifies unittest and pytest tests as methods whose names start with test.
To see how Visual Studio initiates test discovery, follow these steps:
Open a Python project in Visual Studio.
Set the test framework Properties for the project, as described in Select test framework for Python project.
In Solution Explorer, right-click the project and select Add > New Item.
In the Add New Item dialog, select the Python Unit Test file type.
Enter a filename that satisfies the Pattern definition you specified for the project Properties.
Select Add.
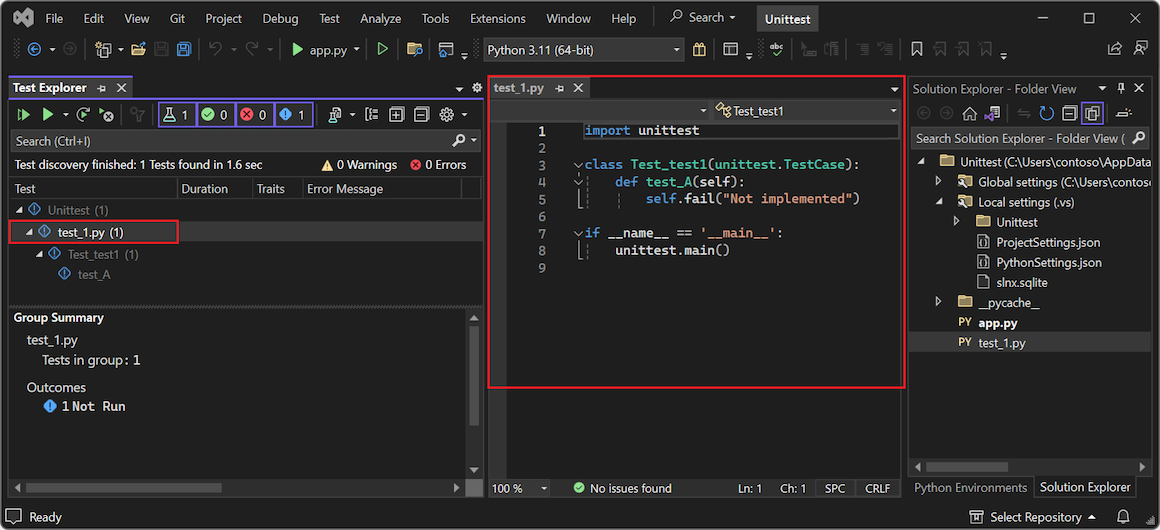
Visual Studio creates the test file with default code:
import unittest

class Test_test1(unittest.TestCase):
    def test_A(self):
        self.fail("Not implemented")

if __name__ == '__main__':
    unittest.main()
This code imports the standard
unittestmodule and derives a test class from theunittest.TestCasemethod. When you run the script directly, this code also invokes theunittest.main()function.
When you add new test files, Visual Studio makes them available in Test Explorer.
View tests with Test Explorer
After you configure your test framework and test files, Visual Studio searches for tests and displays them in Test Explorer.
Here are some of the ways you can work with Test Explorer:
Open the Test Explorer window by selecting Test > Test Explorer.
When the Test Explorer window is open, use the keyboard shortcut CTRL+R, A to trigger test discovery.
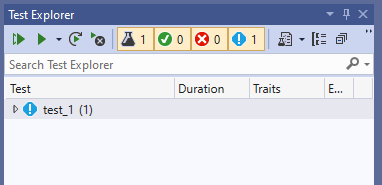
Double-click a test in Test Explorer to open the corresponding source file in the editor:
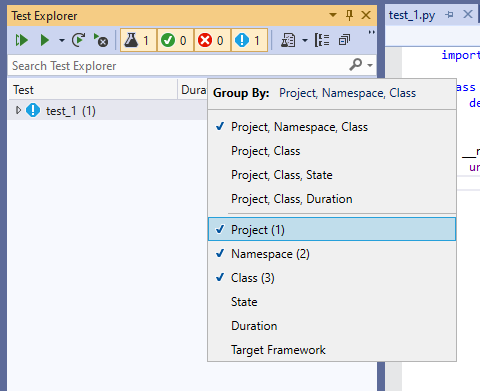
Organize the view of your tests by using the Group By option on the toolbar:

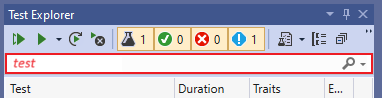
Filter tests by name by entering text in the Search field:

Run tests and view the status for the test run, as described in the next section.


For more information on the unittest module and writing tests, see the Python documentation.
Run tests with Test Explorer
In Test Explorer, you can run tests in several ways:
- Select Run All (tests in view) to execute all tests shown in the current view based on your filter settings.
- Use commands on the Run menu to run failed, passed, or not run tests as a group.
- Select one or more tests, and then right-click and select the Run Selected Tests option.
Visual Studio runs your tests in the background. Test Explorer updates the status for each test as it completes:
Passing tests show a green tick and the time to complete the test run:


Failed tests show a red X with an Output link that shows console output and
unittestoutput from the test run:


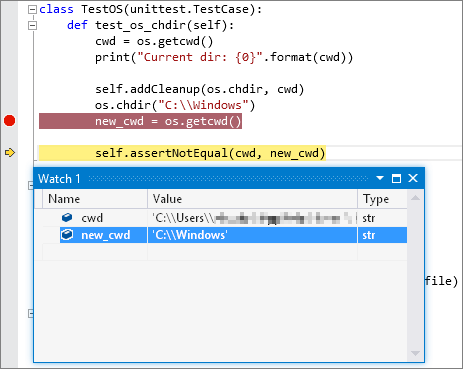
Check tests with the Debugger
Unit tests are pieces of code that are subject to bugs like any other code and occasionally need to be run in a debugger. In the Visual Studio Debugger, you can set breakpoints, examine variables, and step through code. Visual Studio also provides diagnostic tools for unit tests.
Review these points about checking your tests with the Visual Studio Debugger:
By default, test debugging uses the debugpy debugger for Visual Studio 2019 version 16.5 and later. Some earlier versions of Visual Studio use the ptvsd 4 debugger. If you're using an earlier version of Visual Studio and prefer the ptvsd 3 debugger, select the Use Legacy Debugger option under Tools > Options > Python > Debugging.
To start debugging, set an initial breakpoint in your code, then right-click the test (or a selection) in Test Explorer and select Debug Selected Tests. Visual Studio starts the Python debugger as it would for application code.

If you prefer, you can use the Analyze Code Coverage for Selected Tests. For more information, see Use code coverage to determine how much code is tested.


Related content
Feedback
Coming soon: Throughout 2024 we will be phasing out GitHub Issues as the feedback mechanism for content and replacing it with a new feedback system. For more information see: https://aka.ms/ContentUserFeedback.
Submit and view feedback for