Box integration
Viva Goals Box integration lets you update your objective and key result (OKR) progress automatically by syncing your data from your spreadsheets in Box to your OKRs in Viva Goals.
When you link your objectives to the corresponding key performance indicator (KPIs) within spreadsheets in Box, the status of your OKR will be updated based on the data in your spreadsheets. Viva Goals automatically syncs the values for you and charts your progress toward the goal, saving time while keeping your OKRs current.
How to enable Box integration
Admins can follow these steps to enable the integration:
From the sidebar, go to Admin and select the Integrations tab.
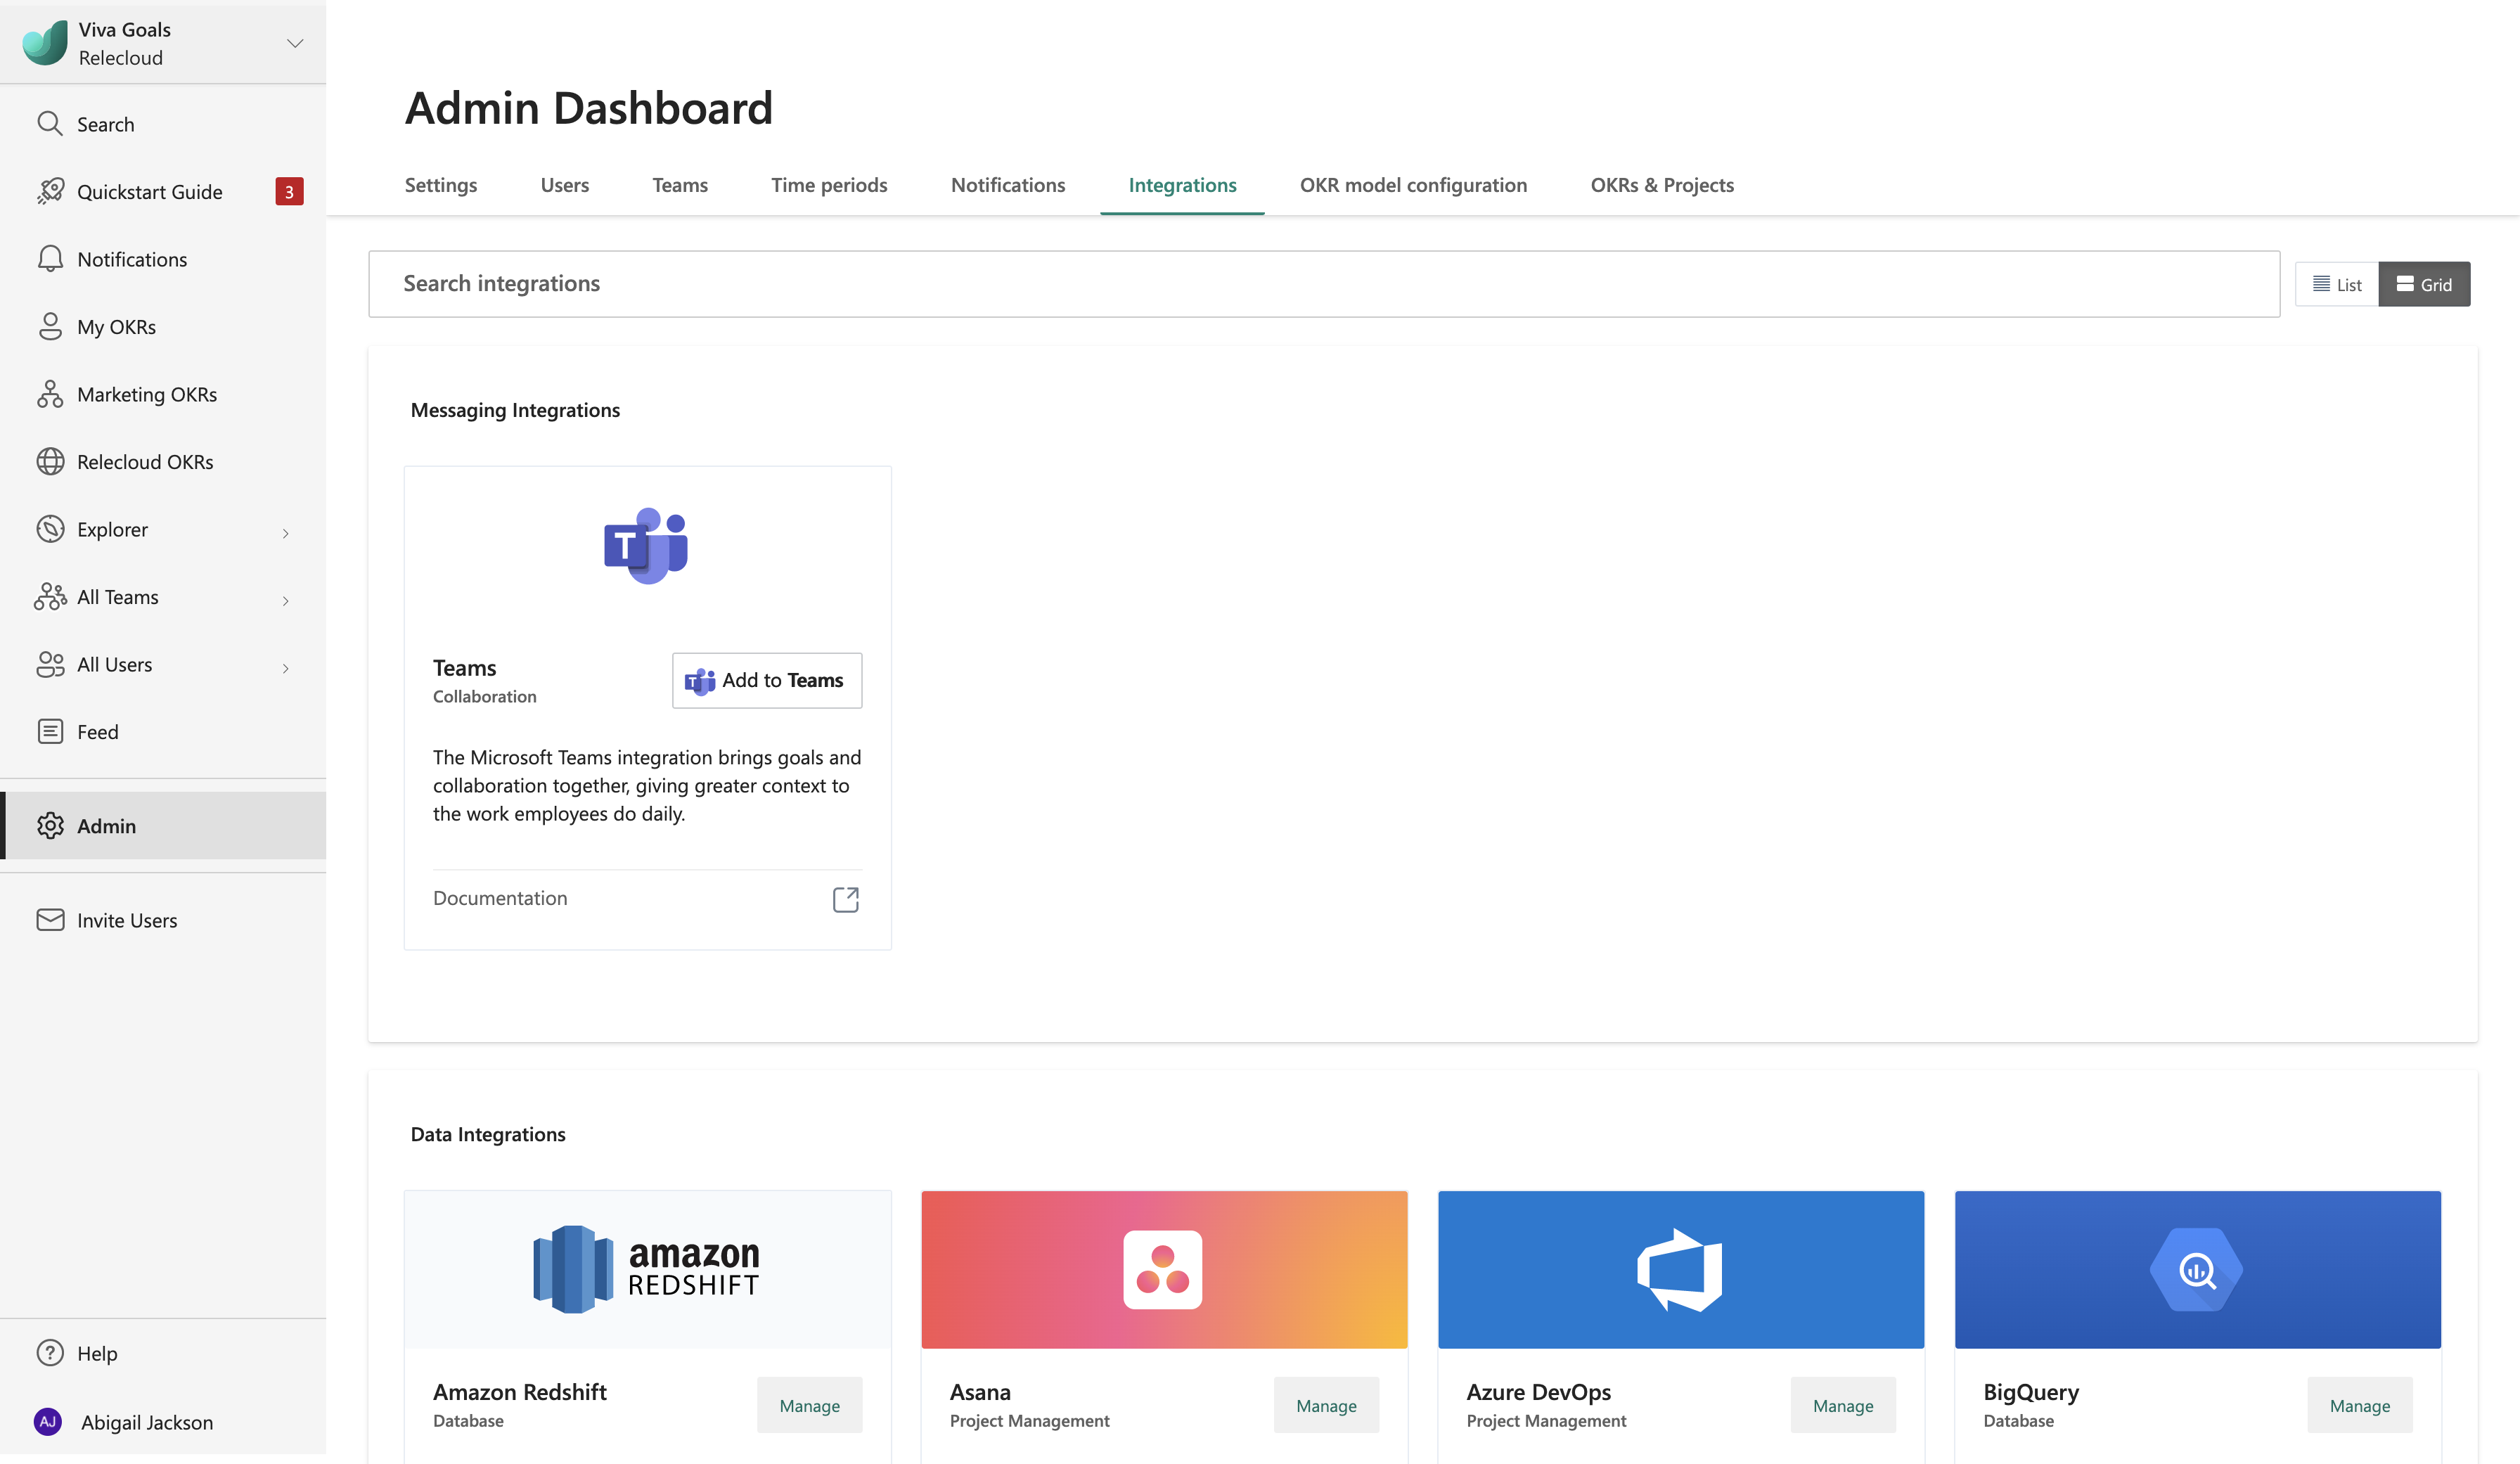
For Box, choose to Enable the integration. If a connection was made previously or if the integration was already enabled, you can choose to Manage the enabled integration.

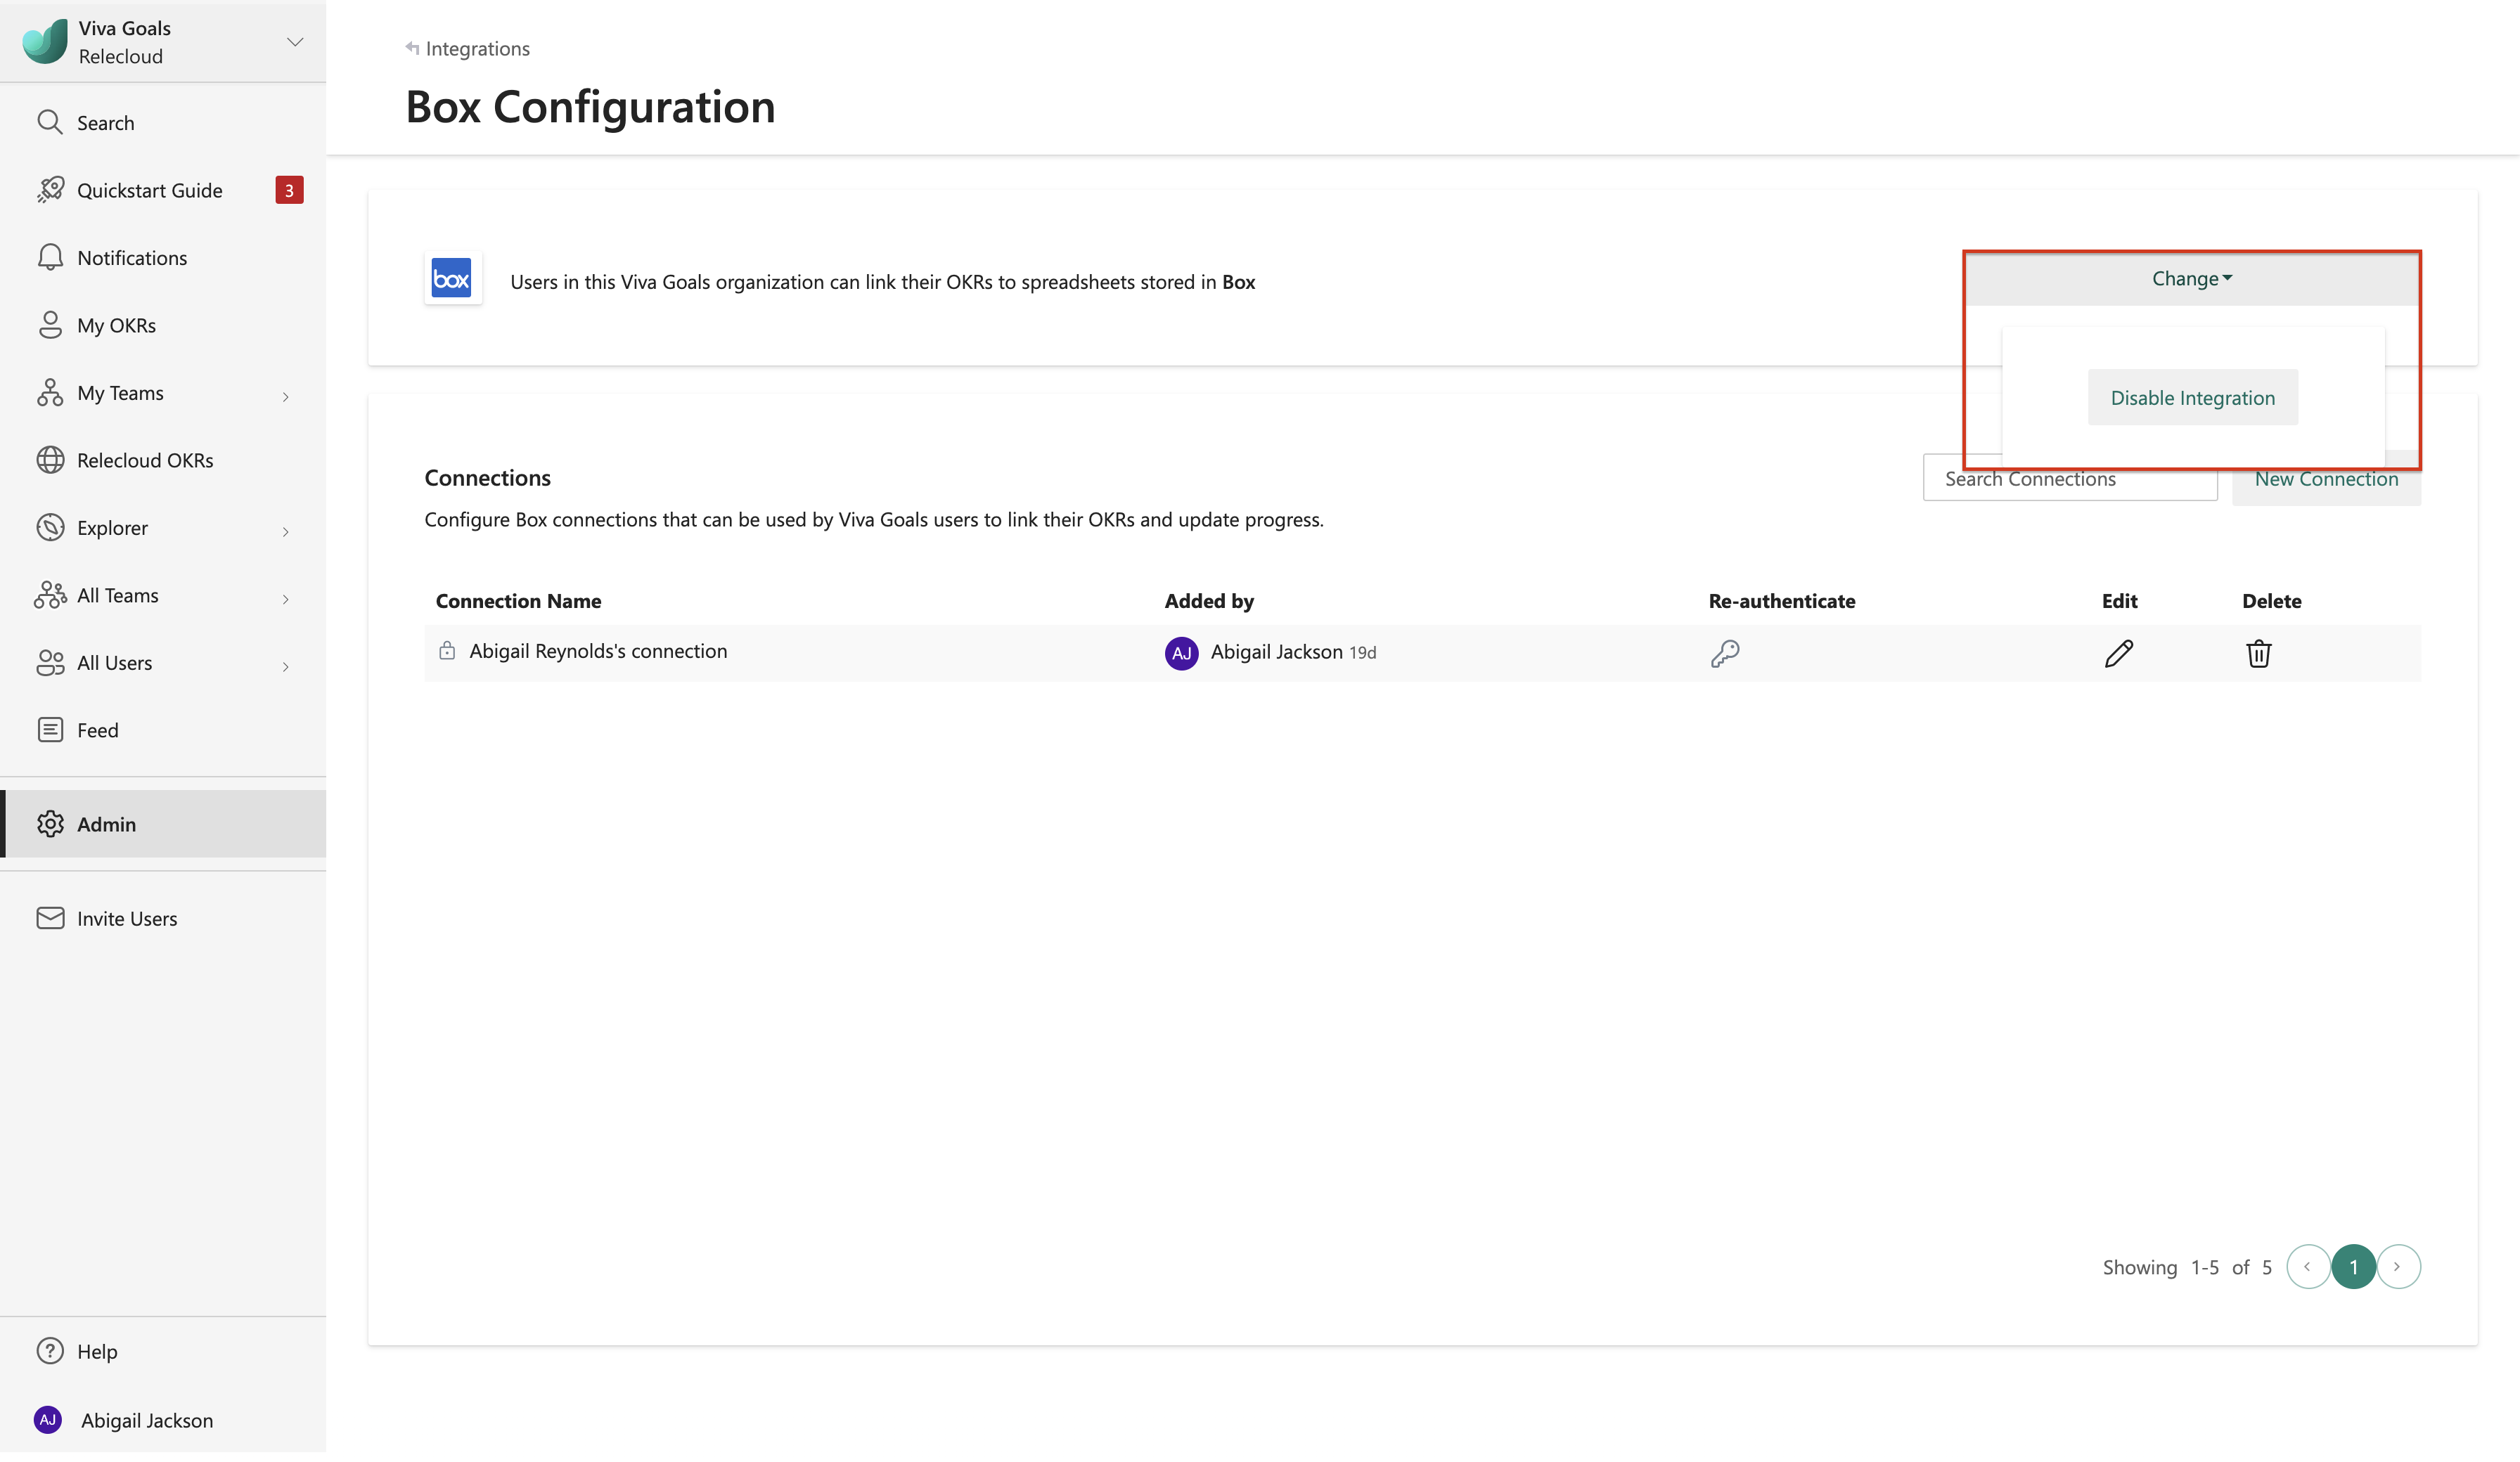
This integration can also be disabled from the same section: Go to Change and select Disable integration from the dropdown.


How to configure Box integration
After you enable the integration, the next step is to configure a Box connection.
Select the Add Objective button to create an objective.
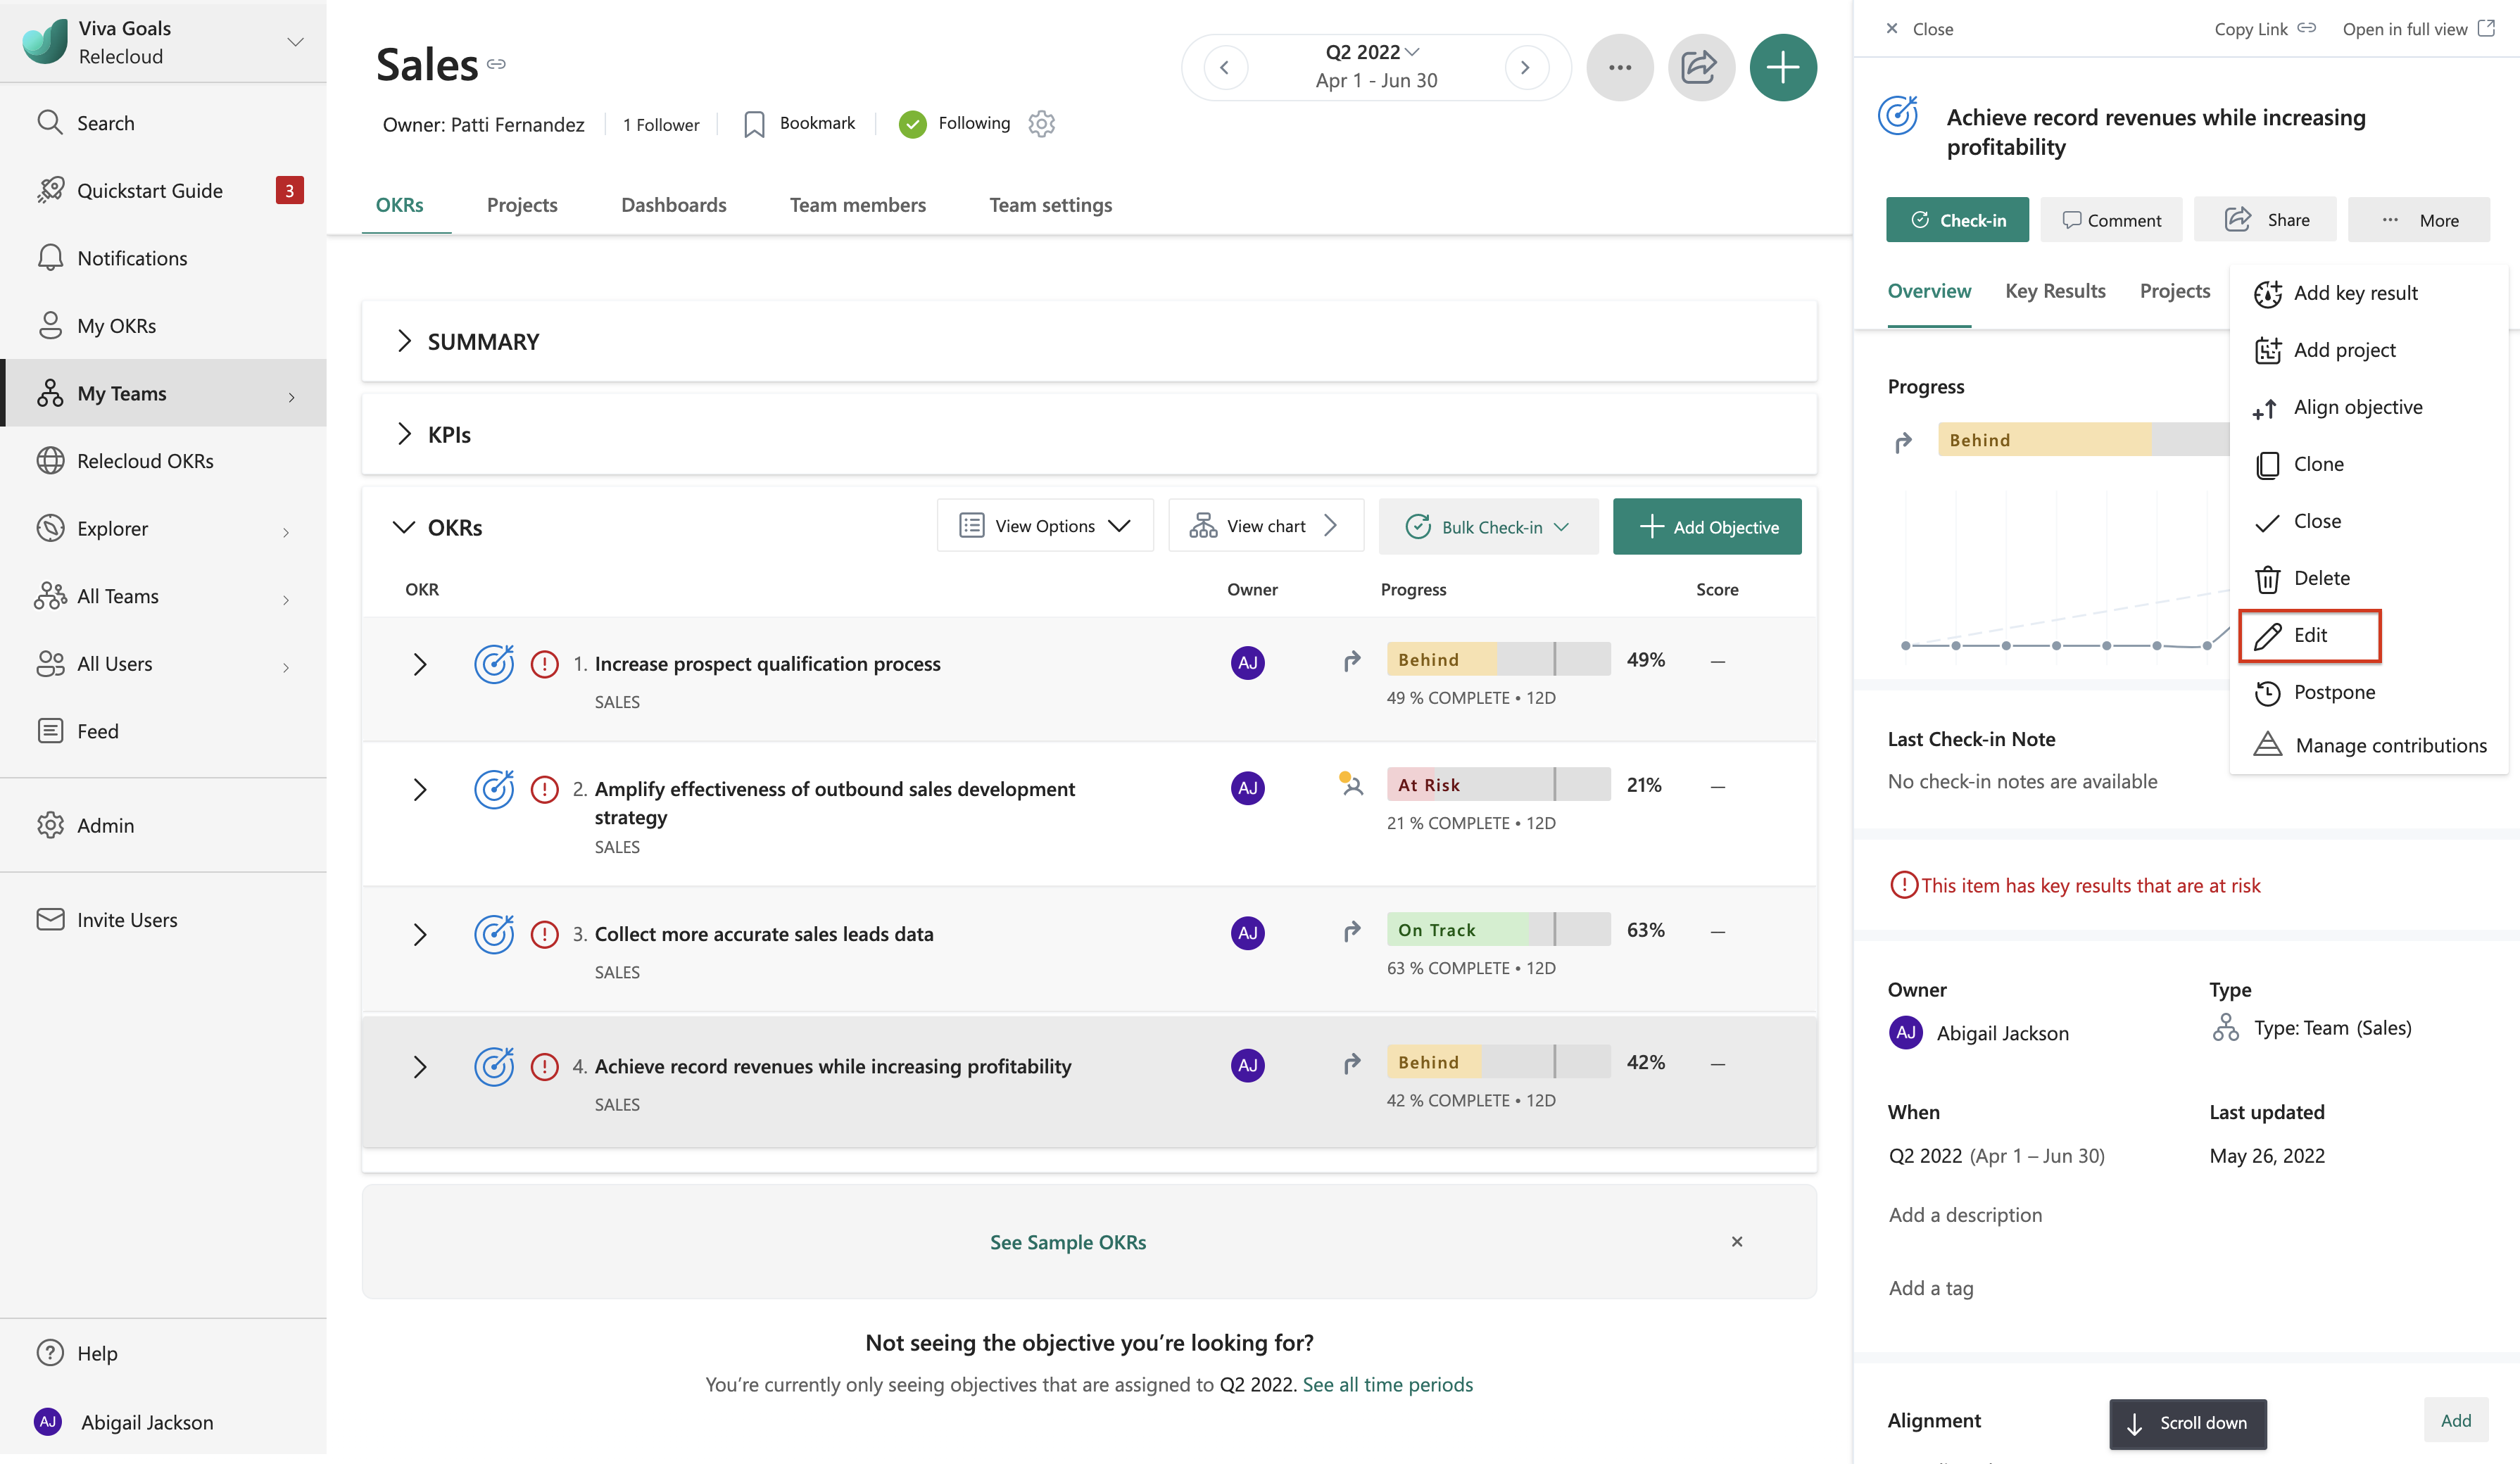
Open the newly created objective and select Edit within the More option.
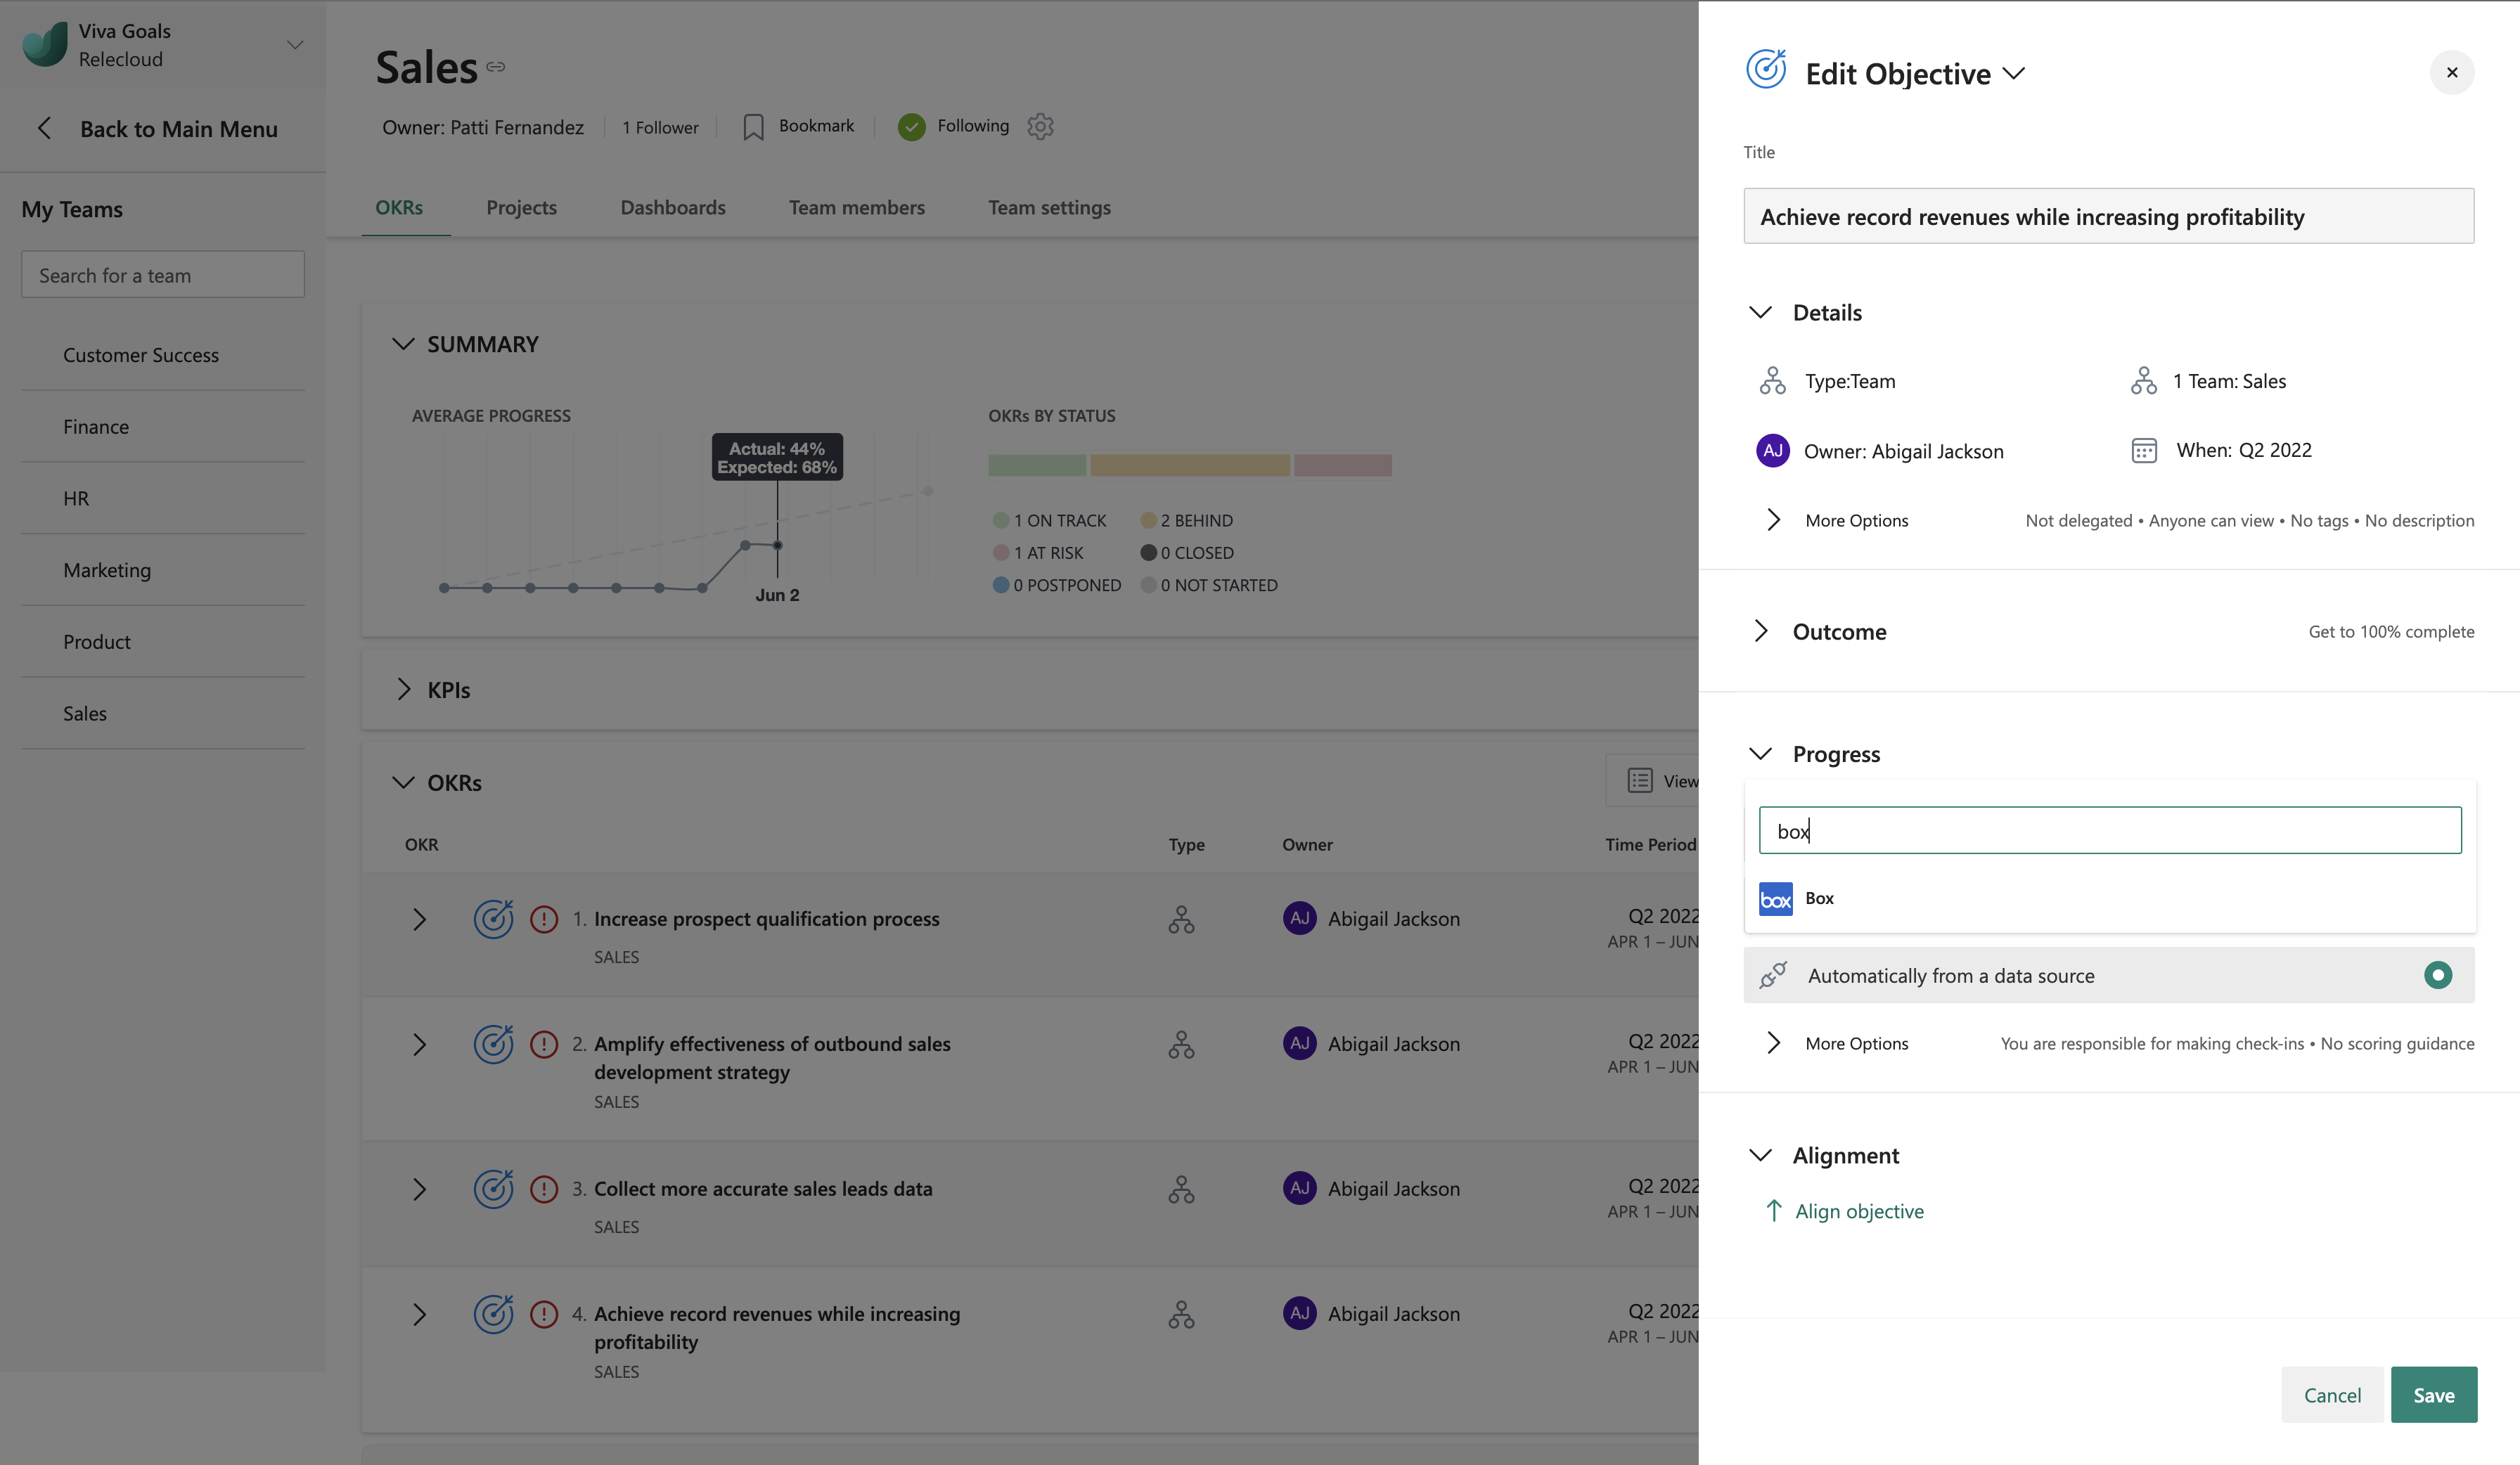
Under Progress, select Automatically from a data source and choose Box from the search menu.
To add a new connection between Viva Goals and Box, sign in with your Box credentials.
A dialog opens where you grant access to Box to integrate with Viva Goals. This access allows Viva Goals to read and download files from your Box account.


How to connect a spreadsheet in Box to an OKR
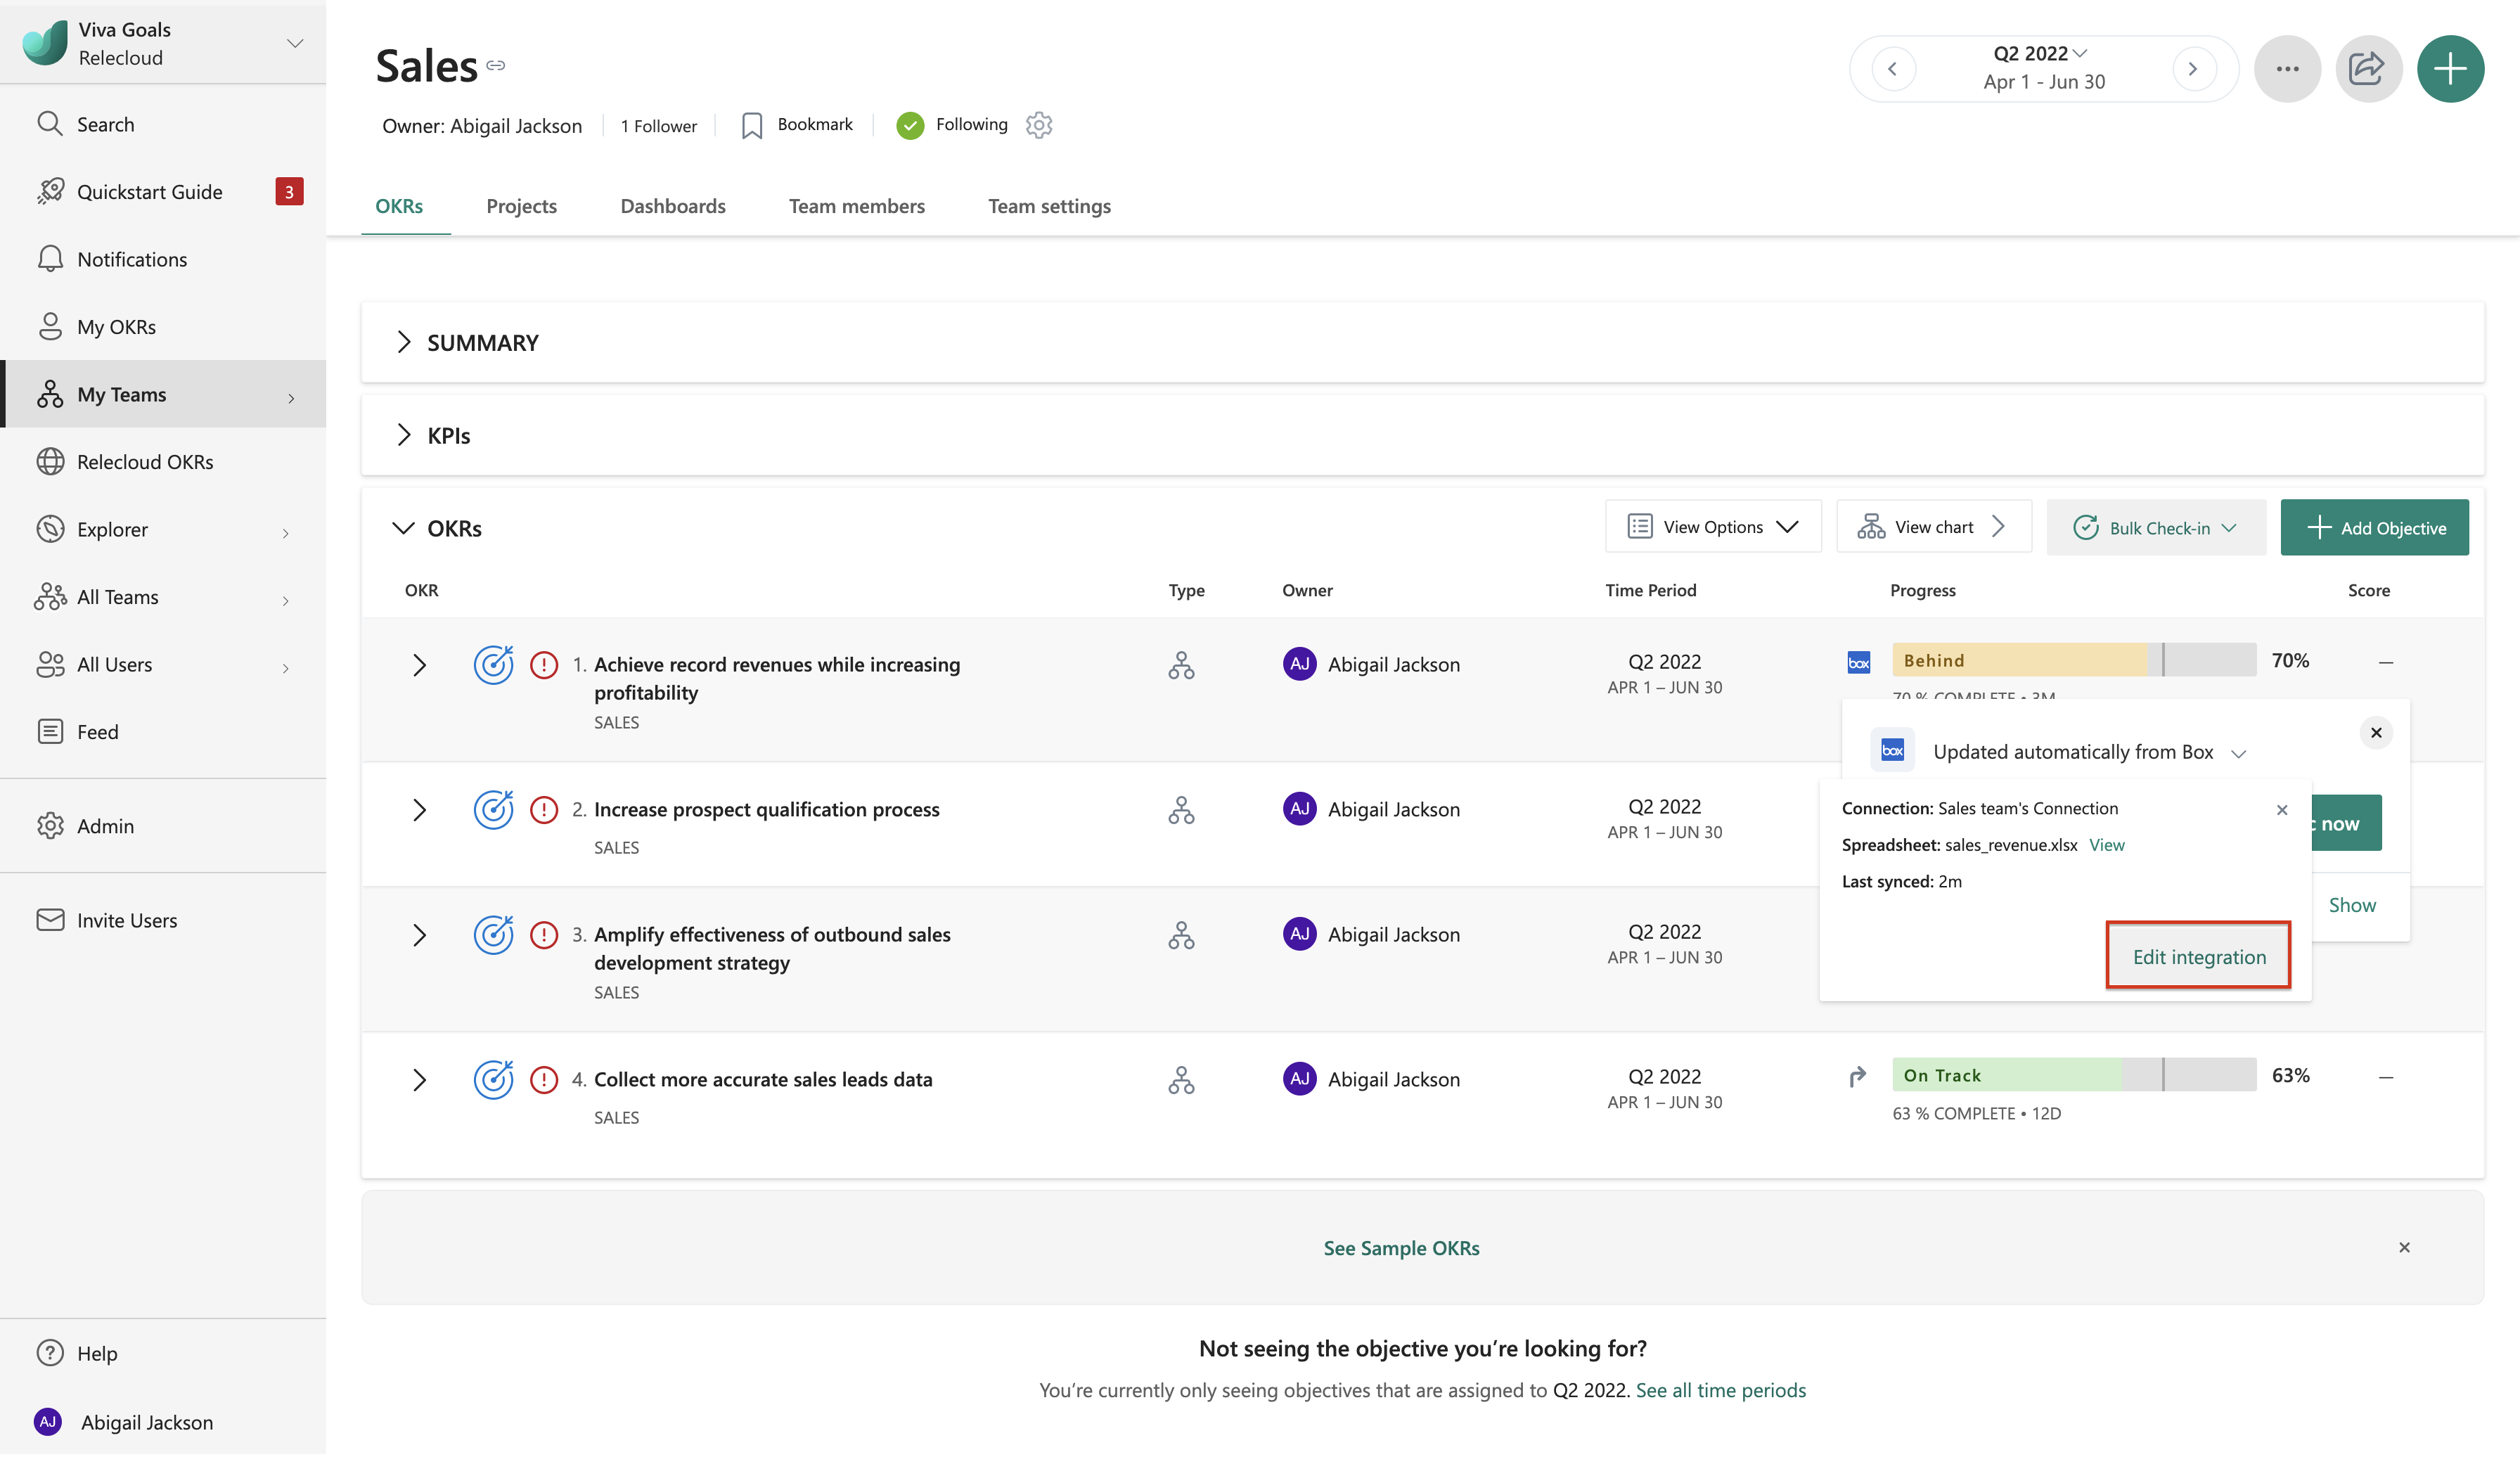
After you configure the connection, the next step is to link OKRs to the spreadsheets in Box.
Select the KPIs you want to reflect within the objective from your spreadsheet in Box. To do this, select edit integration, which appears when you select the Box icon.
Select the Edit Integration link from the dropdown.
Next, select the spreadsheet or the Excel workbook (.xlsx) by searching for it from the search bar. You can search for any sheet that you own or that was shared with you by other users. For your spreadsheet to be processed, it needs to be unlocked from the sheet.
After the spreadsheet is downloaded, you can select any sheet within it from the Sheet drop-down menu.
Now can track value by either a Named Range or a Column & Row Number. This value is used to locate your KPI data in the spreadsheet.
It takes up to 15 minutes for your newly created named range to be displayed in the Select a named range dropdown.
After you select the range, you'll see a preview of the selected value from the sheet so you can double-check from the sheet.

Select the Next button. You'll see that the objective has been connected to Box.
Select Save to save the integration.


How to create a named range in Excel and Google Sheets
You can create named ranges in Excel (.xlsx) or Google Sheets to keep better track of values in your Box spreadsheets. Instead of using a column and row number to describe a range of cells, you could give the cell a unique range name that can be referred to.
The benefits of using named ranges
Naming ranges in Box using Excel or Google sheets bring flexibility into your workbooks.
Named ranges have an explicit name that makes it simpler for you or other users to refer to the contents in a cell. With a unique name, you can mitigate the confusion that comes with using row and column numbers, and it's much easier for anyone who needs to work with that workbook/sheet.
Also, name ranges are permanent. So, if you make any changes in your sheet such as adding or deleting rows and columns, the cell you refer to by a named range will always be permanent. This isn't the case when you use row and column numbers.
Create a named range in Excel
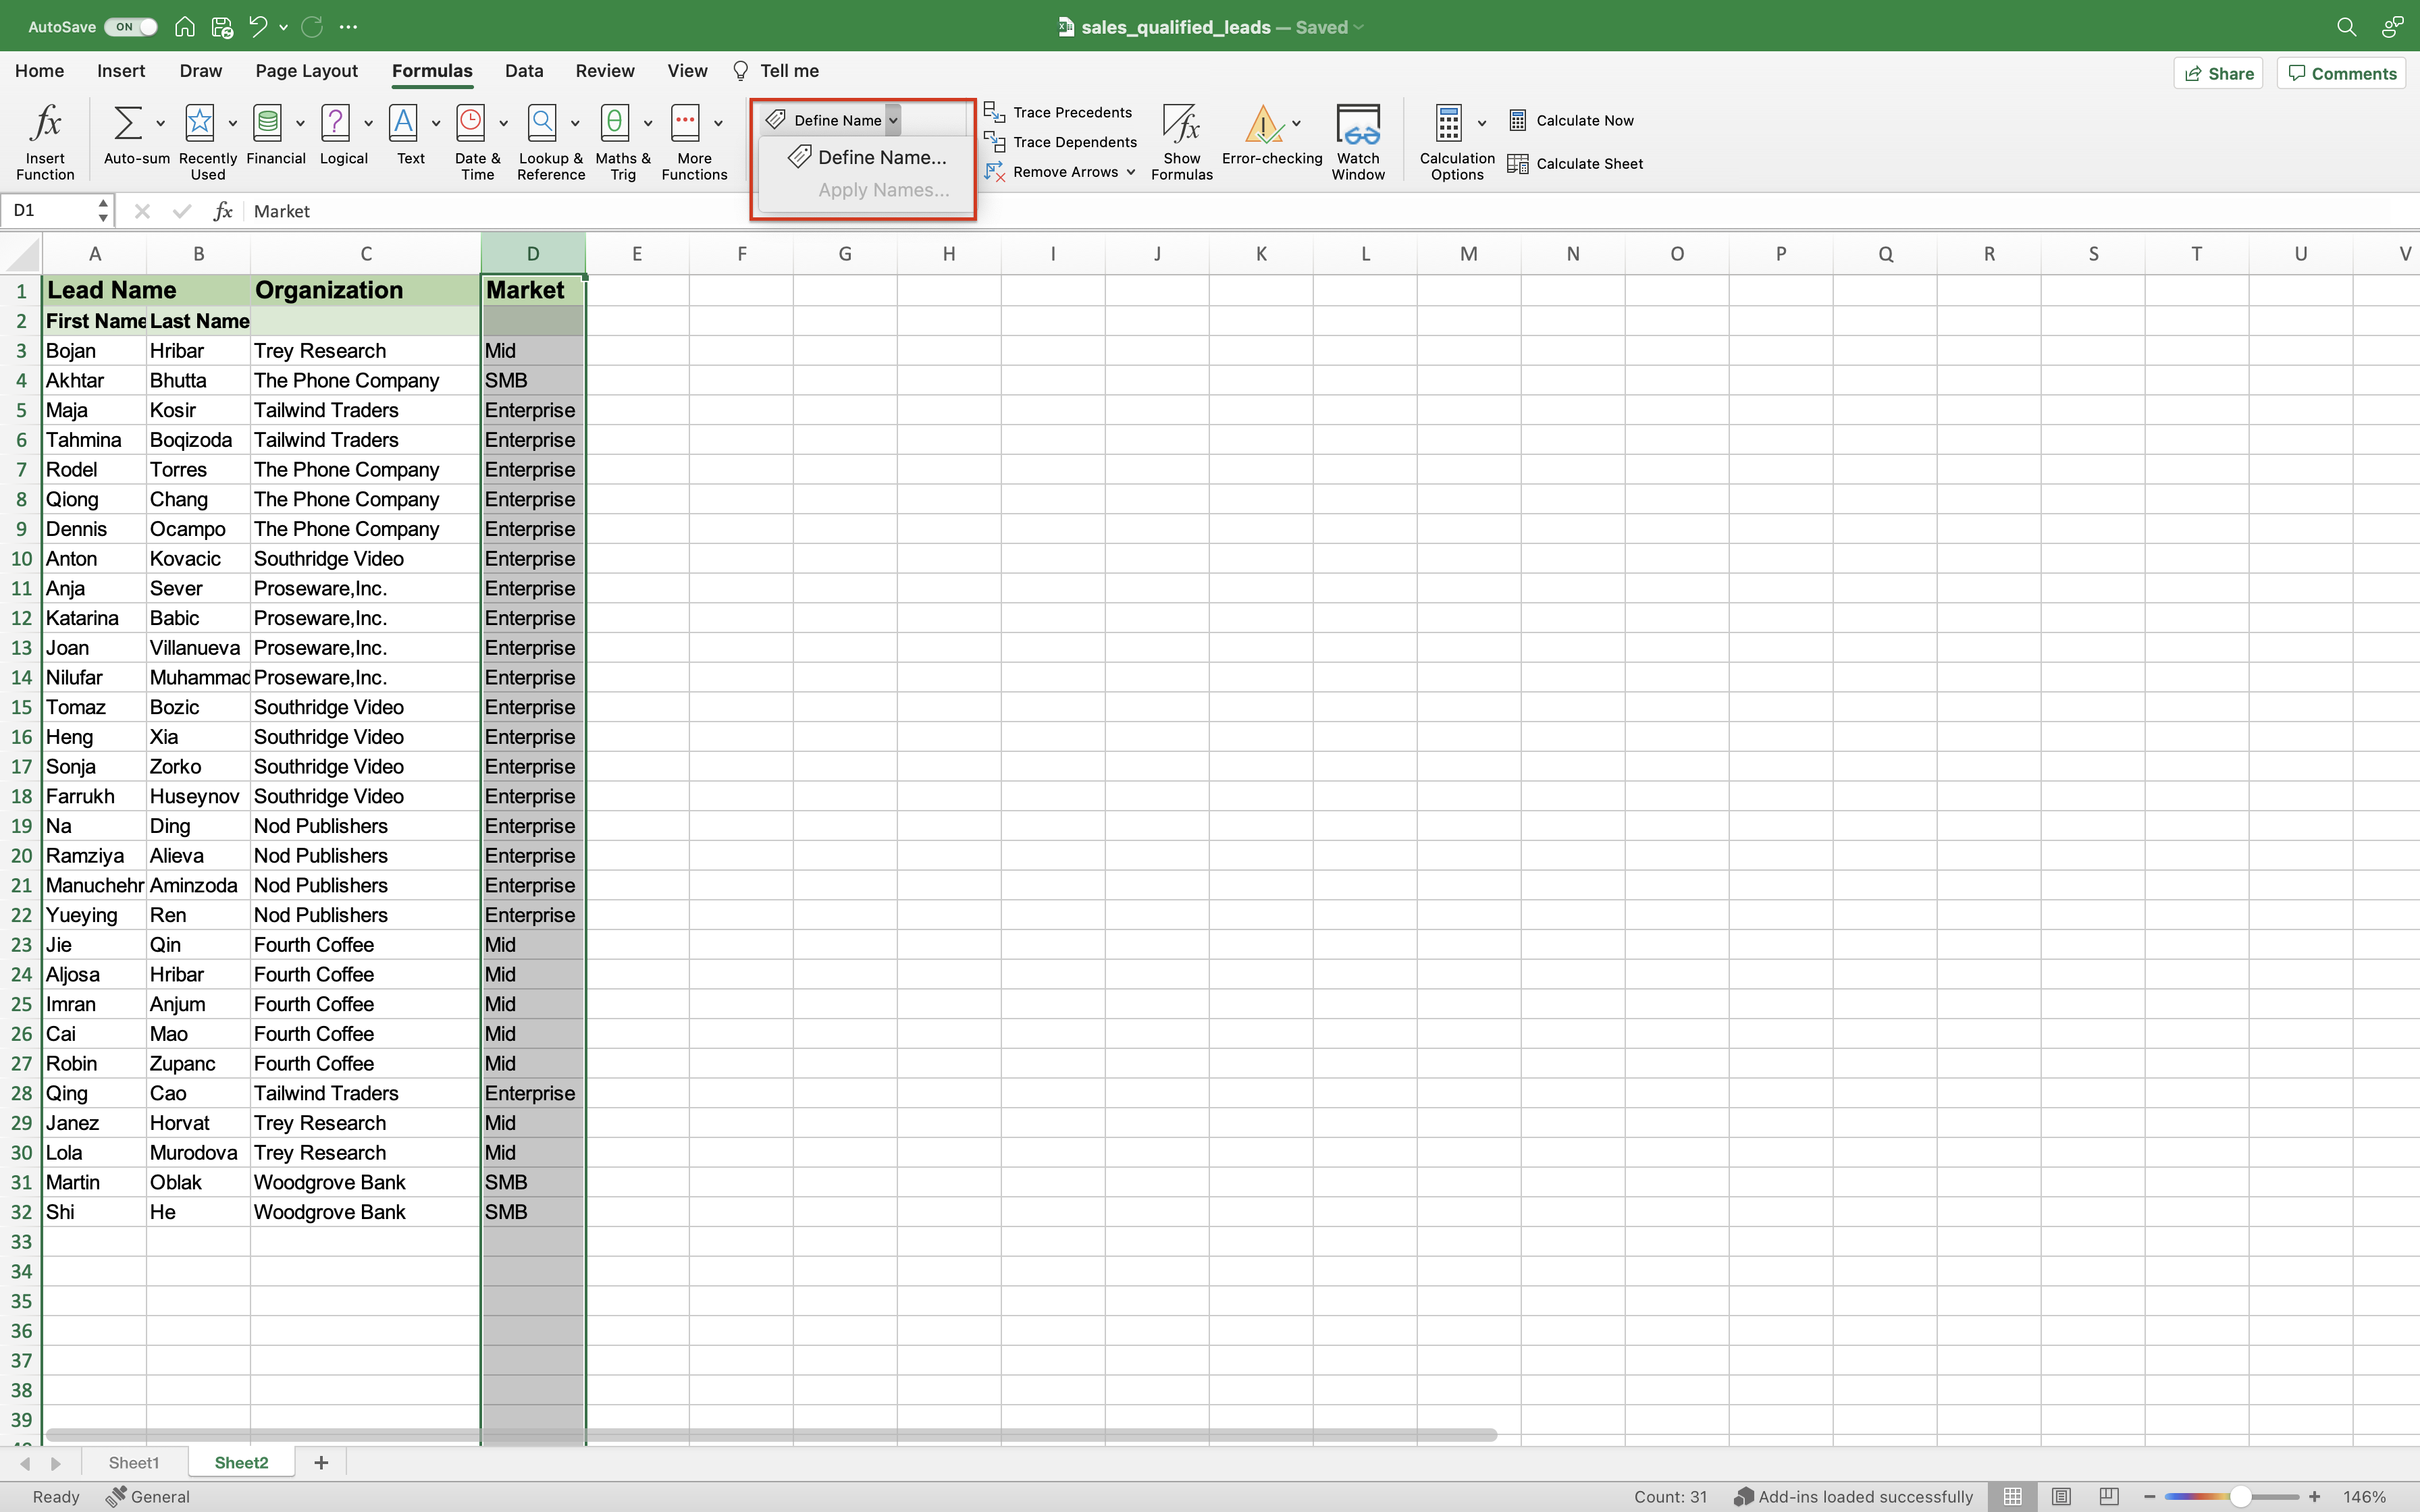
Select the range for which you want to create a Named Range in Excel.
Select Define Name under Formulas.
In the New Name dialogue, type the name you want to assign to the selected data range. You can specify the scope as the entire workbook or a specific worksheet. If you select a particular sheet, the name wouldn't be available on other sheets.
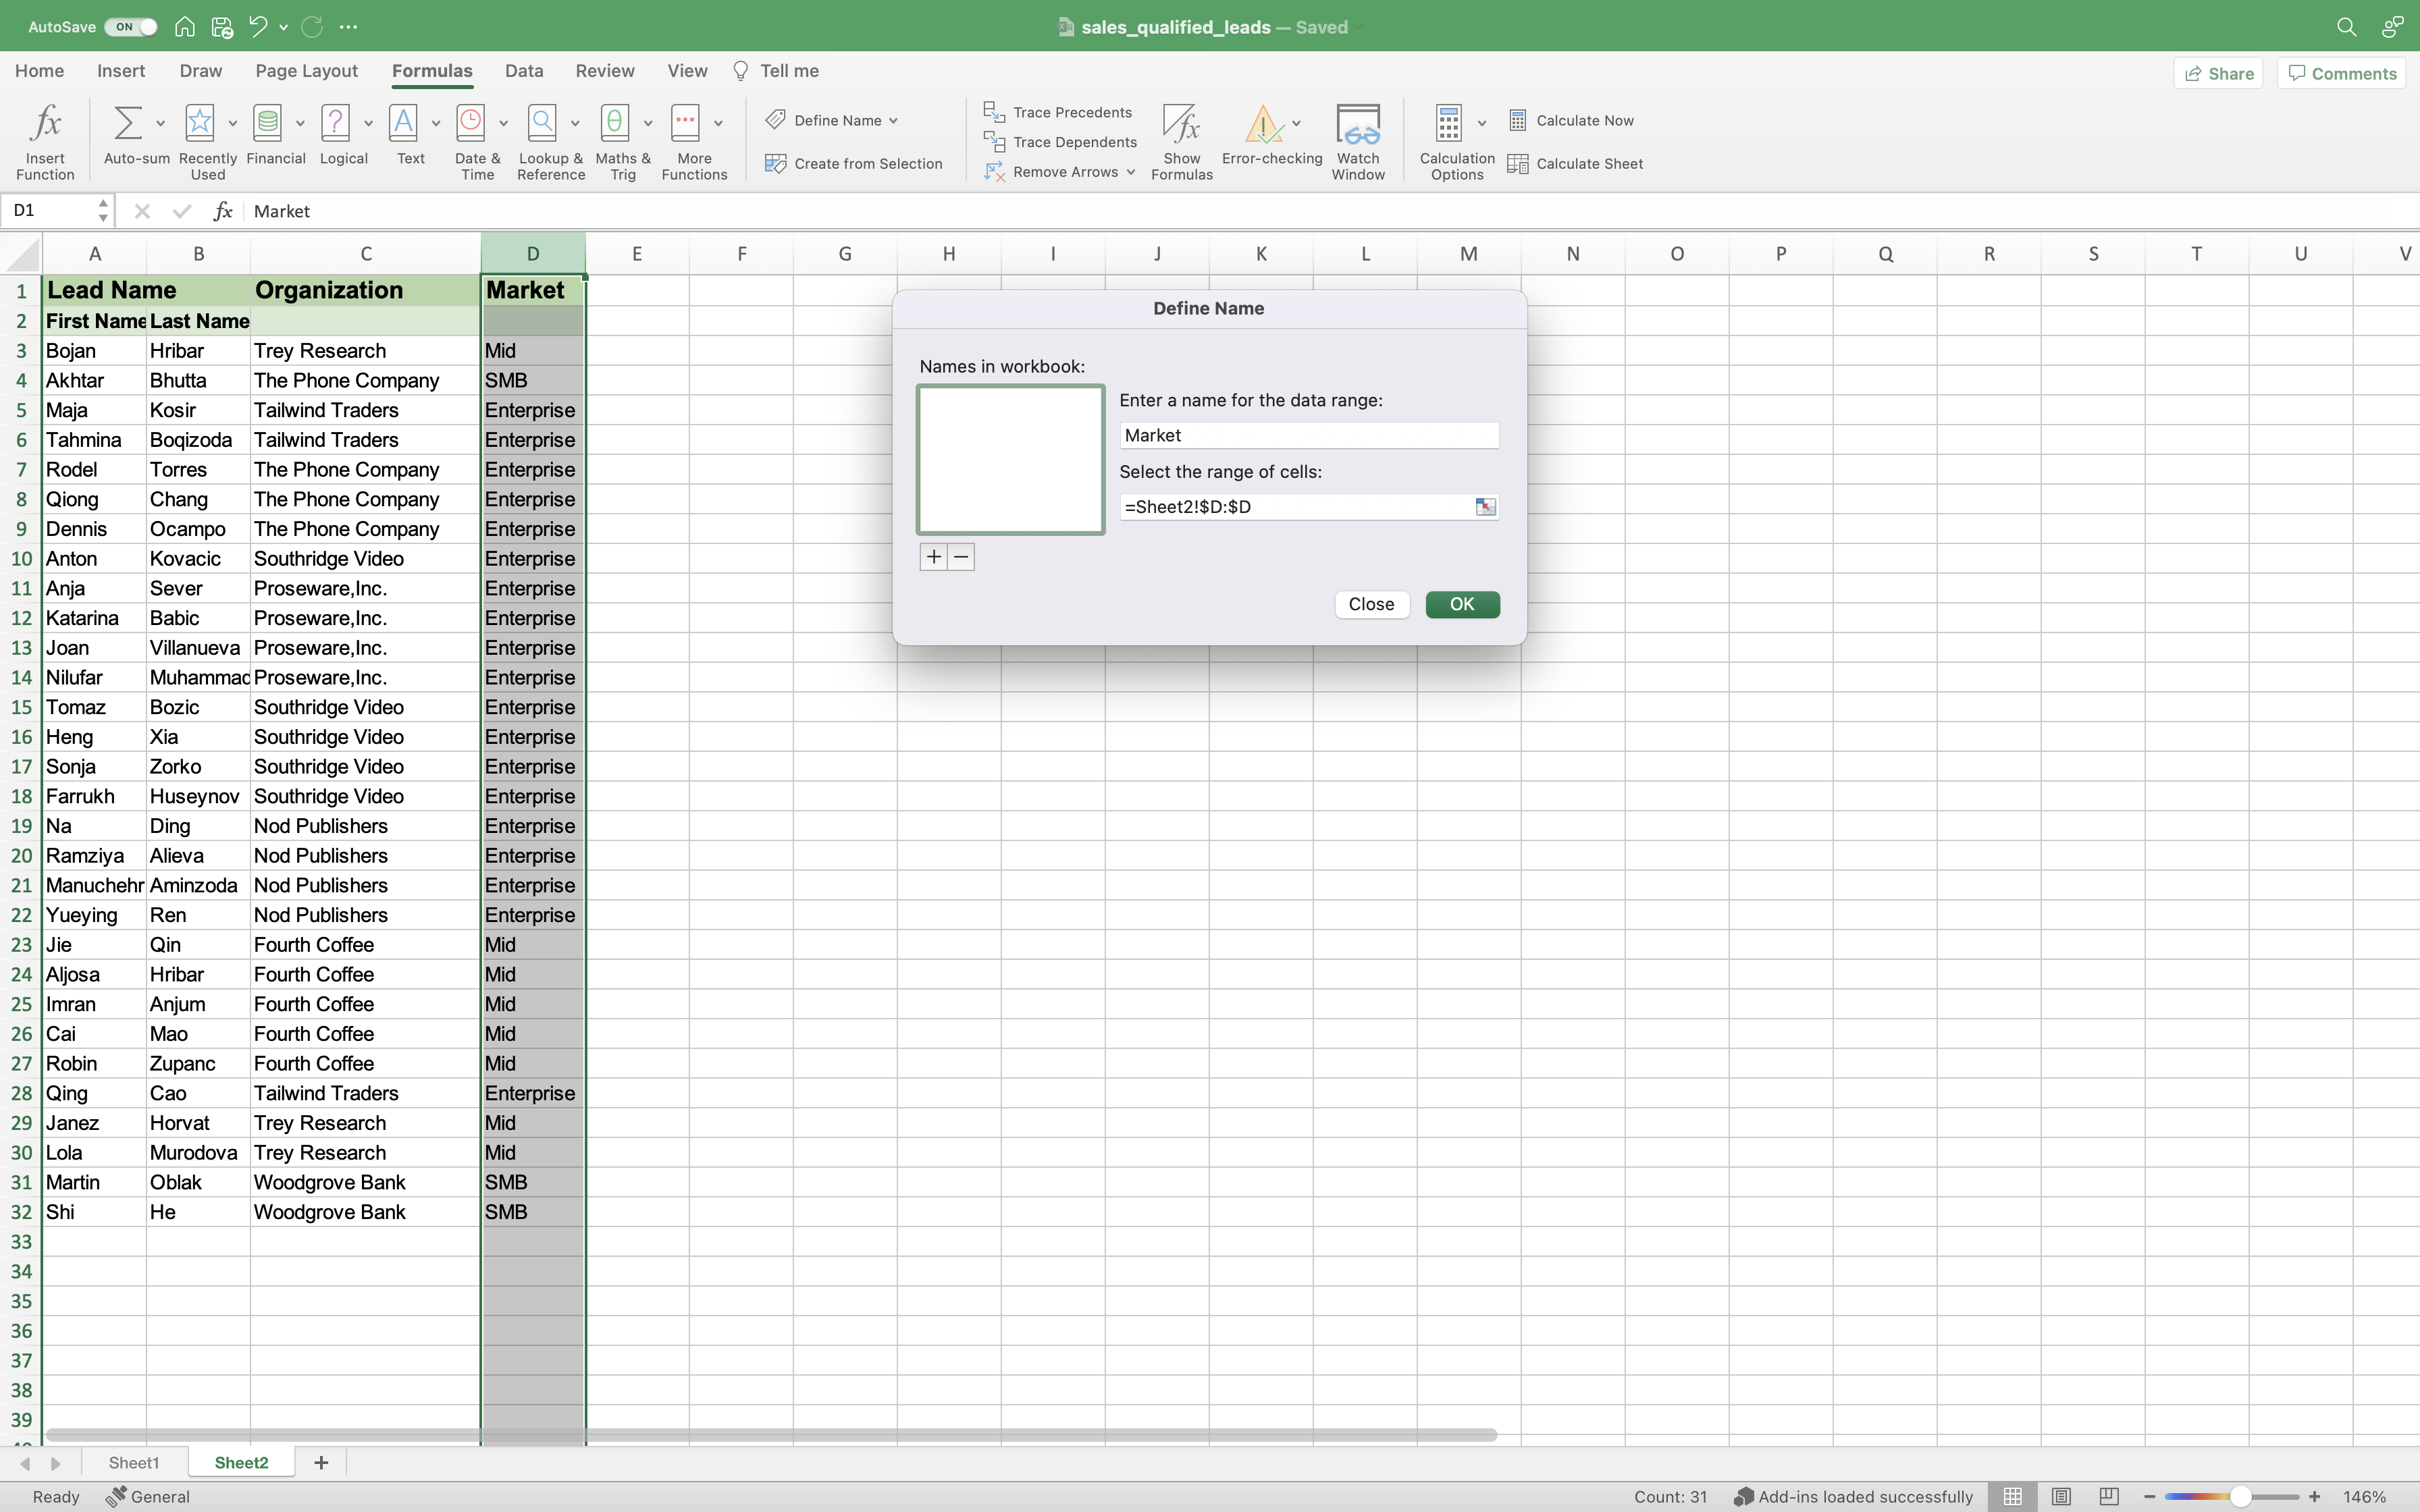
Select OK.


Create a named range in Google Sheets
Open a spreadsheet in Google Sheets.
Select the cells you want to name.
Select Named ranges under Data. A menu will open on the right.

Type the range name you want.
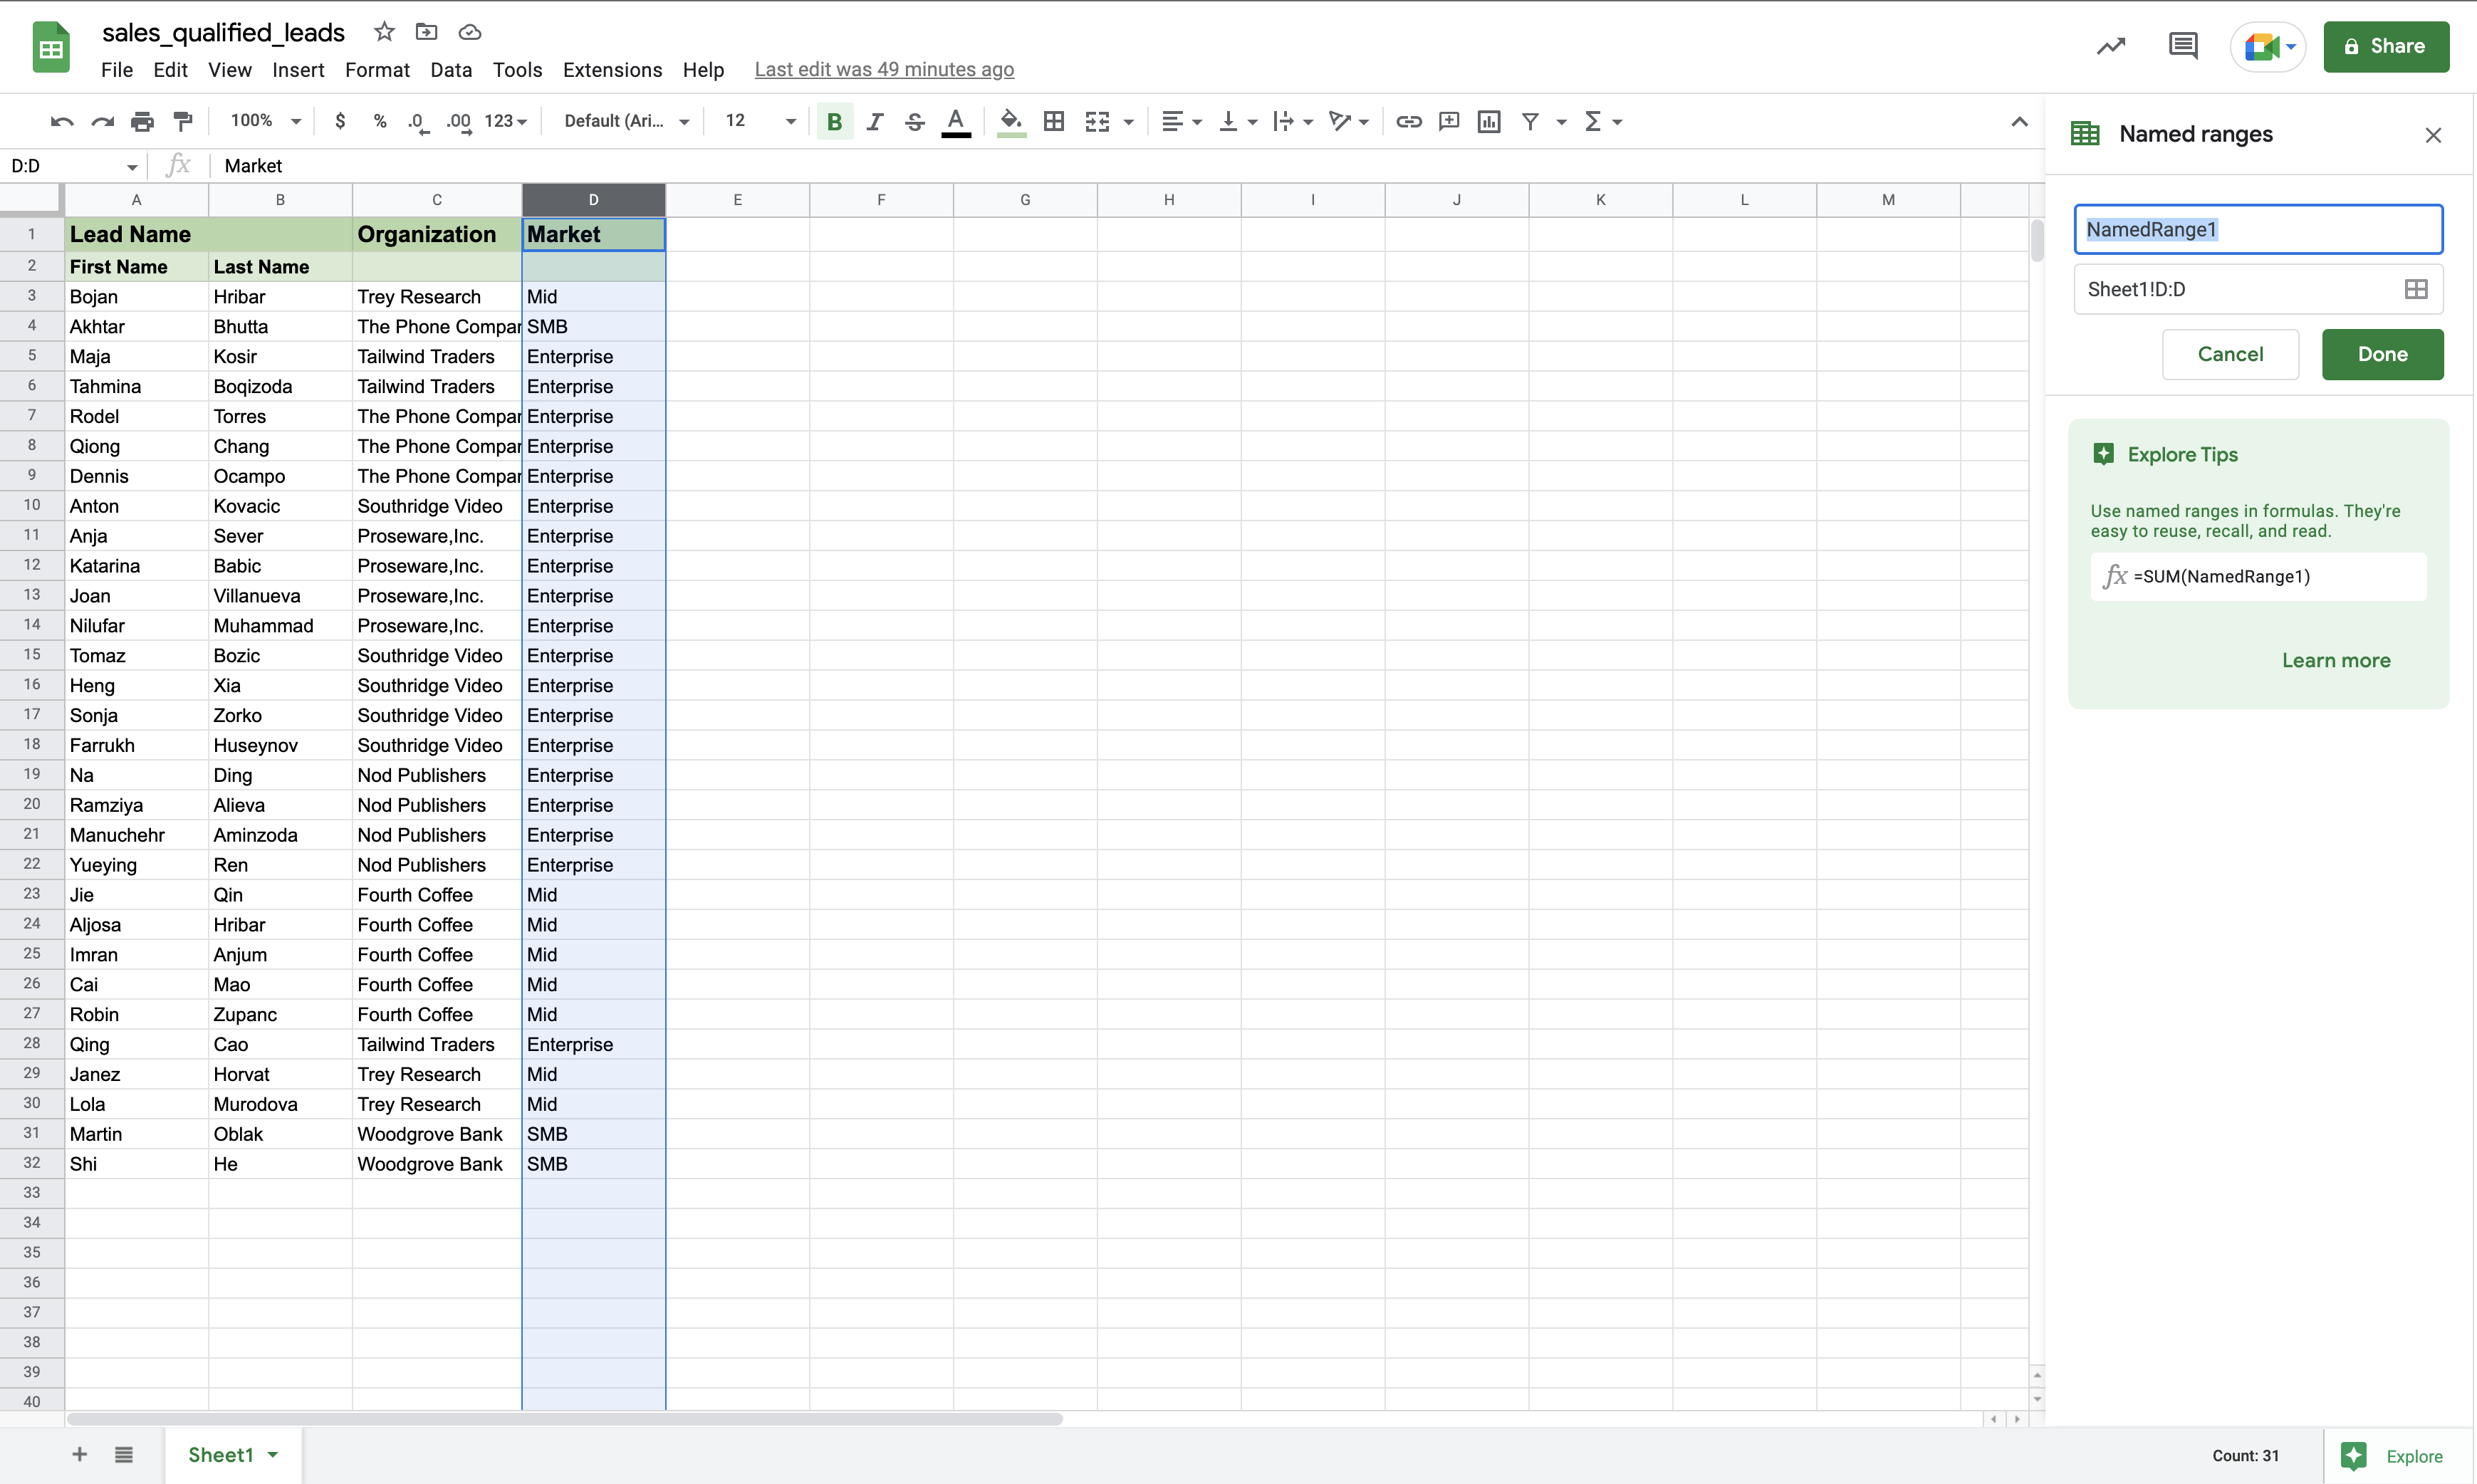
Select Done.


Feedback
Coming soon: Throughout 2024 we will be phasing out GitHub Issues as the feedback mechanism for content and replacing it with a new feedback system. For more information see: https://aka.ms/ContentUserFeedback.
Submit and view feedback for