Windows 11 image creation using the image deployment framework
This guide demonstrates how to create customized Windows 11 images, using a collection of scripts that are available for download from the Microsoft Download Center.
You can use the images you create to deploy to a line of devices, complete with customizations like apps, drivers, languages, and settings.
Prepare your environment
To follow the steps in this lab, you'll need:
- A technician PC where you'll be making offline customizations to your image
- A reference PC where you'll deploy your custom image
- A 16 Gb USB drive that you'll use to deploy your image. This is required for both USB- and network-based deployments.
- Windows installation ISO and supplemental media (collateral).
Technician PC
Ensure your technician PC meets the following requirements:
- Quad core CPU
- 8 Gb RAM
- 128 Gb SSD
- Windows 11 Professional
- The Windows ADK for Windows 11 and associated WinPE add-on installed. When you install the ADK, at minimum, install:
- Deployment Tools
- User State Migration Tool (USMT)
- Network connection if you're going to deploy your image over a network
Collateral
Download the following collateral onto your technician PC:
| Collateral | Part number |
|---|---|
| Windows installation media | X22-77379 |
| Languages and Optional Features ISO | X22-62160 |
| RDX ISO | X22-62162 |
| Inbox apps ISO | X22-79194 |
| The latest LCU for Windows 11 | X22-89545 |
| Office 2106 OPK | X22-61138 |
| Office C2R Scripts for OPK v 2106 | X22-61128 |
| The Images.zip download | No part number |
Prepare the Images folder
Now that you've gathered your collateral, you can configure your technician PC to start creating images. The image creation process described in this lab is based on the Images.zip download, which you'll extract onto your PC and then populate it with contents from the other collateral.
Extract Images.zip
Extract the contents of Images.zip to the root of your hard drive. once extracted, you should have this folder structure:
C:\
📁 Images
📁 Mount
📁 Projects
📁 Scripts
--📁 AutoPilot
📁 Windows
--📁 Drivers
--📁 FOD
--📁 InboxApps
--📁 Languages
--📁 Office
--📁 Unattend
    --📁 Office
--📁 Updates
--📁 WinRE
    --📁 Languages
    --📁 Updates
📁 WinPE
--📁 Drivers
Here's a description of what each folder is for. Many of these folders will be empty when you extract images.zip, and you'll copy packages into them:
| Folder | Description |
|---|---|
| Images | This is where custom project images are stored. |
| Mount | Used for mounting wim files during the customization process. This folder must be empty before starting a new custom image. Never store files here. |
| Projects | Projects are stored here and inherit the file system and files from \Windows folder when CreateProject.cmd is run |
| Scripts | contains scripts required for WinPE environment including WinPEMenu.cmd. |
| Windows\Drivers | Drivers placed here will be injected into the Windows and WinRE images. |
| Windows\FOD | Retail Demo Experience and Language Features on Demand packages. |
| Windows\InboxApps | Inbox UWP Apps Updates and other UWP apps. Apps in this folder are managed with UpdateInboxApps.cmd. |
| Windows\Language | Language files for multi-language Windows images. |
| Windows\Unattend | OEM customization files and other scripts required for automated processing. |
| Windows\Updates | .msu update packages, including the ZDP and LCUs. |
| Windows\WinRE\Languages | WinRE language files from the ADK for multi language Windows images. |
| Windows\WinRE\Updates | WinRE update packages. |
| WinPE\Drivers | Drivers required for WinPE. |
Script usage
The scripts in Images.zip make it easy to build and deploy images. The steps in this lab use the scripts for each of the image creation and deployment phases.
When you run the scripts, you'll see the following colors, each with a different meaning:
| Color | Description |
|---|---|
| Green | Waiting for user input |
| Blue | The script is running |
| Red | Warning |
Copy collateral
Now that you have the folder structure and scripts on your hard drive, add packages from your collateral into the Images folder.
Copy drivers
Add drivers to the Images\Windows\Drivers and Images\WinPE\Drivers folders.
- If you are preparing a system specific image you can place Windows drivers in this folder that will be added to the image
- If you are preparing a generic Windows image and do not want to include system specific driver then you’ll have the opportunity to add drivers on the Reference PC during image customization.
- Only .inf based drivers can be added. Drivers than use an installer (Setup.exe) cannot be added using DISM
- Only install applicable driver architecture. Some IHVs may deliver the driver package that includes both x86 and x64 binaries, but only install the applicable architecture.
Copy RDX packages
Copy the packages from the RDX FOD ISO into the Images\Windows\FOD folder.
Copy at least the Microsoft-Windows-RetailDemo-OfflineContent-Content-Package~31bf3856ad364e35~amd64~~.cab and Microsoft-Windows-RetailDemo-OfflineContent-Content-en-us-Package~31bf3856ad364e35~amd64~~.cab files
Also copy the Microsoft-Windows-RetailDemo-OfflineContent-Content-xx-yy-Package~31bf3856ad364e35~amd64~~.cab files of all the languages you are adding.
Copy Language packages
If you're planning to include additional languages into your image:
Copy language FOD packages from the Languages and Optional Features ISO into the
Images\Windows\FODfolder. These files are:Microsoft-Windows-LanguageFeatures-TextToSpeech-xx-yy-Package~31bf3856ad364e35~amd64~~.cabMicrosoft-Windows-LanguageFeatures-Basic-xx-yy-Package~31bf3856ad364e35~amd64~~.cabMicrosoft-Windows-LanguageFeatures-Handwriting-xx-yy-Package~31bf3856ad364e35~amd64~~.cabMicrosoft-Windows-LanguageFeatures-OCR-xx-yy-Package~31bf3856ad364e35~amd64~~.cabMicrosoft-Windows-LanguageFeatures-Speech-xx-yy-Package~31bf3856ad364e35~amd64~~.cab
Note
Only some Languages have the
Microsoft-Windows-LanguageFeatures-Speechpackage. Some Languages require the optional fonts package e.g. Japanese (Microsoft-Windows-LanguageFeatures-Fonts-Jpan-Package~31bf3856ad364e35~amd64~~.cab).Copy the contents of the the LanguagesAndFeatures folder of Languages and Optional Features ISO into the
Images\Windows\Languagesfolder. After copying, delete theMicrosoft-Windows-Client-Language-Pack_x64_xx-yy.cabmain language files of the languages you do not want to add.To save disk space, you can also delete the
Microsoft-Windows-Client-Language-Pack_x64_en-us.cabfile since it’s already in the image.Important
Don't remove the rest 3,000+ files as they are needed for the correct configuration of satellite packages.
If you are building an English only image, you can leave the folder empty
Copy inbox apps
- Copy the contents of the amd64fre folder of the Inbox Apps ISO into the
Images\Windows\InboxAppsfolder. - Copy the contents (4 files) of the x64\Microsoft.SecHealthUI_8wekyb3d8bbwe folder of the X22-79194 Win 11 21H2 x64 MltLng OPK Inbox Apps (Win Security AppX) JuneRTM\SW ELCTRNC Win 11 21H2 x64 MltLng InboxAppsOEM (WinSecurityAppX) JuneRTM\Layer\X22-79198.zip archive - overwriting the two existing files: Microsoft.SecHealthUI_8wekyb3d8bbwe.appx and Microsoft.SecHealthUI_8wekyb3d8bbwe.xml.
Copy Office packages
Copy the contents of the 2106ODT folder of the X22-61128 Office C2RScriptsConfigDeployment Tool for OEM OPK v2106 in the
Windows\Officefolder.Copy the contents of the X22-61138 Office 2106 English OPK in the Images\Windows\Office folder.
Optional: Copy the contents of additional Office 2106 OPKs of the Office languages that you intend to preinstall
Notes:
- The top folder of each Office 2106 OPK is Office. This is the folder that must be copied in the Windows\Office folder so you'll end up with an
Images\Windows\Office\Office\Data\..folder structure. - Office 2106 OPKs have different language resource files but the base files are the same. If you're copying multiple Office OPKs then you’ll get a file-overwrite prompt. It's OK to skip overwriting files to speed up the copying process.
- The Office languages you add will not all be preinstalled by default. You'll be prompted to select which Office languages will be preinstalled later in the project creation process.
- If you don’t want to add multiple languages in a multilanguage Windows image, then you must preinstall Office in the default Windows language.
Unattend
The Images\Unattend folder contains the file Unattend.xml which is used to add OEM information to the Windows image. This file will be customized with the information you will be asked to provide during CreateImage.cmd process in the image creation process.
All the files and scripts in this folder are required for successful image creation.
Wallpaper
If you're using a custom desktop background (wallpaper) image, copy it into the Images\Unattend folder wallpaper.jpg overwriting the existing file. If you don’t plan to use a custom wallpaper, then please delete the existing wallpaper.jpg file
Updates
Place all .msu update packages in the Images\WIndows\Updates and Images\Windows\WinRE\Updates folder. Updates in these folders will programmatically update the Install.wim file during the CreateImage.cmd process.
Place the following into the update folders:
- The Windows10.0-KB5005027-x64.msu package from he Windows installation media OPK.
- The Windows10.0-KB5005635-x64.msu from the LCU media.
Recovery
Place all the WinPE language packs you want to be applied to WinRE into the Images\Windows\WinRE\Languages folder. Copy the language packs from C:\Program Files (x86)\Windows Kits\10\Assessment and Deployment Kit\Windows Preinstallation Environment\amd64\WinPE_Ocs\xx-yy.
You'll also need the following files for each language; if adding multiple languages you may preserve the folder structure from C:\Program Files (x86)\Windows Kits\10\Assessment and Deployment Kit\Windows Preinstallation Environment\amd64\WinPE_OCs
lp.cabWinPE-Rejuv_xx-yy.cabWinPE-EnhancedStorage_xx-yy.cabWinPE-Scripting_xx-yy.cabWinPE-SecureStartup_xx-yy.cabWinPE-SRT_xx-yy.cabWinPE-WDS-Tools_xx-yy.cabWinPE-WMI_xx-yy.cabWinPE-StorageWMI_xx-yy.cabWinPE-HTA_xx-yy.cab
Important
You must match the WinRE languages with the preinstalled Windows languages. If you're building an English only image, you can leave the folder empty. Some Languages require the optional fonts package e.g. Japanese.
For network based deployment - Share the Images folder
If you'll be deploying your image over a network, you'll need to make youe Images folder available over the network.
- In File explorer on your technician PC, right-click on the
C:\Imagesfolder and select Properties. - Click on the Sharing tab.
- Under Advanced Sharing, click the Advanced Sharing... button.
- Check the box next to Share this folder.
- Click on Permissions.
- Configure permissions:
- Full control: Allow
- Change: Allow
- Read: Allow
- Click OK on the Permissions and Advanced Sharing windows.
- Close the Image Properties window. Your Images folder is now available over the network.
Note
Ensure that your network is set as Private, and your firewall rules allow for sharing a folder over a network.
Create a USB drive that can boot to WinPE
Now that you have your environment setup, you can start using the Images.zip scripts. We'll first use CreateWinPE.cmd to create a bootable USB drive with a customized version of WinPE that you'll use to boot the reference PC with WinPE and store Images, or create a network mapping back to the technician PC.
CreateWinPE.cmd uses the following syntax:
CreateWinPE {/DualPart | /OnePart | /Network <NetworkName> <UserName> <Password>}
| Command | Description |
|---|---|
| Partition option (required) | |
| /DualPart | Dual partitioned bootable WinPE with NTFS partition for Images to be stored. |
| /OnePart | Single partitioned bootable WinPE drive, formatted as FAT32. |
| /Network | Single partitioned bootable WinPE with network mapping capabilities. You'll need to supply the Computer Name, User Account name and the Password for that account. |
Open the Deployment and Imaginging tools as an administrator
Run
CreateWinPE.cmd:CreateWinPE.cmd /dualpartto create a dual-partitioned USB drive, or:
CreateWinPE.cmd /networkto create WinPE media that will connect over a network to a share that contains your image.
Start a new project
Before you can start creating a custom Windows image, create a new project. A project is a design for one image.
Mount the Windows installation ISO image. In Windows Explorer, double click on the ISO file and the ISO will appear as an optical drive and be assigned a drive letter. Notice the drive letter, e.g.
D:\.Tip
You can copy the
\Sources\install.wimfile from the Windows installation ISO into the C:\Images folder for easier access.If it's not already open, run the Deployment and Imaging Tools Environment as an administrator.
Navigate to the
C:\Imagesfolder:cd c:\ImagesRun the
CreateProject.cmdscript to create a new project:CreateProject.cmd <projectname> D:\Sources\install.wimWhere
<projectname>is a name for your project, e.g. "testproj", and D:\Sources\install.wim is the path to the install.wim file on the mounted ISO file or your hard disk.When this script runs, all files and folders from the Images\Windows folder will be copied to
Images\Projects\<projectname>.The
Images\Projects\<projectname>folder is now presented for verification, additions and removals of files. TheImages\Windowsfolder is left intact for future use with additional projects.
Create a new image
Now that you've created a project, you can start creating a new image. We'll use CreateImage.cmd to create our image.
From the Deployment and Imaging Tools running as an administrator, run
CreateImage.cmd:CreateImage.cmd NewProjectWhere
NewImageis the name you're giving the image.You'll be prompted to select a Windows 11 edition. The default OA 3.0 Manufacturing Key will be automatically applied to the image and the unattend.xml updated:
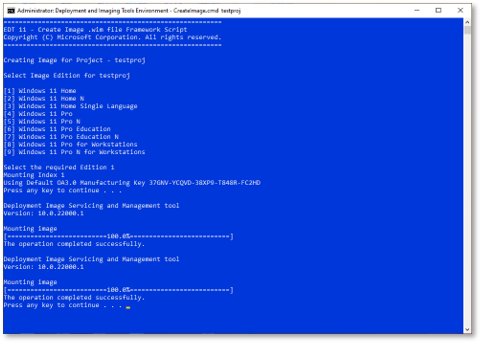
Once you choose an edition, the image will be mounted and your drivers, languages, FOD, and Updates will be applied programmatically.
All the drivers in your
Images\Projects\<projectname>\Driversfolder will be applied to both Windows and WinRE.
The script pauses at the end of this process for your review of applied packages and drivers.
OEM Customizations
After you've reviewed the list of applied packages and drivers, NewImage.cmd will prompt for additional information.
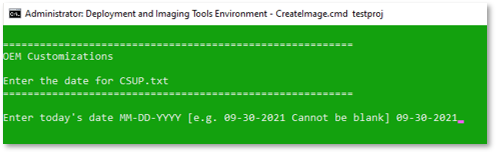
Enter the date. This date will be used to create a csup.txt file that includes the date, in the MM-DD-YYYY format.
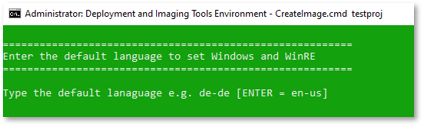
Enter the default language of the image. This will also be applied as the default language for WinRE. Note that a corresponding Language Pack must be have been included in your \Images\Windows\Languages folder when you initially ran
CreateImage.cmd.The default value is en-US.
Type the name of your time zone.
The default value is Pacific Standard Time.

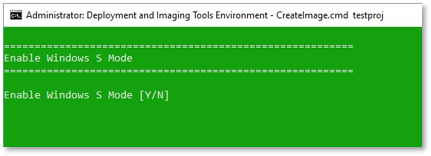
Enter whether you want to enable S Mode (Y/N).
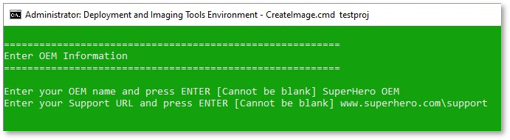
Enter your OEM name and support URL. Entering this information is required and will be used in the Get Help app.
If you've included Office in your image you will prompted to select the Office languages, you want to include in your image from the file which is presented in Notepad. Completely remove the lines with languages you do not want to include, select File and Save, then close Notepad when done.
Save your image
Image customization is now complete, and the custom image is saved in the Images\Images\<projectname>.wim folder.
- If you'll be deploying your image from a USB, copy the
<projectname>.wimfile to your USB drive. - If you'll be deploying your image over a network, you can leave the image where it is.
Apply your image to a reference PC
Now that you have a customized image, you can deploy it to your reference PC. You can:
- Deploy it over a network, or
- Deploy it using a USB key
USB Deployment Method
- Copy the
C:\Images\ImagesandC:\Images\Scriptsfolders to the NTFS USB drive/partition
USB and Network Method
Boot the reference device from the WinPE USB drive.
After the device boots, you'll be prompted to choose an option. Select Enter
1to Apply a .wim file. You'll be shown a list of available wim files.Select the image you want to apply (but don't press Enter).
On the selection screen, enter
2to Apply Recovery.Once the image is applied, enter
5to Exit and reboot the reference PC into Audit mode.
Audit mode customizations
The reference PC will bot Windows 11 in Audit mode and an automated process will start in a paused state, and the Sysprep window will be closed.
When you're ready to start Audit mode customizations, press any key in the script window to start Office configuration and installation.
When Office the installation finishes, close the Office window.
If you have additional drivers or applications to add to your image, add them.
Once you're finished installing additional apps and drivers, click any key in the paused script window to configure recovery, finalize the image, and shut down the PC.

Capture your image
Next you'll boot the reference PC from the WinPE USB drive to capture the customized image. Make sure that the USB with the Images and Scripts folder is in the reference PC when you turn it on.
Important
Make sure you're booting to the USB drive, and not into Windows. If you boot into Windows, you may have to manually enter Audit mode and run Sysprep again.
USB Deployment Method
Once booted to the USB drive, you'll be prompted with a list of options:
Enter
3to capture a .wim file. The Windows image will be captured on the USB drive in the\Imagesfolder as<projectname_Final>.wimWhen the image capture is finished enter
5to Exit and Reboot.
Network Deployment Method
Once booted to the USB drive, you'll be prompted with a list of options:
Enter
3to capture a .wim file. The Windows image will be captured on the network share in the\Imagesfolder as<projectname>_Final.wimWhen the image capture is finished enter
5to Exit and Reboot.

Deploy your image
Boot the reference PC from the WinPE USB
USB Deployment Method
To deploy your image, you'll boot the reference PC from the WinPE USB drive and then choose the Apply wim optione. Make sure that the USB with the Images and Scripts folder is in the reference PC when you turn it on.
- Once you've booted to the USB drive, you'll be shown a list of options. Enter
1to Apply .wim file. - Select your finalized image (
<projectname>_Final.wim). - Once the image is finished being deployed, enter
5to Exit and Reboot to reboot the destination PC to Audit mode - When the device reboots into Audit mode, you can run quality checks and OA 3.0 DPK injection, and then use the Sysprep pane to seal the PC to OOBE mode, shutdown and ship.
- For images shipping with S Mode enabled: Run the
Sysprep S Mode.cmdfile on the desktop. This script configures the registry for final shipment and runsSysprep /OOBE /Shutdown.Important
Don't manually run Sysprep, use this script instead.
