Device Update Center User Guide
Device Update Center portal provides OEMs a way to:
- Publish OEM custom packages(OCP) to Windows Update Cloud
- Flight OEM custom packages to their devices based on flight rings
- Flight OS updates to their devices based on flight rings
Pre-requisites for Device Update Center
Review the following requirements before you start the registration process:
You must have an Extended Validation (EV) code signing certificate. Please check whether your company already has a code signing certificate. If your company already has a certificate, have the certificate available. You will need the certificate to sign files. If your company does not have a certificate, you will need to buy one as part of the registration process.
You will need to sign in as a global administrator in your organization's Azure Active Directory. If you do not know whether your organization has an Azure Active Directory, contact your IT department. If your organization does not have an Azure Active Directory, you will be able to create one for free.
You must have the authority to sign legal agreements on behalf of your organization.
Step 1: Get set up
Sign up
Create a Windows Hardware Dev Center account to access the Device Update Center(DUC). You will need:
- An Extended Validation (EV) code signing certificate: Used to validate the update cab file submitted for updates
- An Azure Active Directory (AAD) account with administrator rights: Used to sign legal agreements
See Register for the Hardware Program for the detailed instructions on the registration process.
Sign up for Windows 10 IoT Core Services
Login to Hardware Dev Center with the administrator role and specify roles for other users in your organisation. You will need:
- Driver Submitter role for update submission
- Shipping Label Owner role for update flighting
See Change a user's role for detailed instructions.
Install the tools
- Windows Assessment and Deployment Kit(Windows ADK)
- IoT Core ADK Add-Ons
- Windows 10 IoT Core Packages
- Get BSP for your platform from the silicon vendor. See Windows 10 IoT Core BSP
Set up your environment
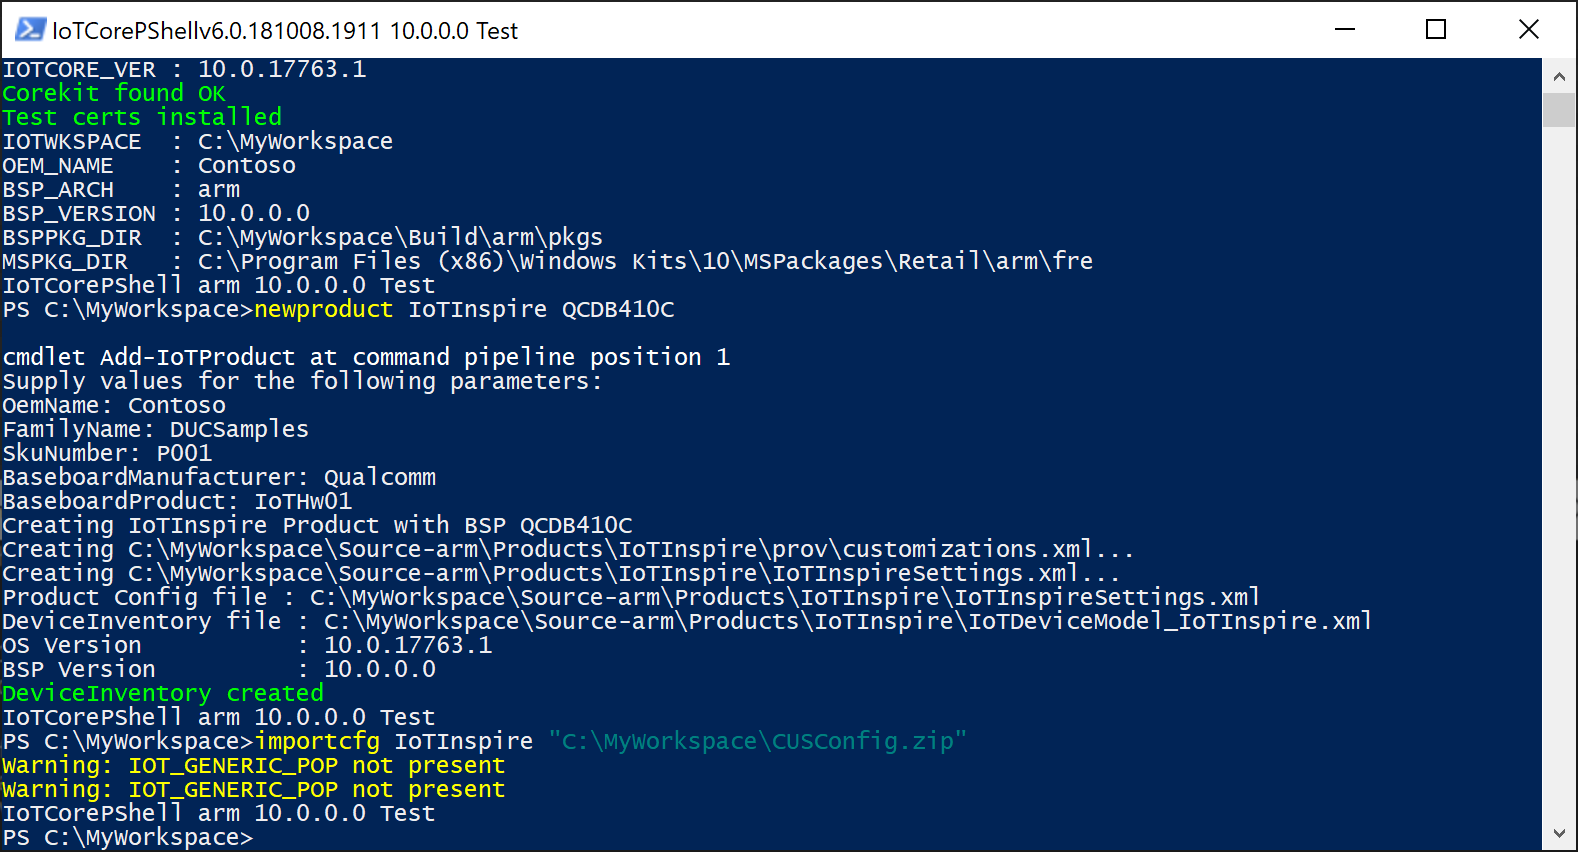
Launch IoTCorePShell (launches an elevated command prompt), and create/open your workspace
new-ws C:\MyWorkspace <oemname> <arch>
(or)
open-ws C:\MyWorkspace
Note that the initial version of the OEM Custom package is set to 10.0.0.0.
Configure the EV certificate used in the Device Update Center and the code signing certificate in the Workspace.
<!--Specify the retail signing certificate details, Format given below --> <RetailSignToolParam>/s my /i "Issuer" /n "Subject" /ac "C:\CrossCertRoot.cer" /fd SHA256</RetailSignToolParam> <!--Specify the ev signing certificate details, Format given below --> <EVSignToolParam>/s my /i "Issuer" /n "Subject" /fd SHA256</EVSignToolParam>- Update the "Issuer", "Subject" as per the certificate details.
- CrossCertRoot.cer corresponds to the cross-signing certificate root published in Cross-Certificate List.
You can use the same EV cert used for Hardware Dev Center or get a different one for code signing purpose only. It is recommended to keep a separate certificate for each purpose.
Step 2: Create a new product
Create a new product using Add-IoTProduct
Add-IoTProduct <productname> <bspname>
(or) newproduct <productname> <bspname>
Provide the SMBIOS information when prompted. For Qualcomm, this is stored in a SMBIOS.cfg file. For other platforms, you will have to update the BIOS to reflect these values.
See OEM License Requirements for the mandatory SMBIOS fields. The key fields used in the update are:
System Product Name, referred in the update portal as Device Model.
Base Board Product, referred in the update portal as Hardware Variant ID.
Note that
IoTDeviceModel_<productname>.xmlis also created. This is used to register the device model in the next step.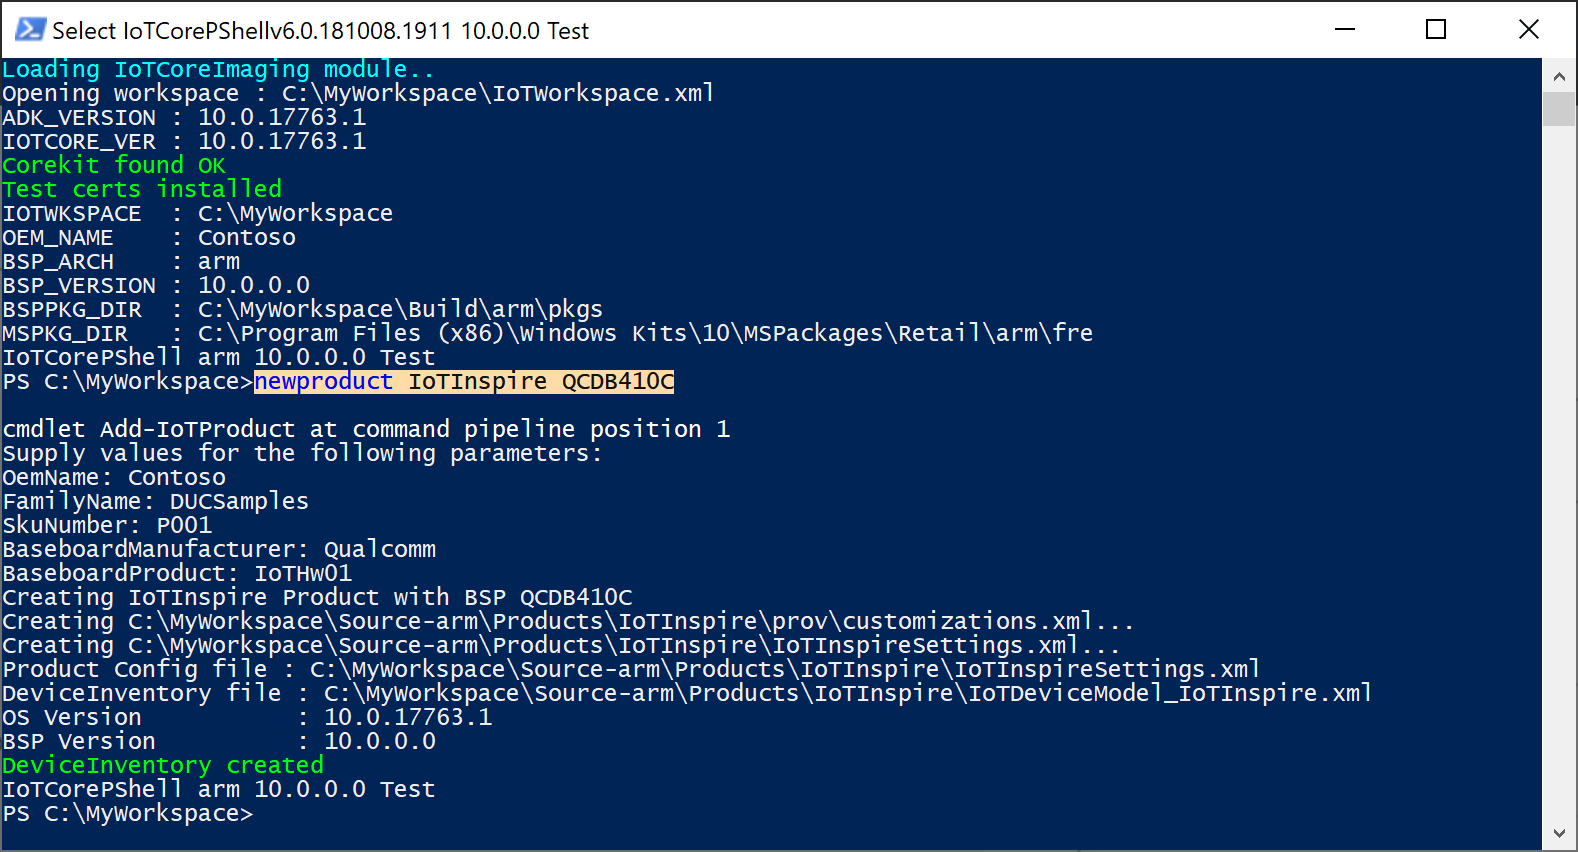
Step 3: Register Device Model in Device Update Center
In the Device Update Center portal, select New Device Model.
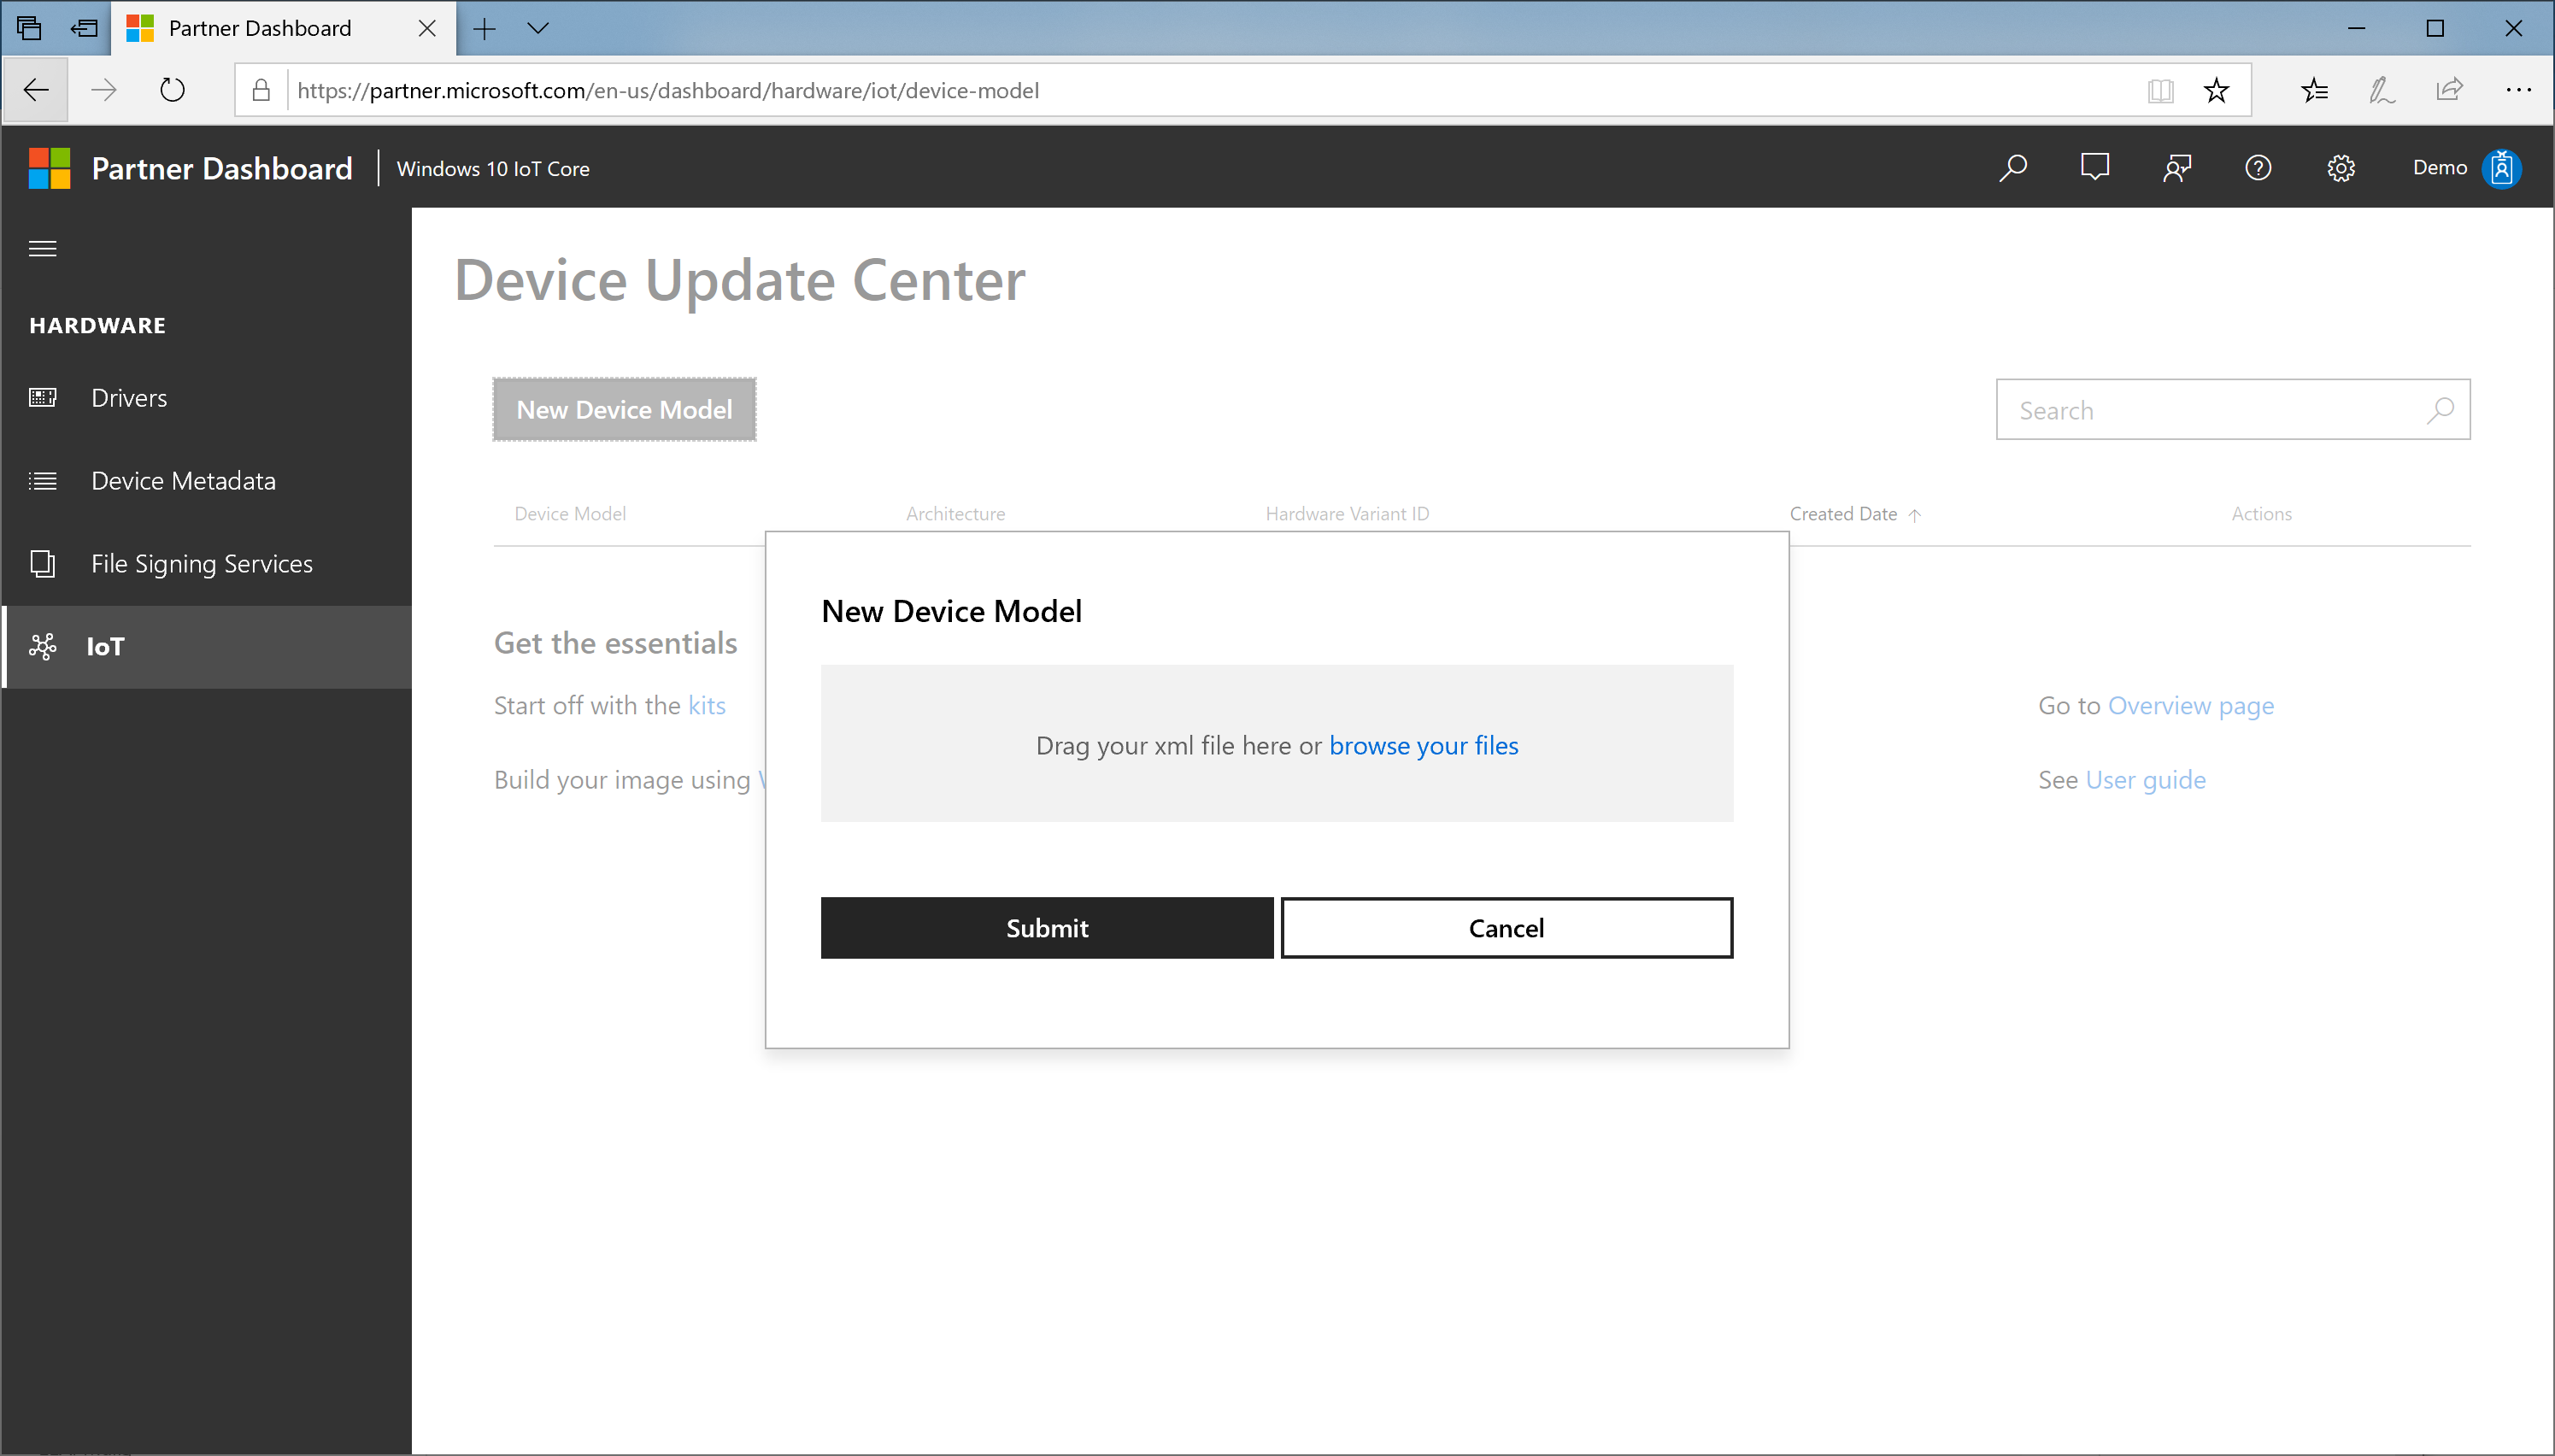
Browse your files and select the
IoTDeviceModel_<productname>.xmlfrom your workspace.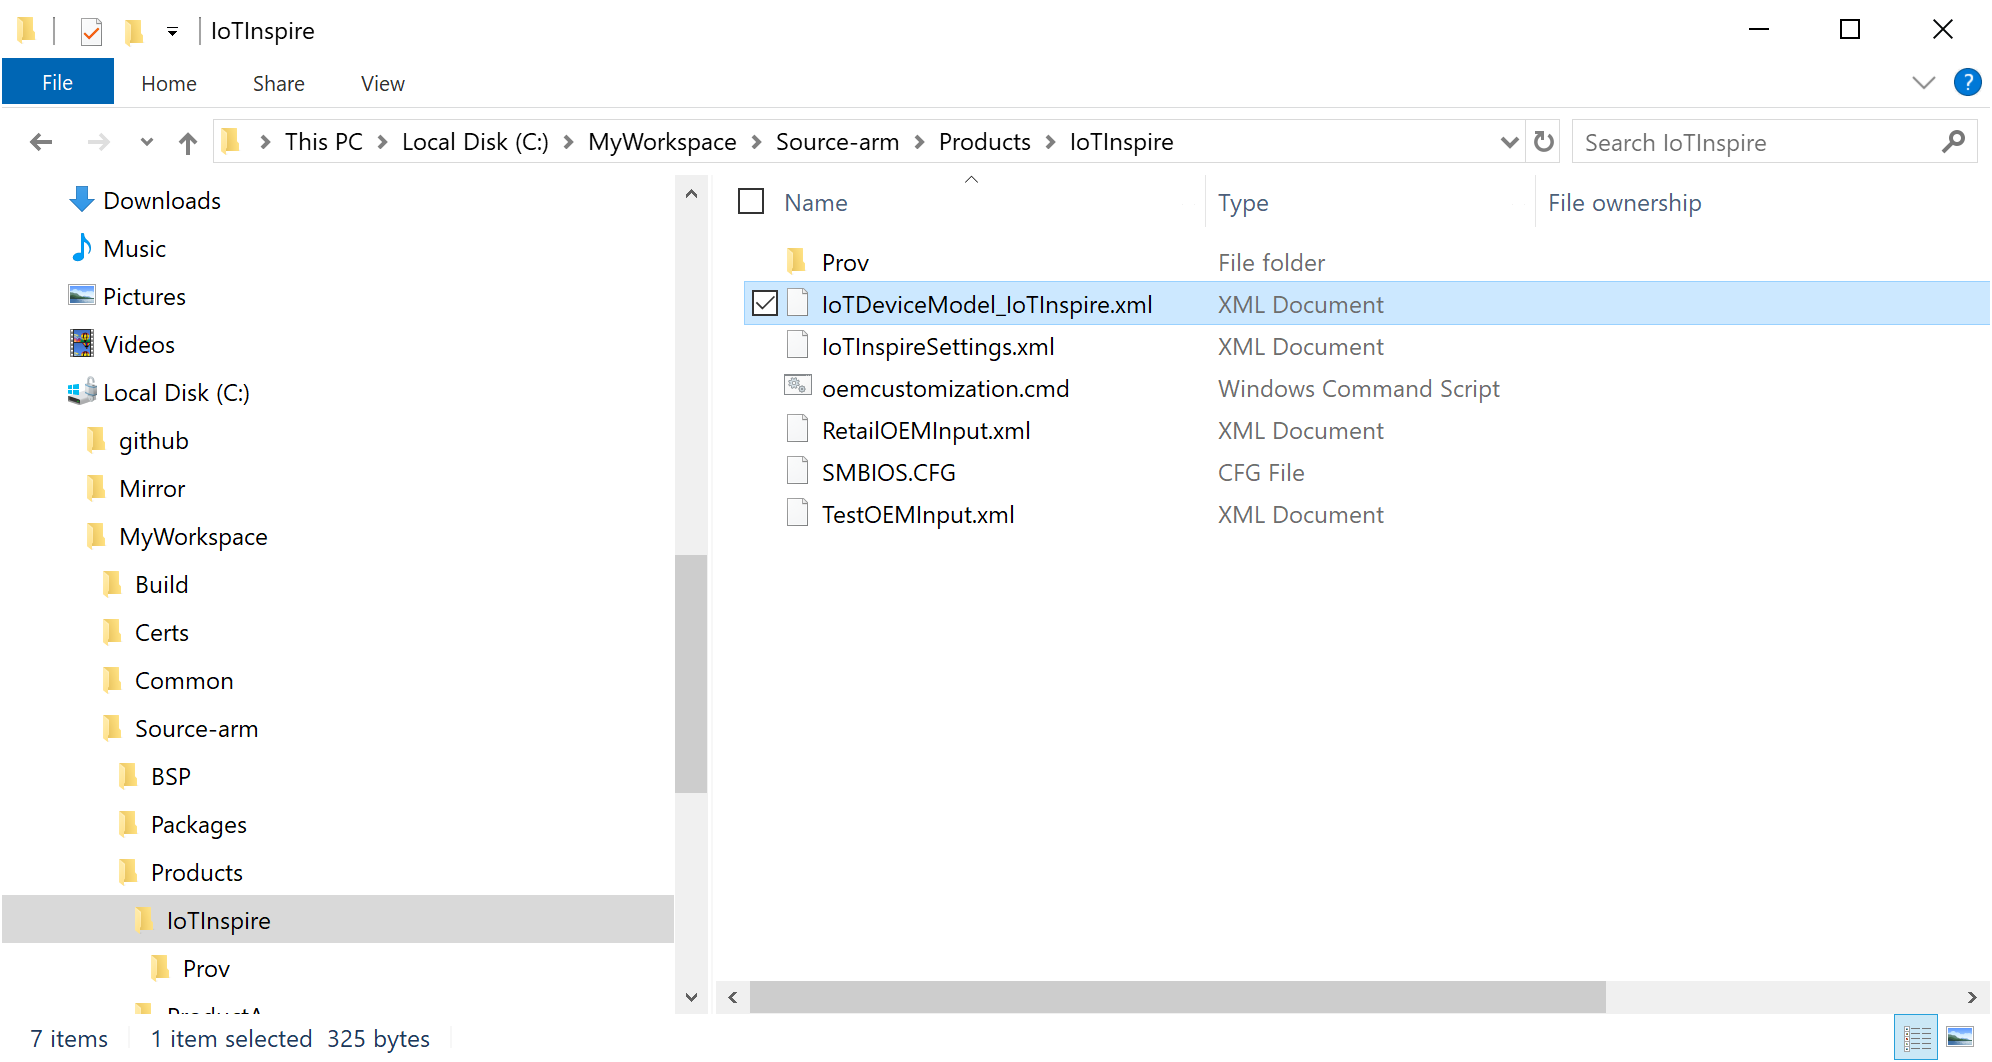
Confirm the device model specification and press Submit.
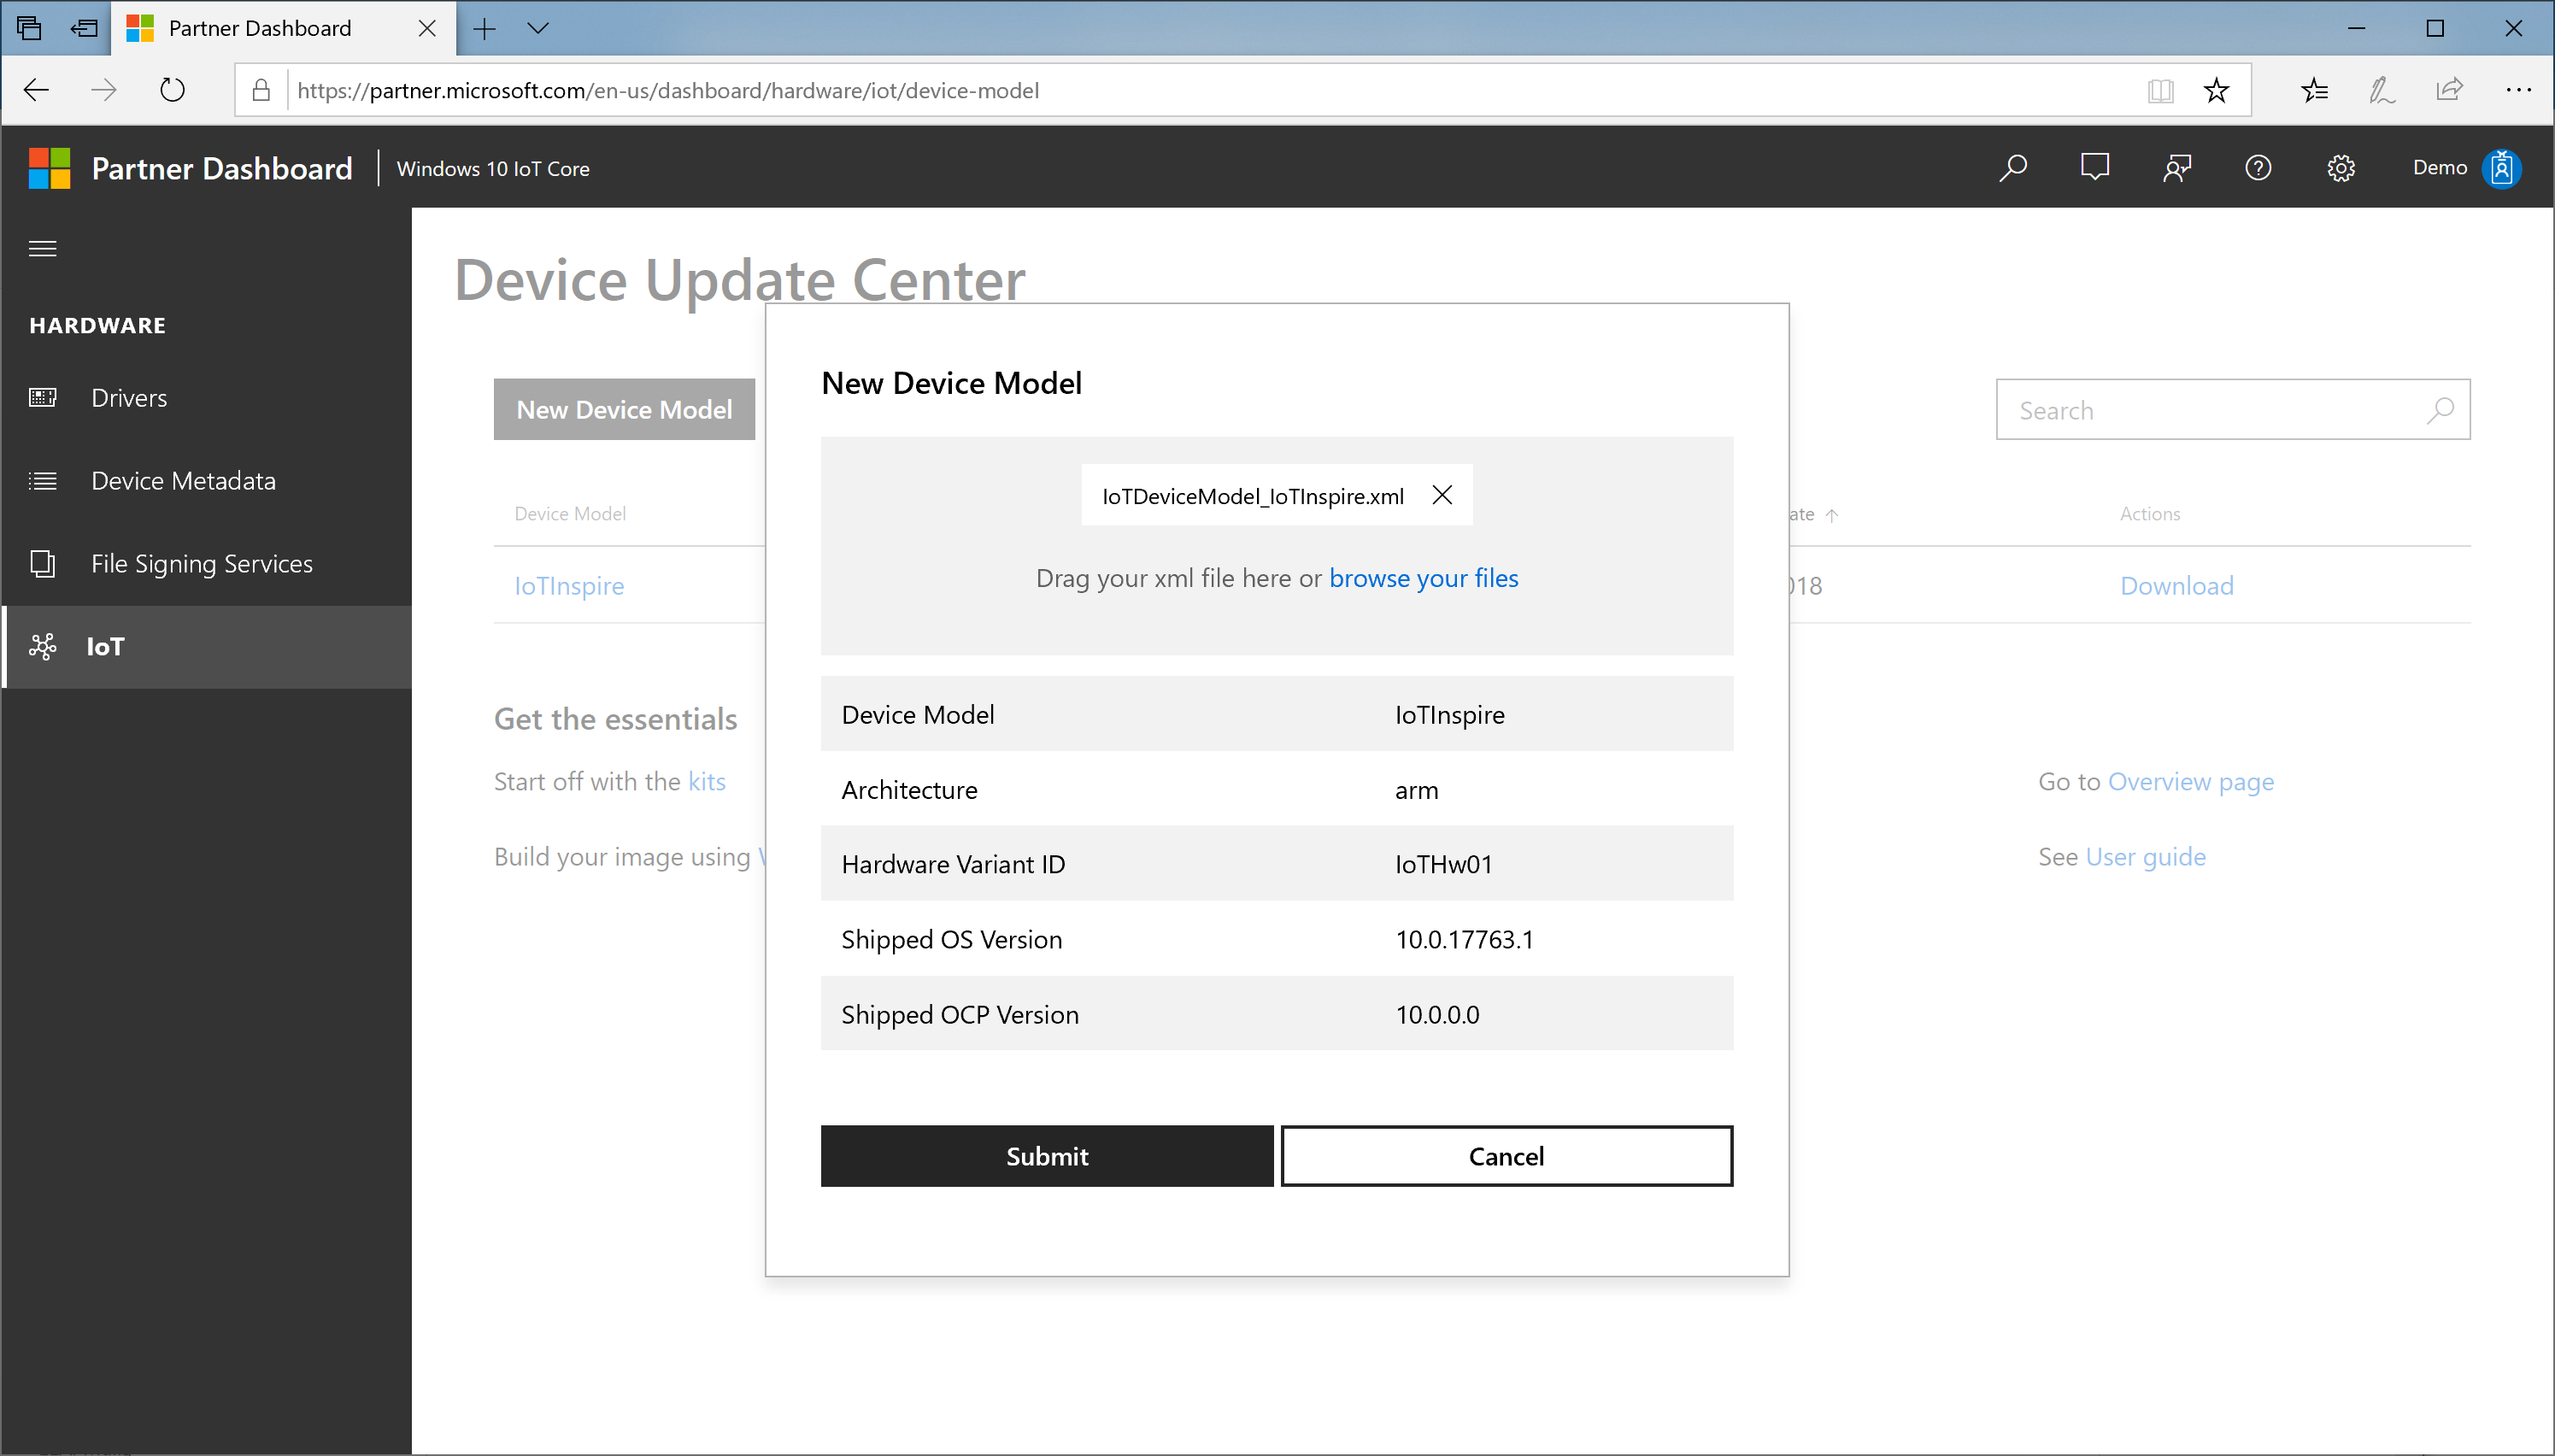
A new device model entry will be added to device model table. You will also see a download link in that table.
Download the zip file (CUSConfig.zip)
Build a base image for the device
In the IoTCoreShell, import the config file using Import-IoTDUCConfig
Import-IoTDUCConfig <productname> "C:\Downloads\CUSConfig.zip"
(or) importcfg <productname> "C:\Downloads\CUSConfig.zip"
This will also edit the OEMInputXML files for the inclusion of required FM files and feature IDs. This also removes IOT_GENERIC_POP feature if present.
Sign all required binaries with the code signing certificate using Add-IoTSignature and Redo-IoTCabSignature
# enable retail signing
Set-IoTRetailSign On
(or) retailsign On
# sign all binaries in the workspace
Add-IoTSignature C:\MyWorkspace *.sys,*.dll,*.exe
(or) signbinaries C:\MyWorkspace *.sys,*.dll,*.exe
# re-sign prebuilt bsp cabs if applicable
Redo-IoTCabSignature <srcbspdir> <dstbspdir>
Build the base image using the below commands
# build all packages
buildpkg All
# build the image
buildimage <productname> <retail/test>
# build recovery image, if recovery mechanism needed
buildrecovery <productname> <retail/test>
This gives you the base image with the OEM custom package version 10.0.0.0.
Validate this image on the device.
Step 4: Publish updates
So far, we have created an updateable image which can be used to manufacture and ship the devices. In this step, we will look at the procedure of creating update packages and publishing it in the portal.
Create update packages
Update the version number first using Set-IoTCabVersion
Set-IoTCabVersion <a.b.c.d>
(or) setversion <a.b.c.d>
Make sure that a.b.c.d is higher version than the previous version set.
If new versions of BSP drivers are available, copy them to the BSP folder setup earlier (example,
C:\BSP). Alternatively, keep all the updated drivers in a different folder, for example,C:\BSPv2and update your workspace xml.If there is an new version of the existing appx, create new appx with the same name. Note that the ID in the generated customizations.xml will be the same as the earlier version.
If updated versions of drivers are available, update both the binaries and the packaging xml file.
Update any other package contents as applicable.
Sign all required binaries with the code signing certificate using Add-IoTSignature and Redo-IoTCabSignature
# enable retail signing
Set-IoTRetailSign On
(or) retailsign On
# sign all binaries in the workspace
Add-IoTSignature C:\MyWorkspace *.sys,*.dll,*.exe
(or) signbinaries C:\MyWorkspace *.sys,*.dll,*.exe
# re-sign prebuilt bsp cabs if applicable
Redo-IoTCabSignature <srcbspdir> <dstbspdir>
Build the update image using the below commands
# build all packages
buildpkg All
# build the image
buildimage <productname> <retail/test>
# build recovery image, if recovery mechanism needed
buildrecovery <productname> <retail/test>
This gives you the base image with the OEM custom package version <a.b.c.d>.
Validate this image on the device to make sure the device boots with all updates included.
After successful validation of the update build, export the required packages using Export-IoTDUCCab
Export-IoTDUCCab <productname> <retail/test> (or) exportpkgs <productname> <retail/test><productname>_OCP_<version>.cabwill be created in the<workspacedir>\Build\<arch>\<productname>\<config>\<version>\folder along with<productname>_OCP_pkgver.txtfile that lists the cabs included along with their version information. This cab will be signed with the EV cert configured in the workspace xml.
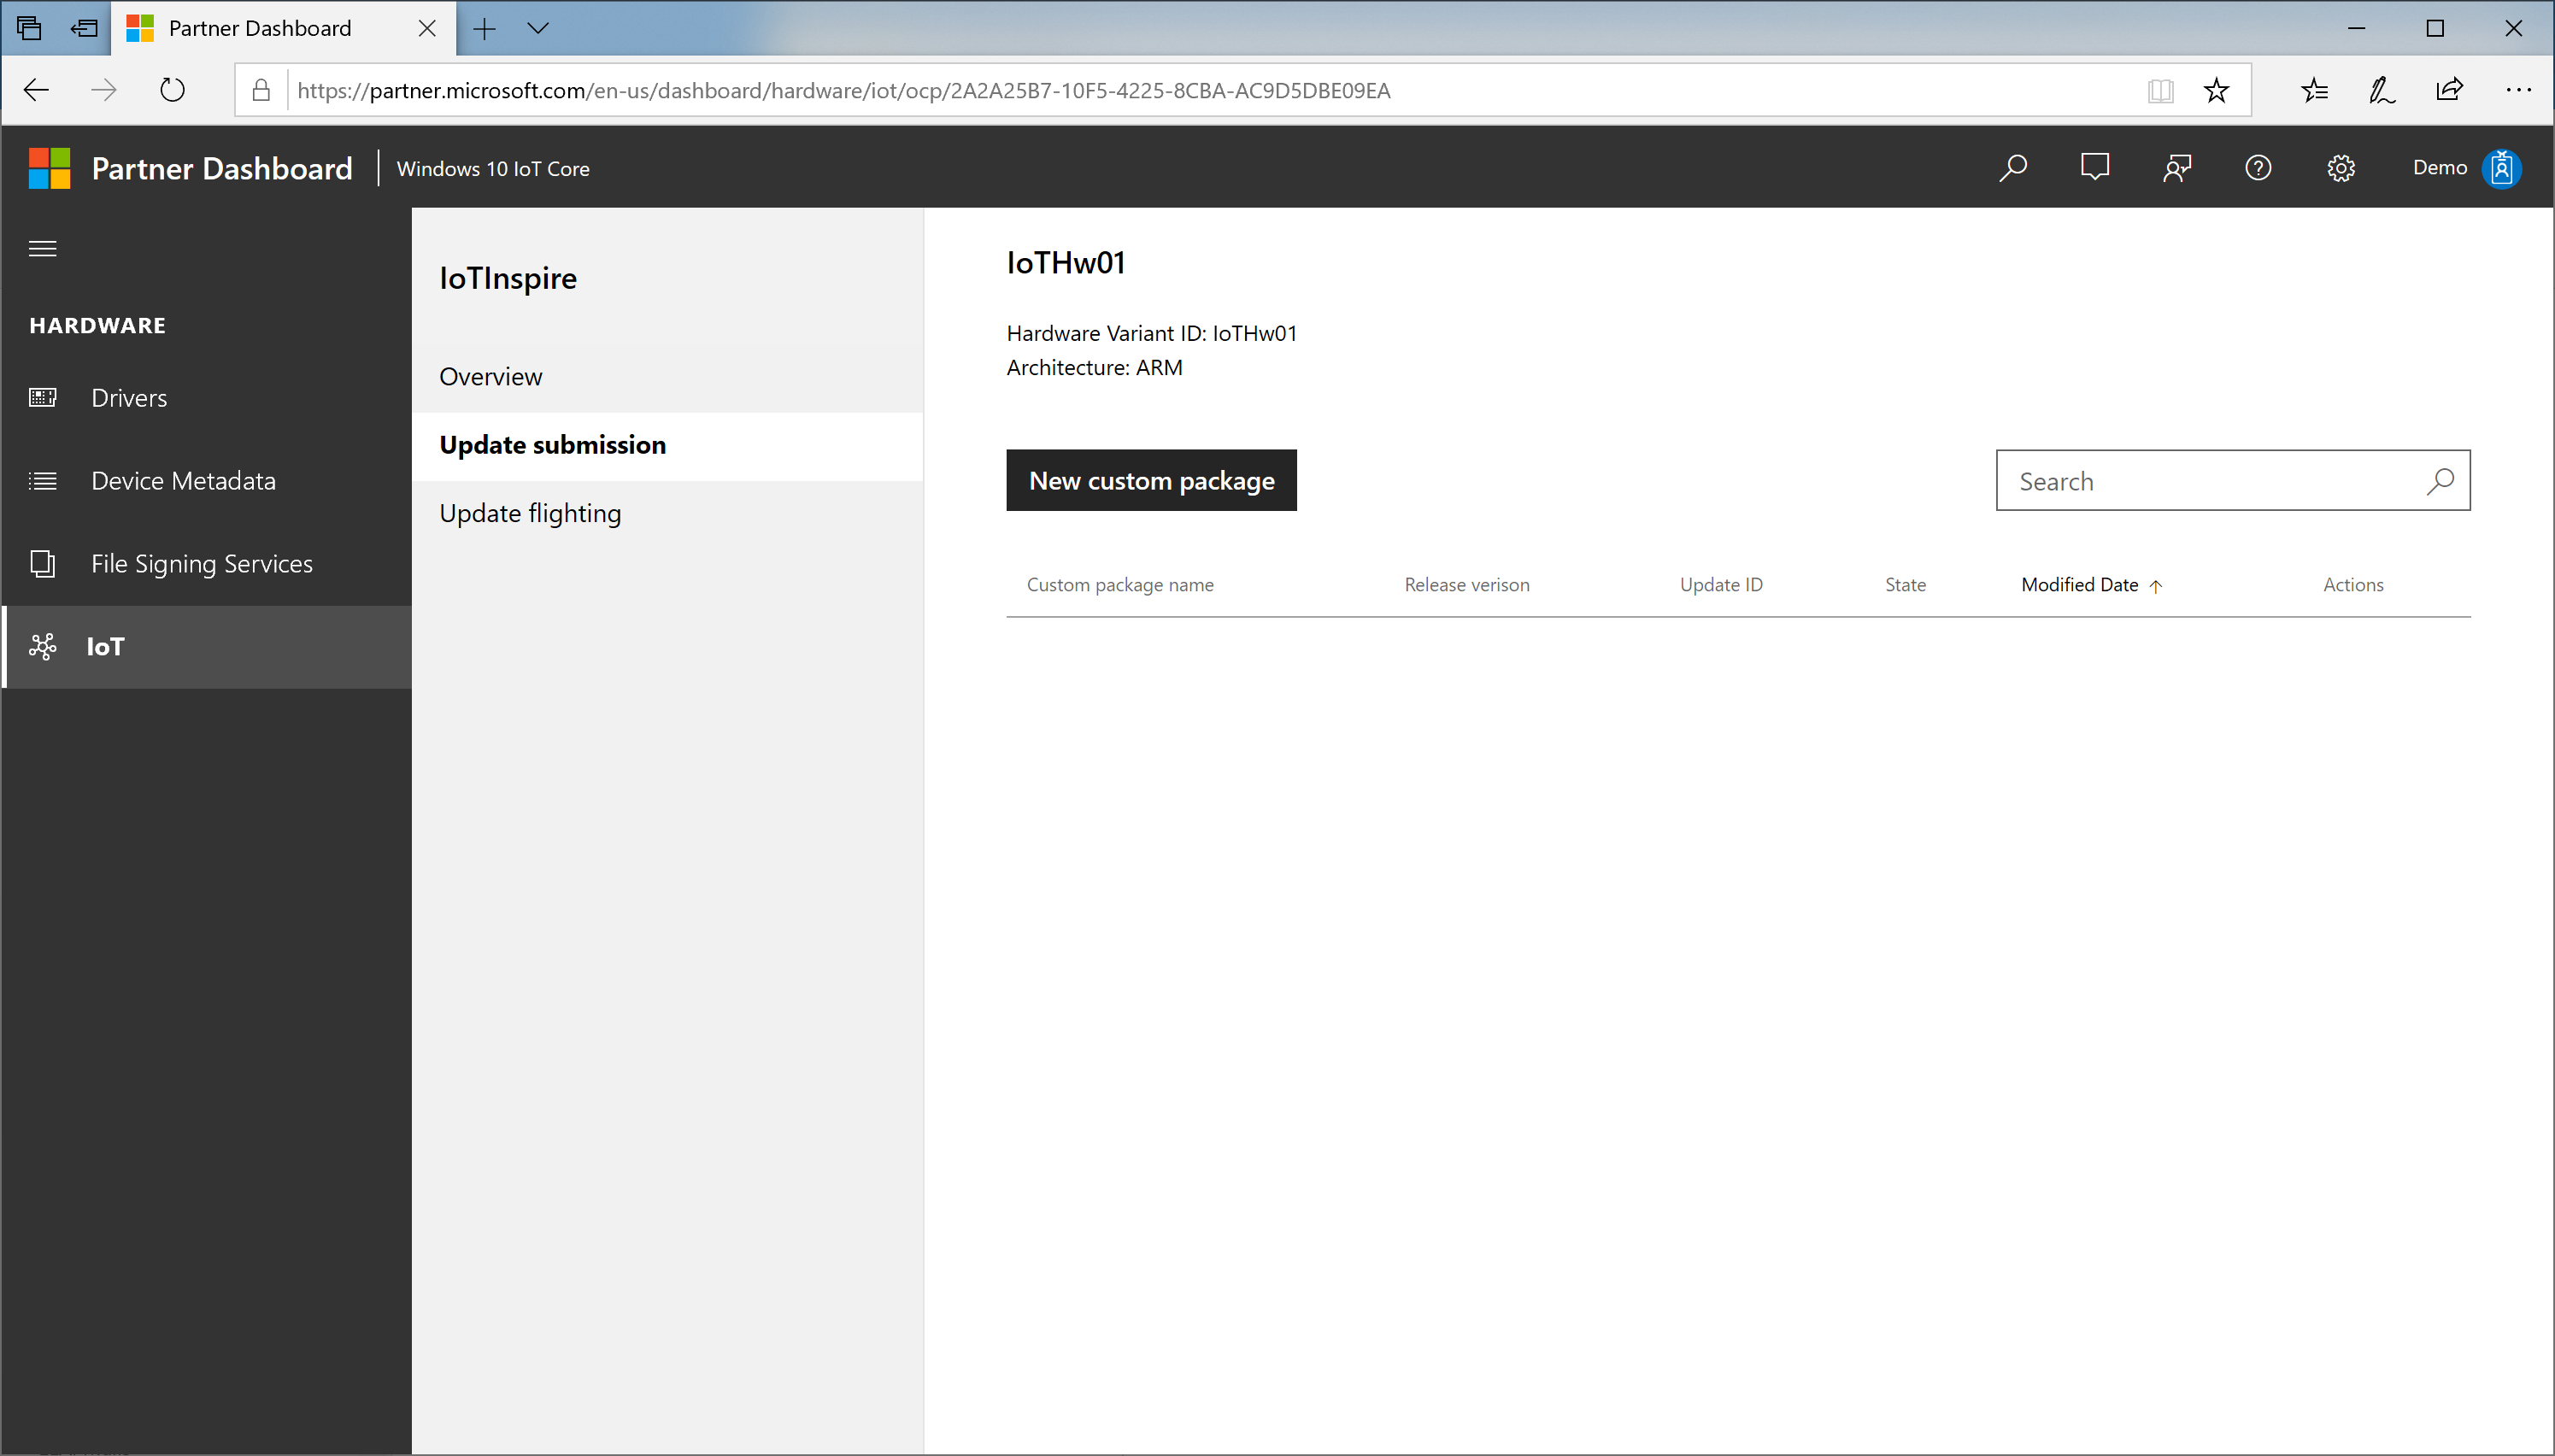
Publish updates
In the Device Update Center portal, select the Device Model in the Device Model table
Select Update submission > New custom package
Browse your files and select the
<productname>_OCP_<version>.cabfrom your workspace.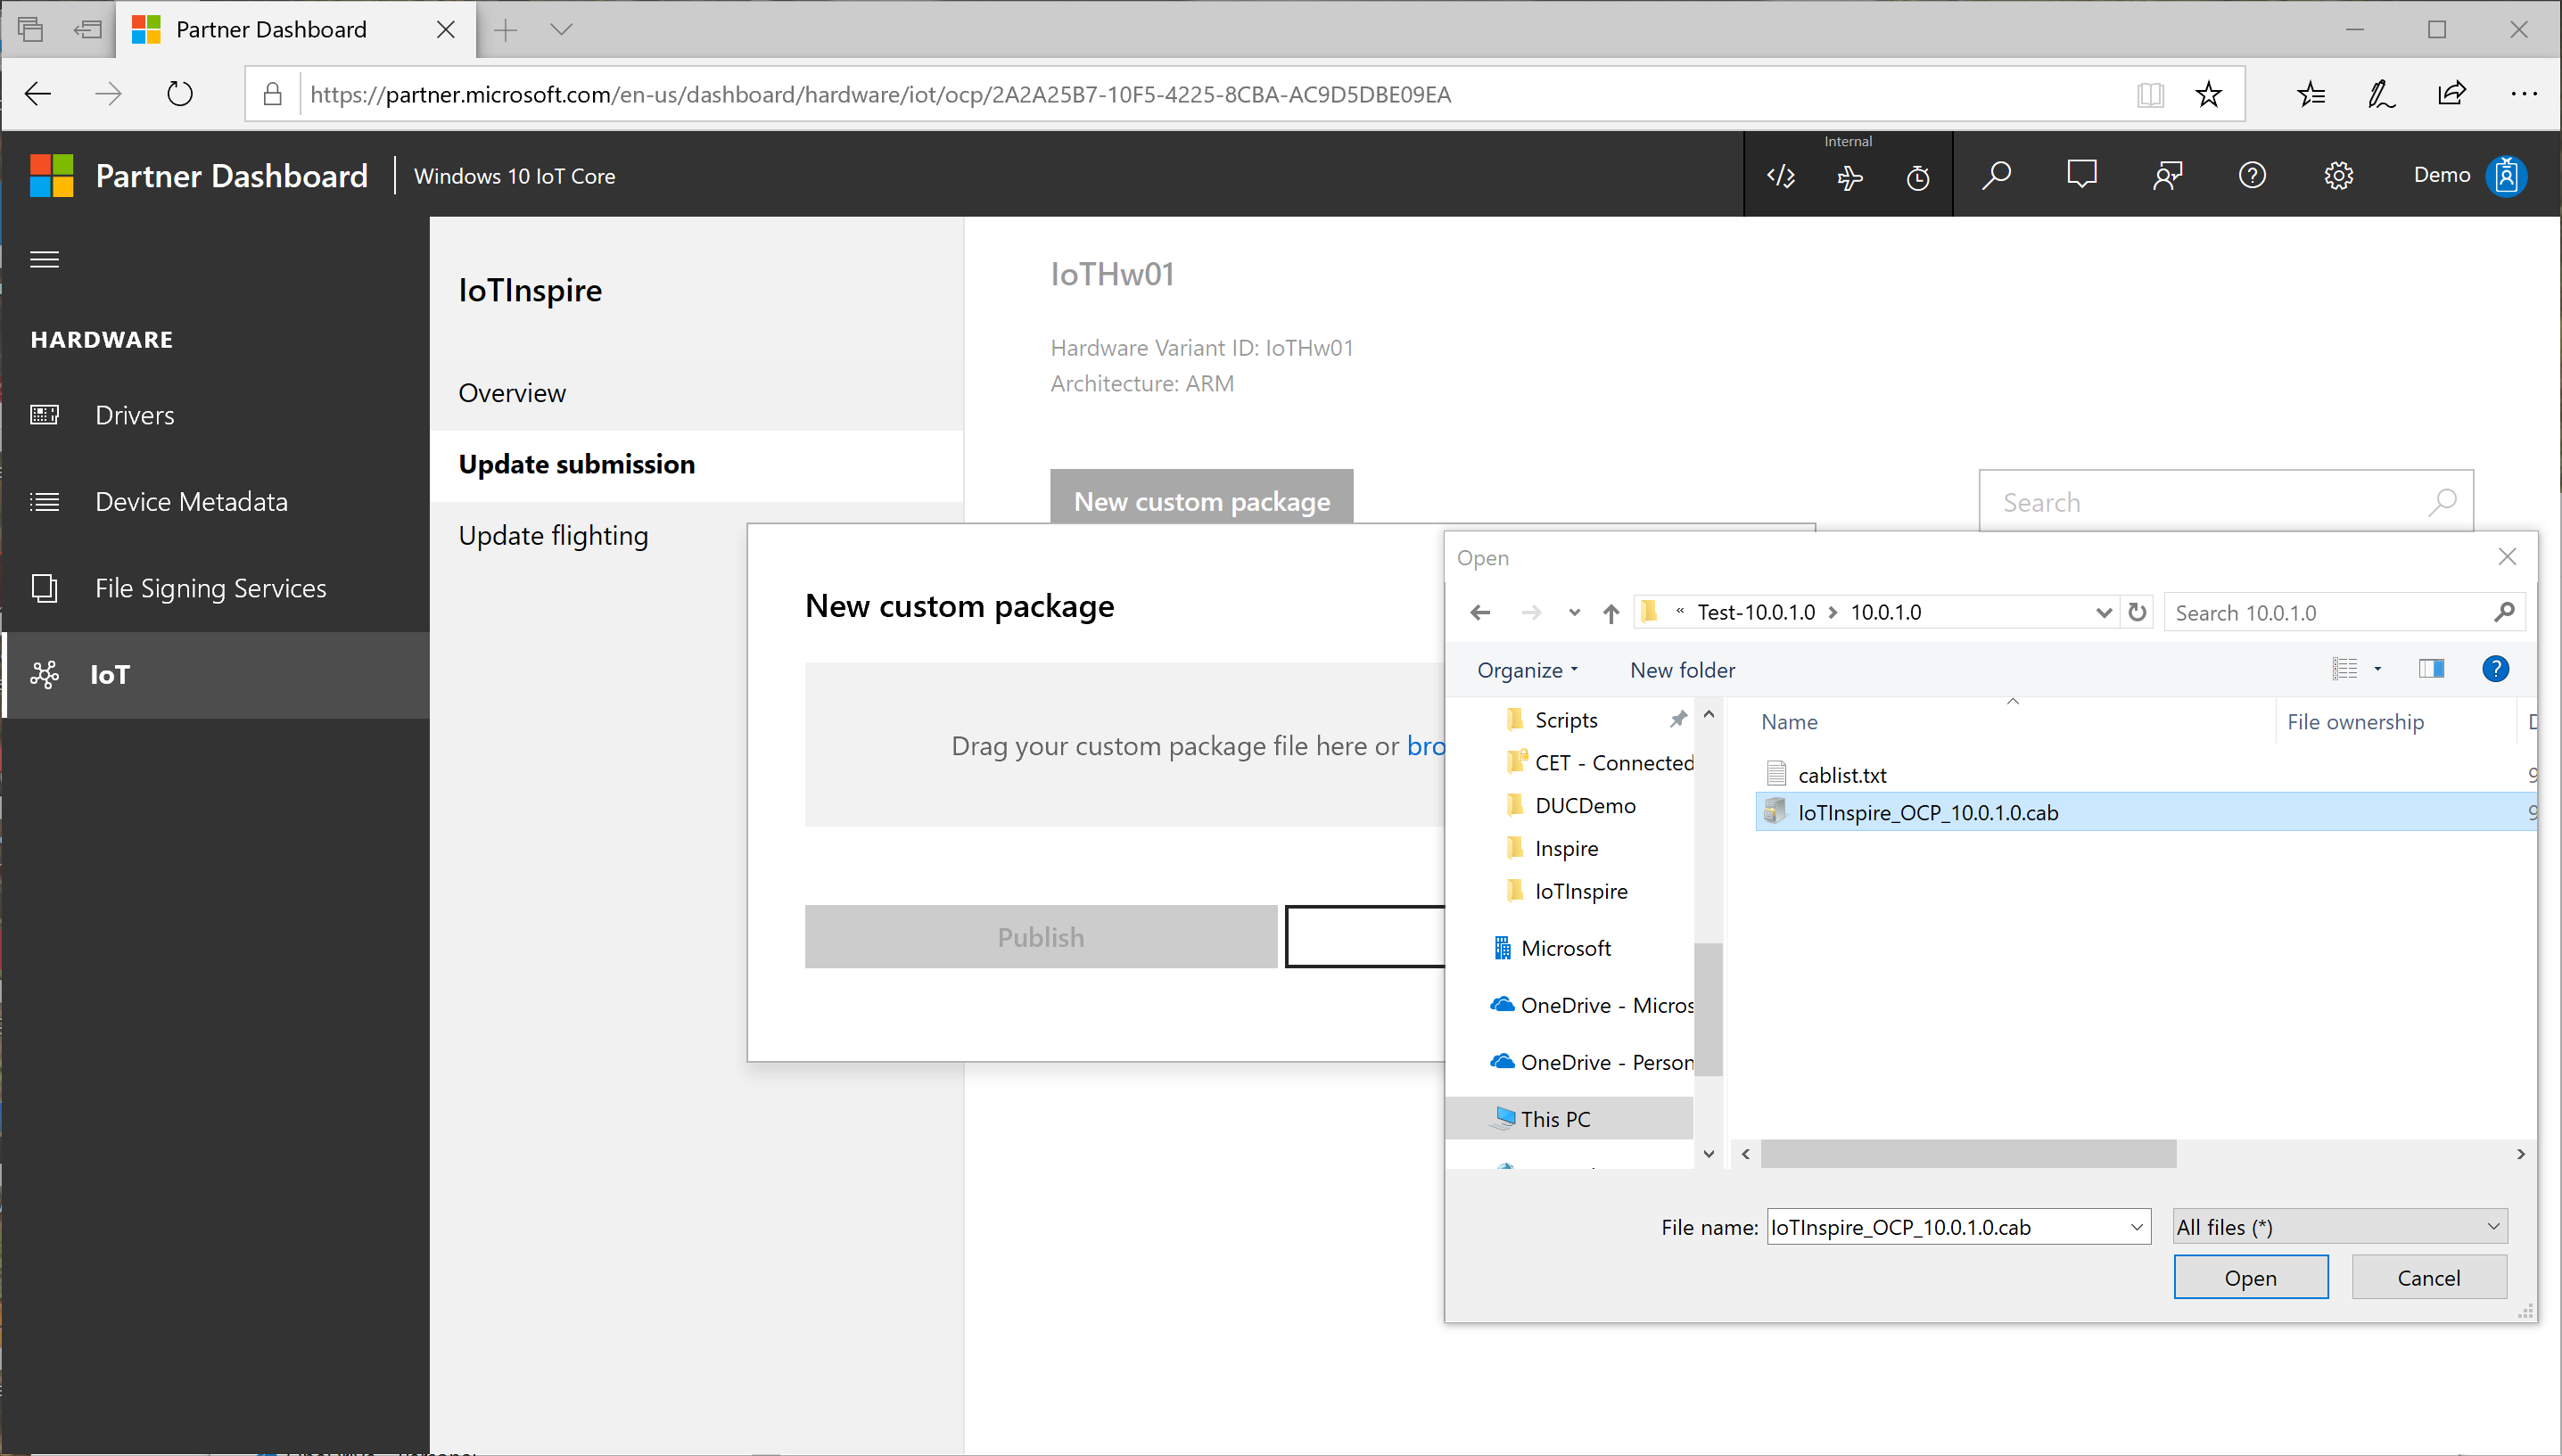
Confirm the release version information and press Publish.
The release submission goes through a process consisting of:
Validation : checking the contents of the uploaded package for authenticity and correctness
Sign : signs the cabs with microsoft certificate for publishing to Windows Update
Publish : Actual publish step to Windows Update
Finalize : Finalizing the publishing process
You can check the status of the publishing process by clicking Status link. This process takes some time to complete.

Step 5: Targeting updates
After successfully publishing the updates, you can now control the delivery process by specifying the targeting rules.
Select Update flighting and select New Flight
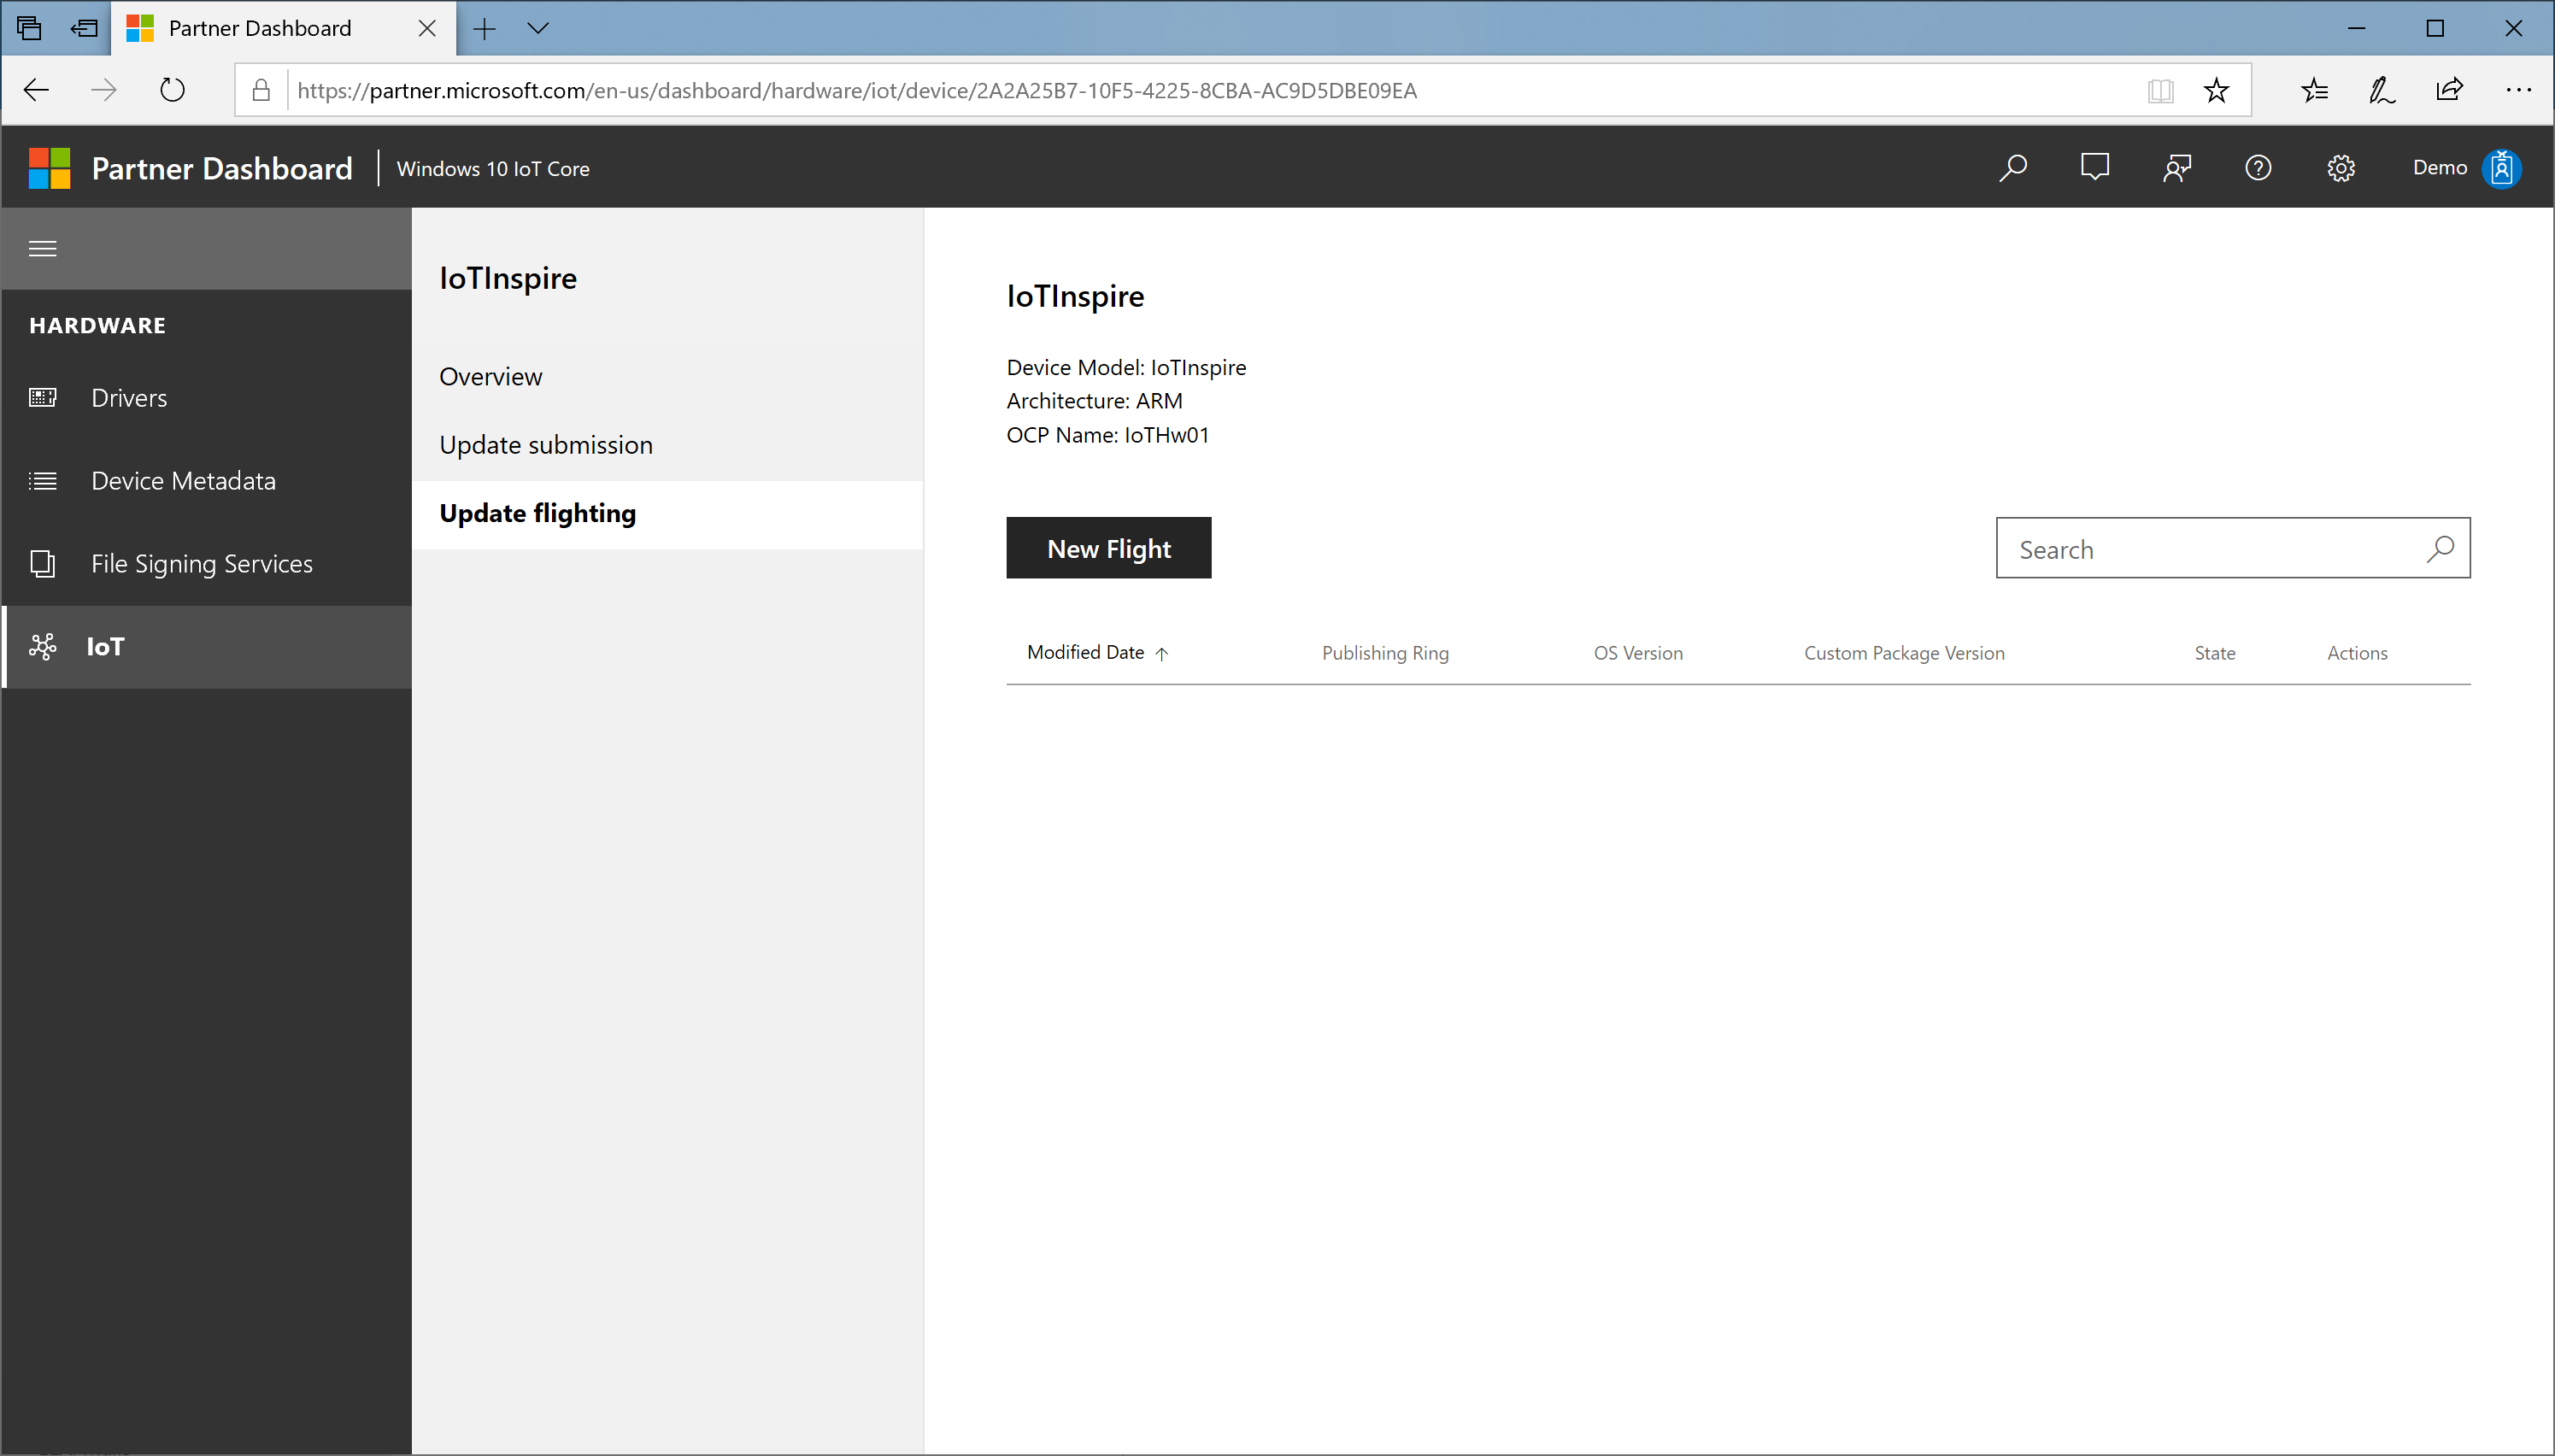
In the New Flight dialog:

a. Specify the ring (
Preview/EarlyAdopter/GeneralAvailability), for example, Preview. Note that the xml file that is downloaded and included in the image, sets this value to GeneralAvailability by defaultPreview ring: updates a limited set of devices, mostly in the lab
EarlyAdopter ring: updates a moderate number of devices in the user environment, including self-host devices
GeneralAvailability ring: updates every device in the market
b. Select the OS version box if you want to specify new OS version and then select the required OS version
c. Select the OEM custom package version box if you want to specify new OEM custom package version and then select the required OEM custom package version, for example, a.b.c.d
d. Select Next
Note
Update OS version to atleast 10.0.17763.615 first to support SHA-2 signing. See SHA1 Deprecation for IoT Core section below for details.
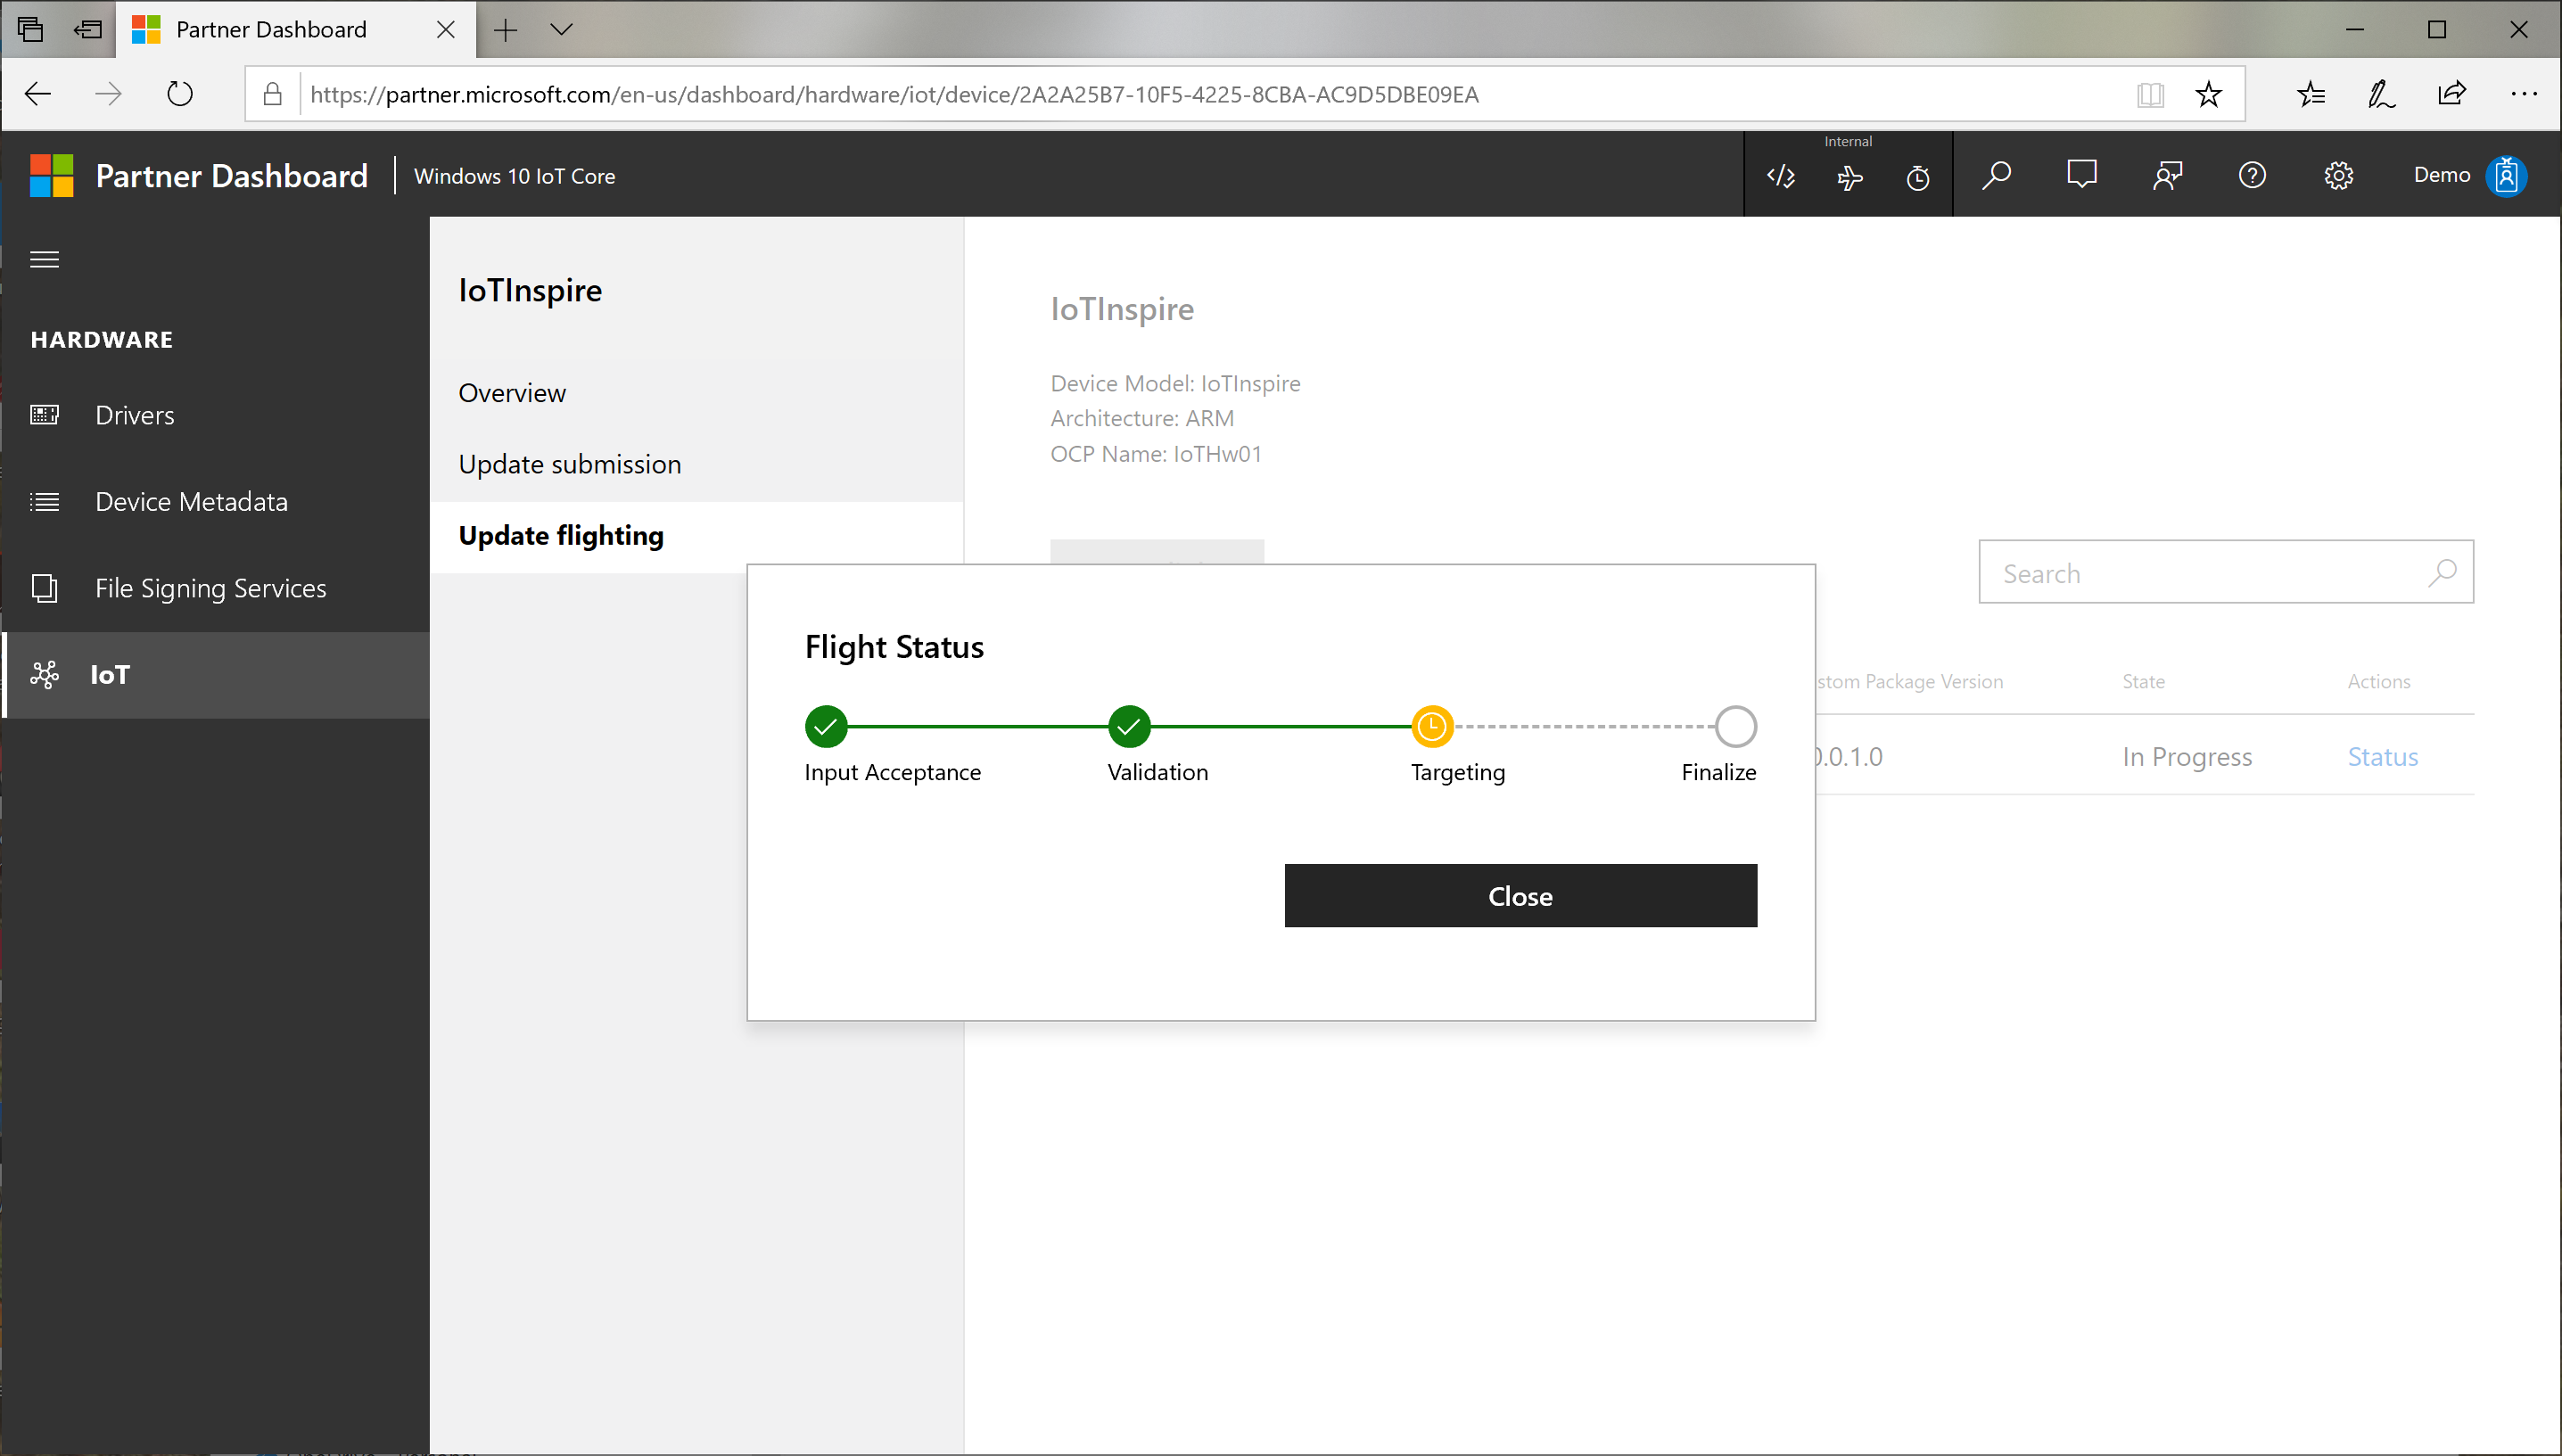
In the Confirm Flighting dialog, Select Publish. The targeting submission goes through a process consisting of
Validation : verifying the correctness of the targeting rules
Targeting : actual configurations set on the Windows Update
Finalize : finalizing the targeting process
You can check the status of the publishing process by clicking Status link.
At this point the Windows Update system is set to deliver the required update packages to the device. It can take few hours before the settings are propogated.
Step 6: Validate the updates on device
Now that the updates are available on the Windows update, you can validate the updates on the device now. The rings are provided to enable staged roll-out of the updates, starting with Preview, then EarlyAdopter, then GeneralAvailability.
Configure your device to Preview Ring. This can be set using the Azure DM API or the Update UWP API
Let the device scan for update, the device will detect the published update, download and install automatically (based on the update policies configured).
This process may take 24 hours or more depending on the scan time and active hours settings.
SHA1 Deprecation for IoT Core
The SHA1 deprecation for Windows 10 IoT Core OS has been rolled out and SHA-2 only support is enabled starting Windows 10 IoTCore version 1809 July update (10.0.17763.615). Starting November 2019, all OEM custom packages will be signed with SHA-2 signatures only and all devices should first be updated to Windows 10 1809 July Update (10.0.17763.615) or later version to be able to target SHA-2 signed OEM custom packages.
Note
The SHA-2 signed updates will fail to install in OS versions older than 10.0.17763.611. We recommend to update your device OS to atleast this version first and then target OEM custom package updates.
For devices running Windows 10 IoTCore, version 1803, you will require to update to Windows 10 IoTCore version 1803 July update (10.0.17134.885). We strongly recommend to update 1803 devices also to 1809 version July update.
OEM Signing and Cross Certificate roots expiry
The Cross-signed root certificates are SHA1 and will be supported till their expiry dates. This expiry does not impact the already signed drivers in the image and impacts signing of new drivers after the expiry date.
Important
Starting Windows 10 IoT Core version 1809 November 10, 2020 update(17763.1577), OEM kernel driver signing is supported. With this, the code signing certificate does not require to be chained to cross-signed root. OEM signing requires secure boot and device guard features to be enabled for both retail and test images. See IoT-ADK-AddonKit 17763-v7 branch for the tooling updates and sample certificates.
See the following links for more information on SHA1 deprecation: