CRM Integration with Unified Service Desk Setup
Hello Everyone,
While I was working on USD integration with CRM, I had installed and configure USD with
my CRM online instance and wanted to share the same details. Although these
information are available online but I thought it would be good if I put them
together.
Before you can install and deploy Unified Service Desk for Microsoft Dynamics CRM, you must
identify the CRM instance on which you want to build and deploy the
configuration. While you can use a new CRM instance, Unified Service Desk works
best when the CRM customization is mostly complete. Unified Service Desk
controls the call center agent’s view of Microsoft Dynamics CRM by manipulating
windows, injecting JavaScript, and so on. If major changes occur to the CRM
environment after Unified Service Desk is deployed, it might cause your Unified
Service Desk configuration to no longer work as required. While Unified Service
Desk configuration often comes later in a CRM implementation, having Unified
Service Desk in mind when designing your CRM environment is beneficial.
Unified Service Desk installation and deployment is done in phases where initially you set up a
development environment to configure agent applications using one of the sample
Unified Service Desk applications as the base. Next, you test how your
configurations appear and work using the Unified Service Desk client
application by connecting to the CRM instance where you configured Unified
Service Desk. Next, you deploy the customized Unified Service Desk
configuration on to a production instance of CRM, and the client application,
along with any files and assemblies required for your customizations, to your
agent’s computers in your organization.
System Requirements for Unified Service desk.
https://technet.microsoft.com/en-us/library/dn646882.aspx
1. Install the Unified Service Desk client on the development computer
a) Download: - https://www.microsoft.com/en-us/download/details.aspx?id=43110
For 32-bit version of Windows, download the UnifiedServiceDesk-i386.exe file.
For 64-bit version of Windows, download the UnifiedServiceDesk-amd64.exe file.
b) Double-click the downloaded file to extract the contents
into a folder.
- After the files are extracted, the Unified Service Desk client installer starts automatically. If
it doesn’t, navigate to the extracted folder and run the
SetupUnifiedServiceDesk.exe file to begin the installation. - On the Welcome screen, click Next.
- On the End-User License Agreement screen,
accept the terms in the license agreement by selecting the check box, and then
click Next. - On the Welcome screen, click Next.
- On the User Registration screen, click Next.
- The Installation Prerequisites screen displays the status of the
prerequisites check on your computer. You will not be able to proceed with the
installation if the prerequisites listed in the screen are not met. Click Next. - On the Destination Folder screen, specify the
folder where you want Unified Service Desk client to be installed. You can also
specify whether you want a desktop shortcut or a quick launch icon to be
created for the Unified Service Desk client. Click Next. - On the Ready to install screen, click Install.
- The next screen displays the
installation status of the Unified Service Desk client. You are prompted to
authorize the installation as a result of User Account Control (UAC), Click Yes. - A confirmation message
appears on successful installation of the Unified Service Desk client. Click Finish to exit the installer.
2. Deploy a sample Unified Service desk Package using Package Deployer.
- Navigate to the
<ExtractedFolder>\USDPackageDeployer folder, and double-click the
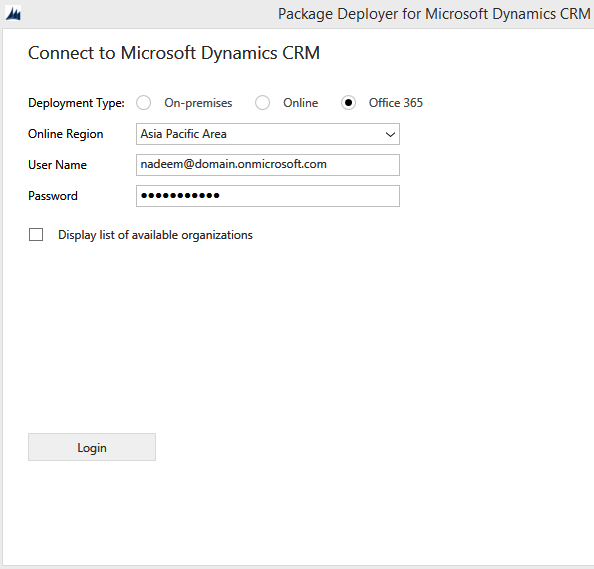
PackageDeployer.exe file to run the Package Deployer tool. - In the Connect to Microsoft Dynamics CRM
screen, provide authentication details to connect to the CRM instance where you
want to deploy the package. If you have multiple organizations, and want to
select the organization where you want to deploy the Unified Service Desk
package, select the Display list of available
organizations check box. Click Login. -
- If you have multiple organizations and chose to select the organization that you
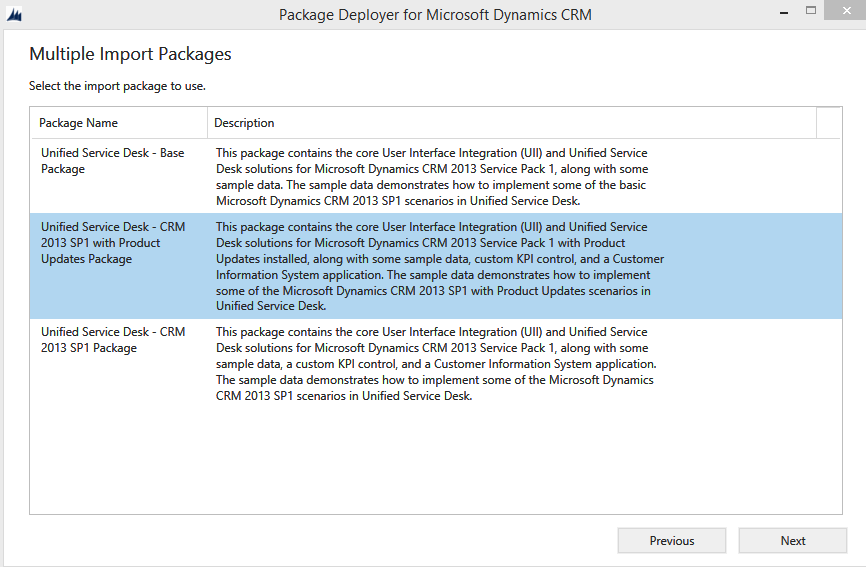
want to connect to in the previous step, the next screen displays the list of organizations. Select a CRM organization to connect to, and proceed. - On successful authentication, the next screen displays the packages available
for deployment. Read the description to determine the package that you
want to deploy, select the package, and then click Next. -
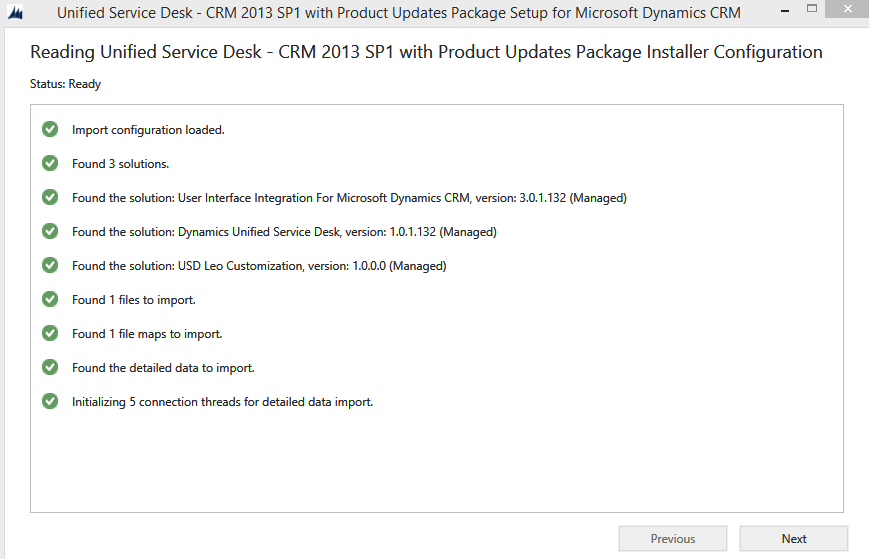
- The next screen displays detailed information about the selected package and the things that will be
installed on your CRM instance. Review the information, and click Next. - The Ready to Install screen displays the package selected for
deployment and name of the CRM organization where it will be deployed to.
Review the information, and click Next. - The next screen displays the validation status of the
package selected to be deployed. After the validation completes successfully,
click Next.
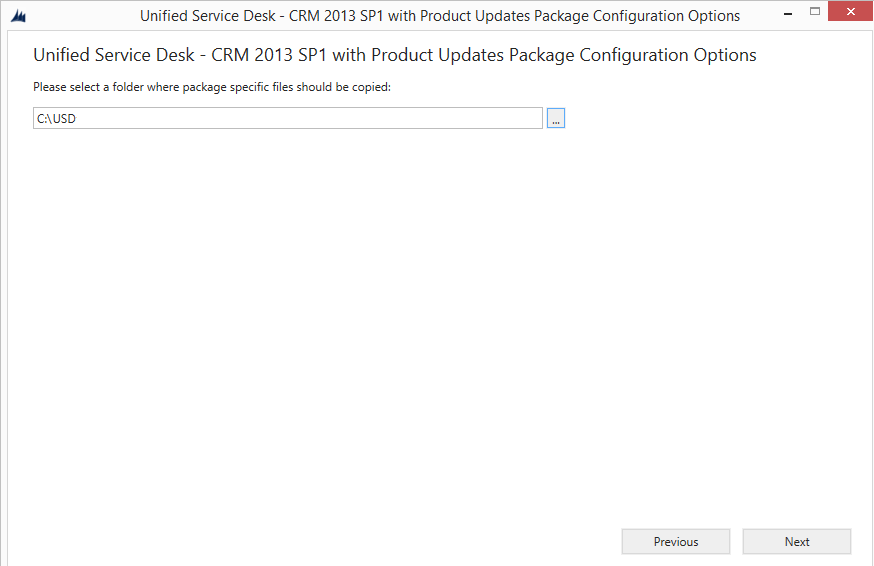
10. The next screen appears only if you selected a package other than the Base package in step 7.
If you selected the Base package to deploy, jump to the next step.
In this screen, specify the location where you want to copy the files or
assemblies that define the custom functionality implemented in the selected
package. This is required for rendering the custom functionality in the Unified
Service Desk client application. In this case, we copy the files to the C:\USD folder.
11. After completing the package deployment, you must copy
these files (If CRM 2013 SP1 Product update package) to the Unified Service
Desk client application installation directory which
is C:\Program Files\Microsoft Dynamics CRM USD\USD, by default. You will be
prompted to overwrite some files; accept to overwrite the files.
12. To configure any other client machine for USD. Install Unified Service Desk client on the system.
Follow the previous step.
13. Verify If you have these 3 solutions installed in CRM.
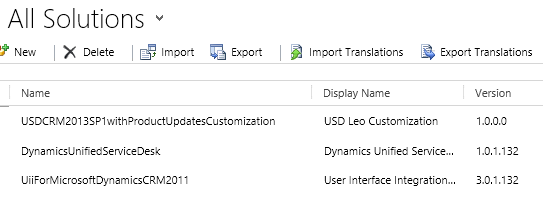
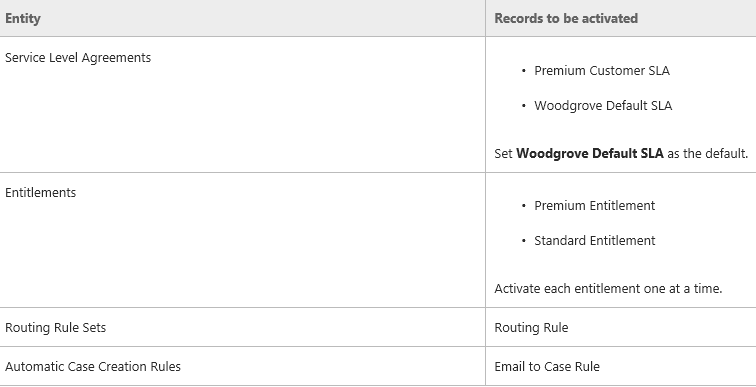
14. If you have deployed the CRM 2013 SP1 with Product Updates package, you must manually activate the following
records in the Service Management area (Settings > Service Management) that are created by the package:
3. Run the Unified Service Desk Client, and connect to the CRM instance where the Unified Service Desk package
is deployed to verify if it runs successfully.
1. Start the Unified Service Desk client by double-clicking the application shortcut on
your desktop.
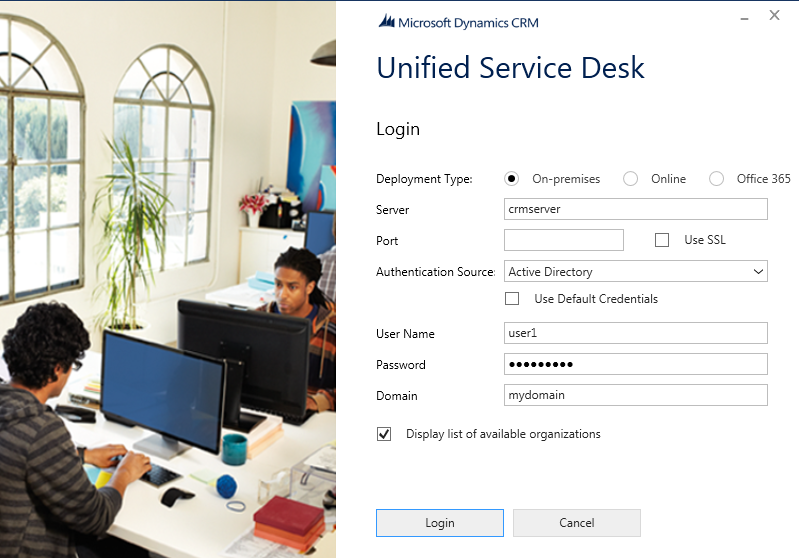
2. In the Unified Service Desk sign-in page, provide authentication details to connect to
your CRM server. If you have multiple organizations, and want to select the
organization where Unified Service Desk is deployed, select the Display list of available organizations
check box. Click Login.
3. If you have multiple organizations, select the organization that you want to connect to.
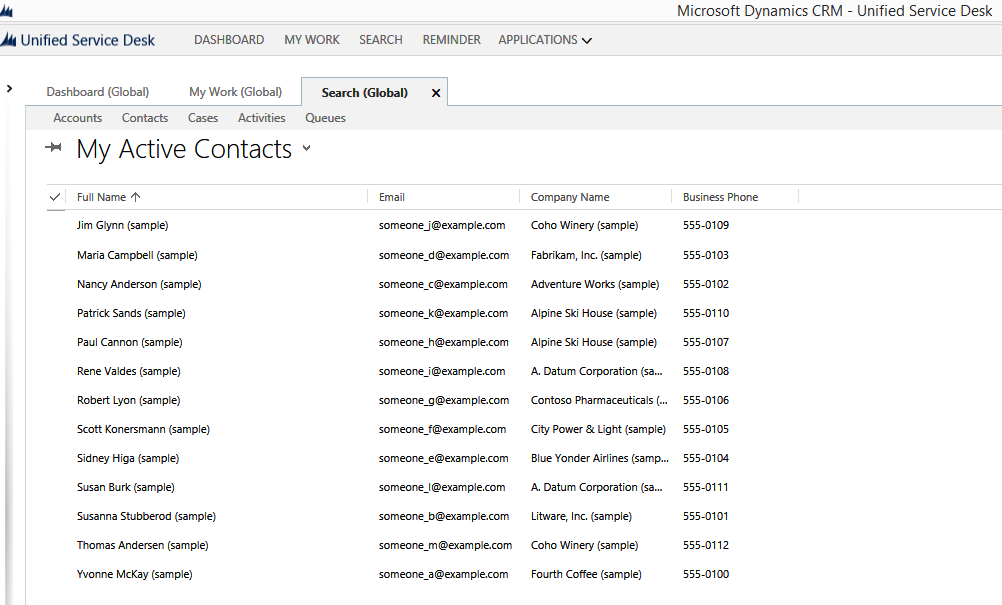
4. The Unified Service Desk splash screen appears. The screen displays the information about the configuration
data being read by the client in the background. Next, the main window appears
that prompts you to enter your CRM server credentials.
Type in your credentials, and then sign in to the Unified Service Desk client application.
5. Below is the screen shot of the data synched in USD from CRM.
4. Troubleshooting Package Deployment Issues.
The Package Deployer tool provides logging support to record detailed information about
errors that can occur while signing in to the Microsoft Dynamics CRM instance
using the tool and deploying packages. There are three log files generated by
the tool that are available at the following location on the computer where you
run the tool:
c:\Users\<UserName>\AppData\Roaming\Microsoft\PackageDeployer\<Version>.
1. Login_ErrorLog.log: This provides information about the issues that
occurred while signing in to the CRM instance using the tool.
If there are any issues while signing in, a message appears on the sign-in screen of the tool with a link to
this log file stating that an error occurred while processing the sign-in
request and the user can view the error log.
You can click the link in the message to view this log file.
The log file is created the first time you encounter any sign-in issues in the tool. Thereafter, the log file
records information about any sign-in issues.
2. PackageDeployer.log: This provides detailed information about each
task performed in the tool during the deployment of the packages. You can view
the log file from the tool by clicking the View Log File link at the bottom of
the screen.
3.ComplexImportDetail.log: This provides detailed information about
the data imported in the last deployment using the tool.
Each time you deploy a package
using this tool, the existing details from the log file are moved to a file
called CompelxImportDetail._old.log in the same directory, and the
ComplexImportDetail.log file displays information about the latest import done
using the tool.
Configure
Diagnostics Loggings for Unified Service Desk.
https://technet.microsoft.com/en-us/library/dn633607.aspx
Unified
Service Desk Walkthroughs
https://technet.microsoft.com/en-us/library/dn749502.aspx
I hope this is helpful.