Tutorial: Creación de una aplicación iOS que inicia el Lector inmersivo con el contenido de una foto (Swift)
El Lector inmersivo es una herramienta diseñada de forma inclusiva que implementa técnicas demostradas para mejorar la comprensión lectora.
La Read API de Visión de Azure AI detecta el contenido de texto de una imagen con los últimos modelos de reconocimiento de Microsoft y convierte el texto identificado en una secuencia de caracteres legible por máquinas.
En este tutorial, creará una aplicación iOS desde cero e integrará la Read API, así como Immersive Reader mediante su SDK. Hay disponible un ejemplo de trabajo completo de este tutorial en GitHub.
Requisitos previos
- Suscripción a Azure. Puede crear una de forma gratuita.
- MacOS y Xcode.
- Un recurso del Lector inmersivo configurado para la autenticación de Microsoft Entra. Siga estas instrucciones para realizar la configuración.
- Una suscripción al servicio Visión de Azure AI. Cree un recurso de Visión de Azure AI en Azure Portal.
Creación de un proyecto de Xcode
Cree un proyecto nuevo en Xcode.
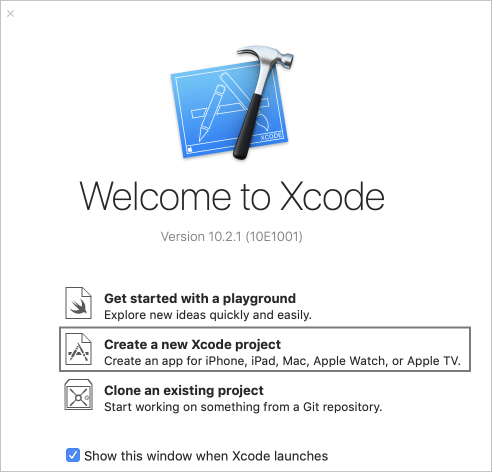
Elija Single View App (Aplicación de vista única).

Obtención del SDK CocoaPod
La manera más sencilla de usar el SDK de Lector inmersivo es a través de CocoaPods. Para instalarlo a través de CocoaPods:
Siga la guía para instalar Cocoapods.
Ejecute
pod initen el directorio raíz del proyecto de Xcode para crear un podfile.Agregue
pod 'immersive-reader-sdk', :path => 'https://github.com/microsoft/immersive-reader-sdk/tree/master/iOS/immersive-reader-sdk'para incorporar CocoaPod al podfile. El podfile debe tener un aspecto similar al siguiente, reemplazando picture-to-immersive-reader-swift por el nombre del destino:platform :ios, '9.0' target 'picture-to-immersive-reader-swift' do use_frameworks! # Pods for picture-to-immersive-reader-swift pod 'immersive-reader-sdk', :git => 'https://github.com/microsoft/immersive-reader-sdk.git' endEn el terminal, en el directorio del proyecto de Xcode, ejecute el comando
pod installpara instalar el pod del SDK de Lector inmersivo.Agregue
import immersive_reader_sdka todos los archivos que necesitan hacer referencia al SDK.Asegúrese de abrir el proyecto abriendo el archivo
.xcworkspacey no el archivo.xcodeproj.
Adquisición de un token de autenticación de Microsoft Entra
Necesita algunos valores del paso de configuración de autenticación de Microsoft Entra en la sección de requisitos previos. Vuelva al archivo de texto que guardó de esa sesión.
TenantId     => Azure subscription TenantId
ClientId     => Microsoft Entra ApplicationId
ClientSecret => Microsoft Entra Application Service Principal password
Subdomain    => Immersive Reader resource subdomain (resource 'Name' if the resource was created in the Azure portal, or 'CustomSubDomain' option if the resource was created with Azure CLI PowerShell. Check the Azure portal for the subdomain on the Endpoint in the resource Overview page, for example, 'https://[SUBDOMAIN].cognitiveservices.azure.com/')
En la carpeta principal del proyecto, que contiene el archivo ViewController.swift, cree un archivo de clase Swift denominado Constants.swift. Reemplace la clase por el código siguiente y agregue sus propios valores cuando proceda. Conserve este archivo como un archivo local que solo exista en el equipo y asegúrese de no confirmar este archivo en el control de código fuente porque contiene secretos que no se deben hacer públicos. Se recomienda no conservar secretos en la aplicación. En su lugar, use un servicio back-end para obtener el token; así los secretos se pueden mantener fuera de la aplicación y del dispositivo. El punto de conexión de la API de back-end debe estar protegido mediante algún tipo de autenticación (por ejemplo, OAuth) para evitar que usuarios no autorizados obtengan tokens y los utilicen en el servicio Lector inmersivo y su facturación; este trabajo está fuera del ámbito de este tutorial.
Configuración de la aplicación para que se ejecute sin un guion gráfico
Abra AppDelegate.swift y reemplace el archivo por el siguiente código.
import UIKit

@UIApplicationMain
class AppDelegate: UIResponder, UIApplicationDelegate {

    var window: UIWindow?

    var navigationController: UINavigationController?

    func application(_ application: UIApplication, didFinishLaunchingWithOptions launchOptions: [UIApplication.LaunchOptionsKey: Any]?) -> Bool {
        // Override point for customization after application launch.

        window = UIWindow(frame: UIScreen.main.bounds)

        // Allow the app run without a storyboard
        if let window = window {
            let mainViewController = PictureLaunchViewController()
            navigationController = UINavigationController(rootViewController: mainViewController)
            window.rootViewController = navigationController
            window.makeKeyAndVisible()
        }
        return true
    }

    func applicationWillResignActive(_ application: UIApplication) {
        // Sent when the application is about to move from active to inactive state. This can occur for certain types of temporary interruptions (such as an incoming phone call or SMS message) or when the user quits the application and it begins the transition to the background state.
        // Use this method to pause ongoing tasks, disable timers, and invalidate graphics rendering callbacks. Games should use this method to pause the game.
    }

    func applicationDidEnterBackground(_ application: UIApplication) {
        // Use this method to release shared resources, save user data, invalidate timers, and store enough application state information to restore your application to its current state in case it is terminated later.
        // If your application supports background execution, this method is called instead of applicationWillTerminate: when the user quits.
    }

    func applicationWillEnterForeground(_ application: UIApplication) {
        // Called as part of the transition from the background to the active state; here you can undo many of the changes made on entering the background.
    }

    func applicationDidBecomeActive(_ application: UIApplication) {
        // Restart any tasks that were paused (or not yet started) while the application was inactive. If the application was previously in the background, optionally refresh the user interface.
    }

    func applicationWillTerminate(_ application: UIApplication) {
        // Called when the application is about to terminate. Save data if appropriate. See also applicationDidEnterBackground:.
    }

}
Incorporación de funcionalidad para tomar y cargar fotos
Cambie el nombre deViewController.swift a PictureLaunchViewController.swift y reemplace el archivo por el siguiente código.
import UIKit
import immersive_reader_sdk

class PictureLaunchViewController: UIViewController, UINavigationControllerDelegate, UIImagePickerControllerDelegate {

    private var photoButton: UIButton!
    private var cameraButton: UIButton!
    private var titleText: UILabel!
    private var bodyText: UILabel!
    private var sampleContent: Content!
    private var sampleChunk: Chunk!
    private var sampleOptions: Options!
    private var imagePicker: UIImagePickerController!
    private var spinner: UIActivityIndicatorView!
    private var activityIndicatorBackground: UIView!
    private var textURL = "vision/v2.0/read/core/asyncBatchAnalyze";

    override func viewDidLoad() {
        super.viewDidLoad()

        view.backgroundColor = .white

        titleText = UILabel()
        titleText.text = "Picture to Immersive Reader with OCR"
        titleText.font = UIFont.boldSystemFont(ofSize: 32)
        titleText.textAlignment = .center
        titleText.lineBreakMode = .byWordWrapping
        titleText.numberOfLines = 0
        view.addSubview(titleText)

        bodyText = UILabel()
        bodyText.text = "Capture or upload a photo of handprinted text on a piece of paper, handwriting, typed text, text on a computer screen, writing on a white board and many more, and watch it be presented to you in the Immersive Reader!"
        bodyText.font = UIFont.systemFont(ofSize: 18)
        bodyText.lineBreakMode = .byWordWrapping
        bodyText.numberOfLines = 0
        let screenSize = self.view.frame.height
        if screenSize <= 667 {
            // Font size for smaller iPhones.
            bodyText.font = bodyText.font.withSize(16)

        } else if screenSize <= 812.0 {
            // Font size for medium iPhones.
            bodyText.font = bodyText.font.withSize(18)

        } else if screenSize <= 896  {
            // Font size for larger iPhones.
            bodyText.font = bodyText.font.withSize(20)

        } else {
            // Font size for iPads.
            bodyText.font = bodyText.font.withSize(26)
        }
        view.addSubview(bodyText)

        photoButton = UIButton()
        photoButton.backgroundColor = .darkGray
        photoButton.contentEdgeInsets = UIEdgeInsets(top: 10, left: 5, bottom: 10, right: 5)
        photoButton.layer.cornerRadius = 5
        photoButton.setTitleColor(.white, for: .normal)
        photoButton.setTitle("Choose Photo from Library", for: .normal)
        photoButton.titleLabel?.font = UIFont.systemFont(ofSize: 18, weight: .bold)
        photoButton.addTarget(self, action: #selector(selectPhotoButton(sender:)), for: .touchUpInside)
        view.addSubview(photoButton)

        cameraButton = UIButton()
        cameraButton.backgroundColor = .darkGray
        cameraButton.contentEdgeInsets = UIEdgeInsets(top: 10, left: 5, bottom: 10, right: 5)
        cameraButton.layer.cornerRadius = 5
        cameraButton.setTitleColor(.white, for: .normal)
        cameraButton.setTitle("Take Photo", for: .normal)
        cameraButton.titleLabel?.font = UIFont.systemFont(ofSize: 18, weight: .bold)
        cameraButton.addTarget(self, action: #selector(takePhotoButton(sender:)), for: .touchUpInside)
        view.addSubview(cameraButton)

        activityIndicatorBackground = UIView()
        activityIndicatorBackground.backgroundColor = UIColor.black
        activityIndicatorBackground.alpha = 0
        view.addSubview(activityIndicatorBackground)
        view.bringSubviewToFront(_: activityIndicatorBackground)

        spinner = UIActivityIndicatorView(style: .whiteLarge)
        view.addSubview(spinner)

        let layoutGuide = view.safeAreaLayoutGuide

        titleText.translatesAutoresizingMaskIntoConstraints = false
        titleText.topAnchor.constraint(equalTo: layoutGuide.topAnchor, constant: 25).isActive = true
        titleText.leadingAnchor.constraint(equalTo: layoutGuide.leadingAnchor, constant: 20).isActive = true
        titleText.trailingAnchor.constraint(equalTo: layoutGuide.trailingAnchor, constant: -20).isActive = true

        bodyText.translatesAutoresizingMaskIntoConstraints = false
        bodyText.topAnchor.constraint(equalTo: titleText.bottomAnchor, constant: 35).isActive = true
        bodyText.leadingAnchor.constraint(equalTo: layoutGuide.leadingAnchor, constant: 20).isActive = true
        bodyText.trailingAnchor.constraint(equalTo: layoutGuide.trailingAnchor, constant: -20).isActive = true

        cameraButton.translatesAutoresizingMaskIntoConstraints = false
        if screenSize > 896  {
            // Constraints for iPads.
            cameraButton.heightAnchor.constraint(equalToConstant: 150).isActive = true
            cameraButton.leadingAnchor.constraint(equalTo: layoutGuide.leadingAnchor, constant: 60).isActive = true
            cameraButton.trailingAnchor.constraint(equalTo: layoutGuide.trailingAnchor, constant: -60).isActive = true
            cameraButton.topAnchor.constraint(equalTo: bodyText.bottomAnchor, constant: 150).isActive = true
        } else {
            // Constraints for iPhones.
            cameraButton.heightAnchor.constraint(equalToConstant: 100).isActive = true
            cameraButton.leadingAnchor.constraint(equalTo: layoutGuide.leadingAnchor, constant: 30).isActive = true
            cameraButton.trailingAnchor.constraint(equalTo: layoutGuide.trailingAnchor, constant: -30).isActive = true
            cameraButton.topAnchor.constraint(equalTo: bodyText.bottomAnchor, constant: 100).isActive = true
        }
        cameraButton.bottomAnchor.constraint(equalTo: photoButton.topAnchor, constant: -40).isActive = true

        photoButton.translatesAutoresizingMaskIntoConstraints = false
        if screenSize > 896  {
            // Constraints for iPads.
            photoButton.heightAnchor.constraint(equalToConstant: 150).isActive = true
            photoButton.leadingAnchor.constraint(equalTo: layoutGuide.leadingAnchor, constant: 60).isActive = true
            photoButton.trailingAnchor.constraint(equalTo: layoutGuide.trailingAnchor, constant: -60).isActive = true
        } else {
            // Constraints for iPhones.
            photoButton.heightAnchor.constraint(equalToConstant: 100).isActive = true
            photoButton.leadingAnchor.constraint(equalTo: layoutGuide.leadingAnchor, constant: 30).isActive = true
            photoButton.trailingAnchor.constraint(equalTo: layoutGuide.trailingAnchor, constant: -30).isActive = true
        }

        spinner.translatesAutoresizingMaskIntoConstraints = false
        spinner.centerXAnchor.constraint(equalTo: view.centerXAnchor).isActive = true
        spinner.centerYAnchor.constraint(equalTo: view.centerYAnchor).isActive = true

        activityIndicatorBackground.translatesAutoresizingMaskIntoConstraints = false
        activityIndicatorBackground.topAnchor.constraint(equalTo: layoutGuide.topAnchor).isActive = true
        activityIndicatorBackground.bottomAnchor.constraint(equalTo: layoutGuide.bottomAnchor).isActive = true
        activityIndicatorBackground.leadingAnchor.constraint(equalTo: layoutGuide.leadingAnchor).isActive = true
        activityIndicatorBackground.trailingAnchor.constraint(equalTo: layoutGuide.trailingAnchor).isActive = true

        // Create content and options.
        sampleChunk = Chunk(content: bodyText.text!, lang: nil, mimeType: nil)
        sampleContent = Content(title: titleText.text!, chunks: [sampleChunk])
        sampleOptions = Options(uiLang: nil, timeout: nil, uiZIndex: nil)
    }

    @IBAction func selectPhotoButton(sender: AnyObject) {
            // Launch the photo picker.
            imagePicker =  UIImagePickerController()
            imagePicker.delegate = self
            self.imagePicker.sourceType = .photoLibrary
            self.imagePicker.allowsEditing = true
            self.present(self.imagePicker, animated: true, completion: nil)
            self.photoButton.isEnabled = true
    }

    @IBAction func takePhotoButton(sender: AnyObject) {
        if !UIImagePickerController.isSourceTypeAvailable(.camera) {
            // If there is no camera on the device, disable the button
            self.cameraButton.backgroundColor = .gray
            self.cameraButton.isEnabled = true

        } else {
            // Launch the camera.
            imagePicker =  UIImagePickerController()
            imagePicker.delegate = self
            self.imagePicker.sourceType = .camera
            self.present(self.imagePicker, animated: true, completion: nil)
            self.cameraButton.isEnabled = true
        }
    }

    func imagePickerController(_ picker: UIImagePickerController, didFinishPickingMediaWithInfo info: [UIImagePickerController.InfoKey : Any]) {
        imagePicker.dismiss(animated: true, completion: nil)
        photoButton.isEnabled = false
        cameraButton.isEnabled = false
        self.spinner.startAnimating()
        activityIndicatorBackground.alpha = 0.6

        // Retrieve the image.
        let image = (info[.originalImage] as? UIImage)!

        // Retrieve the byte array from image.
        let imageByteArray = image.jpegData(compressionQuality: 1.0)

        // Call the getTextFromImage function passing in the image the user takes or chooses.
        getTextFromImage(subscriptionKey: Constants.computerVisionSubscriptionKey, getTextUrl: Constants.computerVisionEndPoint + textURL, pngImage: imageByteArray!, onSuccess: { cognitiveText in
            print("cognitive text is: \(cognitiveText)")
            DispatchQueue.main.async {
                self.photoButton.isEnabled = true
                self.cameraButton.isEnabled = true
            }

            // Create content and options with the text from the image.
            let sampleImageChunk = Chunk(content: cognitiveText, lang: nil, mimeType: nil)
            let sampleImageContent = Content(title: "Text from image", chunks: [sampleImageChunk])
            let sampleImageOptions = Options(uiLang: nil, timeout: nil, uiZIndex: nil)

            // Callback to get token for Immersive Reader.
            self.getToken(onSuccess: {cognitiveToken in

                DispatchQueue.main.async {

                    launchImmersiveReader(navController: self.navigationController!, token: cognitiveToken, subdomain: Constants.subdomain, content: sampleImageContent, options: sampleImageOptions, onSuccess: {
                        self.spinner.stopAnimating()
                        self.activityIndicatorBackground.alpha = 0
                        self.photoButton.isEnabled = true
                        self.cameraButton.isEnabled = true

                    }, onFailure: { error in
                        print("An error occurred launching the Immersive Reader: \(error)")
                        self.spinner.stopAnimating()
                        self.activityIndicatorBackground.alpha = 0
                        self.photoButton.isEnabled = true
                        self.cameraButton.isEnabled = true

                    })
                }

            }, onFailure: { error in
                DispatchQueue.main.async {
                    self.photoButton.isEnabled = true
                    self.cameraButton.isEnabled = true

                }
                print("An error occurred retrieving the token: \(error)")
            })

        }, onFailure: { error in
            DispatchQueue.main.async {
                self.photoButton.isEnabled = true
                self.cameraButton.isEnabled = true
            }

        })
    }

    /// Retrieves the token for the Immersive Reader using Microsoft Entra authentication
    ///
    /// - Parameters:
    ///     -onSuccess: A closure that gets called when the token is successfully received using Microsoft Entra authentication.
    ///     -theToken: The token for the Immersive Reader received using Microsoft Entra authentication.
    ///     -onFailure: A closure that gets called when the token fails to be obtained from the Microsoft Entra authentication.
    ///     -theError: The error that occurred when the token fails to be obtained from the Microsoft Entra authentication.
    func getToken(onSuccess: @escaping (_ theToken: String) -> Void, onFailure: @escaping ( _ theError: String) -> Void) {

        let tokenForm = "grant_type=client_credentials&resource=https://cognitiveservices.azure.com/&client_id=" + Constants.clientId + "&client_secret=" + Constants.clientSecret
        let tokenUrl = "https://login.windows.net/" + Constants.tenantId + "/oauth2/token"

        var responseTokenString: String = "0"

        let url = URL(string: tokenUrl)!
        var request = URLRequest(url: url)
        request.httpBody = tokenForm.data(using: .utf8)
        request.httpMethod = "POST"

        let task = URLSession.shared.dataTask(with: request) { data, response, error in
            guard let data = data,
                let response = response as? HTTPURLResponse,
                // Check for networking errors.
                error == nil else {
                    print("error", error ?? "Unknown error")
                    onFailure("Error")
                    return
            }

            // Check for http errors.
            guard (200 ... 299) ~= response.statusCode else {
                print("statusCode should be 2xx, but is \(response.statusCode)")
                print("response = \(response)")
                onFailure(String(response.statusCode))
                return
            }

            let responseString = String(data: data, encoding: .utf8)
            print("responseString = \(String(describing: responseString!))")

            let jsonResponse = try? JSONSerialization.jsonObject(with: data, options: [])
            guard let jsonDictonary = jsonResponse as? [String: Any] else {
                onFailure("Error parsing JSON response.")
                return
            }
            guard let responseToken = jsonDictonary["access_token"] as? String else {
                onFailure("Error retrieving token from JSON response.")
                return
            }
            responseTokenString = responseToken
            onSuccess(responseTokenString)
        }

        task.resume()
    }

    /// Returns the text string after it has been extracted from an Image input.
    ///
    /// - Parameters:
    ///     -subscriptionKey: The Azure subscription key.
    ///     -pngImage: Image data in PNG format.
    /// - Returns: a string of text representing the
    func getTextFromImage(subscriptionKey: String, getTextUrl: String, pngImage: Data, onSuccess: @escaping (_ theToken: String) -> Void, onFailure: @escaping ( _ theError: String) -> Void) {

        let url = URL(string: getTextUrl)!
        var request = URLRequest(url: url)
        request.setValue(subscriptionKey, forHTTPHeaderField: "Ocp-Apim-Subscription-Key")
        request.setValue("application/octet-stream", forHTTPHeaderField: "Content-Type")

        // Two REST API calls are required to extract text. The first call is to submit the image for processing, and the next call is to retrieve the text found in the image.

        // Set the body to the image in byte array format.
        request.httpBody = pngImage

        request.httpMethod = "POST"

        let task = URLSession.shared.dataTask(with: request) { data, response, error in
            guard let data = data,
                let response = response as? HTTPURLResponse,
                // Check for networking errors.
                error == nil else {
                    print("error", error ?? "Unknown error")
                    onFailure("Error")
                    return
            }

            // Check for http errors.
            guard (200 ... 299) ~= response.statusCode else {
                print("statusCode should be 2xx, but is \(response.statusCode)")
                print("response = \(response)")
                onFailure(String(response.statusCode))
                return
            }

            let responseString = String(data: data, encoding: .utf8)
            print("responseString = \(String(describing: responseString!))")

            // Send the second call to the API. The first API call returns operationLocation which stores the URI for the second REST API call.
            let operationLocation = response.allHeaderFields["Operation-Location"] as? String

            if (operationLocation == nil) {
                print("Error retrieving operation location")
                return
            }

            // Wait 10 seconds for text recognition to be available as suggested by the Text API documentation.
            print("Text submitted. Waiting 10 seconds to retrieve the recognized text.")
            sleep(10)

            // HTTP GET request with the operationLocation url to retrieve the text.
            let getTextUrl = URL(string: operationLocation!)!
            var getTextRequest = URLRequest(url: getTextUrl)
            getTextRequest.setValue(subscriptionKey, forHTTPHeaderField: "Ocp-Apim-Subscription-Key")
            getTextRequest.httpMethod = "GET"

            // Send the GET request to retrieve the text.
            let taskGetText = URLSession.shared.dataTask(with: getTextRequest) { data, response, error in
                guard let data = data,
                    let response = response as? HTTPURLResponse,
                    // Check for networking errors.
                    error == nil else {
                        print("error", error ?? "Unknown error")
                        onFailure("Error")
                        return
                }

                // Check for http errors.
                guard (200 ... 299) ~= response.statusCode else {
                    print("statusCode should be 2xx, but is \(response.statusCode)")
                    print("response = \(response)")
                    onFailure(String(response.statusCode))
                    return
                }

                // Decode the JSON data into an object.
                let customDecoding = try! JSONDecoder().decode(TextApiResponse.self, from: data)

                // Loop through the lines to get all lines of text and concatenate them together.
                var textFromImage = ""
                for textLine in customDecoding.recognitionResults[0].lines {
                    textFromImage = textFromImage + textLine.text + " "
                }

                onSuccess(textFromImage)
            }
            taskGetText.resume()

        }

        task.resume()
    }

    // Structs used for decoding the Text API JSON response.
    struct TextApiResponse: Codable {
        let status: String
        let recognitionResults: [RecognitionResult]
    }

    struct RecognitionResult: Codable {
        let page: Int
        let clockwiseOrientation: Double
        let width, height: Int
        let unit: String
        let lines: [Line]
    }

    struct Line: Codable {
        let boundingBox: [Int]
        let text: String
        let words: [Word]
    }

    struct Word: Codable {
        let boundingBox: [Int]
        let text: String
        let confidence: String?
    }

}
Compilación y ejecución de la aplicación
Seleccione como destino un simulador o un dispositivo para establecer el esquema de archivo en Xcode.


En Xcode, presione Ctrl + R o seleccione el botón de reproducción para ejecutar el proyecto. La aplicación debe iniciarse en el simulador o el dispositivo especificados.
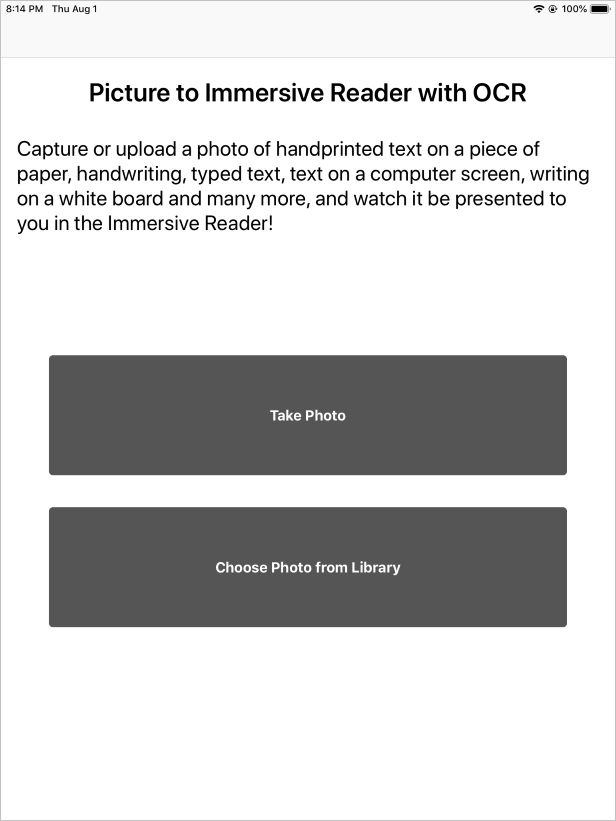
En la aplicación, debe ver lo siguiente:
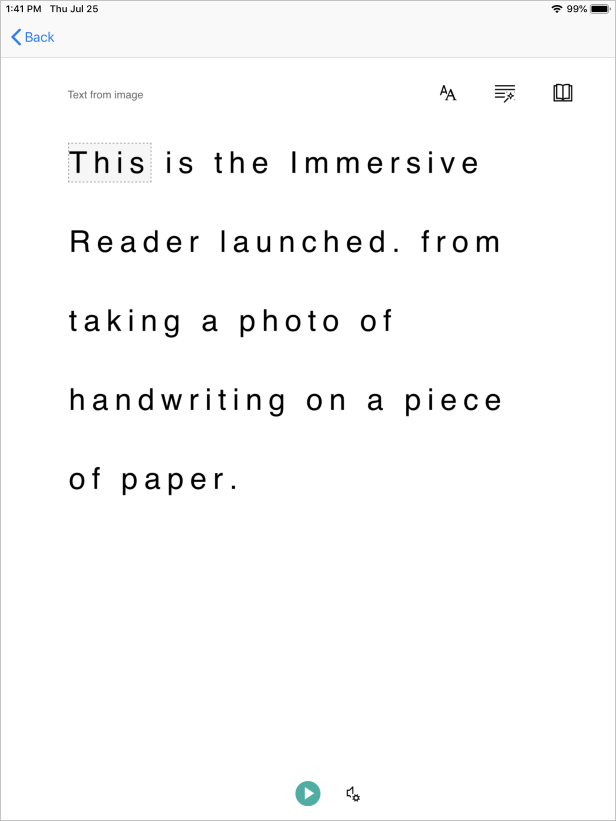
Tome o cargue una foto del texto presionando el botón Tomar foto o el botón Elegir foto de la biblioteca. A continuación, se inicia Immersive Reader y muestra el texto de la foto.