Sign in to Visual Studio on Windows
Applies to: ![]() Visual Studio
Visual Studio ![]() Visual Studio for Mac
Visual Studio for Mac
Note
This article applies to Visual Studio 2017. If you're looking for the latest Visual Studio documentation, see Visual Studio documentation. We recommend upgrading to the latest version of Visual Studio. Download it here
In this article, you'll learn:
- The benefits to account sign in
- How to sign in with an account
- How to add and switch user accounts
- How to access multiple user accounts
- How to sign out of an account
- How to update your profile
Warning
To work with resources configured for conditional access or multi-factor authentication, you need Visual Studio 2019 Update 16.6 or later. Earlier versions may trigger a degraded authentication experience, prompting reauthentication several times within the same Visual Studio session.
Benefits: why sign in?
While you don't have to sign in, there are many advantages to doing so.
| Benefit | Description |
|---|---|
| Extend your Visual Studio trial period | Use Visual Studio Professional or Visual Studio Enterprise for an additional 90 days, instead of being limited to the trial period of 30 days. |
| Unlock Visual Studio | Unlock Visual Studio if you use an account that's associated with a Visual Studio subscription or an Azure DevOps organization. |
| Synchronize your settings | Settings that you customize, such as key bindings, window layout, and color theme, apply immediately when you sign in to Visual Studio on any device. |
| Auto-connect to Azure services | Connect to services, such as Azure and Azure DevOps Services, in the IDE without prompting again for credentials for the same account. |
| Continue using our Community edition without interruptions | If the installation prompts you to sign-in periodically, sign in to the IDE to continue using Visual Studio Community without interruptions. |
| Get 'Visual Studio Dev Essentials' | This program includes free software, training, support, and more. |
Sign in with a Microsoft account or an organizational account
Choose a Microsoft account or a work or school account. If you don't have one, create a Microsoft account for free by selecting the link near the Sign in button.
Choose your preferred color theme and other UI settings. Visual Studio remembers these settings and synchronizes them across all Visual Studio environments you have signed in to. You can change the settings later if you open the Tools > Options menu in Visual Studio.
You can see that you're successfully signed in the upper-right corner of the Visual Studio environment. Unless you sign out, you're automatically signed in to Visual Studio whenever you start it, and any changes to synchronized settings are automatically applied.
Add and switch user accounts
If you have multiple Microsoft accounts and/or work or school accounts, you can add them all to Visual Studio so that you can access the resources from any account without having to sign in to it separately.
After you add multiple accounts on one machine, that set of accounts roams with you if you sign in to Visual Studio on another machine.
Note
Although the account names roam, the credentials do not. You'll be prompted to enter credentials for those other accounts the first time you attempt to use their resources on a new machine.
Add an additional account to Visual Studio
To add an additional account to Visual Studio:
Choose File > Account Settings.
Under All Accounts, choose Add an account.
On the Sign in to your account page, select the account or choose Use another account. Follow the prompts to enter the new account credentials.
(Optional) Now you can go to Server Explorer and see the Azure services associated with the account you just added. In Server Explorer, right-click on the Azure node and choose Manage and Filter Subscriptions. Choose the new account by clicking the drop-down arrow next to the current account, and then choose which subscriptions you want to display in Server Explorer. You should see all the services associated with the specified subscription. Even though you're not currently signed into Visual Studio with the second account, you are signed in to that account's services and resources. The same is true for Project > Add Connected Service and Team > Connect to Team Foundation Server.
Add an account using device code flow
In some cases, you can't sign in or add an account in the regular manner. This can happen if Internet Explorer is blocked for some reason, or if your network is behind a firewall. To work around this, you can enable device code flow to add an account or reauthenticate your account. Device code flow lets you sign in using a different browser or on a different machine—either physical or virtual (VM).
To sign in using device code flow:
Open the Accounts page under Tools > Options > Environment, and then select Enable device code flow when adding or re-authenticating an account. Choose OK to close the options pages.
Choose File > Account Settings to open the account management page.
Choose Add an account under All Accounts.
A dialog box shows you a URL and a code to paste into a web browser.
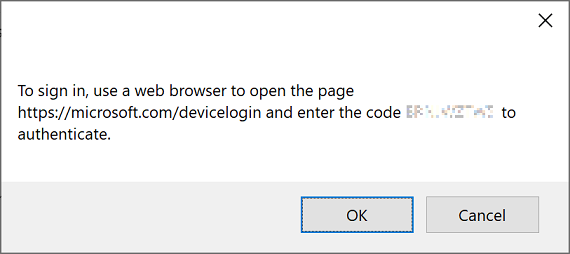
Press Ctrl+C to copy the text of the dialog, and then choose OK to close the dialog. Paste the text you copied into a text editor such as Notepad. This makes it easier to copy the code in the next step.
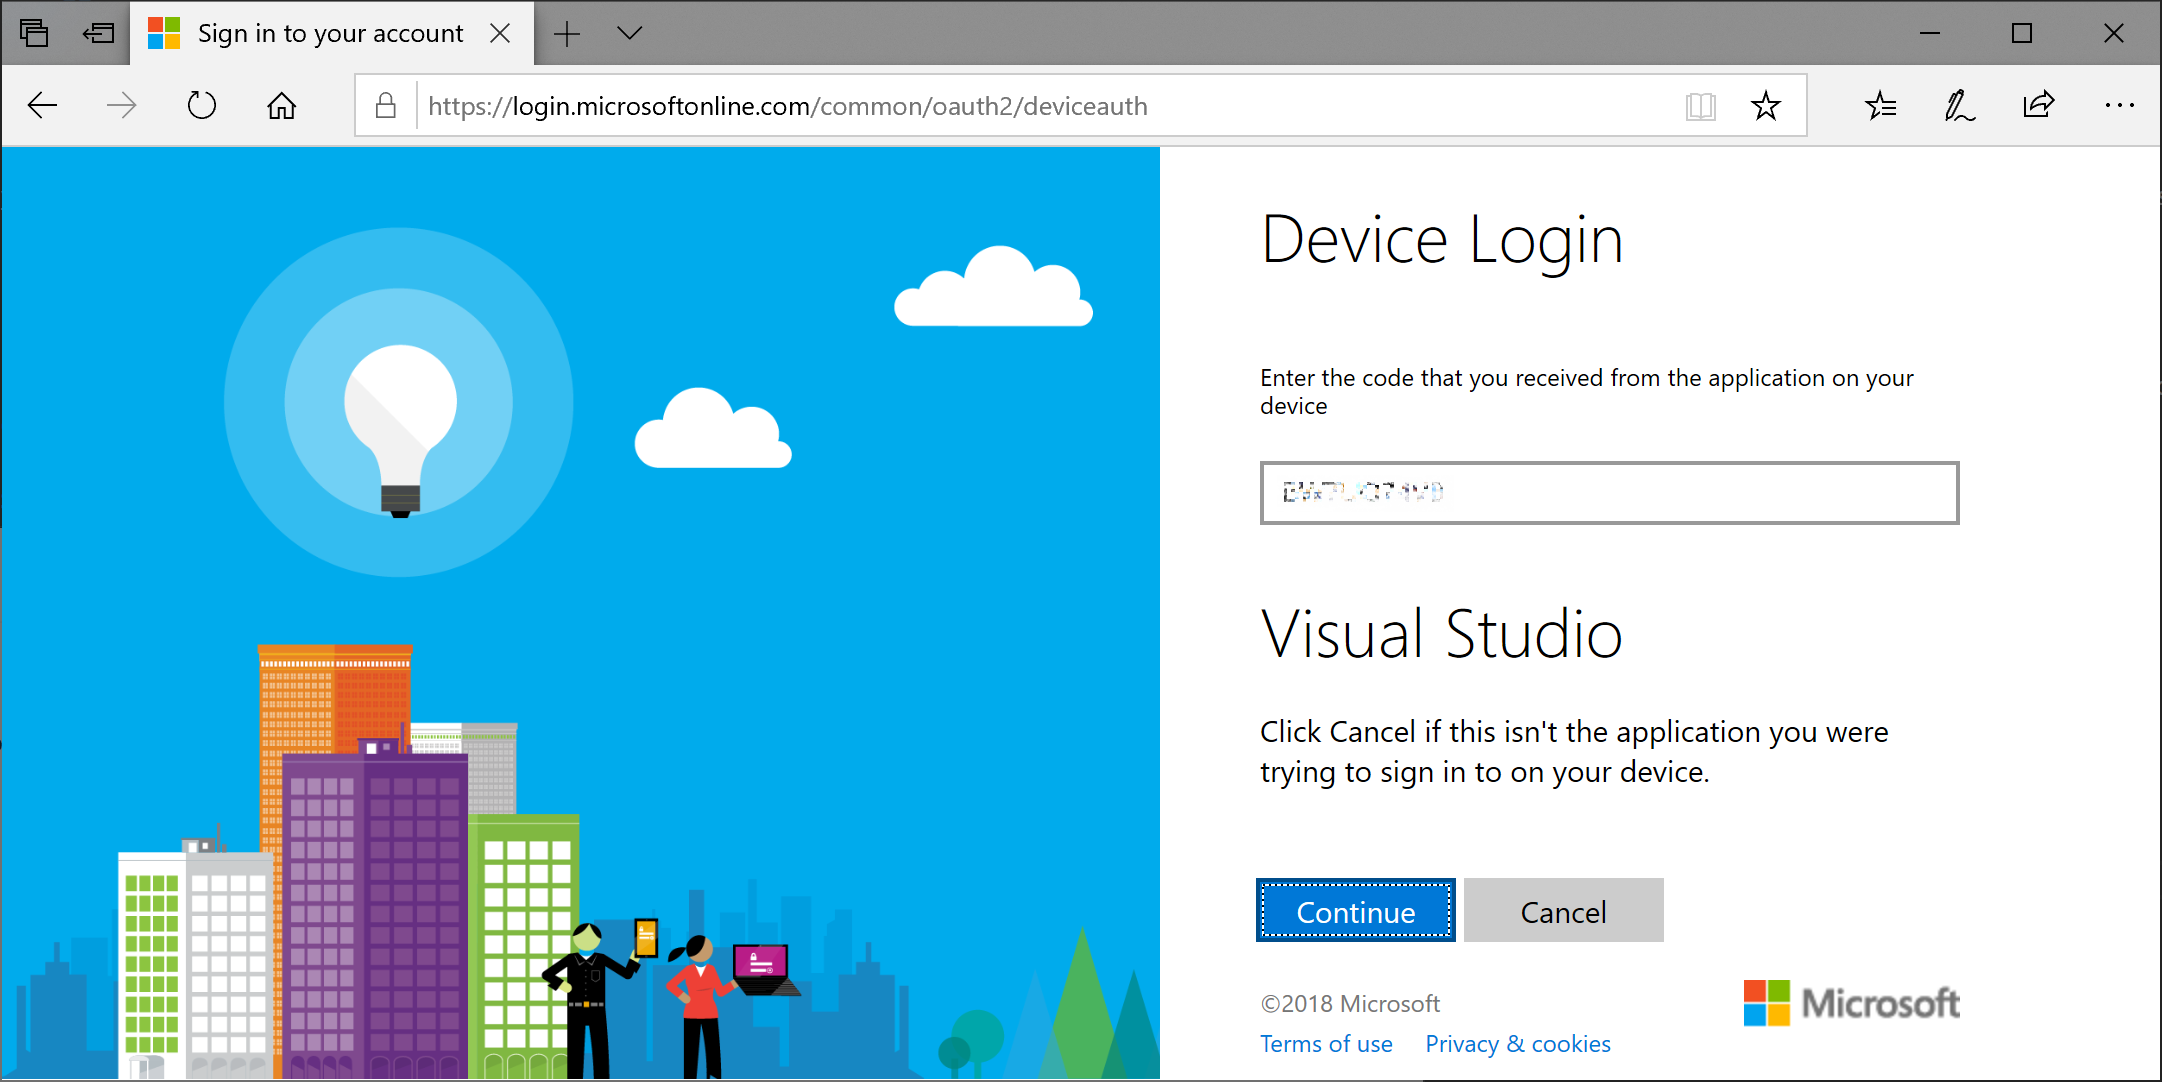
Navigate to the device login URL on the machine or web browser you want to use to sign in to Visual Studio, and then paste or enter the code you copied into the box that says Code.
The Visual Studio app name should appear further down on the page.
Under Visual Studio, choose Continue.
Follow the prompts to enter your account credentials.
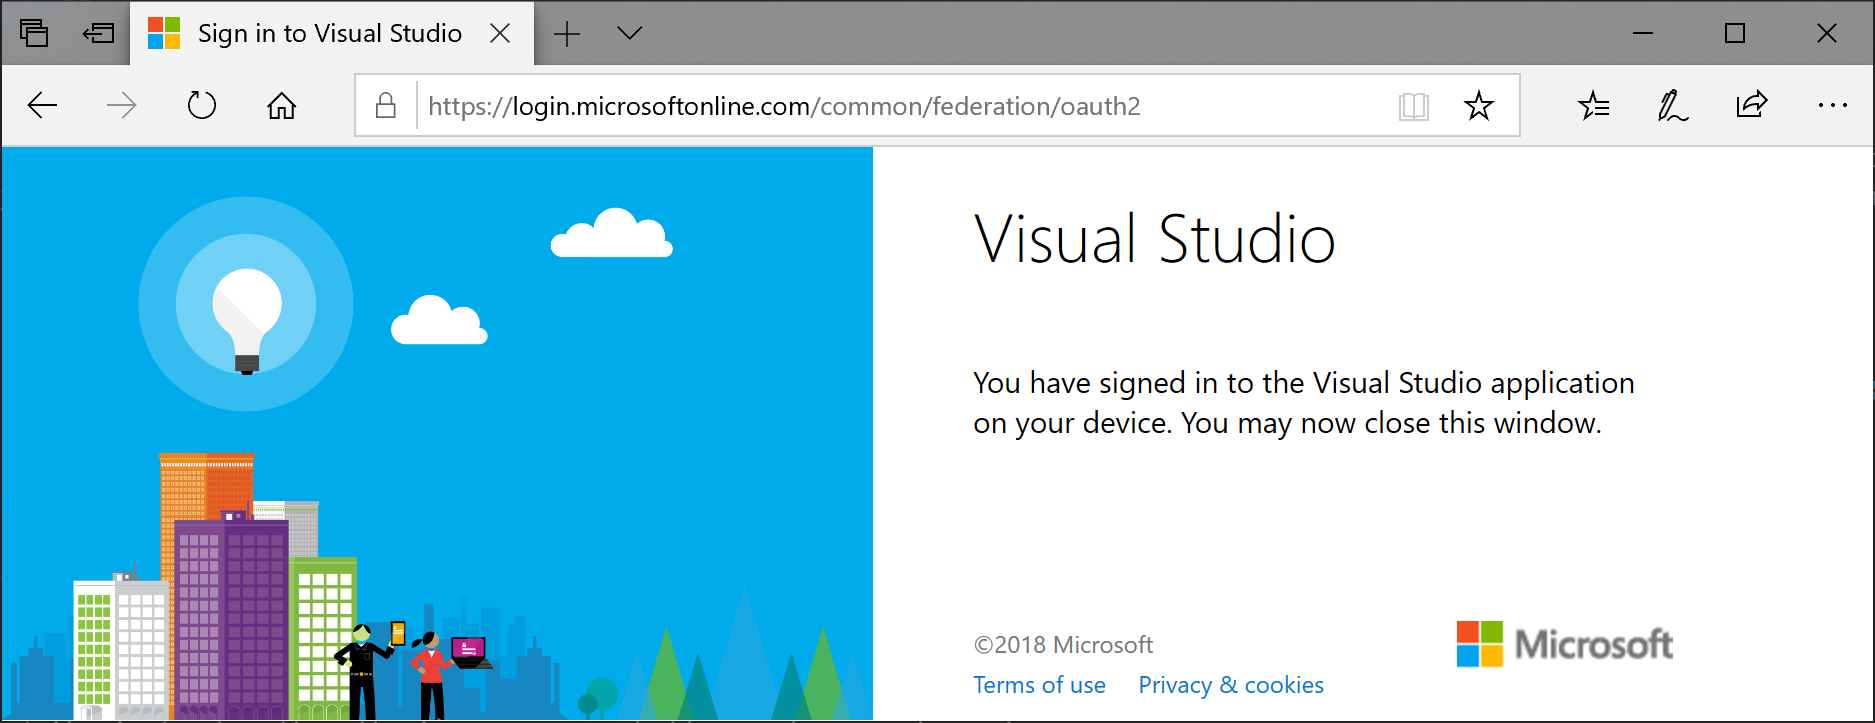
A page appears telling you that you've signed into Visual Studio on your device, and that you can close the browser window.
Go back to the account management page in Visual Studio and you'll see the newly added account listed under All Accounts. Choose Close.
Access multiple accounts associated with the Visual Studio sign-in account
After you sign-in to Visual Studio with a Microsoft or an organizational account, you can see the resources accessible from your accounts in places such as the Add Connected Service dialog, Server Explorer, and Team Explorer.
Azure, Application Insights, Azure DevOps, and Microsoft 365 services all support the streamlined sign-in experience.
Access your Azure account in Server Explorer
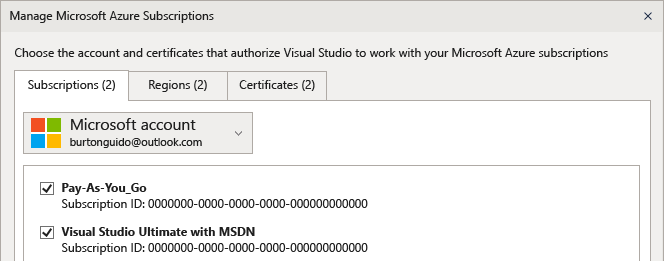
To open Server Explorer, choose View > Server Explorer (or, if you're using the "General" environment settings, press Ctrl+Alt+S). Expand the Azure node and notice that it contains the resources available in the Azure account that's associated with the account that you used to sign in to Visual Studio. It looks similar to the following image:
The first time you use Visual Studio on any specific device, the dialog only shows the subscriptions registered under the account that you signed in with. You can access resources for any of your other accounts directly from Server Explorer by right-clicking on the Azure node, choosing Manage and Filter Subscriptions, and then adding your accounts from the account picker control. You can then choose another account, if desired, by clicking the down arrow and choosing from the list of accounts. After choosing the account, you can customize which subscriptions under that account to display in Server Explorer.
The next time you open Server Explorer, the resources for that subscription are displayed.
Access your Azure account via Add Connected Service dialog
Open an existing project, or create a new project.
Choose the project node in Solution Explorer, and then right-click and choose Add > Connected Service.
The Connected Services window appears and shows you the list of services in the Azure account that's associated with your Visual Studio personalization account. You don't have to sign in separately to Azure. However, you do need to sign in to the other accounts the first time you attempt to access their resources from a different machine.
Access Azure Active Directory in a Web project
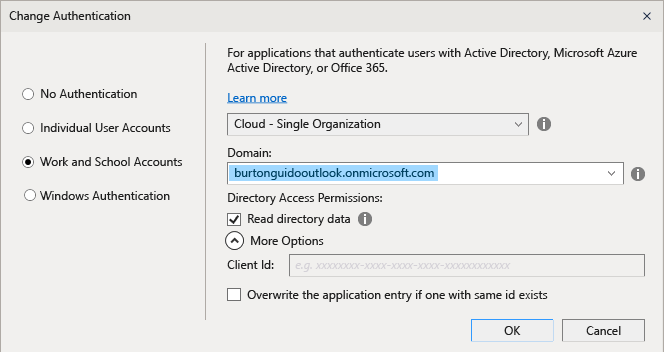
Azure Active Directory (Azure AD) enables support for end-user single sign-in in ASP.NET MVC web apps or AD authentication in web API services. Domain authentication is different from individual user account authentication. Users that have access to your Active Directory domain can use their existing Azure AD accounts to connect to your web applications. Microsoft 365 apps can also use domain authentication.
To see this in action, create a new ASP.NET Core Web Application project. In the New ASP.NET Core Web Application dialog box, choose the Web Application template, and then choose Change Authentication.
The Change Authentication dialog box appears where you can choose what kind of authentication to use in your application.
For more information about the different kinds of authentication in ASP.NET, see Create ASP.NET web projects in Visual Studio.
Access your Azure DevOps organization
From the main menu, choose Team > Manage Connections to open the Team Explorer - Connect window. Choose Manage Connections > Connect to a Project. In the Connect to a Project dialog, select a project from the list (or select Add TFS Server and enter the URL to your server). When you select a URL, you're logged in without having to reenter your credentials.
For more information, see Connect to projects in Team Explorer.
Sign out of account
- Select the icon with your profile name in the upper-right corner of the Visual Studio environment.
- Select Account settings...
- Select Sign out.
Update your account profile
- Go to File > Account Settings... and select the Manage Visual Studio profile link.
- In the browser window, select Edit profile and change the settings that you want.
- When you're done, select Save changes.
See also
- Troubleshooting: Subscription support
- Compare Visual Studio 2022 Editions