Trabajar con alertas de tvOS en Xamarin
Este artículo aborda el trabajo con UIAlertController para mostrar un mensaje de alerta al usuario en Xamarin.tvOS.
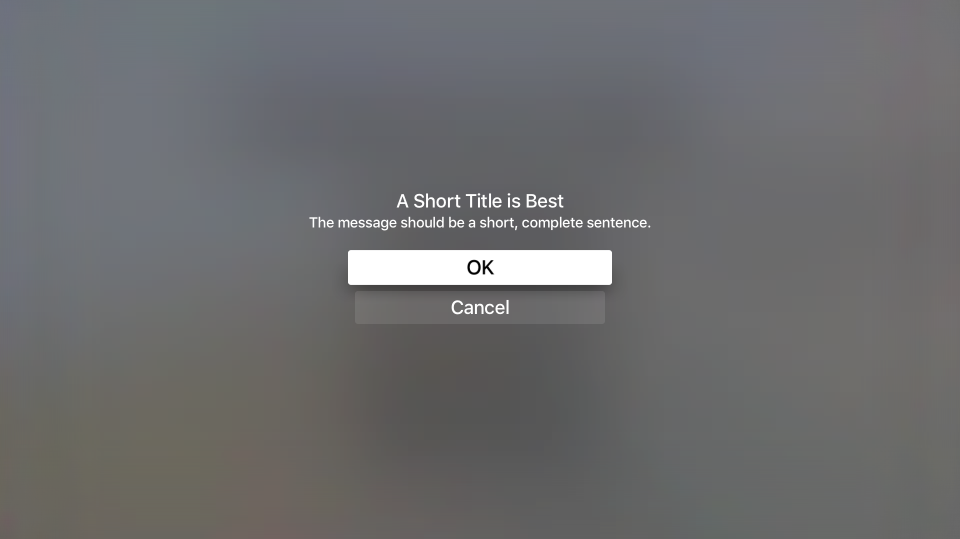
Si necesita llamar la atención del usuario de tvOS o pedirle permiso para realizar una acción destructiva (como eliminar un archivo), puede presentar un mensaje de alerta usando el UIAlertViewController:
Además de mostrar un mensaje, puede agregar botones y campos de texto a una alerta para que el usuario pueda responder a las acciones y dar su opinión.
Acerca de las alertas
Como se ha indicado anteriormente, las alertas se usan para llamar la atención del usuario e informarle del estado de su aplicación o solicitar su opinión. Las alertas deben presentar un Título, opcionalmente pueden tener un mensaje y uno o más botones o campos de texto.
Apple tiene las siguientes sugerencias para trabajar con alertas:
- Usar alertas con moderación: las alertas interrumpen el flujo del usuario con la aplicación e interrumpen la experiencia del usuario y, como tal, solo se deben usar para situaciones importantes como notificaciones de error, compras desde la aplicación y acciones destructivas.
- Proporcionar opciones útiles: si la alerta presenta opciones al usuario, debe asegurarse de que cada opción ofrece información crítica y proporciona acciones útiles para que el usuario realice.
Títulos y mensajes de alerta
Apple tiene las siguientes sugerencias para presentar el título de una alerta y un mensaje opcional:
- Usar títulos de varias palabras: el título de una alerta debe transmitir claramente el objetivo de la situación sin dejar de ser sencillo. Un título de una sola palabra rara vez proporciona suficiente información.
- Usar títulos descriptivos que no requieran un mensaje: siempre que sea posible, considere la posibilidad de que el título de la alerta sea lo suficientemente descriptivo como para que no sea necesario el texto de mensaje opcional.
- Hacer que el mensaje sea una frase corta y completa: si es necesario un mensaje opcional para transmitir el objetivo de la alerta, hágalo lo más sencillo posible y que sea una frase completa con las mayúsculas y la puntuación adecuadas.
Botones de alerta
Apple tiene la siguiente sugerencia para agregar botones a una alerta:
- Limitar a dos botones: siempre que sea posible, limite la alerta a un máximo de dos botones. Las alertas de un solo botón proporcionan información, pero no hay acciones. Las alertas de dos botones ofrecen una sencilla opción de acción sí/no.
- Usar títulos de botones concisos y lógicos: los títulos de botón sencillos, de una o dos palabras, que describan claramente la acción del botón son los que mejor funcionan. Para más información, consulte nuestra documentación Trabajar con botones.
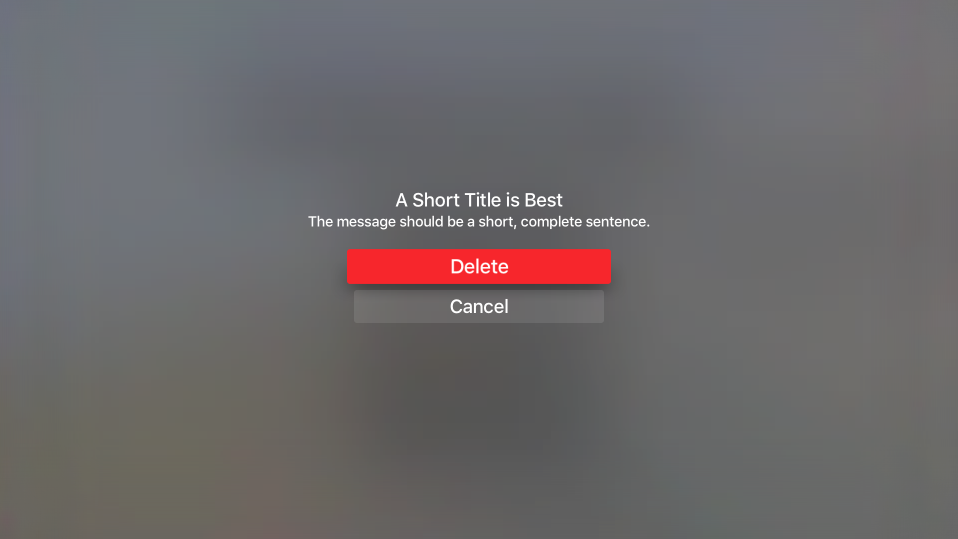
- Marcar claramente botones destructivos: para los botones que realizan una acción destructiva (como eliminar un archivo), márquelos claramente con el estilo
UIAlertActionStyle.Destructive.
Mostrar una alerta
Para mostrar una alerta, se crea una instancia del UIAlertViewController y se configura añadiendo Acciones (botones) y seleccionando el estilo de la Alerta. Por ejemplo, el código siguiente muestra una alerta Aceptar/Cancelar:
const string title = "A Short Title is Best";
const string message = "A message should be a short, complete sentence.";
const string acceptButtonTitle = "OK";
const string cancelButtonTitle = "Cancel";
const string deleteButtonTitle = "Delete";
...

var alertController = UIAlertController.Create (title, message, UIAlertControllerStyle.Alert);

// Create the action.
var acceptAction = UIAlertAction.Create (acceptButtonTitle, UIAlertActionStyle.Default, _ =>
    Console.WriteLine ("The \"OK/Cancel\" alert's other action occurred.")
);

var cancelAction = UIAlertAction.Create (cancelButtonTitle, UIAlertActionStyle.Cancel, _ =>
    Console.WriteLine ("The \"OK/Cancel\" alert's other action occurred.")
);

// Add the actions.
alertController.AddAction (acceptAction);
alertController.AddAction (cancelAction);
PresentViewController (alertController, true, null);
Echemos un vistazo a este código en detalle. En primer lugar, creamos una nueva alerta con el título y el mensaje especificados:
UIAlertController.Create (title, message, UIAlertControllerStyle.Alert)
A continuación, para cada botón que queremos mostrar en la alerta, creamos una acción que define el título del botón, su estilo y la acción que queremos realizar si se presiona el botón:
UIAlertAction.Create ("Button Title", UIAlertActionStyle.Default, _ =>
    // Do something when the button is pressed
    ...
);
La enumeración UIAlertActionStyle permite establecer el estilo del botón como uno de los siguientes:
- Valor predeterminado: el botón será el botón predeterminado seleccionado cuando se muestre la alerta.
- Cancelar: el botón es el botón Cancelar de la alerta.
- Destructivo: resalta el botón como una acción destructiva, como eliminar un archivo. Actualmente, tvOS representa el botón Destructivo con un fondo rojo.
El método AddAction agrega la acción dada al UIAlertViewController y finalmente el método PresentViewController (alertController, true, null) muestra la alerta dada al usuario.
Agregar campos de texto
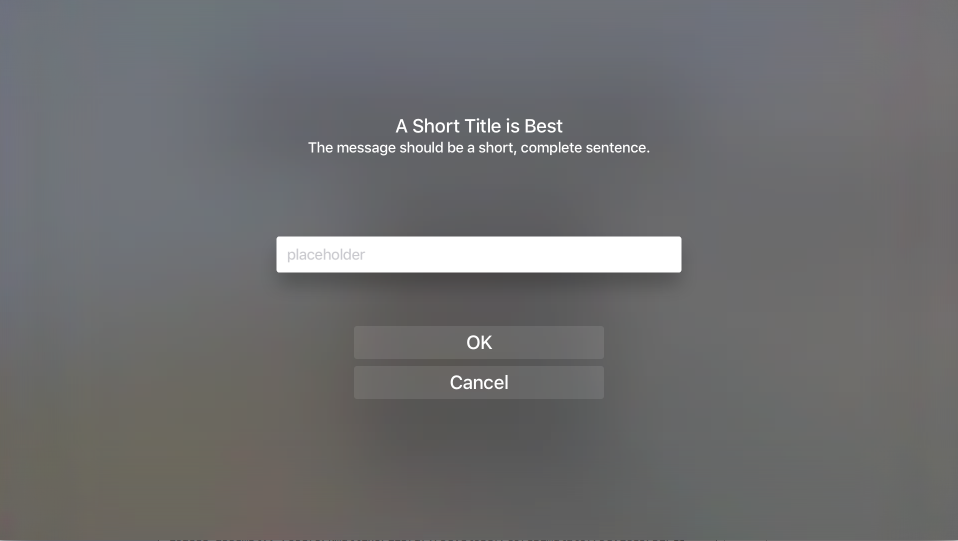
Además de agregar Acciones (botones) a la alerta, puede agregar Campos de texto a la Alerta para permitir que el usuario rellene información como id. de usuario y contraseñas:
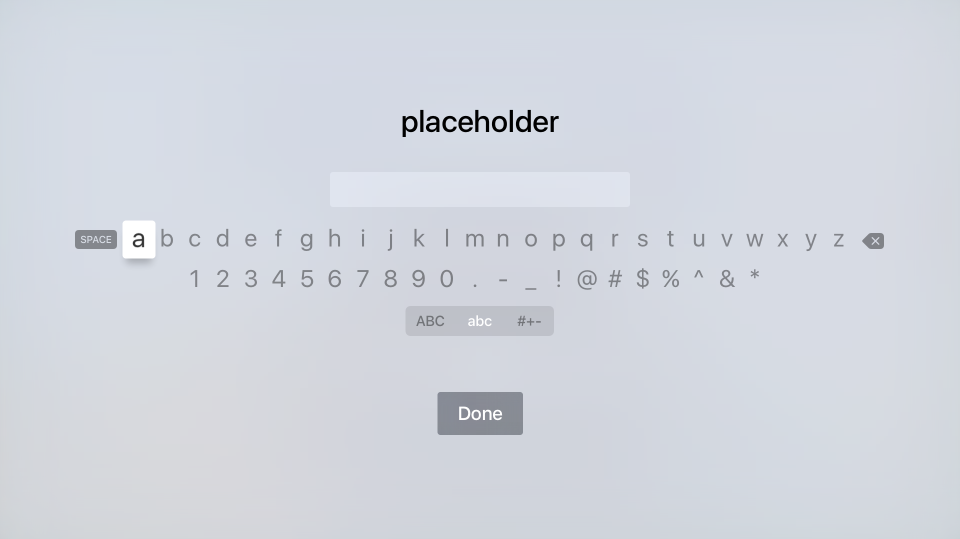
Si el usuario selecciona el Campo de texto, aparecerá el teclado estándar de tvOS que le permitirá escribir un valor para el campo:
El siguiente código muestra una alerta de Aceptar/Cancelar con un único campo de texto para introducir un valor:
UIAlertController alert = UIAlertController.Create(title, description, UIAlertControllerStyle.Alert);
UITextField field = null;

// Add and configure text field
alert.AddTextField ((textField) => {
    // Save the field
    field = textField;

    // Initialize field
    field.Placeholder = placeholder;
    field.Text = text;
    field.AutocorrectionType = UITextAutocorrectionType.No;
    field.KeyboardType = UIKeyboardType.Default;
    field.ReturnKeyType = UIReturnKeyType.Done;
    field.ClearButtonMode = UITextFieldViewMode.WhileEditing;

});

// Add cancel button
alert.AddAction(UIAlertAction.Create("Cancel",UIAlertActionStyle.Cancel,(actionCancel) => {
    // User canceled, do something
    ...
}));

// Add ok button
alert.AddAction(UIAlertAction.Create("OK",UIAlertActionStyle.Default,(actionOK) => {
    // User selected ok, do something
    ...
}));

// Display the alert
controller.PresentViewController(alert,true,null);
El método AddTextField agrega un nuevo campo de texto a la alerta que después puede configurar estableciendo propiedades como el texto del marcador de posición (el texto que aparece cuando el campo está vacío), el valor predeterminado del texto y el tipo de teclado. Por ejemplo:
// Initialize field
field.Placeholder = placeholder;
field.Text = text;
field.AutocorrectionType = UITextAutocorrectionType.No;
field.KeyboardType = UIKeyboardType.Default;
field.ReturnKeyType = UIReturnKeyType.Done;
field.ClearButtonMode = UITextFieldViewMode.WhileEditing;
Para poder actuar posteriormente sobre el valor del Campo de texto, también estamos guardando una copia usando el siguiente código:
UITextField field = null;
...

// Add and configure text field
alert.AddTextField ((textField) => {
    // Save the field
    field = textField;
    ...
});
Después de que el usuario haya introducido un valor en el campo de texto, podemos usar la variable field para acceder a ese valor.
Clase auxiliar del controlador de vistas de alertas
Dado que mostrar tipos de Alertas simples y comunes usando UIAlertViewController puede suponer bastante código duplicado, puede usar una clase auxiliar para reducir la cantidad de código repetitivo. Por ejemplo:
using System;
using Foundation;
using UIKit;
using System.CodeDom.Compiler;

namespace UIKit
{
    /// <summary>
    /// Alert view controller is a reusable helper class that makes working with <c>UIAlertViewController</c> alerts
    /// easier in a tvOS app.
    /// </summary>
    public class AlertViewController
    {
        #region Static Methods
        public static UIAlertController PresentOKAlert(string title, string description, UIViewController controller) {
            // No, inform the user that they must create a home first
            UIAlertController alert = UIAlertController.Create(title, description, UIAlertControllerStyle.Alert);

            // Configure the alert
            alert.AddAction(UIAlertAction.Create("OK",UIAlertActionStyle.Default,(action) => {}));

            // Display the alert
            controller.PresentViewController(alert,true,null);

            // Return created controller
            return alert;
        }

        public static UIAlertController PresentOKCancelAlert(string title, string description, UIViewController controller, AlertOKCancelDelegate action) {
            // No, inform the user that they must create a home first
            UIAlertController alert = UIAlertController.Create(title, description, UIAlertControllerStyle.Alert);

            // Add cancel button
            alert.AddAction(UIAlertAction.Create("Cancel",UIAlertActionStyle.Cancel,(actionCancel) => {
                // Any action?
                if (action!=null) {
                    action(false);
                }
            }));

            // Add ok button
            alert.AddAction(UIAlertAction.Create("OK",UIAlertActionStyle.Default,(actionOK) => {
                // Any action?
                if (action!=null) {
                    action(true);
                }
            }));

            // Display the alert
            controller.PresentViewController(alert,true,null);

            // Return created controller
            return alert;
        }

        public static UIAlertController PresentDestructiveAlert(string title, string description, string destructiveAction, UIViewController controller, AlertOKCancelDelegate action) {
            // No, inform the user that they must create a home first
            UIAlertController alert = UIAlertController.Create(title, description, UIAlertControllerStyle.Alert);

            // Add cancel button
            alert.AddAction(UIAlertAction.Create("Cancel",UIAlertActionStyle.Cancel,(actionCancel) => {
                // Any action?
                if (action!=null) {
                    action(false);
                }
            }));

            // Add ok button
            alert.AddAction(UIAlertAction.Create(destructiveAction,UIAlertActionStyle.Destructive,(actionOK) => {
                // Any action?
                if (action!=null) {
                    action(true);
                }
            }));

            // Display the alert
            controller.PresentViewController(alert,true,null);

            // Return created controller
            return alert;
        }

        public static UIAlertController PresentTextInputAlert(string title, string description, string placeholder, string text, UIViewController controller, AlertTextInputDelegate action) {
            // No, inform the user that they must create a home first
            UIAlertController alert = UIAlertController.Create(title, description, UIAlertControllerStyle.Alert);
            UITextField field = null;

            // Add and configure text field
            alert.AddTextField ((textField) => {
                // Save the field
                field = textField;

                // Initialize field
                field.Placeholder = placeholder;
                field.Text = text;
                field.AutocorrectionType = UITextAutocorrectionType.No;
                field.KeyboardType = UIKeyboardType.Default;
                field.ReturnKeyType = UIReturnKeyType.Done;
                field.ClearButtonMode = UITextFieldViewMode.WhileEditing;

            });

            // Add cancel button
            alert.AddAction(UIAlertAction.Create("Cancel",UIAlertActionStyle.Cancel,(actionCancel) => {
                // Any action?
                if (action!=null) {
                    action(false,"");
                }
            }));

            // Add ok button
            alert.AddAction(UIAlertAction.Create("OK",UIAlertActionStyle.Default,(actionOK) => {
                // Any action?
                if (action!=null && field !=null) {
                    action(true, field.Text);
                }
            }));

            // Display the alert
            controller.PresentViewController(alert,true,null);

            // Return created controller
            return alert;
        }
        #endregion

        #region Delegates
        public delegate void AlertOKCancelDelegate(bool OK);
        public delegate void AlertTextInputDelegate(bool OK, string text);
        #endregion
    }
}
Usando esta clase, la visualización y respuesta a alertas sencillas puede hacerse de la siguiente manera:
#region Custom Actions
partial void DisplayDestructiveAlert (Foundation.NSObject sender) {
    // User helper class to present alert
    AlertViewController.PresentDestructiveAlert("A Short Title is Best","The message should be a short, complete sentence.","Delete",this, (ok) => {
        Console.WriteLine("Destructive Alert: The user selected {0}",ok);
    });
}

partial void DisplayOkCancelAlert (Foundation.NSObject sender) {
    // User helper class to present alert
    AlertViewController.PresentOKCancelAlert("A Short Title is Best","The message should be a short, complete sentence.",this, (ok) => {
        Console.WriteLine("OK/Cancel Alert: The user selected {0}",ok);
    });
}

partial void DisplaySimpleAlert (Foundation.NSObject sender) {
    // User helper class to present alert
    AlertViewController.PresentOKAlert("A Short Title is Best","The message should be a short, complete sentence.",this);
}

partial void DisplayTextInputAlert (Foundation.NSObject sender) {
    // User helper class to present alert
    AlertViewController.PresentTextInputAlert("A Short Title is Best","The message should be a short, complete sentence.","placeholder", "", this, (ok, text) => {
        Console.WriteLine("Text Input Alert: The user selected {0} and entered `{1}`",ok,text);
    });
}
#endregion
Resumen
En este artículo se ha tratado el trabajo con UIAlertController para mostrar un mensaje de alerta al usuario en Xamarin.tvOS. En primer lugar, se mostró cómo mostrar una alerta simple y agregar botones. A continuación, se mostró cómo agregar campos de texto a una alerta. Por último, se mostró cómo usar una clase auxiliar para reducir la cantidad de código repetitivo necesario para mostrar una alerta.


