Connect Azure Front Door Premium to an internal load balancer origin with Private Link
This article guides you through how to configure Azure Front Door Premium to connect to your internal load balancer origin using the Azure Private Link service.
Prerequisites
- An Azure account with an active subscription. Create an account for free.
- Review Secure your origin with Private Link to understand how Private Link works with Azure Front Door.
- Create a Private Link service for your origin web servers.
Enable private connectivity to an internal load balancer
In this section, you map the Private Link service to a private endpoint created in Azure Front Door.
Sign in to the Azure portal.
Navigate to your Azure Front Door Premium profile, then select Origin groups from under Settings in the left side menu pane.
Select an existing or create a new origin group to add an internal load balancer origin.
Select + Add an origin to add new origin. Select or enter the following settings to configure the internal load balancer origin.
Note
The hostname must be a valid domain name, IPv4 or IPv6. The hostname can be the private IP of the internal load balancer or a domain name.

- Name - Enter a name to identify this origin.
- Origin type - Select the Custom origin type.
- Host name - The host name is used for SNI (SSL negotiation) and should match your server side certificate. |
- Origin host header | The origin host header can be the private link private IP for the internal load balancer or a valid domain name.
- Certificate subject name validation - Select the checkbox to enable certificate subject name validation. This validation checks the certificate subject name against the host name. If the certificate subject name doesn't match the host name, the connection is rejected. This validation is required if private link is enabled.
- HTTP port - 80 (default)
- HTTPS port 443 (default)
- Priority - You can determine if this origin has higher priority than other origins in the origin group. With this value you can set primary, secondary, and backup origins. Default value is 1 for all origins.
- Weight - 1000 (default). Assign weights to your origins to determine how traffic gets distributed. For example, if you have two origins with weights 1000 and 2000, then the second origin receives twice as much traffic as the first origin.
- Private link - Select the checkbox to enable private link for this origin.
- Select a private link:
- In my directory - Select this option if you want to use your own private link service.
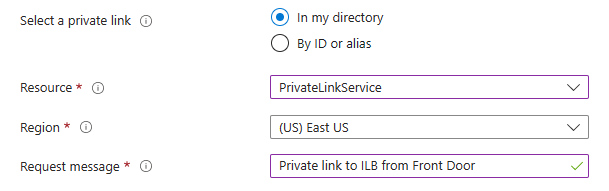
- By ID or alias - Select this option if you want to use a private link service that is shared with you. You need to enter the resource ID of the private link service.

- In my directory - Select this option if you want to use your own private link service.
- Region - Select the region that is the same or closest to your origin.
- Request message - This message is sent to the resource owner to assist them in the connection management process.
- Status - Leave checked to enable the origin.
Select Add to add the internal load balancer origin and then select Update to save the origin group settings.
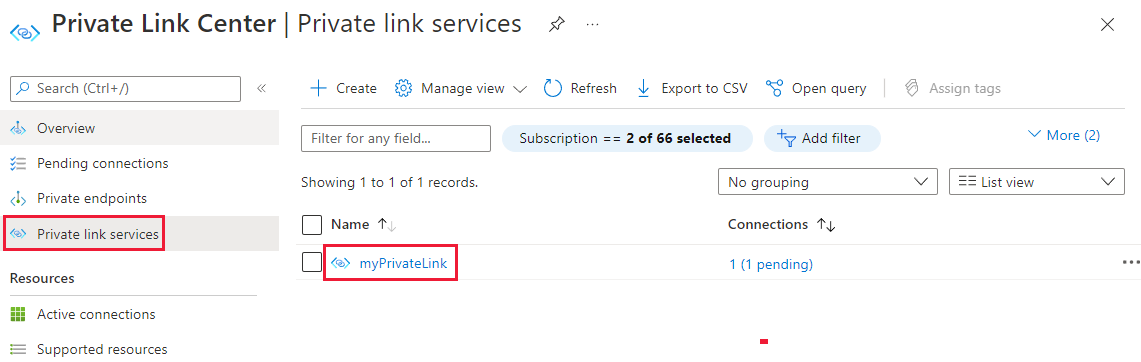
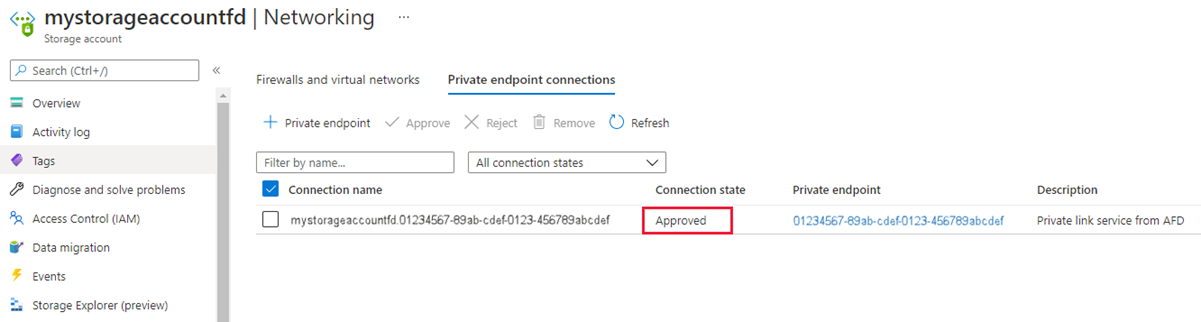
Approve private endpoint connection
Go to the Private Link Center and select Private link services. Then select the private link service you created for the internal load balancer.
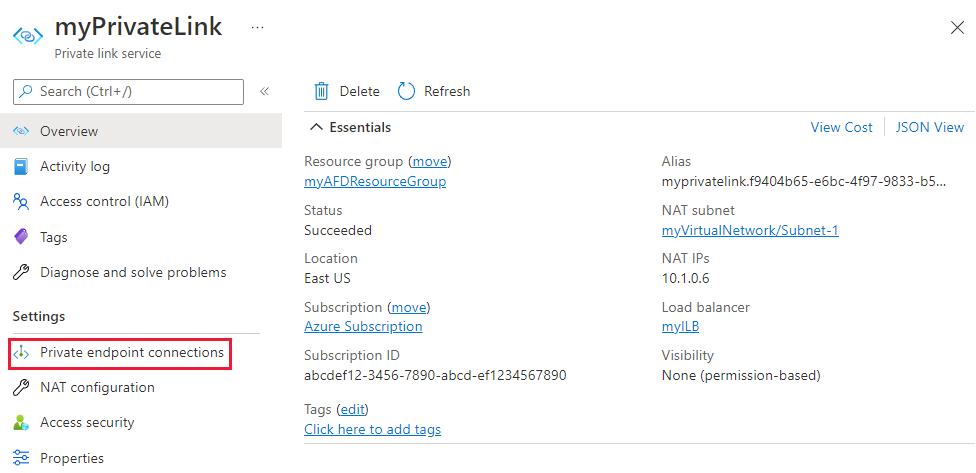
Select Private endpoint connections from under Settings in the left side menu pane.
Select the pending private endpoint request from Azure Front Door then select Approve. When prompted, select Yes to confirm you want to establish this connection.
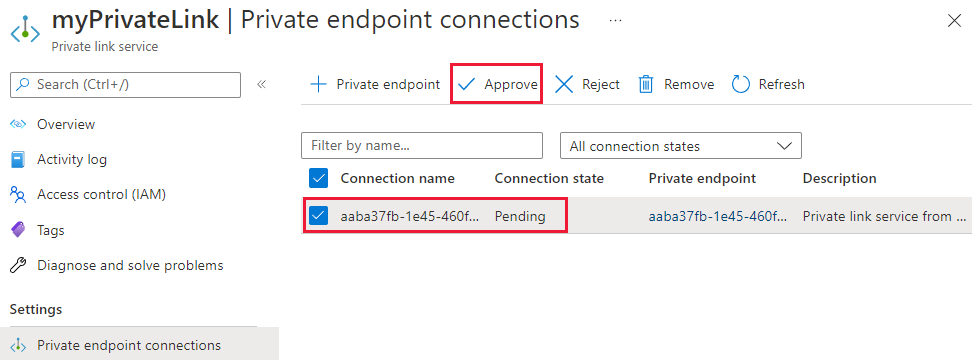
The connection state should change to Approved. It may take a couple of minutes for the connection to fully establish. You can now access your internal load balancer from Azure Front Door.
Next steps
Learn about Private Link service.
Tagasiside
Varsti tulekul: 2024. aasta jooksul tühistame GitHubi probleemide funktsiooni sisutagasiside mehhanismina ja asendame selle uue tagasisidesüsteemiga. Lisateabe saamiseks vt https://aka.ms/ContentUserFeedback.
Esita ja vaata tagasisidet