Migrate to Windows 10/11 Pro or Enterprise on Surface Hub
Surface Hub 2S is designed to facilitate collaboration in meeting-room environments. Instead, You can run Windows 10/11 Pro or Enterprise to use your Surface Hub 2S like any other PC. For Surface Hub 3, see Migrate to Windows 11 Pro or Enterprise on Surface Hub 3.
Important
This migration process requires you to follow the specific procedure described in this article. Before you continue, read Solution components and Migration and installation workflow.
Note
When you install Windows 10/11 Pro or Enterprise, you need a new license distinct from the existing license provided with the device.
Start the migration using a separate PC and the downloadable Surface UEFI Configurator tool. The tool creates a package that contains a new UEFI setting that you apply to Surface Hub.
Surface UEFI Configurator works as an interface into Surface Enterprise Management Mode (SEMM). It enables centralized management of firmware settings on Surface devices in a corporate environment. For more information, see Microsoft Surface Enterprise Management Mode.
Solution components
- Surface Hub 2S device running Windows 10 Team or Surface Hub 3 running Microsoft Teams Rooms on Windows experience
- Separate device running Windows 10/11
- Surface UEFI Configurator tool to create the SEMM package
- Windows 10/11 Pro or Enterprise OS image, version 20H2 or later
- Two USB drives that have 16 GB of storage, FAT32 format
- The drivers and firmware for Windows 10 Pro and Enterprise in a Surface Hub 2S Microsoft Windows Installer (MSI) file
- Internet connection
- Imaging solution (optional)
Migration and installation workflow summary
| Step | Action | Summary |
|---|---|---|
| 1 | Verify the UEFI version on the Surface Hub 2S. | The UEFI version must be version 694.2938.768.0 or later. |
| 2 | Download Surface UEFI Configurator and the Surface Hub 2S drivers and firmware. | On the Surface Tools for IT page, select Download. Then select and download the Surface UEFI Configurator MSI file and install it on a separate PC. Also, download the Drivers and firmware for Windows 10 Pro and Enterprise OS on Surface Hub 2S MSI file. Save this package for use in step 5. |
| 3 | Prepare the SEMM certificate. | Prepare the certificate required to run Surface UEFI Configurator, or use your current certificate. |
| 4 | Create a SEMM package. | Start Surface UEFI Configurator to create a SEMM package on a USB drive. This package will contain the configuration files you must apply on Surface Hub 2S. Copy these SEMM package files to a folder on your PC. |
| 5 | Load a USB flash drive with Windows 10 image, the SEMM package, and drivers and firmware. | Create a USB drive that contains a Windows 10 image. In this example, the drive is named BOOTME. Add the drivers and firmware for Windows 10 Pro and Enterprise OS on Surface Hub 2S (Step 2) and the SEMM package files (Step 4) to the BOOTME drive. |
| 6 | Update the UEFI on the Surface Hub 2S to enable OS migration. | Use the BOOTME drive to boot the Surface Hub 2S to the UEFI menu and install the SEMM package. |
| 7 | Install Windows 10 Pro or Enterprise. | Use the BOOTME drive to install Windows 10 Pro or Enterprise version 20H2 or later. |
| 8 | Install drivers and firmware for Windows 10 Pro and Enterprise. | To ensure that your device has all the latest updates and drivers, install the Drivers and firmware for Windows 10 Pro and Enterprise OS on Surface Hub 2S MSI file. |
| 9 | Configure Surface Hub 2S as a personal productivity device. | Enable the recommended settings and applications to optimize Surface Hub 2S as a personal productivity device. |
Verify the UEFI version on Surface Hub 2S
Before you migrate Surface Hub from Windows 10 Team to Windows 10 Desktop, you need UEFI version 694.2938.768.0 or later.
To verify the UEFI version on your system:
On the Surface Hub 2S home page, select Start, and then open the Surface app (All Apps > Surface).
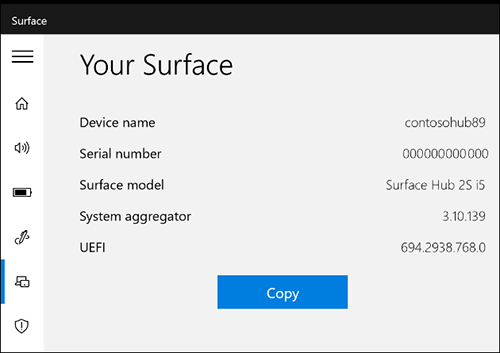
Select Your Surface to display information about Surface Hub, including the current UEFI version on the device.
If the UEFI version is 694.2938.768.0 or later, as the following image shows, you can create the SEMM package to enable OS migration.
If the UEFI version is earlier than version 694.2938.768.0, use one of the following methods to get a newer version
Update UEFI via Windows Update
On your Surface Hub 2S, sign in as Admin.
Note
You'll need to reset the device if you don't know your username or admin password. For more information, see Reset and recovery for Surface Hub 2S.
Go to All apps > Settings > Update and Security > Windows Update, and install all updates.
Restart the device.
Verify the UEFI version by using the Surface app. If the UEFI version isn't version 694.2938.768.0 or later, repeat these steps or use the following procedure to get the latest UEFI version.
Update the UEFI via bare metal recovery (BMR) image
Go to the Surface recovery site and select Surface Hub 2S.
Enter your Hub serial number. It's on the back of the Hub next to the power connection.
Follow the directions to download the image onto a formatted USB drive by installing the Windows 10 Team 2020 Update.
the device enters the out-of-box experience (OOBE) setup after the update. You don't need to complete the setup. The UEFI version is already updated. Instead, power down the device by holding the power button until the screen turns off.
Download Surface UEFI Configurator and Surface Hub 2S drivers and firmware
On a separate PC, follow these steps:
On the Surface Tools for IT page, select Download.
Select and download the Surface UEFI Configurator MSI file and install it on a separate PC. The Surface UEFI Configurator tool can't be run on a Surface Hub 2S while the Windows 10 Team edition is installed.
Download the Surface Hub 2S drivers and firmware Windows Installer MSI file. You'll use this file when you install the new operating system.
Prepare the SEMM certificate
You must prepare a certificate if this is the first time you have used Surface UEFI Configurator. This certificate ensures that after a device is enrolled in SEMM, you can modify UEFI settings only by using packages created with the approved certificate.
How you get a certificate depends on the size or complexity of your organization:
Enterprise organizations typically maintain their own infrastructure to generate certificates according to standard security practices.
Medium-sized businesses and others often choose to get certificates from partner providers. This option is recommended for organizations that don't have as much IT expertise or lack a dedicated IT security team.
Alternatively, you can generate a self-signed certificate using a PowerShell script. For more information, see the Surface Enterprise Management Mode certificate requirements. Or you can use PowerShell to create your own certificate. For more information, see the Self-signed certificate documentation.
The SEMM package that Surface UEFI Configurator creates must be secured with a certificate. The certificate verifies the signature of configuration files before UEFI settings can be applied. For more information, see the SEMM documentation.
Create a SEMM package
On a separate PC, install the Surface UEFI Configurator tool you downloaded earlier.
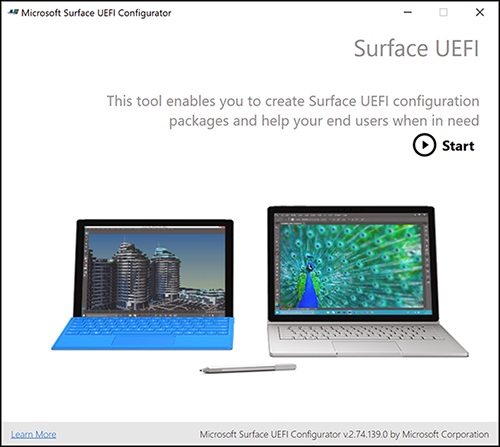
Open Surface UEFI Configurator, and then select Start.
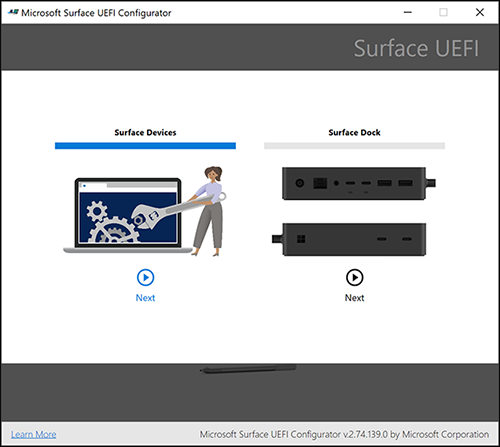
Select Surface Devices, and then select Next.
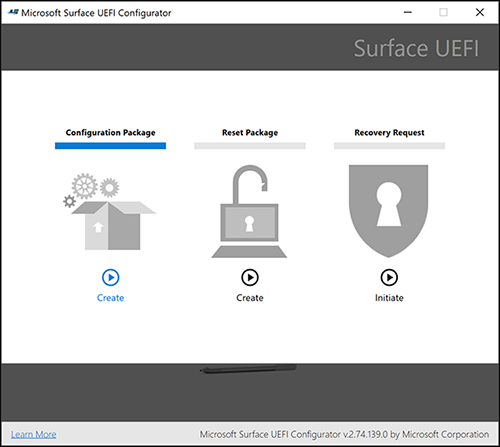
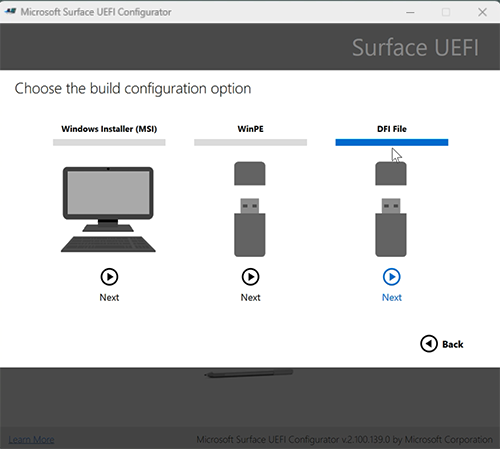
Select Configuration Package.
Select DFI File.
Select Certificate Protection.
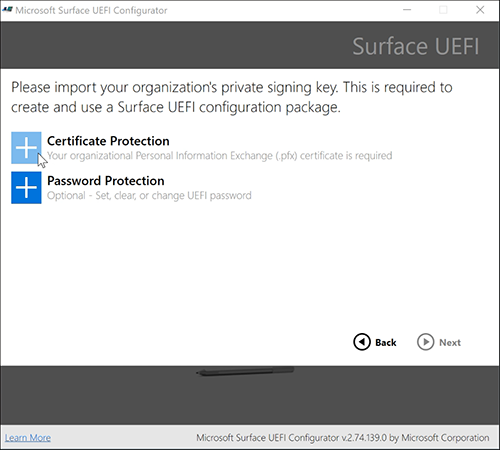
You'll be prompted to add your certificate .pfx file.

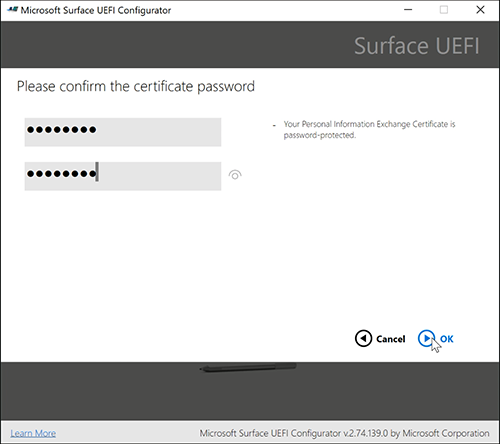
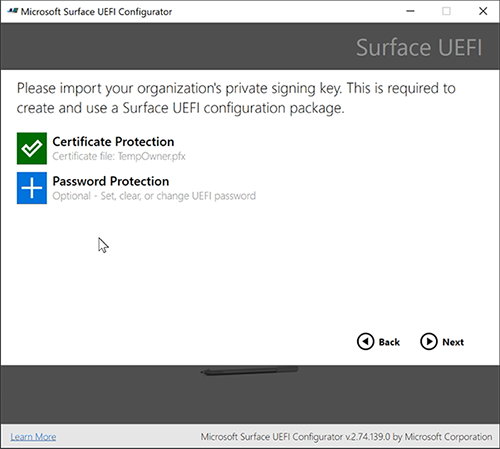
Enter your certificate password, and then select OK.
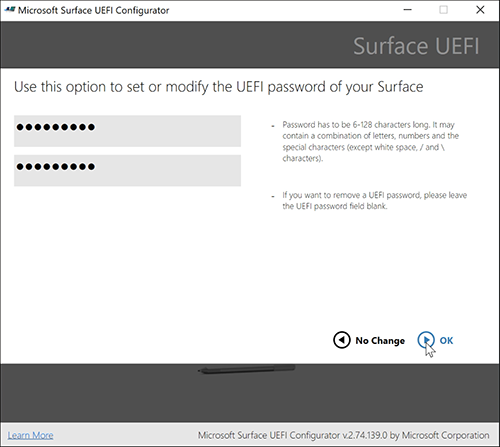
Select Password Protection to add a password to the Surface UEFI. You'll need this password whenever you boot to the UEFI. We strongly recommend that you set a UEFI password that you'll use on Surface Hub 2S.
Set a UEFI password, and then select OK.
Important
Save the password in a secure location accessible to your IT admins who manage Surface Hub. If this password is lost, it can't be recovered.
Select Surface Hub 2S, and then select Next.
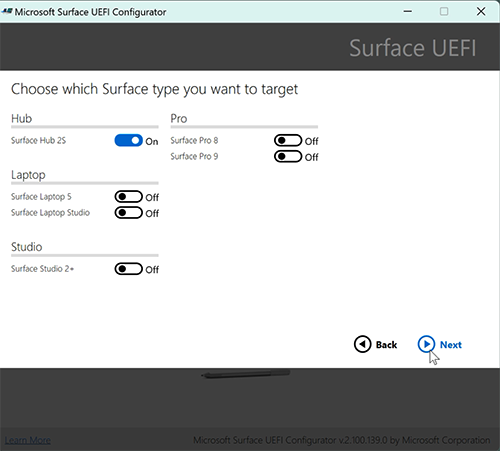
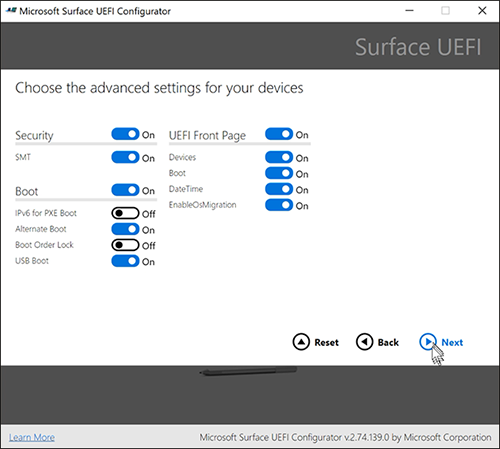
Select Next again.
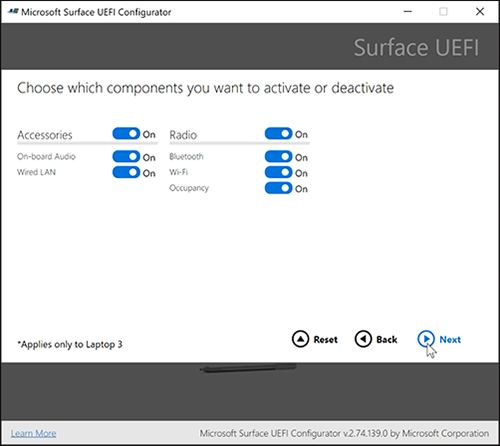
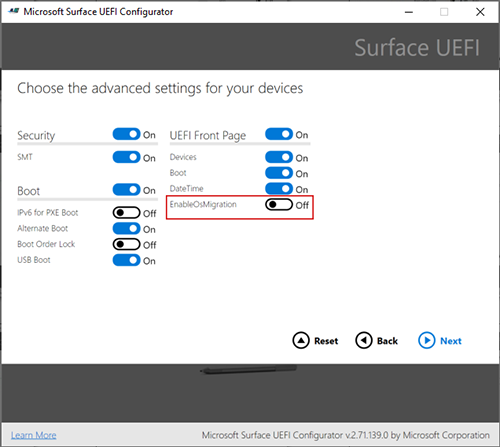
To allow installation of Windows 10/11 Pro or Enterprise, turn on EnableOsMigration, and then select Next.
Manage SEMM enrollment
Enrolling a device into SEMM affects how you can manage it. For example, after you apply a SEMM package, all UEFI settings are unavailable (locked) in the device's UEFI menu. Default values for settings such as IPv6 for PXE Boot are also unavailable.
To change UEFI settings after you finish the migration, apply another SEMM package or unenroll the device from SEMM. If you apply another SEMM package to change the UEFI settings, you must use the original certificate when you build the new SEMM package. Use the UEFI Configurator tool and leave EnableOSMigration off (not on as in the original migration steps).
If you work with partners
If your company outsources the migration, you should have the partner transfer the SEMM certificate, SEMM package, and UEFI password to you. Or, after you migrate the Hub, you can immediately unenroll it from SEMM. This step enables the local administration of UEFI to transfer the device to another party. But we strongly recommend using a UEFI password, which can be configured after migration. To learn more, see Manage Surface UEFI settings.
To roll back to Windows 10 Team
If you choose to restore your device to Windows 10 Team after the migration as described later in this article, we recommend that you first unenroll Hub from SEMM. To learn more, see Unenroll Surface devices from SEMM.
Warning
To unenroll a device from SEMM and restore user control of Surface UEFI settings, you must have the SEMM certificate used to enroll the device in SEMM. If this certificate becomes lost or corrupted, it is not possible to unenroll from SEMM. Back up and protect your SEMM certificate accordingly.
Save the SEMM package to a USB drive
Connect a USB drive to your PC.
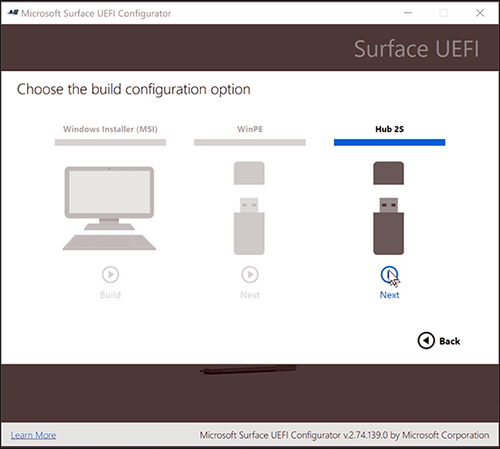
Choose Hub 2S, and then select Next.
Warning
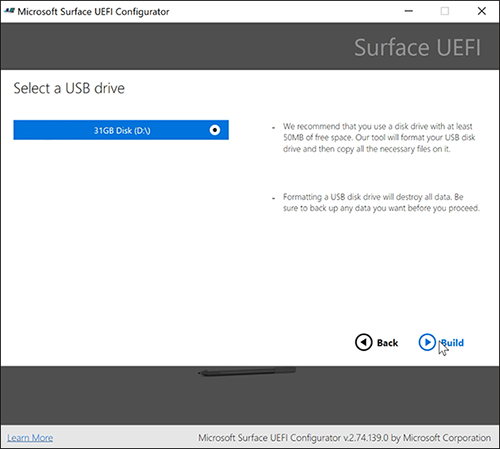
All existing data on the USB drive will be erased when the SEMM package is built. Before you build the SEMM package, remove any files you need from the USB drive.
Select Build.
Capture a screenshot of this page, and then select End. Your SEMM package is now ready. It contains the SEMM package DfciUpdate.dfi and a text file that includes the SEMM thumbprint, which is the last two characters of the certificate's thumbprint.
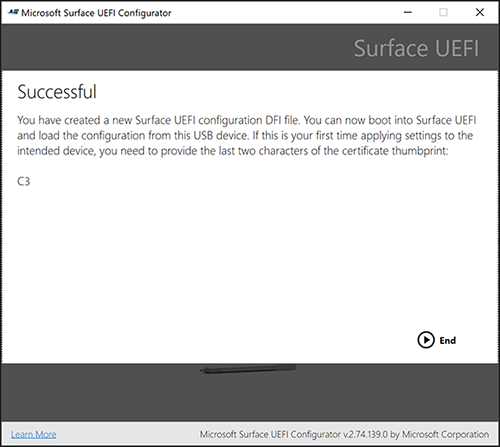
Save the certificate thumbprint's last two characters. You'll need these characters to activate SEMM when you apply the package on Surface Hub 2S.
Load a USB flash drive with a Windows 10 image, SEMM package, and Surface Hub 2S drivers and firmware
You can install a Windows 10/11 Pro or Enterprise image (version 20H2 or later) by using one of the following options:
Your current imaging solution.
Surface Deployment Accelerator. Use this tool to create a bootable Windows 10 image. The image can include all current Windows 10 updates, Microsoft Office, other apps, and the required drivers and firmware.
A USB flash drive that contains a Windows 10/11 Pro or Enterprise image. This option will not have Wi-Fi available until after the out-of-box experience (OOBE) setup. Once setup is complete, install the required Surface Hub 2S drivers and firmware for Windows 10 Pro and Enterprise on the device.
The following steps show how to create a USB flash drive from installation media and then add the SEMM package files, drivers, and firmware for Windows 10 Pro and Enterprise OS to the Surface Hub 2S MSI file. If you use another deployment method, go to the Update UEFI on Surface Hub 2S to enable OS migration section of this article.
Note
After you finish the installation, you'll need a valid Windows 10 Pro or Windows 10 Enterprise license separate from your existing Windows 10 Team license.
To create a Windows 10 Pro installation, follow the instructions to download the media creation tool at Download Windows 10. To download Windows 10 Enterprise, go to the Microsoft Volume Licensing Service Center.
Insert a new USB storage drive.
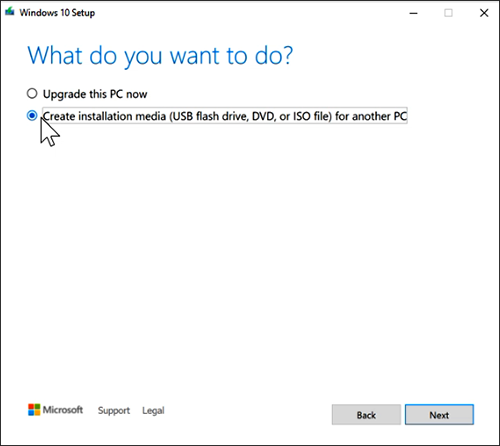
Open the media creation tool, select Create installation media, and then select Next.
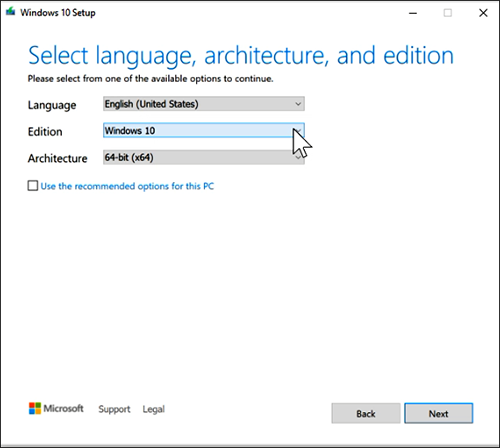
Select a language, and then select Windows 10 and 64-bit (x64). Then select Next.
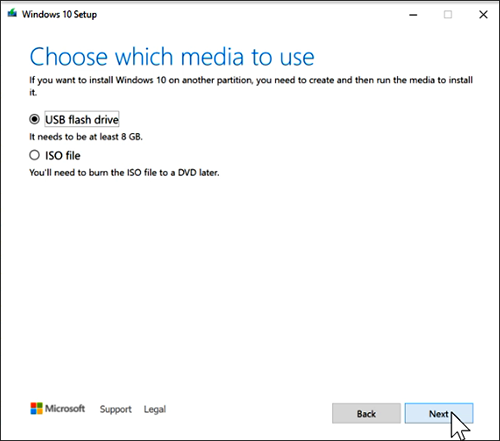
Select USB flash drive, and then select Next.
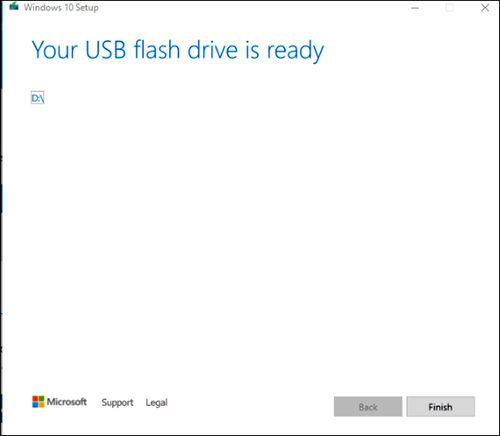
When the download finishes, select Finish.
Copy the SEMM package files and the drivers and firmware for Windows 10 Pro and Enterprise OS on Surface Hub 2S (the MSI file) to the root of the USB flash drive (BOOTME) that contains your Windows 10 image. The BOOTME USB drive includes the following items:
Your Windows 10 bootable image.
The SEMM package files, copied to the root of the USB drive:
DfciUpdate.dfi.
A text file that includes the SEMM thumbprint. (In this example, the file is SurfaceUEFI_2020Aug25_1058.txt.) The automatically generated date-time stamp corresponds to the date you created the file using Surface UEFI Configurator.
The drivers and firmware for Windows 10 Pro and Enterprise OS on Surface Hub 2S (SurfaceHub2S_Win10_18362_20.082.25682.0.msi). Copy this file to the root of the USB drive.
Update UEFI on Surface Hub 2S to enable OS migration
Insert your BOOTME drive into the USB-A port on the Surface Hub 2S. For a list of its required contents, see the previous section.
To boot into UEFI:
Turn off (shut down) your Surface Hub 2S.
Press and hold Volume +, and then press and release the power button. Keep holding Volume + until the UEFI menu appears.

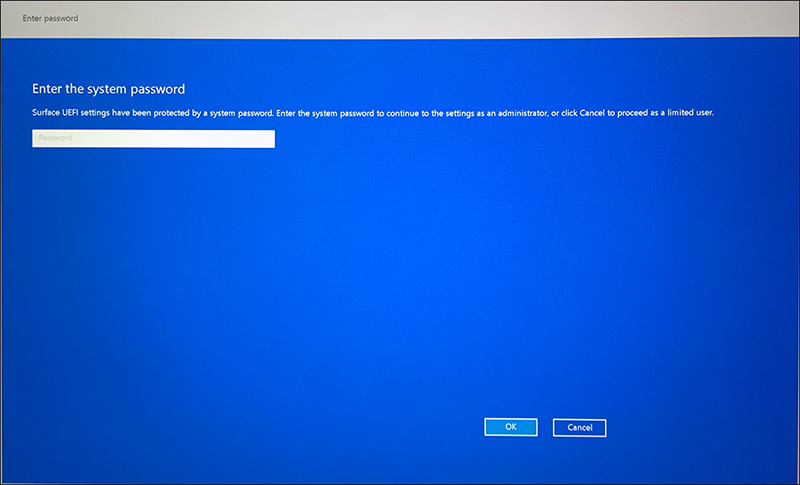
When the device restarts, enter the UEFI password you created earlier, if applicable (recommended).
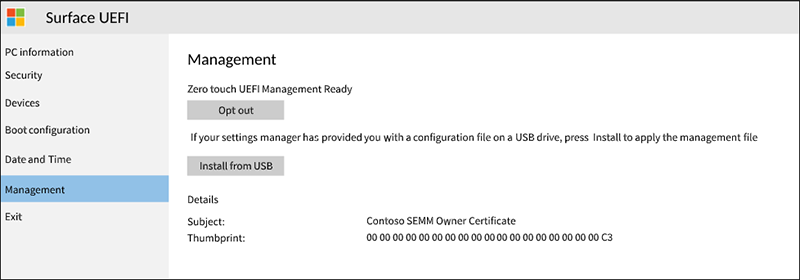
From the UEFI menu, select Management. Then select Install from USB.
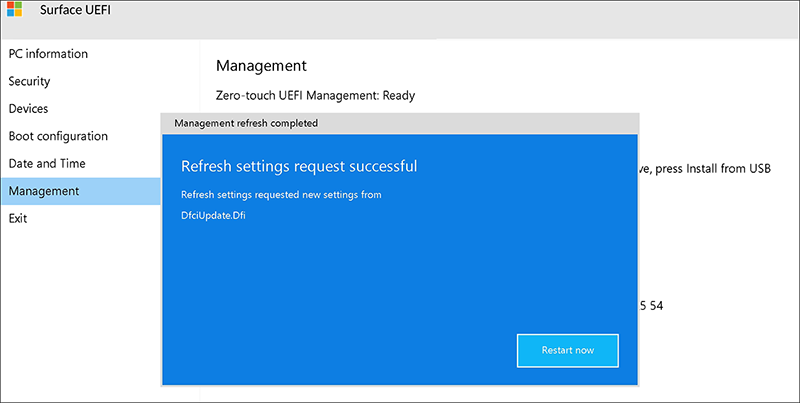
Select Restart now, as the following image shows. The device will restart. It will display a white Microsoft logo in the middle of the window and then shut down.
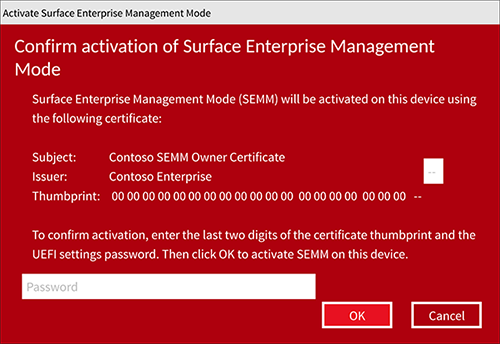
Press and release the power button. In the red dialog box, choose to activate Surface Enterprise Management Mode.
Enter your two-character certificate thumbprint and your UEFI settings password. Then select OK.
Note
After you activate SEMM on your device, the new UEFI setting EnableOSMigration is applied. You can no longer access Windows 10 Team. Instead, you must continue to the next step and install Windows 10 Pro or Windows 10 Enterprise.
The device reboots. It displays the white logo in the middle of the screen and then shuts down again.
Install Windows 10/11 Pro or Enterprise
If your bootable Windows 10/11 Pro or Enterprise drive isn't already in the Surface Hub 2S USB-A port, insert it now. Then press and release the power button.
When the device starts, you'll see the white logo in the middle of the screen. Then, a spinning circle appears below the white logo.
If the Surface device doesn't automatically boot to the USB drive, power off the device (unplug the power cord and then plug it back in). After you plug in the power cord again, the device should boot after a few seconds. Then, you'll see the white logo in the middle of the screen.
If the device doesn't turn on, press and release the power button. Immediately after you see the logo in the middle of the screen, press and hold the Volume down button until you see the spinning circle below the white logo.

When the out-of-box experience (OOBE) setup starts, follow the instructions to install Windows 10/11 Pro or Enterprise (version 20H2 or later).
Install Surface Hub 2S drivers and firmware
To ensure that your Surface Hub 2S is up to date, install drivers and firmware for Windows 10 Pro and Enterprise. Then, reboot the device. Keep the Surface turned on for an hour, then reboot it again. You won't be prompted for the second reboot. This pause and extra reboot ensures that the firmware has been fully updated.
Configure recommended settings
To configure Surface Hub 2S as a personal productivity device, see Configure Windows 10/11 Pro or Enterprise on Surface Hub 2S.
Note
If you can't successfully migrate your device to Windows 10/11 Pro or Enterprise for Surface Hub 2S by following the steps outlined in this article, contact Surface Hub Support.
To roll back to Windows 10 Team
To restore your device to Windows 10 Team, see Reset and recovery for Surface Hub 2S. Before you roll back to Windows 10 Team, we recommend that you first unenroll the Surface Hub from SEMM. To learn more, see Unenroll Surface devices from SEMM.
Warning
To unenroll a device from SEMM and restore user control of Surface UEFI settings, you must have the SEMM certificate used to enroll the device in SEMM. If this certificate becomes lost or corrupted, it is not possible to unenroll from SEMM. Back up and protect your SEMM certificate accordingly.
Troubleshooting and common problems
| Issue | Notes |
|---|---|
| Unable to migrate to Windows 10/11 Pro or Enterprise on Surface Hub version 1 devices | By design, the ability to migrate to Windows 10/11 Pro or Enterprise is only available for Surface Hub 2S devices. |
| UEFI menu does not appear when holding down the Volume + power button | - Ensure you hold down both buttons for approximately 10 seconds. After you see the Windows logo, release the power button while continuing to hold Volume + - Try connecting the USB drive via USB-C. |
| The Surface Hub 2S does not automatically reboot after entering the two-character certificate thumbprint and your UEFI settings password. | Press the Surface Hub 2S Power button to manually power the device back up. |
| No audio from speakers following migration to Windows 10/11 Pro or Enterprise | To resolve, download and install the Drivers and Firmware for Windows 10 Pro and Enterprise on Surface Hub 2S (MSI). |
| The volume rocker button is non-functional following migration to Windows 10/11 Pro or Enterprise. | To resolve, download and install the Drivers and Firmware for Windows 10 Pro and Enterprise on Surface Hub 2S (MSI). |
| How do I determine the serial number of the Surface Hub 2S when running Windows 10/11 Pro or Enterprise? | You can determine the serial number of your Surface Hub 2S running Windows 10/11 Pro or Enterprise just as in the Windows 10 Team OS: You can find the serial number on the outside of the packaging, on the display by the power cord, or by using the Surface app. Alternatively, you can find the serial number via Command Prompt: 1. Type CMD in the search bar and press Enter to open a Command Prompt window. 2. Type the following command: - console wmic bios get serialnumber 3. The serial number will then be displayed within the Command Prompt window. |
| Unable to unenroll Surface Hub 2S from SEMM to roll back to Windows 10 Team | If the SEMM certificate becomes lost or corrupt, SEMM cannot be removed or reset on Surface devices. With this in mind, please ensure you have the appropriate backups of the certificate and its password. |
| In the Windows 10 Team OS, I used the Surface App to view additional device and accessory information, troubleshoot, and access support. Since the migration to Windows 10/11 Pro or Enterprise, this app is no longer installed. | The Surface App is not installed on Windows 10/11 Pro or Enterprise by default, but you can install it manually by following the steps here. |
| Does migrating my Surface Hub 2S device to Windows 10/11 Pro or Enterprise impact the standard or extended warranty for the device? | No, migrating to Windows 10/11 Pro or Enterprise does not change the warranty status of your Surface Hub 2S. |
Version history
The following table summarizes changes to this article.
| Version | Date | Description |
|---|---|---|
| v. 1.7 | September 21, 2023 | Added preliminary info indicating support for migrating to Surface Hub 3. |
| v. 1.6 | January 16, 2023 | Added a new section for troubleshooting and common problems. |
| v. 1.5 | December 1, 2021 | Updated to show support for Windows 11. |
| v. 1.4 | December 14, 2020 | Provides further info about installing the MSI file for "Drivers and firmware for Windows 10 Pro and Enterprise OS on Surface Hub 2S," advising that a second reboot may be necessary depending on the state of your system. |
| v. 1.3 | December 3, 2020 | Updated with guidance about managing SEMM enrollment.. |
| v. 1.2 | September 29, 2020 | Miscellaneous updates that address usability. feedback. |
| v. 1.1 | September 15, 2020 | Placed an additional note in the introduction that clarifies licensing requirements for installing a new OS. |
| v. 1.0 | September 1, 2020 | New article. |
Palaute
Tulossa pian: Vuoden 2024 aikana poistamme asteittain GitHub Issuesin käytöstä sisällön palautemekanismina ja korvaamme sen uudella palautejärjestelmällä. Lisätietoja on täällä: https://aka.ms/ContentUserFeedback.
Lähetä ja näytä palaute kohteelle