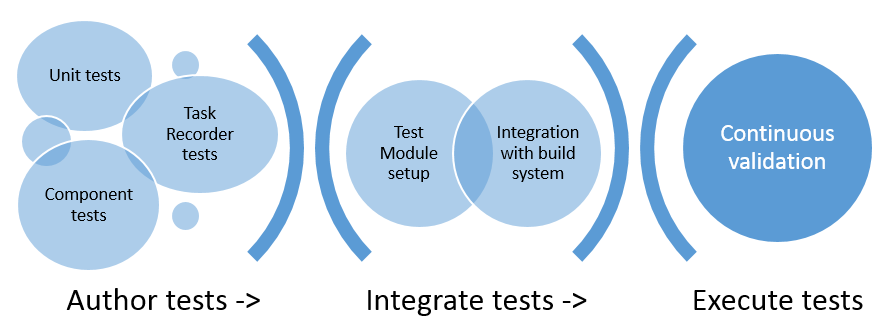
Testing and validations
This tutorial shows you how to create and run test cases.
Prerequisites
You need to deploy Developer Topology with Developer and Build VM.
Key concepts
- Use SysTest Framework to author unit/component test code.
- Test isolation
- Test module creation to manage test code and FormAdaptors.
- Import Task Recorder recordings into Visual Studio to generate test code.
- Integrate a Test module with a build machine.
Use SysTest Framework to author unit/component test code
You can create new test cases to test the functionality in an application.
Open Visual Studio as an administrator.
On the File menu, click Open > Project/Solution, and then select FleetManagement solution from the desktop folder. If the solution file is not on your computer, the steps to create it are listed in End-to-end scenario for the Fleet Management sample application.
In Solution Explorer, right-click the Fleet Management solution, point to Add, and then click New Project.
Choose finance and operations as the project type to create.
Name this new project FleetManagementUnitTestSample, specify the FleetManagement folder on the desktop (C:\Users\Public\Desktop\FleetManagement) as the location, and then click OK.
In Solution Explorer, right-click the new project, and then click Properties.
Set the Model property to FleetManagementUnitTests, and then click OK.

Right-click the FleetManagementUnitTestSample project, point to Add, and then click New Item.
In the Add New Item window, select Class as the type of element to add. Name the new class FMUnitTestSample, and then click Add.

In the first line of the code for the new class, indicate that the class extends the SysTestCase class.
Add the following code to define the methods for the class. These methods define two additional tests.
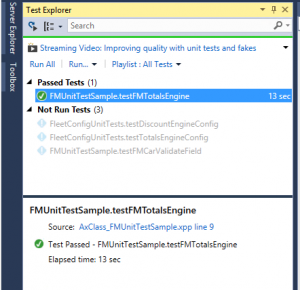
class FMUnitTestSample extends SysTestCase
{
    public void setup()
    {
        // Reset the test data to be sure things are clean
        FMDataHelper::main(null);
    }

    [SysTestMethodAttribute]
    public void testFMTotalsEngine()
    {
        FMRental rental;
        FMTotalsEngine fmTotals;
        FMRentalTotal fmRentalTotal;
        FMRentalCharge rentalCharge;
        FMRentalTotal expectedtotal;
        str rentalID = '000022';

        // Find a known rental
        rental = FMRental::find(rentalID);

        // Get the rental charges associated with the rental
        // Data is seeded randomly, so this will change for each run
        select sum(ExtendedAmount) from rentalCharge
                where rentalCharge.RentalId == rental.RentalId;

        fmTotals = FMTotalsEngine::construct();
        fmTotals.calculateRentalVehicleRate(rental);

        // Get the totals from the engine
        fmRentalTotal = fmTotals.totals(rental);

        // Set the expected amount
        expectedTotal = rental.VehicleRateTotal + rentalCharge.ExtendedAmount;

        this.assertEquals(expectedTotal,fmRentalTotal);
    }

    [SysTestMethodAttribute]
    public void testFMCarValidateField()
    {
        FMCarClass fmCar;

        fmCar.NumberOfDoors = -1;
        this.assertFalse(fmCar.validateField(Fieldnum("FMCarClass", "NumberOfDoors")));

        fmCar.NumberOfDoors = 4;
        this.assertTrue(fmCar.validateField(Fieldnum("FMCarClass", "NumberOfDoors")));
    }
}
Save the new class. After the save is complete, the additional two test cases in Test Explorer are displayed. Right-click on the FleetManagementUnitTestSample project in Solution Explorer, and then click Build.
On the View menu, open Test Explorer.
Click Run selected test to execute specific test case.
Test Explorer shows the results of test after it is complete.

Test isolation
For a test to be of high value it must be reliable. A test will pass or fail consistently, independent of other factors such as other tests. One typical cause of unreliable tests is leaking state, such as data left behind in the data base that influences downstream tests. To prevent this type of issue, you can use the SysTestTransaction attribute.
| TestTransactionMode | Description |
|---|---|
| AutoRollback | Default. Provides the best isolation. All transactions are rolled back using SQL save points, and all database statements are routed to the main connection, including user connections. No data is persisted. |
| LegacyRollback | All insert statements are tracked and deleted during clean-up. All insert statements are downgraded to row-by-row. One typical use case is when testing user connections or concurrency scenarios. This isolation level cleans up setup data, and the recommendation is to wrap each test method in a ttsBegin and ttsAbort. |
| LegacyRollbackWithUpdateTracking | All update, delete, and insert statements are tracked and reverted during cleanup. All insert, update, and delete statements are tracked and downgraded to row-by-row. This is the slowest isolation level. |
| None | Only use for debugging. Provides no isolation. This setting can be useful to temporarily debug a test, as it allows you to use the regular user interface to navigate the data that the test created. |
Example:
    [SysTestTransaction(TestTransactionMode::LegacyRollback)]
    class MyTestSample extends SysTestCase
Test module creation to manage test code and FormAdaptors
Creating a test specific module helps to keep test code together and manageable.
Open Visual Studio and go to Dynamics 365 > Model Management > Create model.
Enter the model name, select the layer, and then enter any additional details. It's a good idea to include the word Test in the name of the test module. The default build definition is configured to discover all test modules that contain the word Test.
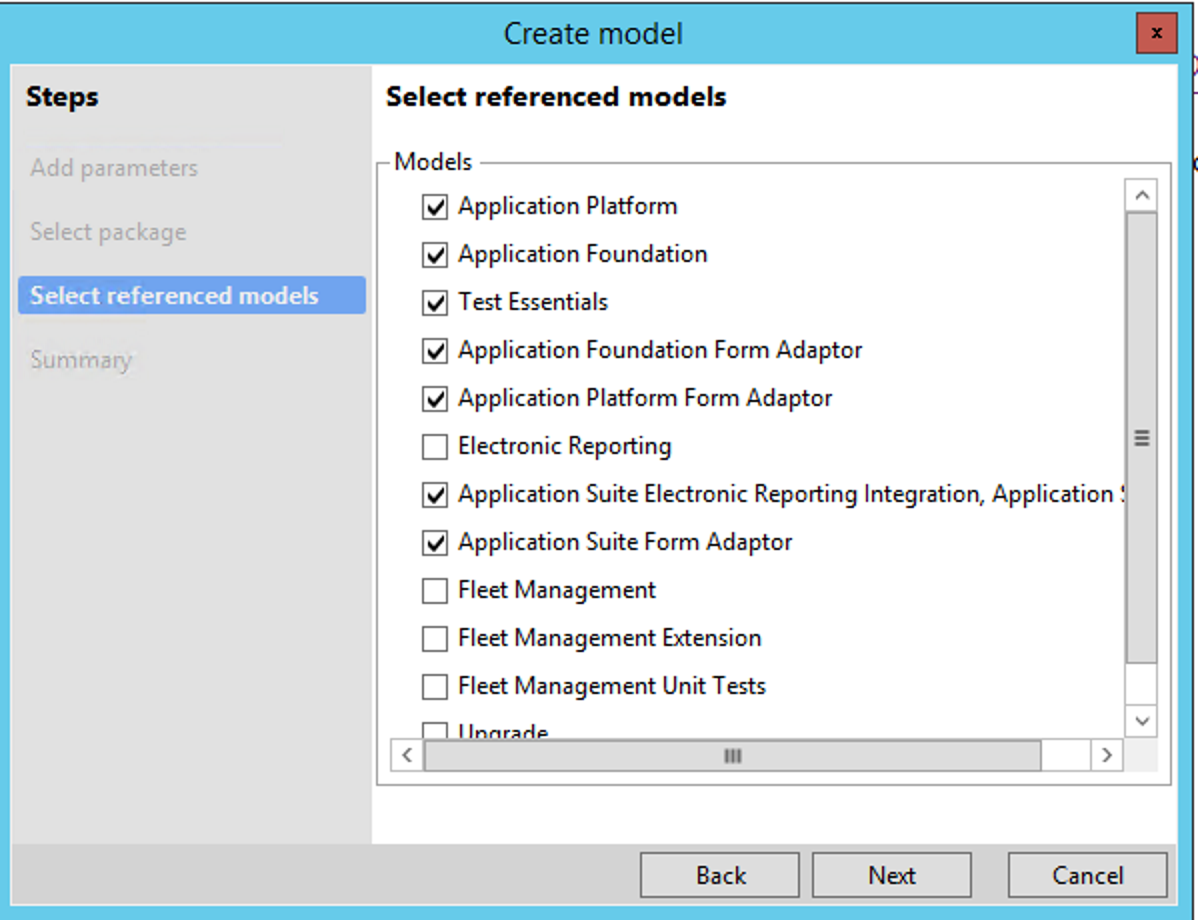
Because this model holds forms from the Application Platform/Foundation, add references to models shown below.

After the base test module is in place, you can import a Task Recorder recording to generate test code. When you import a Task Recorder recording XML, test code is generated using FormAdaptors. Form adaptors are wrapper classes over forms, and provide strongly typed API that can be used to test form functionality. We have included pregenerated FormAdapters for each package for built-in forms. In the test module, add a reference to the corresponding Form Adaptor for packages and Test Essentials, which has helper methods to execute test code.
Import a Task Recorder recording into Visual Studio to generate test code
You can generate test code from Task Recorder recording to execute headless (non-UI) test.
Record a scenario in by using Task Recorder.
To import a Task Recording, in Visual Studio, click Dynamics 365 > Addins > Import Task Recording.
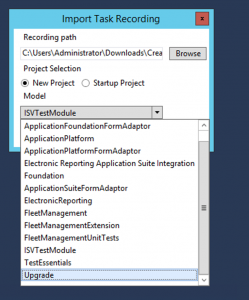
In the Import Task Recording dialog, select the Test Module (ISVTestModule) under which you want to import task recording, and browse to recording xml file.
The task recording import process generates test code that is based on the SysTestAdapter and FormAdaptor, which can be viewed in Visual Studio IDE. We do not expect you to change any test source code that is generated as part of this step.
After the test code is generated, set up Visual Studio options for test discovery and execution:
- If you have a 64-bit machine, you can run unit tests and capture code coverage information as a 64-bit process.
- To configure this, select Test > Test Settings > Default Processor Architecture, and then select X64.
- You might run into a situation in which the test execution engine opens and locks an assembly in your test project. When this happens, you can’t for example, save changes to the assembly. To fix this, select Test > Test Settings, and then select Keep Test Execution Engine Running.
- Now that you have test code generated in Visual Studio IDE, it's time to discover the test and try executing them locally.
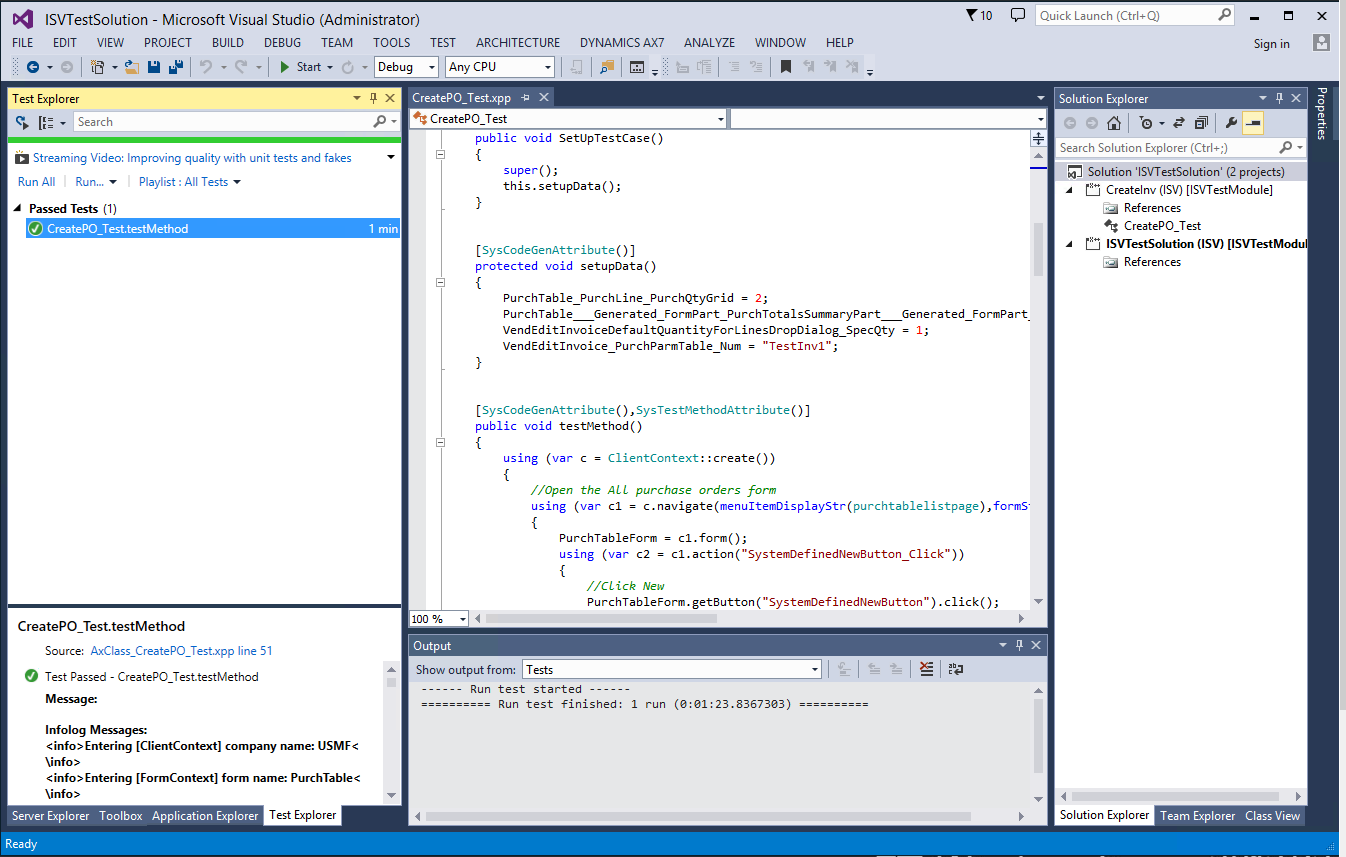
From menu options, select Test > Windows, and then click Test Explorer. After the Test Explorer window is open, it attempts to discover test from test code and list all the available tests as shown below.

Select the test and then click Run > Execute selected, which executes test against the locally deployed environment.


Integration of the test module with build process
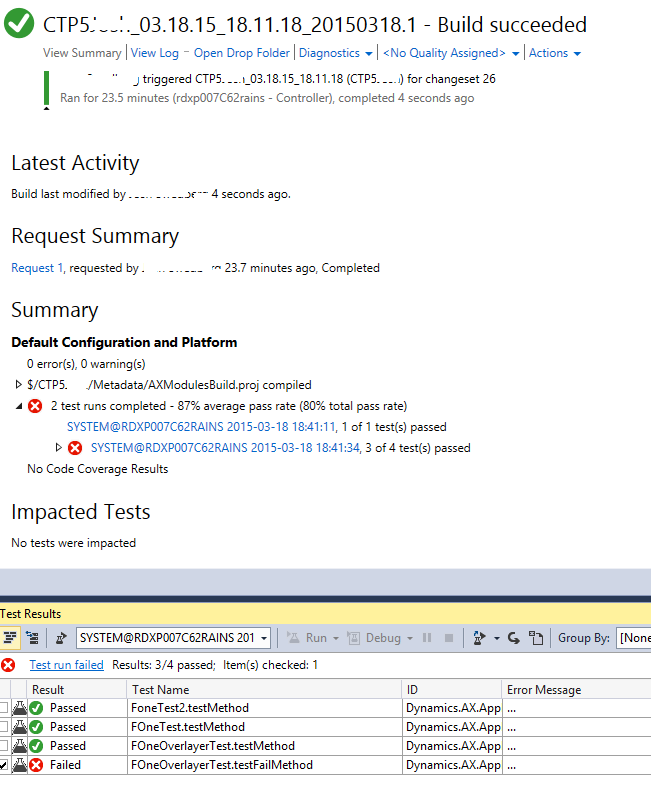
After the test module is a part of source control, the build process template will discover all test modules, which contain the word Test in the name. The following illustration shows build and test execution as part of Visual Studio Codespace.
Commentaires
Bientôt disponible : Tout au long de 2024, nous allons supprimer progressivement GitHub Issues comme mécanisme de commentaires pour le contenu et le remplacer par un nouveau système de commentaires. Pour plus d’informations, consultez https://aka.ms/ContentUserFeedback.
Envoyer et afficher des commentaires pour