Quickstart: Create a load test project
Applies to: ![]() Visual Studio
Visual Studio ![]() Visual Studio for Mac
Visual Studio for Mac
Note
This article applies to Visual Studio 2017. If you're looking for the latest Visual Studio documentation, see Visual Studio documentation. We recommend upgrading to the latest version of Visual Studio. Download it here
In this 10-minute quickstart, you'll learn how to create and run a web performance and load test project in Visual Studio. Load tests execute web performance or unit tests to simulate many users accessing a server at the same time.
Note
Web performance and load test functionality is deprecated. Visual Studio 2019 is the last version where web performance and load testing will be fully available. For more information, see the Cloud-based load testing service end of life blog post. To reduce the impact on users some minimum support is still available in Visual Studio 2022 Preview 3 or later. Users should also note web performance and load test functionality only supports Internet Explorer which is not available on Windows 11 and some versions of Windows 10. Read more on Internet Explorer Lifecycle policy.
Software requirements
Web performance and load test projects are only available in the Enterprise edition of Visual Studio.
Install the load testing component
If you don't already have the web performance and load testing tools component installed, you'll need to install it through the Visual Studio Installer.
Open Visual Studio Installer from the Start menu of Windows. You can also access it in Visual Studio from the new project dialog box or by choosing Tools > Get Tools and Features from the menu bar.
In Visual Studio Installer, choose the Individual components tab, and scroll down to the Debugging and testing section. Select Web performance and load testing tools.
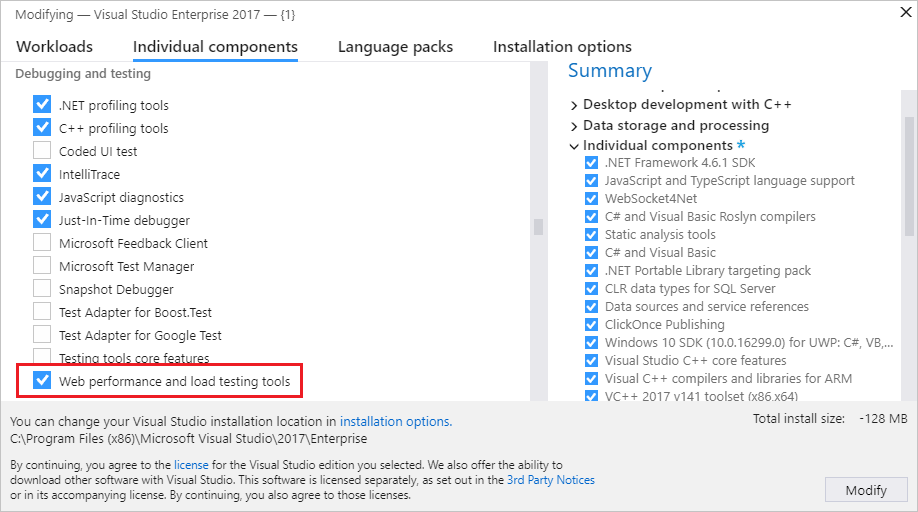
Choose the Modify button.
The web performance and load testing tools component is installed.
Create a load test project
In this section, we'll create a C# load test project. You can also create a Visual Basic load test project, if you prefer.
Open Visual Studio.
Choose File > New > Project from the menu bar.
The New Project dialog box opens.
In the New Project dialog box, expand Installed and Visual C#, and then select the Test category. Choose the Web Performance and Load Test Project template.
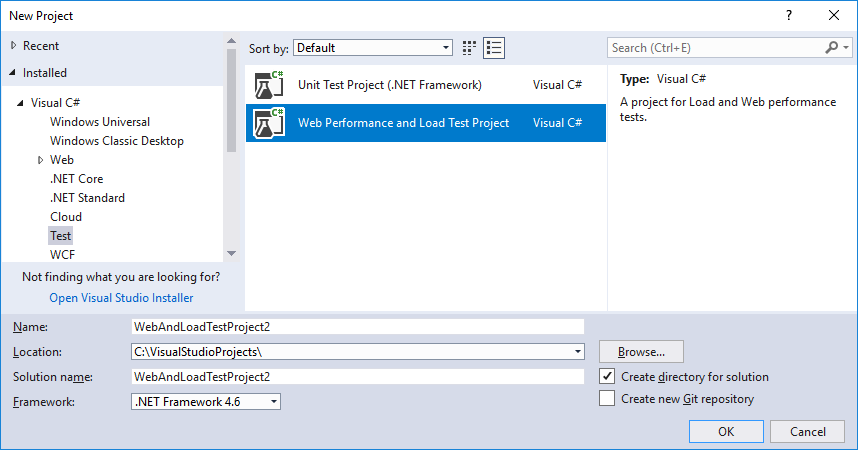
Enter a name for the project if you don't want to use the default name, and then choose OK.
Visual Studio creates the project and displays the files in Solution Explorer. The project initially contains one web test file named WebTest1.webtest.
Add a load test to the project
From the right-click menu, or context menu, of the project node in Solution Explorer, choose Add > Load Test.
The New Load Test Wizard opens.
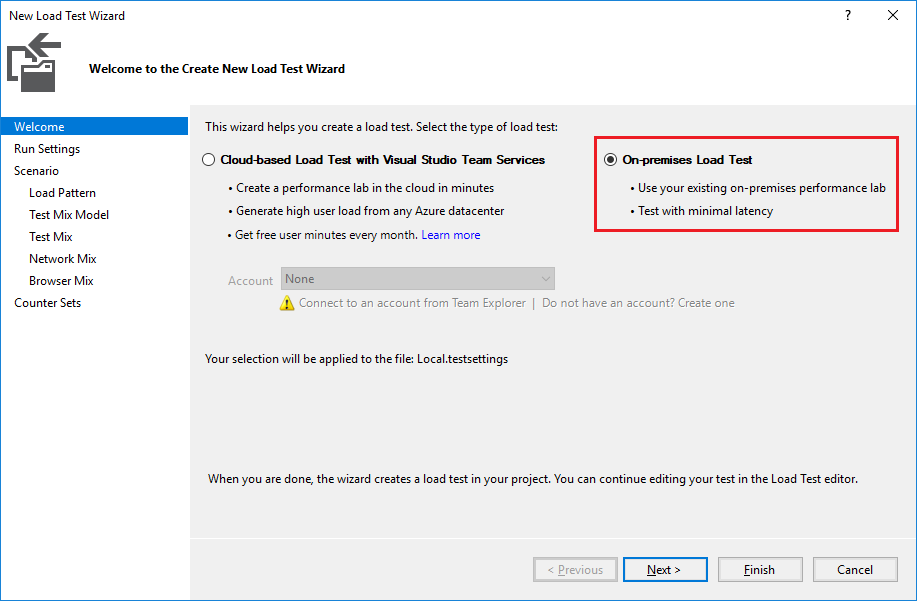
Select the On-premises Load Test option, and then choose Next. You can learn more about cloud-based load testing here.
Choose Next to step through the wizard until you reach the Add tests to a load test scenario and edit the test mix page. Choose the Add button.
The Add Tests dialog box opens.
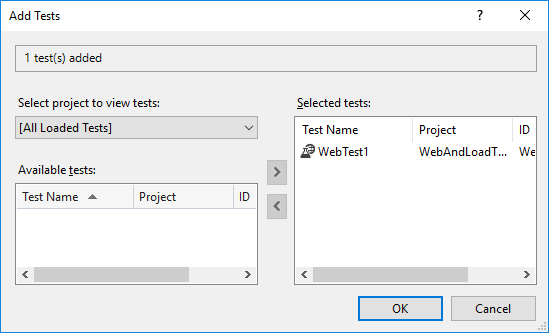
Under Available tests, select WebTest1, and then choose the right arrow to move it over to the Selected tests box. Choose the OK button.
Back in the New Load Test Wizard, choose the Finish button.
The load test is added to the project, and the load test file opens in the editor window.
Run the load test
We've created a load test that doesn't do very much, but let's run it anyway.
From the right-click menu, or context menu, of the load test that's open in the editor, choose Run Load Test.
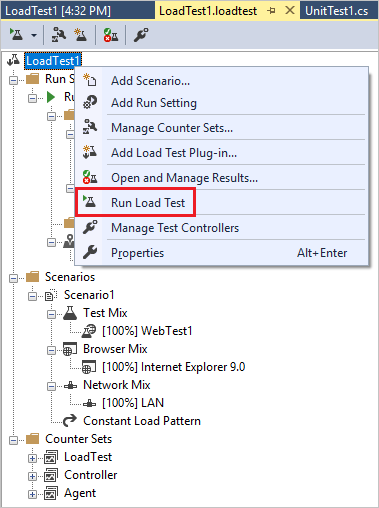
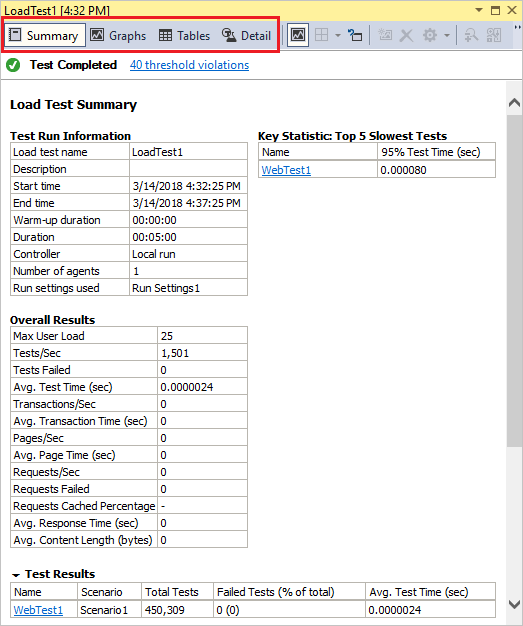
The load test starts running. The Test Results window shows that the test is in progress, and the load test analyzer is displayed in the editor window. After the test completes, which should be five minutes if you accepted the defaults, a summary is shown in the editor. You can choose Graphs, Tables, or Detail to get different information about the results of the load test.
Next steps
Now that you've created a simple load test project, the next step is to configure scenarios, counter sets, and run settings.