Walkthrough: Deploy builds using Game Manager
This article describes how to deploy builds for VMs using Windows OS in Game Manager based on the Windows Runner C# sample.
Note
In order to use and view the PlayFab Multiplayer Servers, you need to enable the feature from Game Manager. For instructions, see Enable the PlayFab Server feature.
Deploying a build is one of the processes in creating a game server using the Windows Runner C# sample.
Prerequisites
Make sure you've completed the following steps.
Steps
- Log into your developer account on PlayFab.com
- Go to My Studios and Titles page and select your game title to display the dashboard
- Go to Multiplayer > Servers page, select New Build at the top right to create a new build
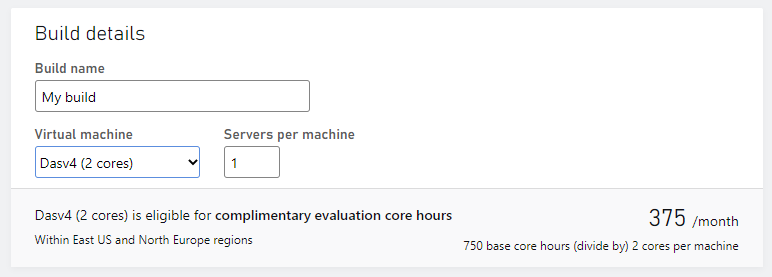
- Use "My build" as the Build Name
- Select a server with limited free usage, such as Dasv4
- Set 1 for Servers per machine
Image below shows values used in the info section.
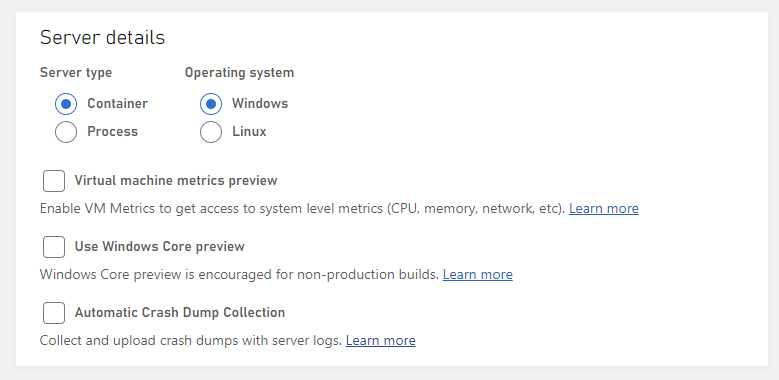
- Under Virtual Machine OS, select Windows as the platform, Windows Server Core as the Container image
Image below shows values used in the OS section.
- Under Assets, select Upload then navigate to folder with the compiled PlayFab Multiplayer Server Build for the WindowsRunnerSample. To get the Build, see Server side set up.
For Windows Container, C:\Assets is the default mounting path where your asset zip will be unzipped. Start Game command should include C:\Asset such as C:\Asset{YourGameServer.exe}. For Linux container, you can optionally specify the assets and where they should be mounted within the container's file system.
Image below shows values used in the assets section.
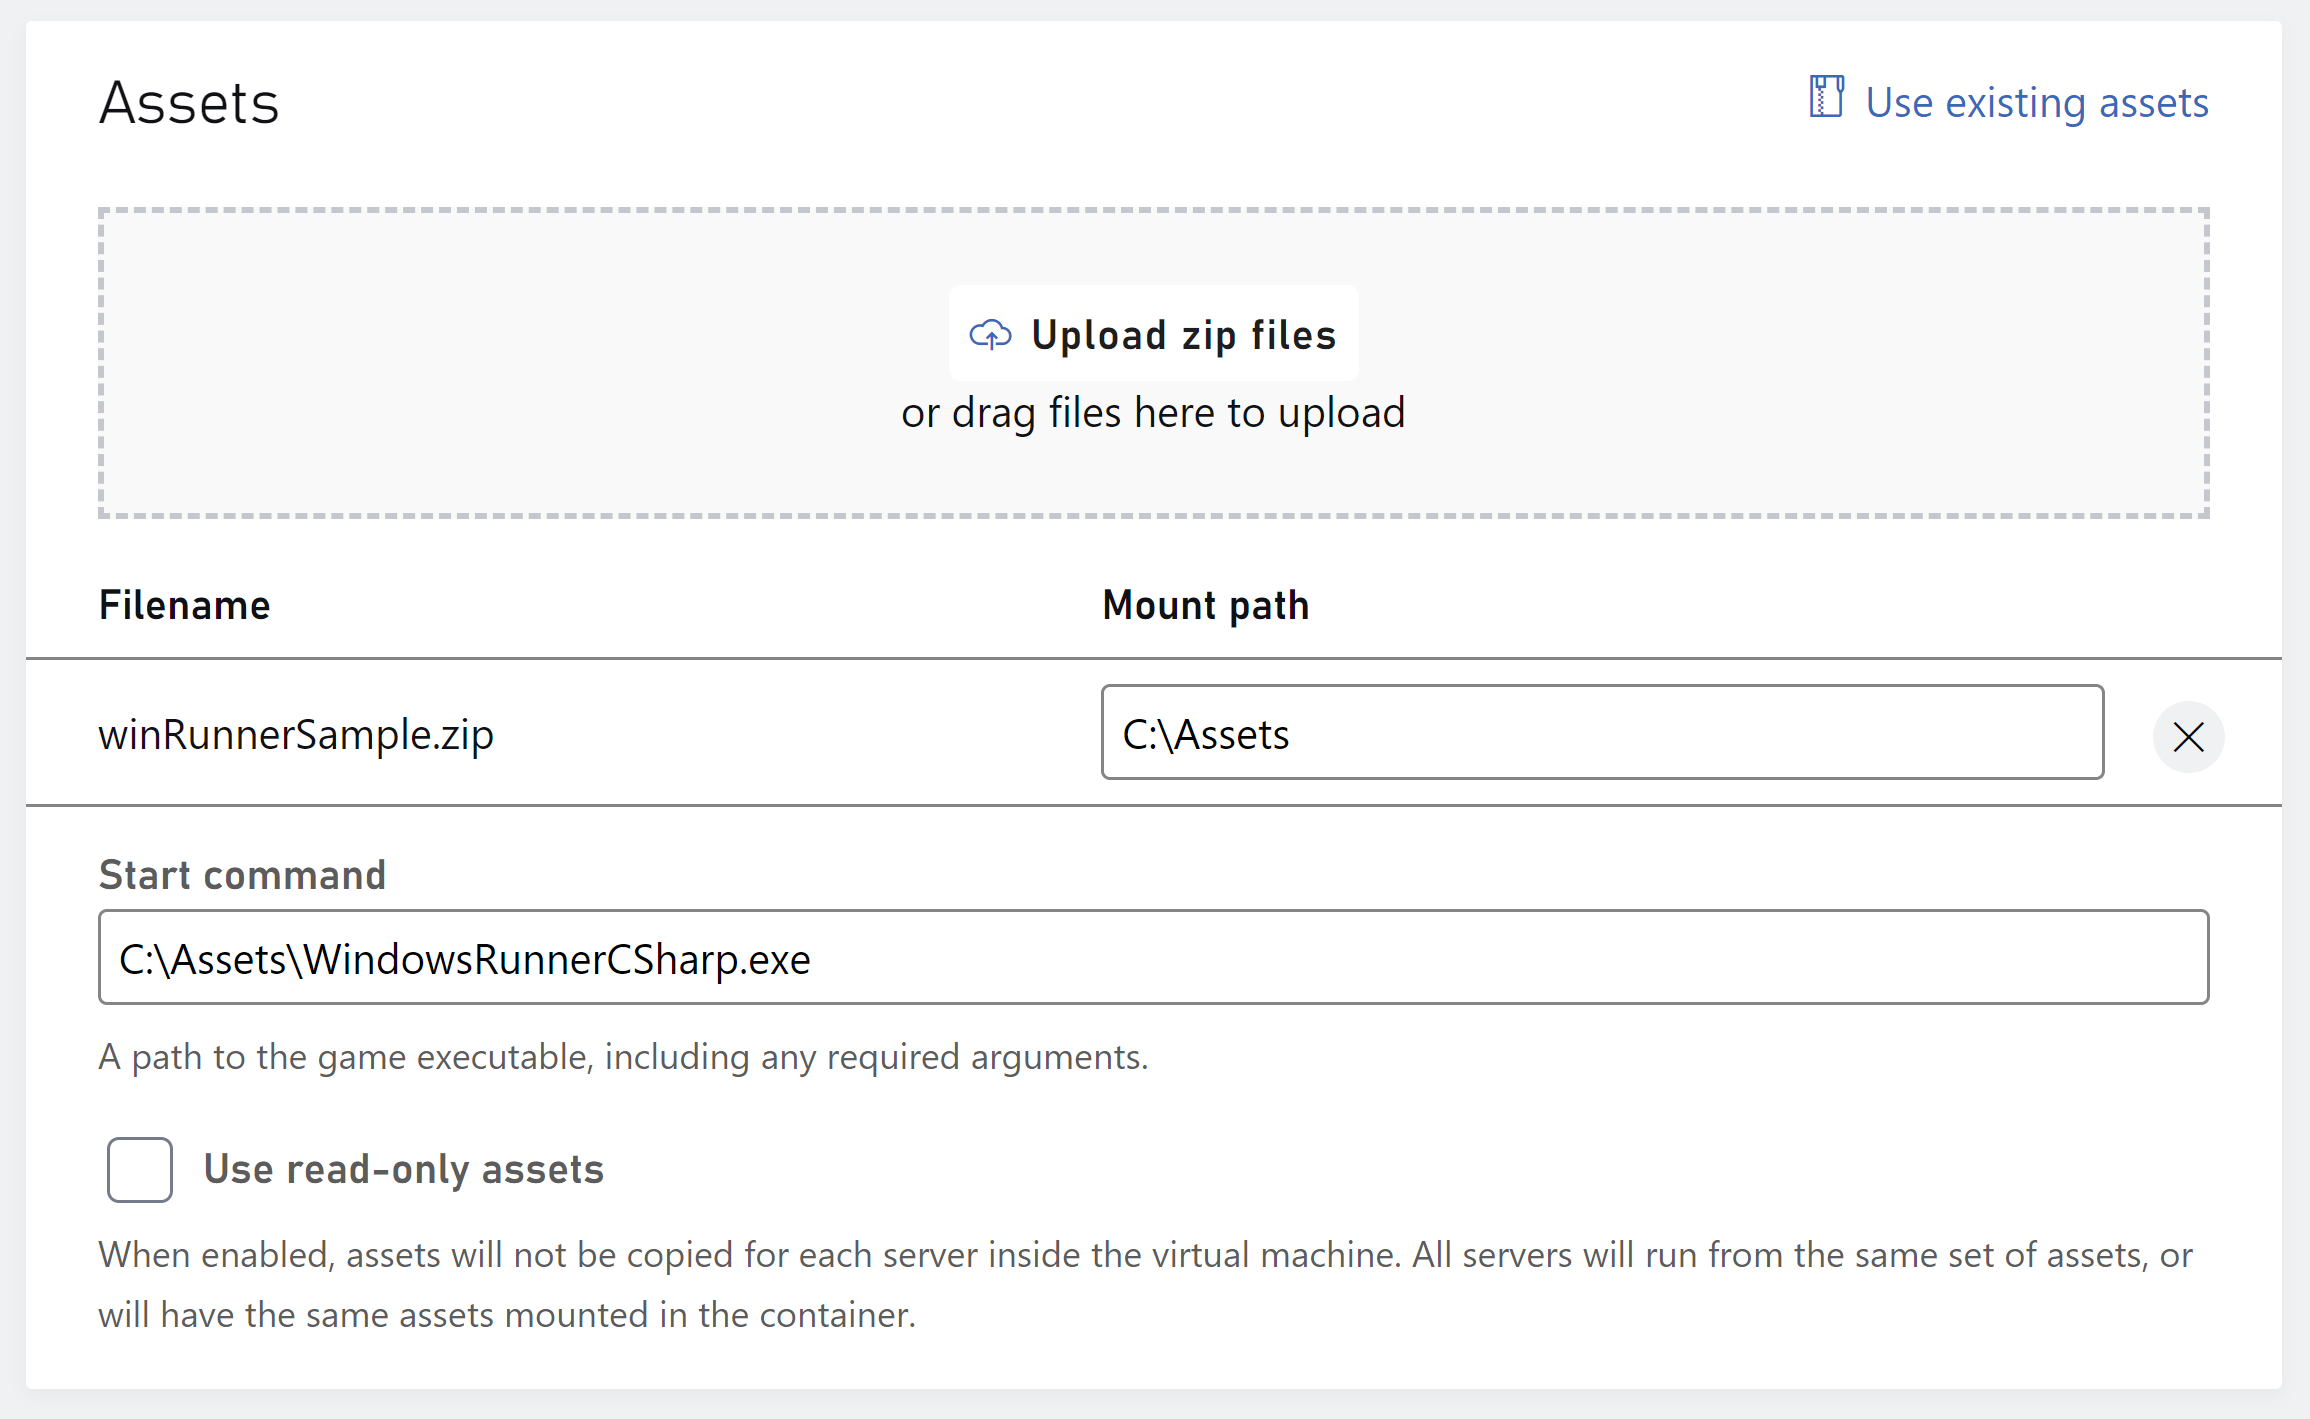
Set C:\Assets\WindowsRunnerCSharp.exe as the Start Command.
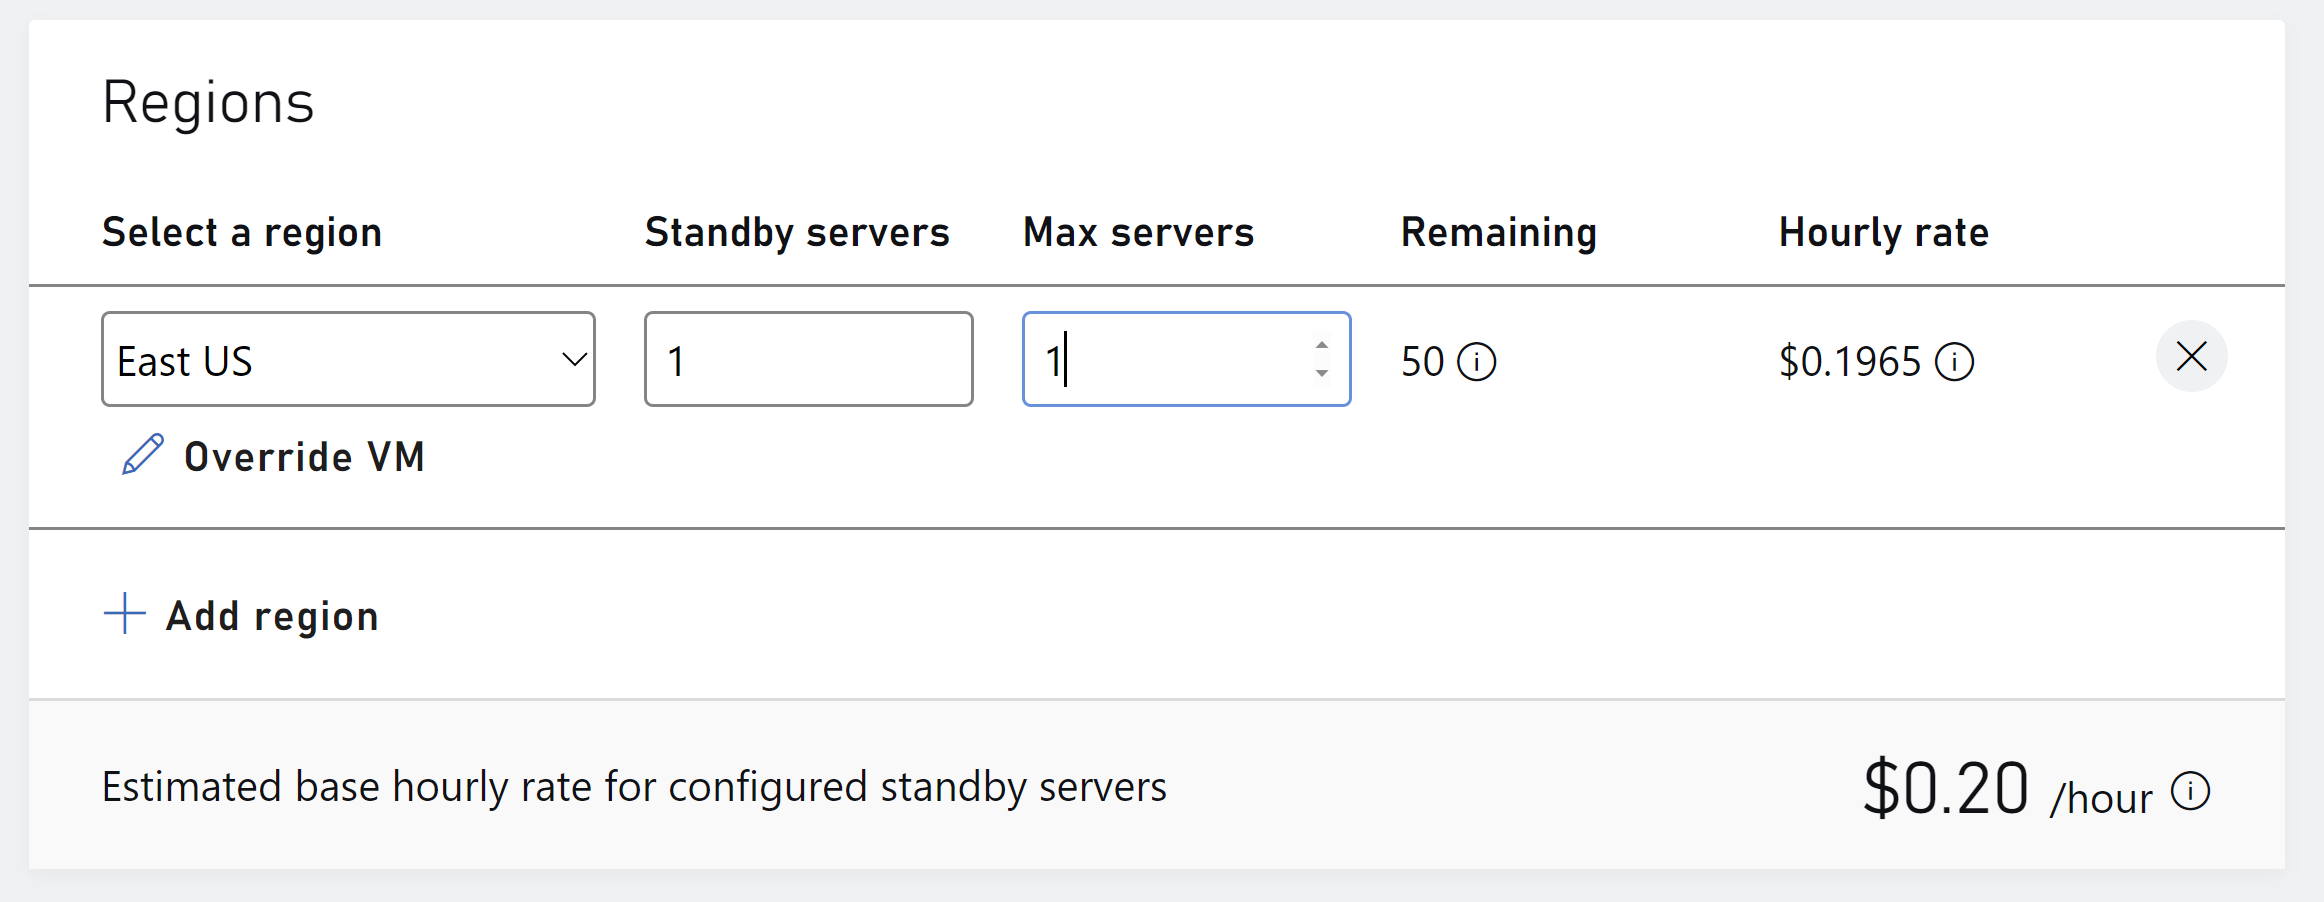
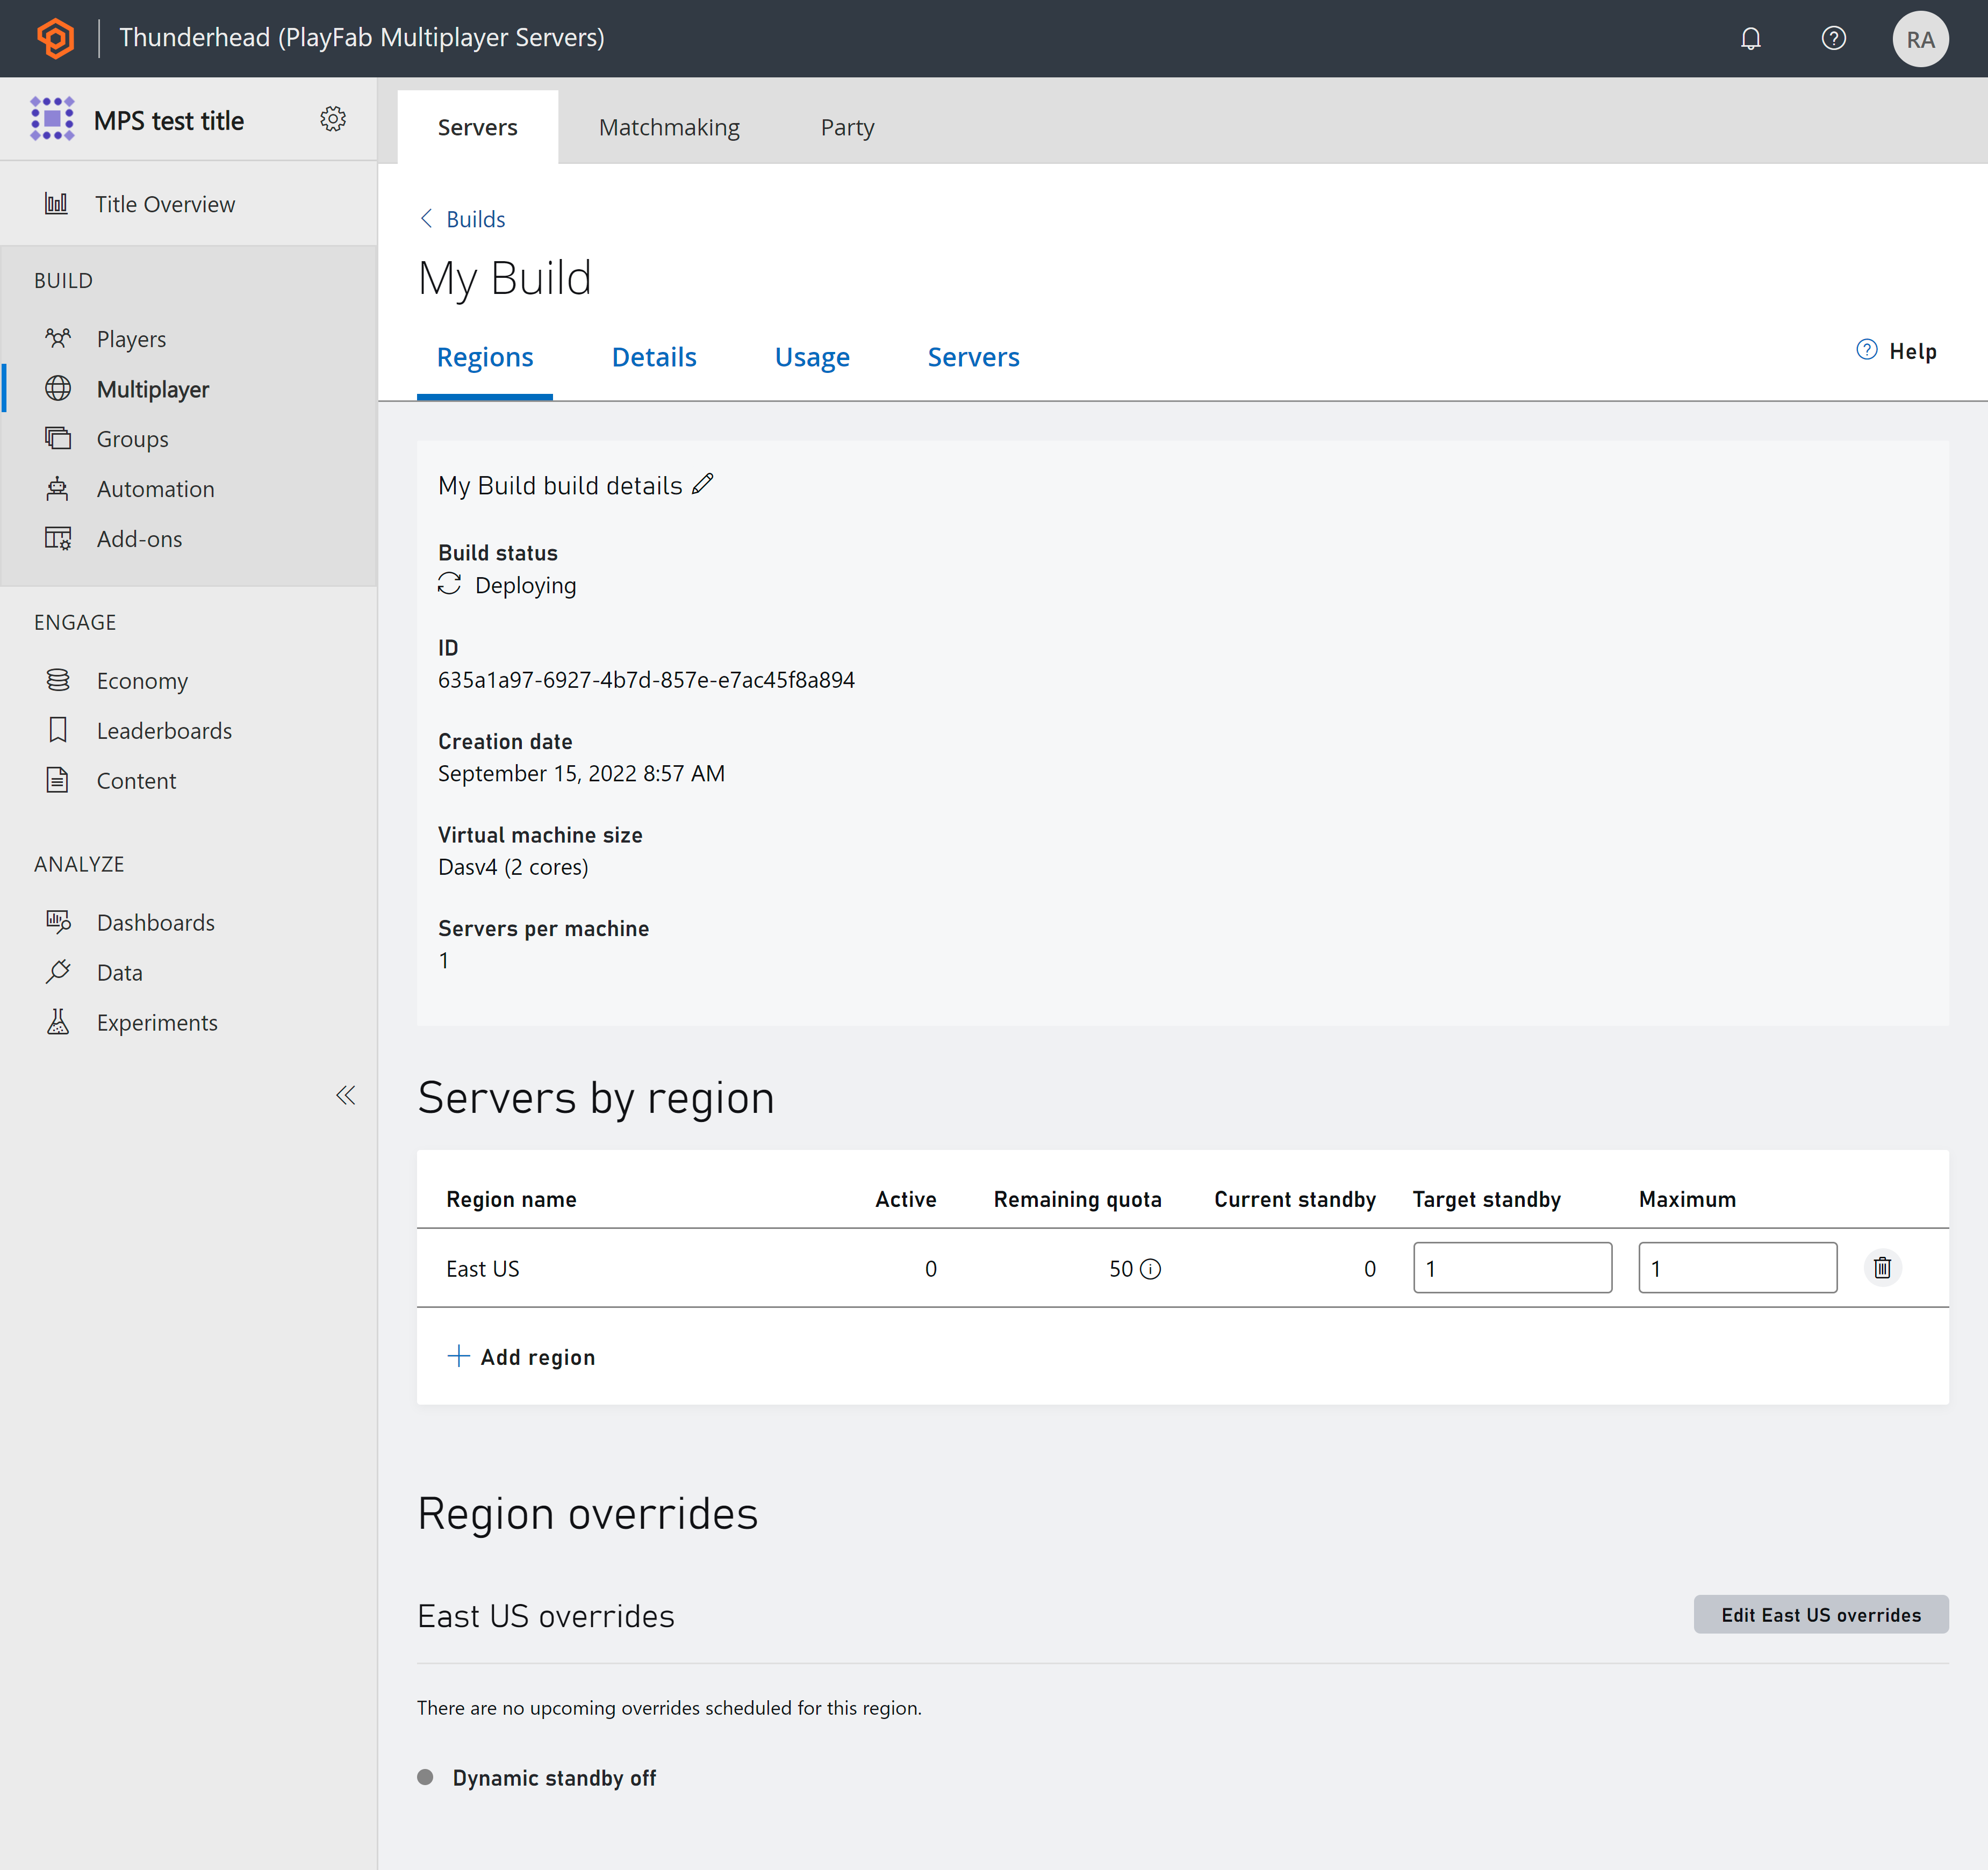
Under Regions, select "East US", one standby server and one maximum server.
- For network, use port 3600 using game_port as the name. Use TCP as the protocol as shown in the image below. For the port name, ensure you're using the name defined in your game sample.

- Select Add build to start the deployment process. You'll be taken to the build details page. The build will display the Deploying status as show in the image below. In 10 to 20 minutes, your build should be in the Deployed state. You can confirm this by going back to the home page and looking at the status of the build.
- After servers are deployed, set up the client and connect to the servers.
See also
Visszajelzés
Hamarosan: 2024-ben fokozatosan kivezetjük a GitHub-problémákat a tartalom visszajelzési mechanizmusaként, és lecseréljük egy új visszajelzési rendszerre. További információ: https://aka.ms/ContentUserFeedback.
Visszajelzés küldése és megtekintése a következőhöz: