Scan data sources in Microsoft Purview
In Microsoft Purview, after you register your data source, you can scan your source to capture technical metadata, extract schema, and apply classifications to your data.
- For more information about scanning in general, see our scanning concept article.
- For best practices, see our scanning best practices article.
In this article, you'll learn the basic steps for scanning any data source.
Tip
Each source has its own instructions and prerequisites for scanning. For the most complete scanning instructions, select your source from the supported sources list and review its scanning instructions.
Prerequisites
Before you can scan your data source, you must take these steps:
- Register your data source - This essentially gives Microsoft Purview the address of your data source, and maps it to a collection in the Microsoft Purview Data Map.
- Consider your network and choose the right integration runtime configuration for your scenario.
- Consider what credentials you're going to use to connect to your source. All source pages will have a Scan section that will include details about what authentication types are available.
Create a scan
In the steps below we'll be using Azure Blob Storage as an example, and authenticating with the Microsoft Purview Managed Identity.
Important
These are the general steps for creating a scan, but you should refer to the source page for source-specific prerequistes and scanning instructions.
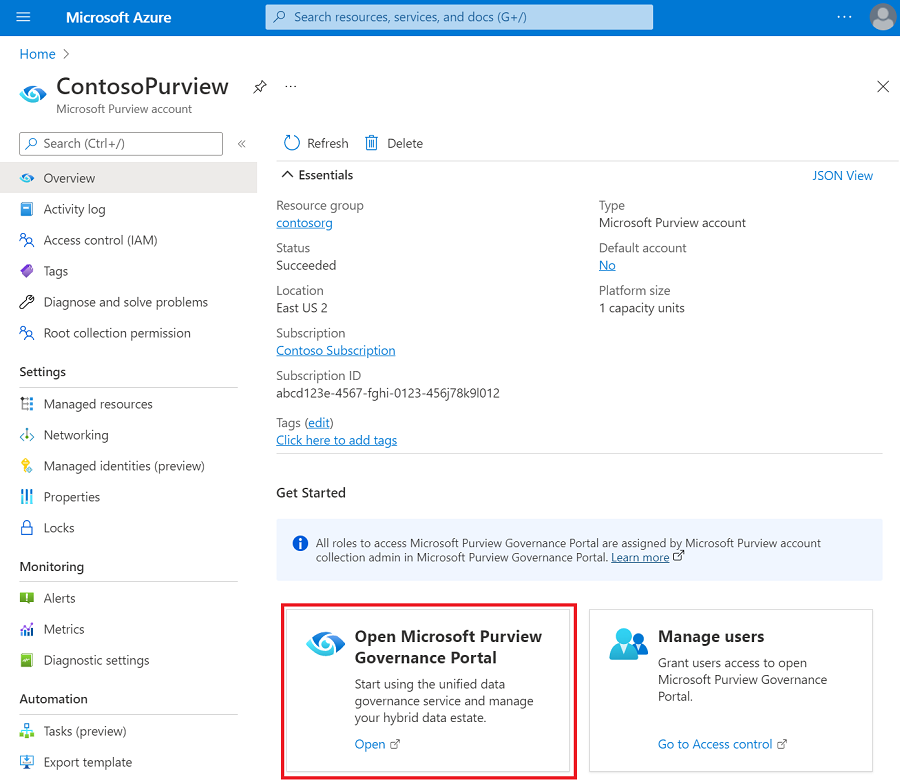
Open the Microsoft Purview governance portal by:
- Browsing directly to https://web.purview.azure.com and selecting your Microsoft Purview account.
- Opening the Azure portal, searching for and selecting the Microsoft Purview account. Select the the Microsoft Purview governance portal button.
Navigate to the Data map -> Sources to view your registered sources either in a map or table view.
Find your source and select the New Scan icon.
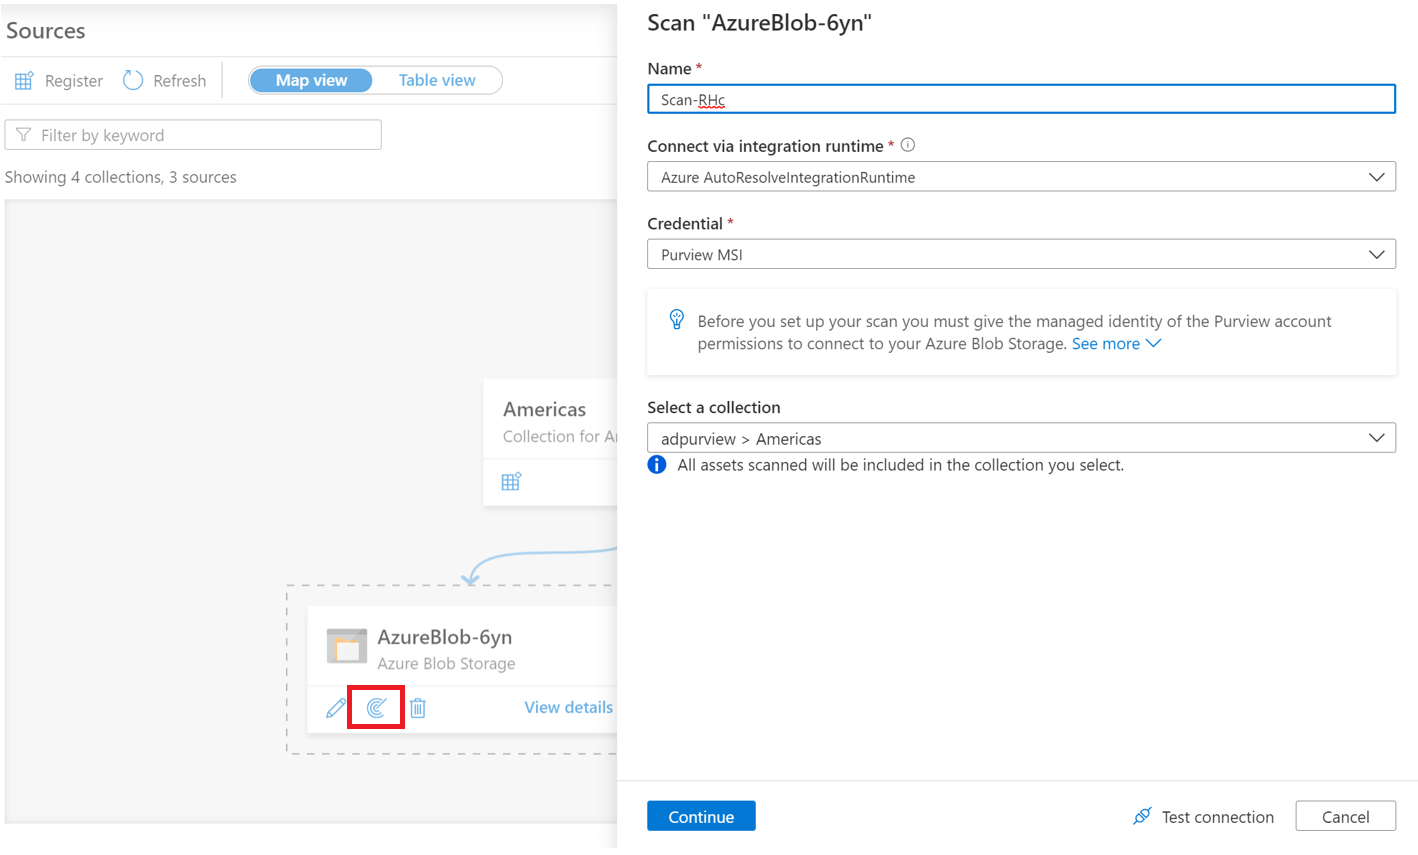
Provide a Name for the scan.
Select your authentication method. Here we chose the Purview MSI (managed identity.)
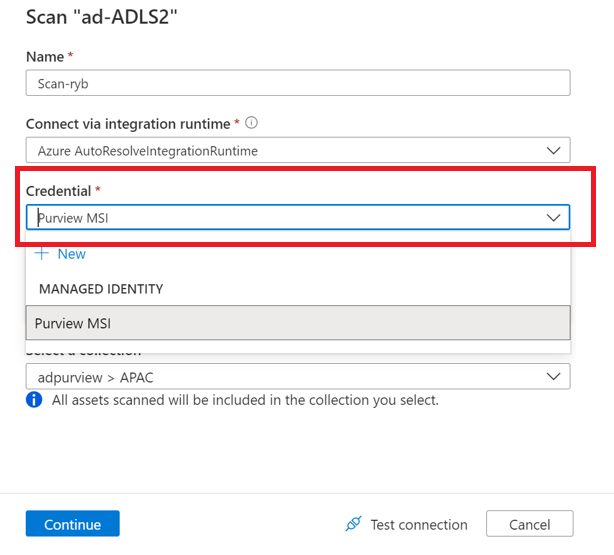
Choose the current collection, or a sub collection for the scan. The collection you choose will house the metadata discovered during the scan.
Select Test connection. If it isn't successful, see our [troubleshooting] section. On a successful connection, select Continue.
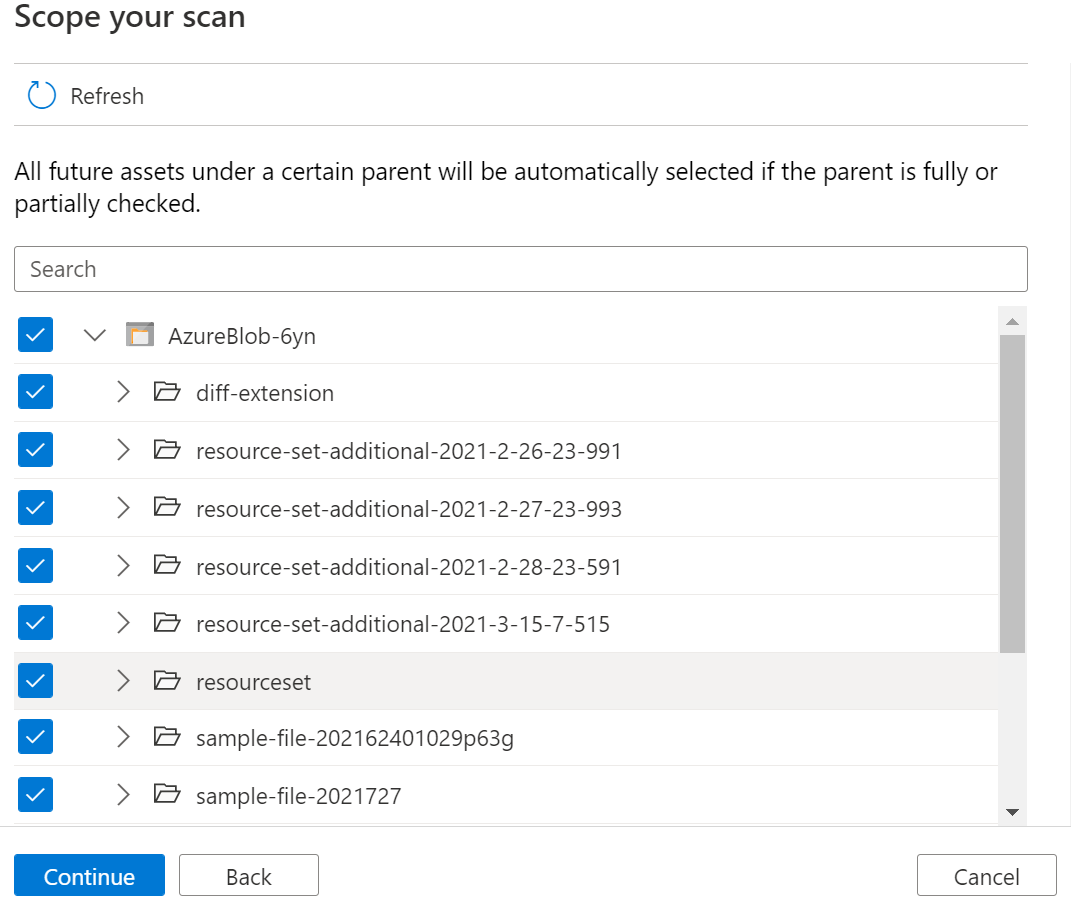
Depending on the source, you can scope your scan to a specific subset of data. For Azure Blob Storage, we can select folders and subfolders by choosing the appropriate items in the list.
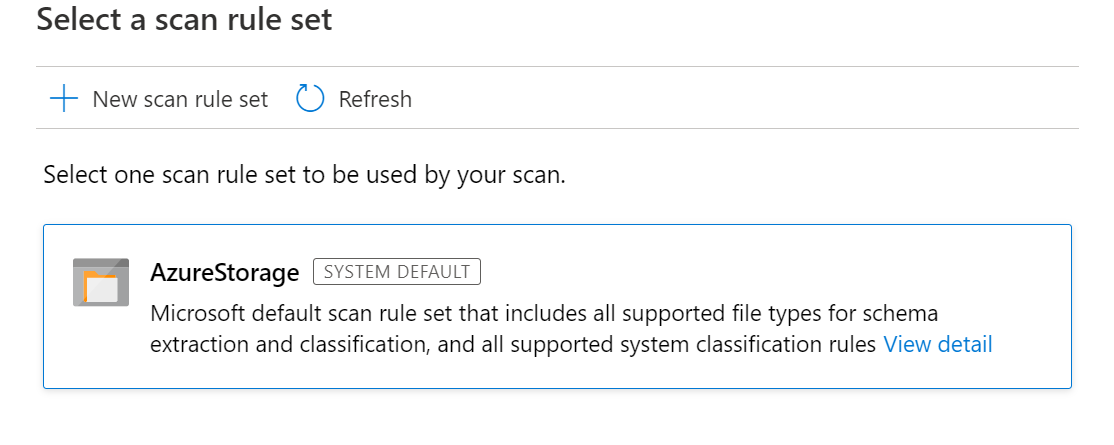
Select a scan rule set. The scan rule set contains the kinds of data classifications your scan will check for. You can choose between the system default (that will contain all classifications available for the source), existing custom rule sets made by others in your organization, or create a new rule set inline.
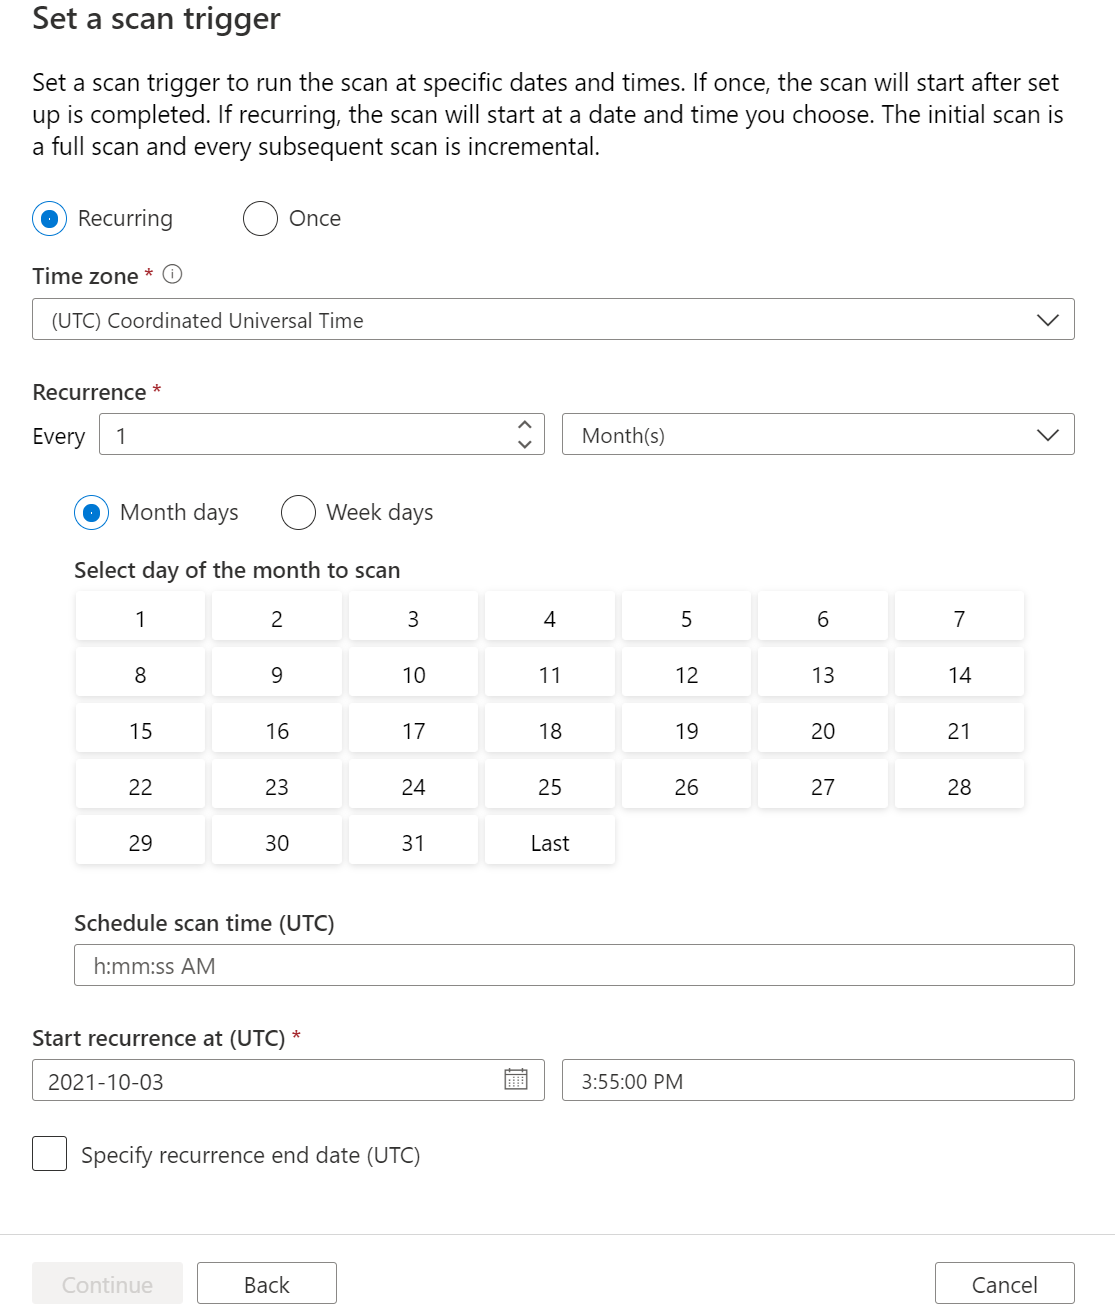
Choose your scan trigger. You can set up a schedule or run the scan once. Learn more about the supported schedule options.
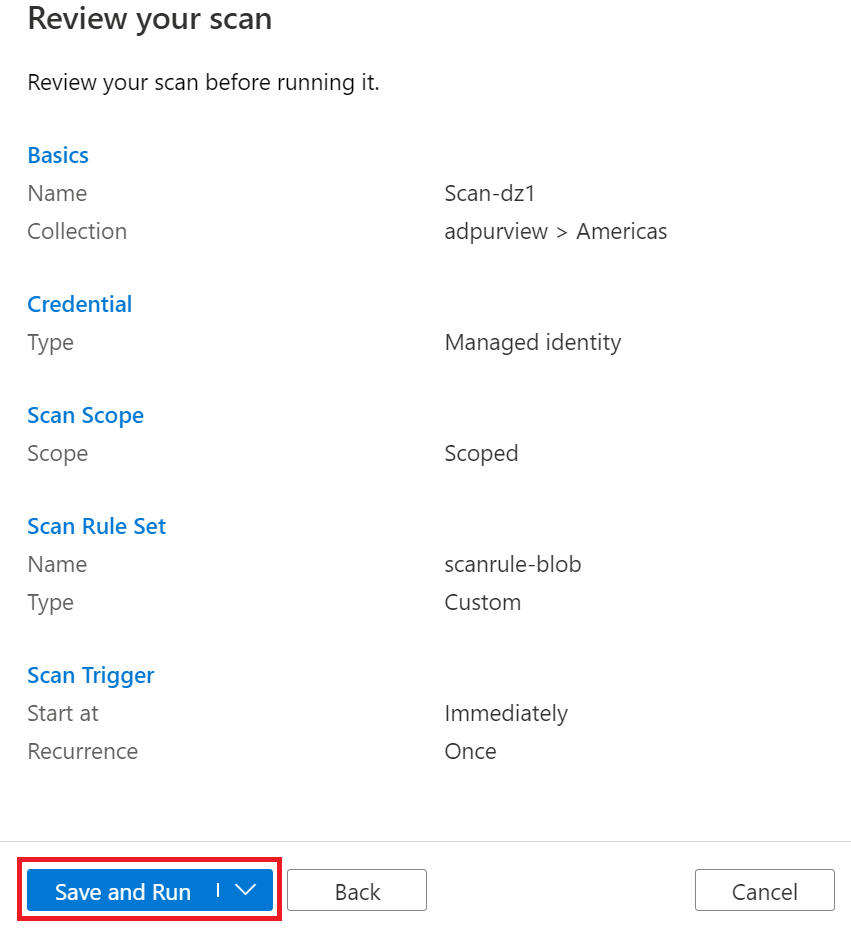
Review your scan and select Save and run.
Schedule a scan
When setting up the scan, you can choose to run it once / on-demand, or on a recurrence schedule. You can configure the following schedule options:
- Time zone: Select the time zone you'd like to align your scan schedule with. If the time zone you select observes daylight savings, the trigger will autoadjust for the difference.
- Recurrence: You can select a daily, weekly, or monthly scan recurrence.
- Daily recurrence: Set recurrence to every X day(s), and specify the scan start time of the day.
- Weekly recurrence: Set recurrence to every X week(s), select one or multiple day(s) of the week, and specify the scan start time of the day.
- Monthly recurrence: Set recurrence to every X month(s), choose between by month days or by weekdays, select one or multiple day(s)/weekday(s) of the month, and specify the scan start time of the day.
- Start recurrence at: Set when the scan schedule begins.
- Specify recurrence end date (optional): If you want to stop the scan after a certain amount of time, you can enable this option by selecting the check box and provide an end date.
View a scan
Depending on the amount of data in your data source, a scan can take some time to run, so here's how you can check on progress and see results when the scan is complete.
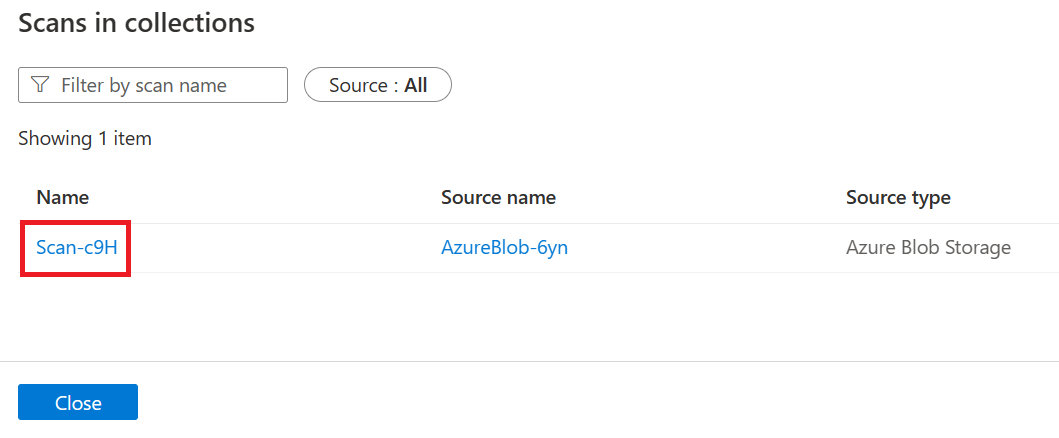
You can view your scan from the collection or from the source itself.
To view from the collection, navigate to your Collection in the data map, and select the Scans button.
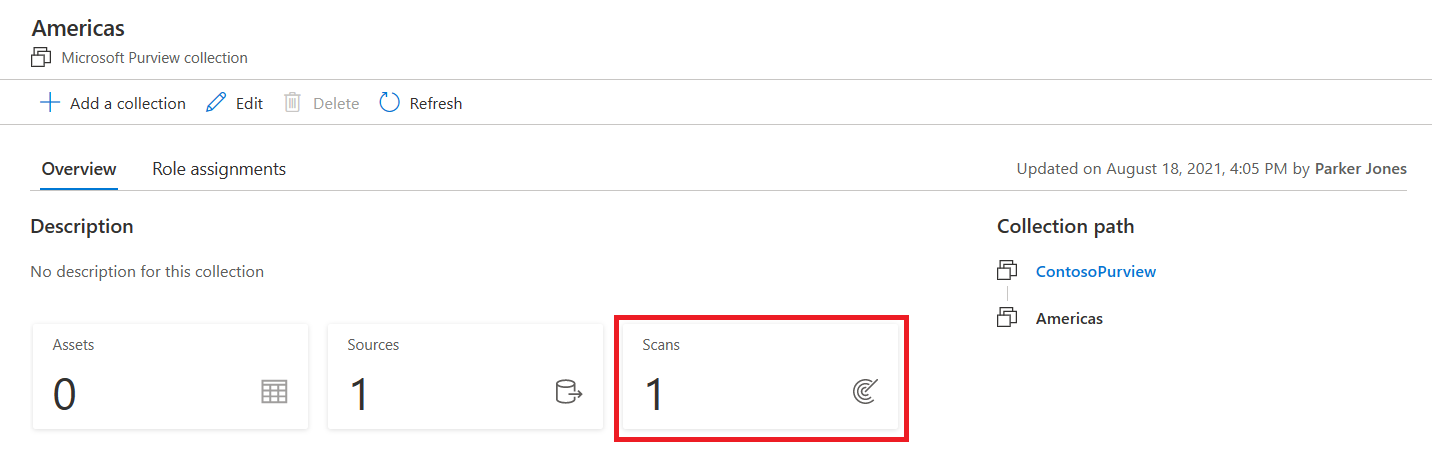
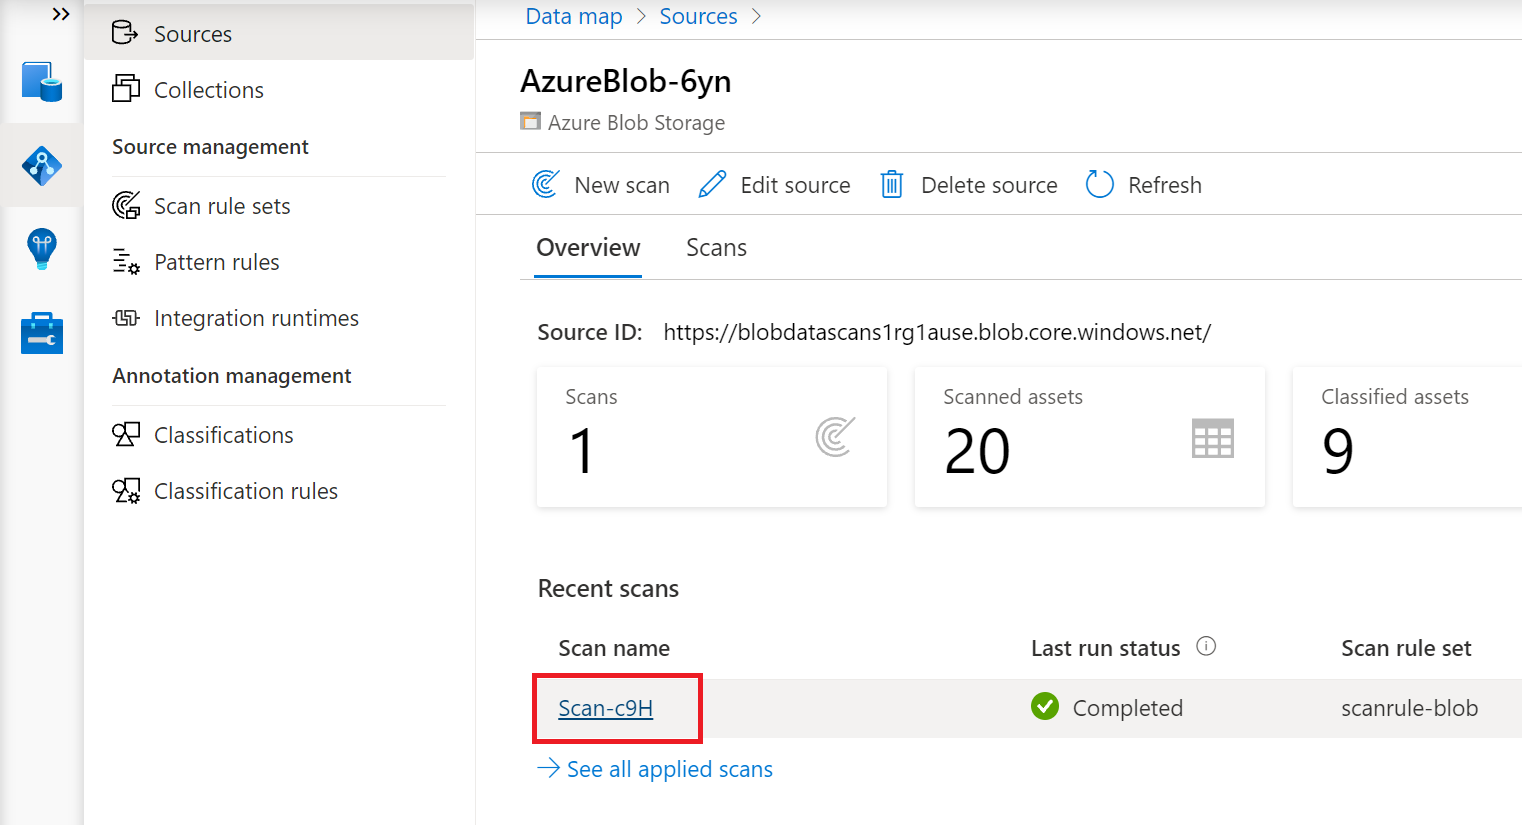
Select your scan name to see details.
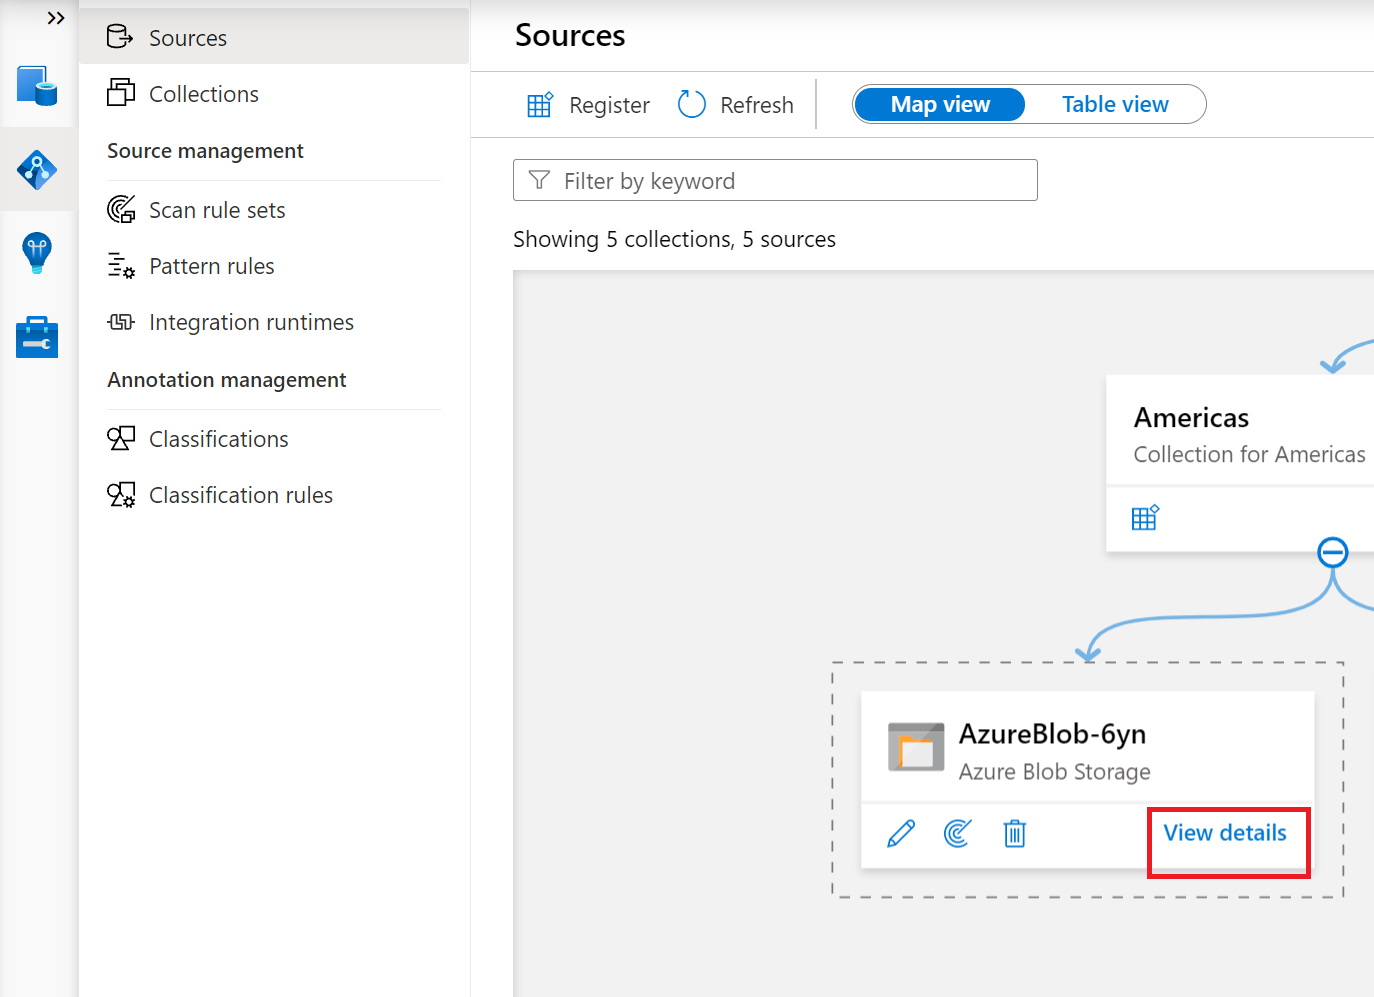
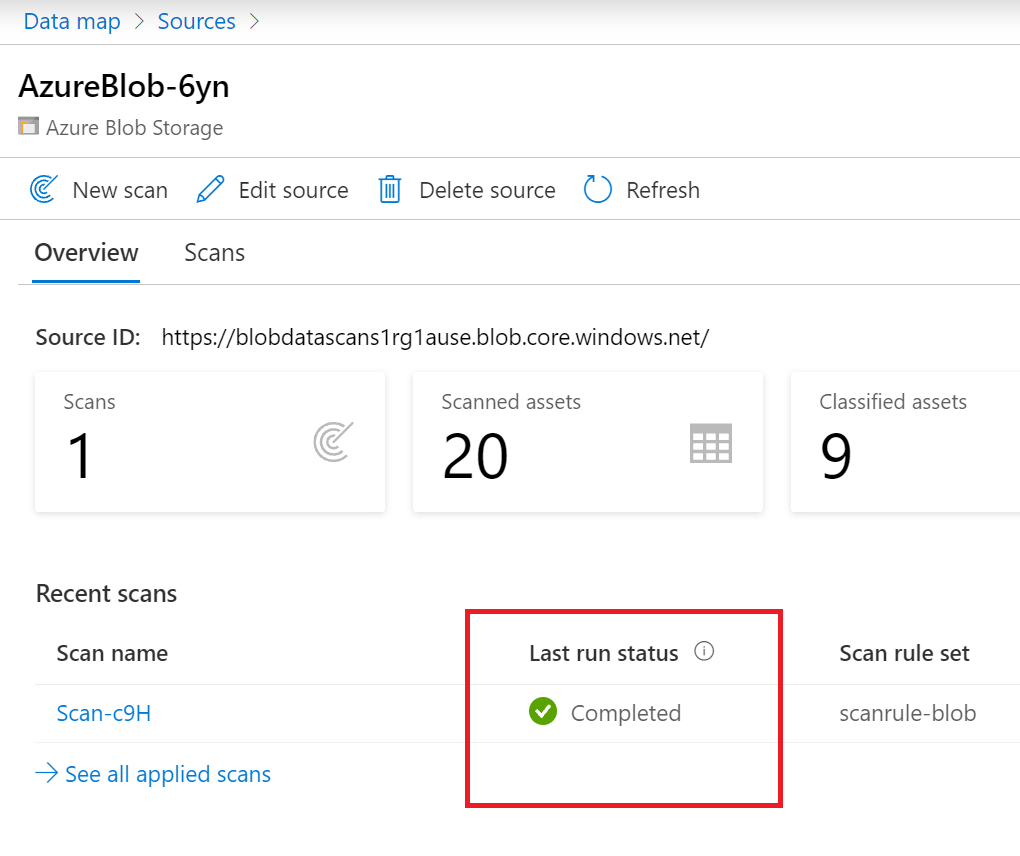
Or, you can navigate directly to the data source in the Collection and select View Details to check the status of the scan.
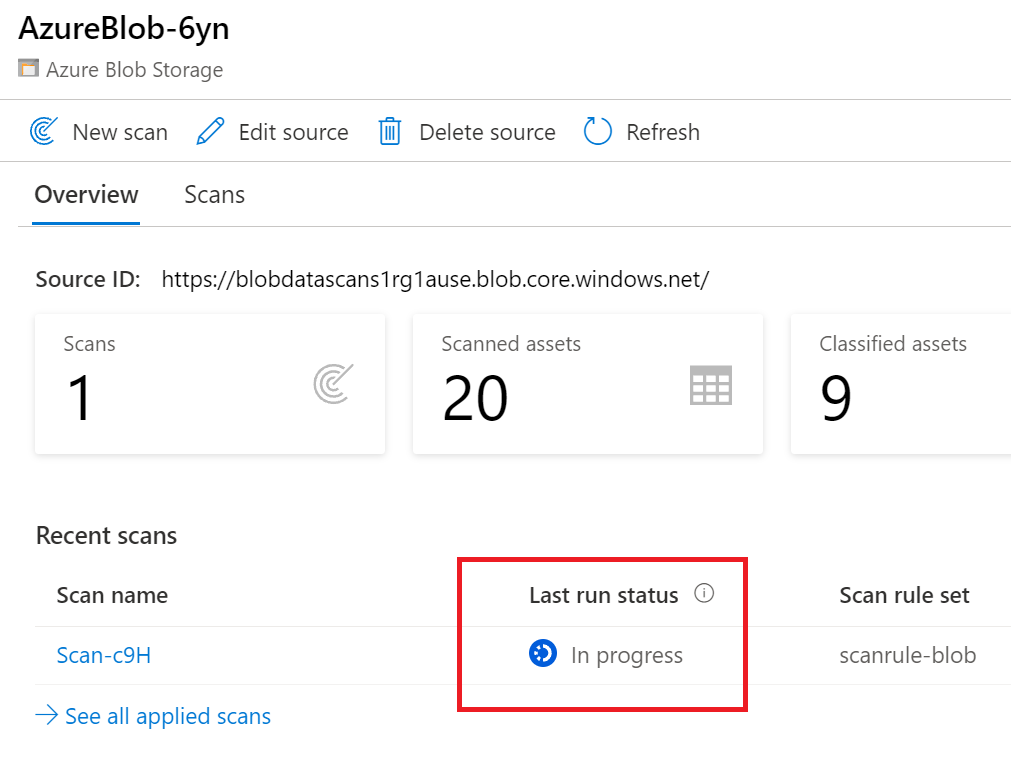
The scan details indicate the progress of the scan in the Last run status and the number of assets scanned and classified.
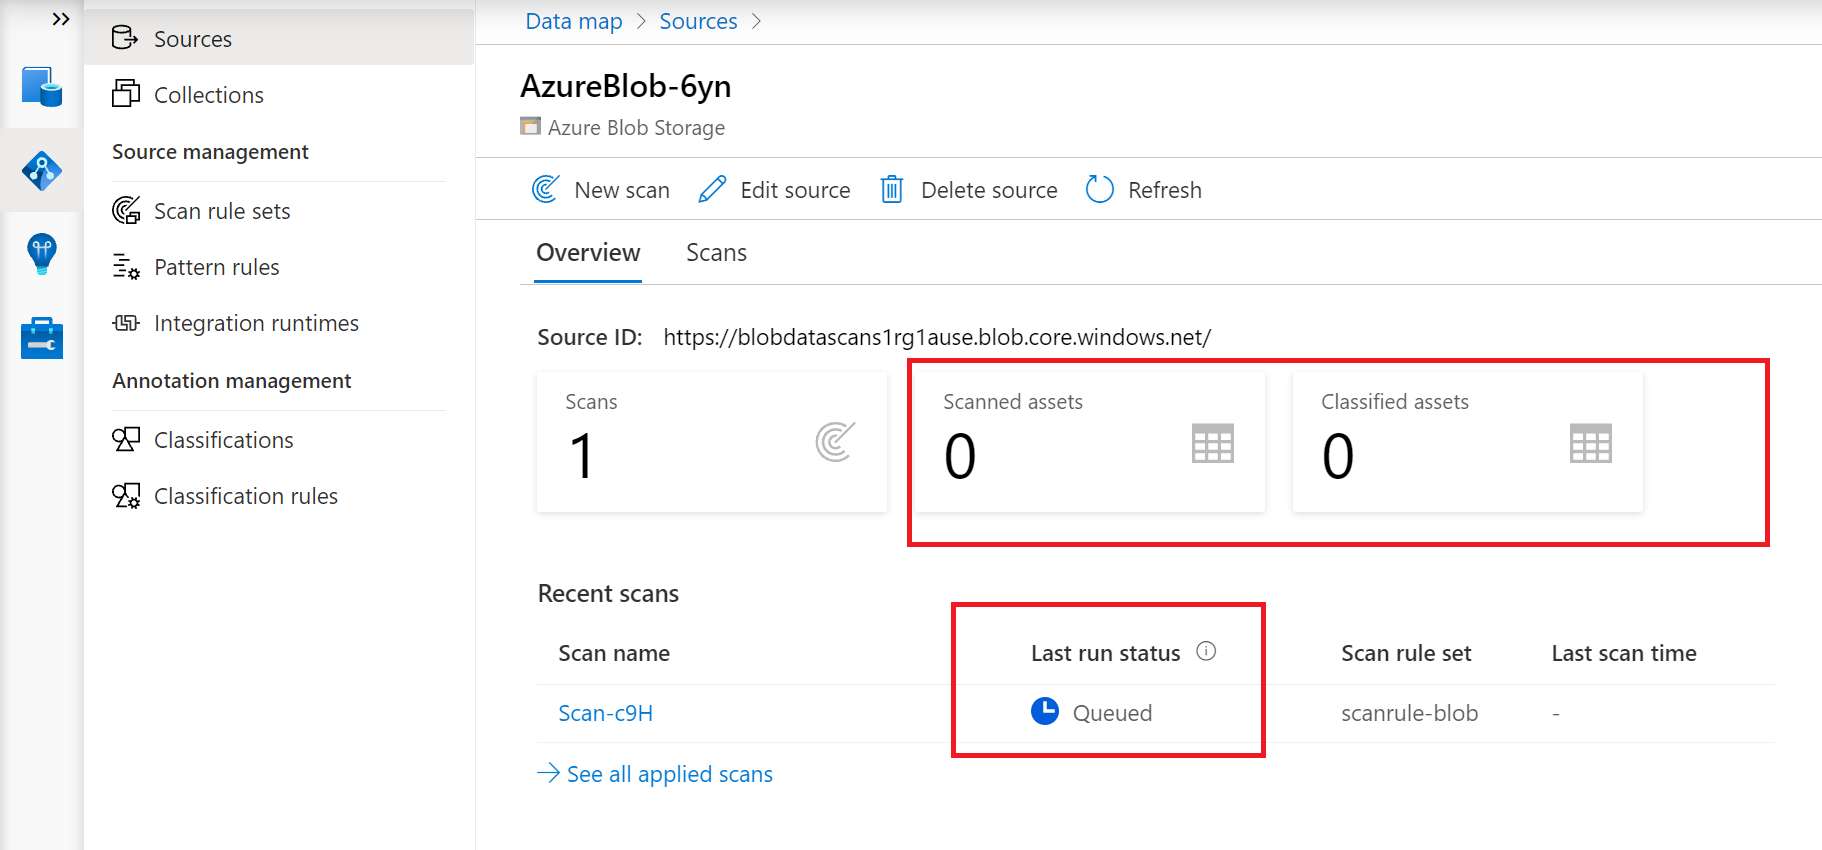
The Last run status will be updated to In progress and then Completed once the entire scan has run successfully
Manage a scan
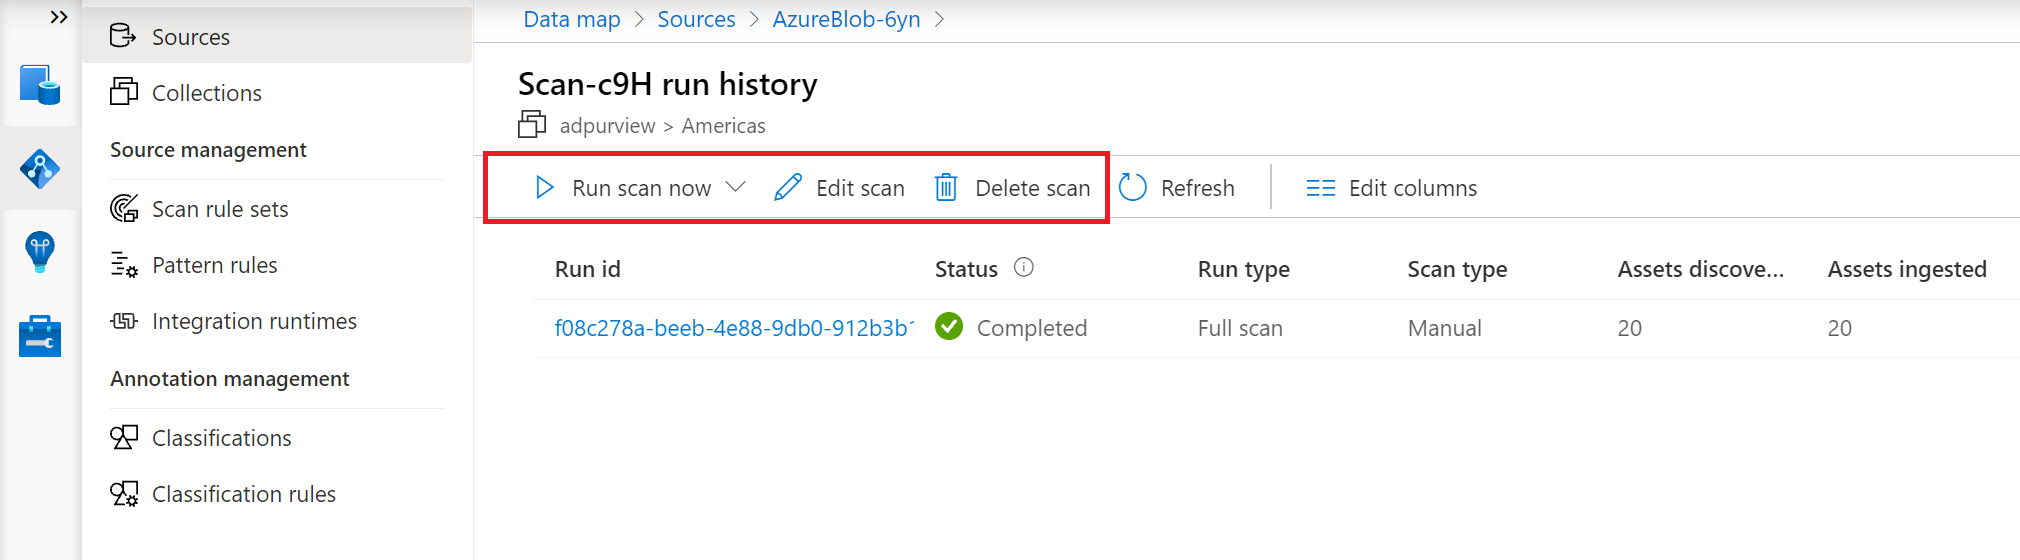
After a scan is complete, it can be managed or run again.
Select the Scan name from either the collections list or the source page to manage the scan.
You can run the scan again, edit the scan, delete the scan
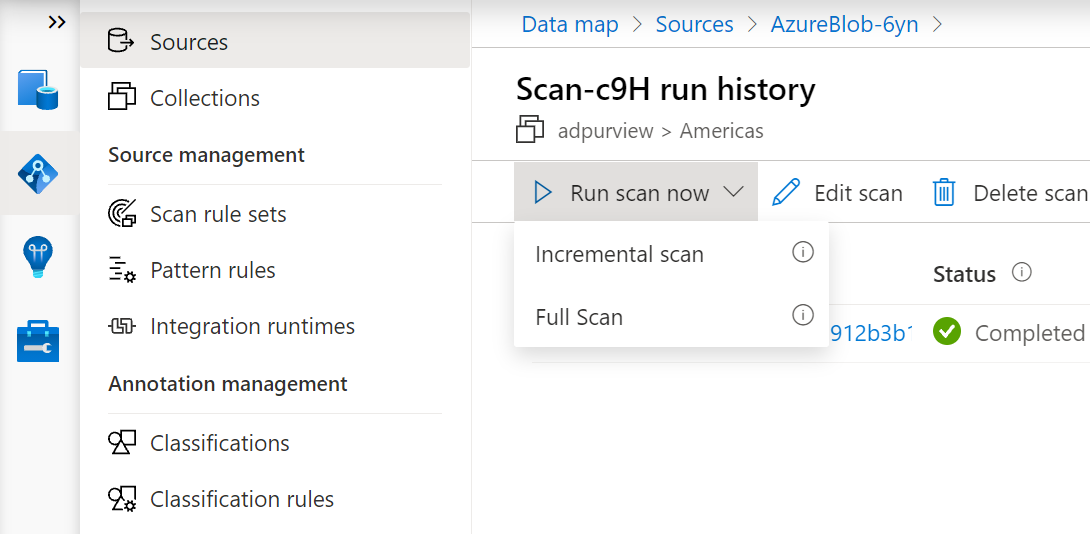
You can run a full scan, which will scan all the content in your scope, but some sources also have incremental scan available. Incremental scan will scan only those resources that have been updated since the last scan. Check the supported capabilities table in your source page to see if incremental scan is available for your source after the first scan.
Troubleshooting
Setting up the connection for your scan can complex since it's a custom set up for your network and your credentials.
If you're unable to connect to your source, follow these steps:
- Review your source page prerequisites to make sure there's nothing you've missed.
- Review your authentication option in the Scan section of your source page to confirm you have set up the authentication method correctly.
- Review our troubleshoot connections page.
- Create a support request, so our support team can help you troubleshoot your specific environment.
Next steps
Saran dan Komentar
Segera hadir: Sepanjang tahun 2024 kami akan menghentikan penggunaan GitHub Issues sebagai mekanisme umpan balik untuk konten dan menggantinya dengan sistem umpan balik baru. Untuk mengetahui informasi selengkapnya, lihat: https://aka.ms/ContentUserFeedback.
Kirim dan lihat umpan balik untuk