Mulai cepat: Bergabung dengan panggilan ruang
Prasyarat
- Akun Azure dengan langganan aktif. Buat akun secara gratis.
- Sumber daya Communication Services aktif dan string koneksi. Buat sumber daya Azure Communication Services.
- Dua atau beberapa Identitas Pengguna Komunikasi. Buat dan kelola token akses atau Buat cepat identitas untuk pengujian.
- Ruang yang dibuat dan peserta ditambahkan ke dalamnya. Membuat dan mengelola ruang
Mendapatkan token akses pengguna
Jika Anda telah membuat pengguna dan telah menambahkan mereka sebagai peserta di ruangan mengikuti bagian "Siapkan peserta ruang" di halaman ini, maka Anda dapat langsung menggunakan pengguna tersebut untuk bergabung dengan ruangan.
Jika tidak, Anda harus membuat Token Akses Pengguna untuk setiap peserta panggilan. Pelajari cara membuat dan mengelola token akses pengguna. Anda juga dapat menggunakan Azure CLI dan menjalankan perintah di bawah ini dengan string koneksi Anda untuk membuat pengguna dan token akses. Setelah pengguna dibuat, Anda harus menambahkannya ke ruangan sebagai peserta sebelum mereka dapat bergabung dengan ruangan.
az communication identity token issue --scope voip --connection-string "yourConnectionString"
Untuk detailnya, lihat Menggunakan Azure CLI untuk Membuat dan Mengelola Token Akses.
Catatan
Ruang dapat diakses menggunakan Pustaka Antarmuka Pengguna Azure Communication Services. Pustaka UI memungkinkan pengembang untuk menambahkan klien panggilan yang mengaktifkan Rooms ke dalam aplikasi mereka hanya dengan beberapa baris kode.
Bergabung dengan panggilan ruang
Untuk mengikuti mulai cepat ini, Anda dapat mengunduh mulai cepat Panggilan Ruang di GitHub.
Prasyarat
- Kau harus memiliki Node.js 18. Anda dapat menggunakan alat penginstal msi untuk menginstalnya.
Menyiapkan
Membuat aplikasi Node.js baru
Buka terminal atau jendela perintah buat direktori baru untuk aplikasi Anda, dan navigasikan ke sana.
mkdir calling-rooms-quickstart && cd calling-rooms-quickstart
Jalankan npm init -y untuk membuat file package.json dengan pengaturan default.
npm init -y
Pasang paket
Gunakan perintah npm install untuk memasang Azure Communication Services Calling SDK untuk JavaScript.
Penting
Mulai cepat ini menggunakan Azure Communication Services Calling SDK versi 1.14.1. Kemampuan untuk bergabung dalam panggilan ruang dan menampilkan peran peserta panggilan tersedia di SDK JavaScript Panggilan untuk browser web versi 1.13.1 ke atas.
npm install @azure/communication-common --save
npm install @azure/communication-calling@1.14.1 --save
Menyiapkan kerangka kerja aplikasi
Mulai cepat ini menggunakan Webpack untuk memaketkan aset aplikasi. Jalankan perintah berikut untuk menginstal paket npm webpack, webpack-cli, dan webpack-dev-server, serta cantumkan sebagai dependensi pengembangan di package.json Anda:
npm install copy-webpack-plugin@^11.0.0 webpack@^5.88.2 webpack-cli@^5.1.4 webpack-dev-server@^4.15.1 --save-dev
Berikut kodenya:
Buat file index.html di direktori akar proyek Anda. Kami menggunakan file ini untuk mengonfigurasi tata letak dasar yang memungkinkan pengguna untuk bergabung dengan panggilan kamar.
<!-- index.html-->
<!DOCTYPE html>
<html>
    <head>
        <title>Azure Communication Services - Rooms Call Sample</title>
        <link rel="stylesheet" type="text/css" href="styles.css"/>
    </head>
    <body>
        <h4>Azure Communication Services - Rooms Call Sample</h4>
        <input id="user-access-token"
            type="text"
            placeholder="User access token"
            style="margin-bottom:1em; width: 500px;"/>
        <button id="initialize-call-agent" type="button">Initialize Call Agent</button>
        <br>
        <br>
        <input id="acs-room-id"
            type="text"
            placeholder="Enter Room Id"
            style="margin-bottom:1em; width: 500px; display: block;"/>
        <button id="join-room-call-button" type="button" disabled="true">Join Room Call</button>
        <button id="hangup-call-button" type="button" disabled="true">Hang up Call</button>
        <button id="start-video-button" type="button" disabled="true">Start Video</button>
        <button id="stop-video-button" type="button" disabled="true">Stop Video</button>
        <br>
        <br>
        <div id="connectedLabel" style="color: #13bb13;" hidden>Room Call is connected!</div>
        <br>
        <div id="remoteVideosGallery" style="width: 40%;" hidden>Remote participants' video streams:</div>
        <br>
        <div id="localVideoContainer" style="width: 30%;" hidden>Local video stream:</div>
        <!-- points to the bundle generated from client.js -->
        <script src="./main.js"></script>
    </body>
</html>
Buat file di direktori akar proyek Anda yang bernama index.js guna memuat logika aplikasi untuk mulai cepat ini. Tambahkan kode berikut ke index.js:
// Make sure to install the necessary dependencies
const { CallClient, VideoStreamRenderer, LocalVideoStream } = require('@azure/communication-calling');
const { AzureCommunicationTokenCredential } = require('@azure/communication-common');
const { AzureLogger, setLogLevel } = require("@azure/logger");
// Set the log level and output
setLogLevel('verbose');
AzureLogger.log = (...args) => {
    console.log(...args);
};

// Calling web sdk objects
let callAgent;
let deviceManager;
let call;
let localVideoStream;
let localVideoStreamRenderer;

// UI widgets
let userAccessToken = document.getElementById('user-access-token');
let acsRoomId = document.getElementById('acs-room-id');
let initializeCallAgentButton = document.getElementById('initialize-call-agent');
let startCallButton = document.getElementById('join-room-call-button');
let hangUpCallButton = document.getElementById('hangup-call-button');
let startVideoButton = document.getElementById('start-video-button');
let stopVideoButton = document.getElementById('stop-video-button');
let connectedLabel = document.getElementById('connectedLabel');
let remoteVideosGallery = document.getElementById('remoteVideosGallery');
let localVideoContainer = document.getElementById('localVideoContainer');

/**
 * Using the CallClient, initialize a CallAgent instance with a CommunicationUserCredential which enable us to join a rooms call.
 */
initializeCallAgentButton.onclick = async () => {
    try {
        const callClient = new CallClient();
        tokenCredential = new AzureCommunicationTokenCredential(userAccessToken.value.trim());
        callAgent = await callClient.createCallAgent(tokenCredential)
        // Set up a camera device to use.
        deviceManager = await callClient.getDeviceManager();
        await deviceManager.askDevicePermission({ video: true });
        await deviceManager.askDevicePermission({ audio: true });

        startCallButton.disabled = false;
        initializeCallAgentButton.disabled = true;
    } catch(error) {
        console.error(error);
    }
}


startCallButton.onclick = async () => {
    try {
        const localVideoStream = await createLocalVideoStream();
        const videoOptions = localVideoStream ? { localVideoStreams: [localVideoStream] } : undefined;

        const roomCallLocator = { roomId: acsRoomId.value.trim() };
        call = callAgent.join(roomCallLocator, { videoOptions });

        // Subscribe to the call's properties and events.
        subscribeToCall(call);
    } catch (error) {
        console.error(error);
    }
}

/**
 * Subscribe to a call obj.
 * Listen for property changes and collection updates.
 */
subscribeToCall = (call) => {
    try {
        // Inspect the initial call.id value.
        console.log(`Call Id: ${call.id}`);
        //Subscribe to call's 'idChanged' event for value changes.
        call.on('idChanged', () => {
            console.log(`Call Id changed: ${call.id}`);
        });

        // Inspect the initial call.state value.
        console.log(`Call state: ${call.state}`);
        // Subscribe to call's 'stateChanged' event for value changes.
        call.on('stateChanged', async () => {
            console.log(`Call state changed: ${call.state}`);
            if(call.state === 'Connected') {
                connectedLabel.hidden = false;
                startCallButton.disabled = true;
                hangUpCallButton.disabled = false;
                startVideoButton.disabled = false;
                stopVideoButton.disabled = false;
                remoteVideosGallery.hidden = false;
            } else if (call.state === 'Disconnected') {
                connectedLabel.hidden = true;
                startCallButton.disabled = false;
                hangUpCallButton.disabled = true;
                startVideoButton.disabled = true;
                stopVideoButton.disabled = true;
                remoteVideosGallery.hidden = true;
                console.log(`Call ended, call end reason={code=${call.callEndReason.code}, subCode=${call.callEndReason.subCode}}`);
            }
        });
        call.on('isLocalVideoStartedChanged', () => {
            console.log(`isLocalVideoStarted changed: ${call.isLocalVideoStarted}`);
        });
        console.log(`isLocalVideoStarted: ${call.isLocalVideoStarted}`);
        call.localVideoStreams.forEach(async (lvs) => {
            localVideoStream = lvs;
            await displayLocalVideoStream();
        });
        call.on('localVideoStreamsUpdated', e => {
            e.added.forEach(async (lvs) => {
                localVideoStream = lvs;
                await displayLocalVideoStream();
            });
            e.removed.forEach(lvs => {
               removeLocalVideoStream();
            });
        });

        // Inspect the call's current remote participants and subscribe to them.
        call.remoteParticipants.forEach(remoteParticipant => {
            subscribeToRemoteParticipant(remoteParticipant);
        });
        // Subscribe to the call's 'remoteParticipantsUpdated' event to be
        // notified when new participants are added to the call or removed from the call.
        call.on('remoteParticipantsUpdated', e => {
            // Subscribe to new remote participants that are added to the call.
            e.added.forEach(remoteParticipant => {
                subscribeToRemoteParticipant(remoteParticipant)
            });
            // Unsubscribe from participants that are removed from the call
            e.removed.forEach(remoteParticipant => {
                console.log('Remote participant removed from the call.');
            });
        });
    } catch (error) {
        console.error(error);
    }
}

/**
 * Subscribe to a remote participant obj.
 * Listen for property changes and collection udpates.
 */
subscribeToRemoteParticipant = (remoteParticipant) => {
    try {
        // Inspect the initial remoteParticipant.state value.
        console.log(`Remote participant state: ${remoteParticipant.state}`);
        // Subscribe to remoteParticipant's 'stateChanged' event for value changes.
        remoteParticipant.on('stateChanged', () => {
            console.log(`Remote participant state changed: ${remoteParticipant.state}`);
        });

        // Inspect the remoteParticipants's current videoStreams and subscribe to them.
        remoteParticipant.videoStreams.forEach(remoteVideoStream => {
            subscribeToRemoteVideoStream(remoteVideoStream)
        });
        // Subscribe to the remoteParticipant's 'videoStreamsUpdated' event to be
        // notified when the remoteParticiapant adds new videoStreams and removes video streams.
        remoteParticipant.on('videoStreamsUpdated', e => {
            // Subscribe to new remote participant's video streams that were added.
            e.added.forEach(remoteVideoStream => {
                subscribeToRemoteVideoStream(remoteVideoStream)
            });
            // Unsubscribe from remote participant's video streams that were removed.
            e.removed.forEach(remoteVideoStream => {
                console.log('Remote participant video stream was removed.');
            })
        });
    } catch (error) {
        console.error(error);
    }
}

/**
 * Subscribe to a remote participant's remote video stream obj.
 * You have to subscribe to the 'isAvailableChanged' event to render the remoteVideoStream. If the 'isAvailable' property
 * changes to 'true', a remote participant is sending a stream. Whenever availability of a remote stream changes
 * you can choose to destroy the whole 'Renderer', a specific 'RendererView' or keep them, but this will result in displaying blank video frame.
 */
subscribeToRemoteVideoStream = async (remoteVideoStream) => {
    let renderer = new VideoStreamRenderer(remoteVideoStream);
    let view;
    let remoteVideoContainer = document.createElement('div');
    remoteVideoContainer.className = 'remote-video-container';

    const createView = async () => {
        // Create a renderer view for the remote video stream.
        view = await renderer.createView();
        // Attach the renderer view to the UI.
        remoteVideoContainer.appendChild(view.target);
        remoteVideosGallery.appendChild(remoteVideoContainer);
    }

    // Remote participant has switched video on/off
    remoteVideoStream.on('isAvailableChanged', async () => {
        try {
            if (remoteVideoStream.isAvailable) {
                await createView();
            } else {
                view.dispose();
                remoteVideosGallery.removeChild(remoteVideoContainer);
            }
        } catch (e) {
            console.error(e);
        }
    });

    // Remote participant has video on initially.
    if (remoteVideoStream.isAvailable) {
        try {
            await createView();
        } catch (e) {
            console.error(e);
        }
    }
}

/**
 * Start your local video stream.
 * This will send your local video stream to remote participants so they can view it.
 */
startVideoButton.onclick = async () => {
    try {
        const localVideoStream = await createLocalVideoStream();
        await call.startVideo(localVideoStream);
    } catch (error) {
        console.error(error);
    }
}

/**
 * Stop your local video stream.
 * This will stop your local video stream from being sent to remote participants.
 */
stopVideoButton.onclick = async () => {
    try {
        await call.stopVideo(localVideoStream);
    } catch (error) {
        console.error(error);
    }
}

/**
 * To render a LocalVideoStream, you need to create a new instance of VideoStreamRenderer, and then
 * create a new VideoStreamRendererView instance using the asynchronous createView() method.
 * You may then attach view.target to any UI element.
 */
createLocalVideoStream = async () => {
    const camera = (await deviceManager.getCameras())[0];
    if (camera) {
        return new LocalVideoStream(camera);
    } else {
        console.error(`No camera device found on the system`);
    }
}

/**
 * Display your local video stream preview in your UI
 */
displayLocalVideoStream = async () => {
    try {
        localVideoStreamRenderer = new VideoStreamRenderer(localVideoStream);
        const view = await localVideoStreamRenderer.createView();
        localVideoContainer.hidden = false;
        localVideoContainer.appendChild(view.target);
    } catch (error) {
        console.error(error);
    }
}

/**
 * Remove your local video stream preview from your UI
 */
removeLocalVideoStream = async() => {
    try {
        localVideoStreamRenderer.dispose();
        localVideoContainer.hidden = true;
    } catch (error) {
        console.error(error);
    }
}

/**
 * End current room call
 */
hangUpCallButton.addEventListener("click", async () => {
    await call.hangUp();
});
Menambahkan kode server lokal webpack
Buat file di direktori akar proyek Anda yang disebut webpack.config.js untuk memuat logika server lokal untuk mulai cepat ini. Tambahkan kode berikut ke webpack.config.js:
const path = require('path');
const CopyPlugin = require("copy-webpack-plugin");

module.exports = {
    mode: 'development',
    entry: './index.js',
    output: {
        filename: 'main.js',
        path: path.resolve(__dirname, 'dist'),
    },
    devServer: {
        static: {
            directory: path.join(__dirname, './')
        },
    },
    plugins: [
        new CopyPlugin({
            patterns: [
                './index.html'
            ]
        }),
    ]
};
Menjalankan kode
Gunakan webpack-dev-server untuk membuat dan menjalankan aplikasi Anda. Jalankan perintah berikut untuk membundel host aplikasi di webserver lokal:
`npx webpack serve --config webpack.config.js`
- Buka browser Anda menavigasi ke http://localhost:8080/.
- Pada bidang input pertama, masukkan token akses pengguna yang valid.
- Klik "Inisialisasi Agen Panggilan" dan masukkan ID Kamar Anda.
- Klik "Gabung Panggilan Ruang"
Anda sekarang telah berhasil bergabung dengan panggilan Rooms!
Memahami bergabung dengan panggilan Ruang
Semua kode yang telah Anda tambahkan di aplikasi Mulai Cepat memungkinkan Anda untuk berhasil memulai dan bergabung dengan panggilan ruang. Berikut adalah informasi selengkapnya tentang metode/penangan lainnya yang dapat Anda akses untuk Kamar untuk memperluas fungsionalitas dalam aplikasi Anda.
Untuk menampilkan peran peserta panggilan lokal atau jarak jauh, berlangganan handler di bawah ini.
// Subscribe to changes for your role in a call
 const callRoleChangedHandler = () => {
 	console.log(call.role);
 };

 call.on('roleChanged', callRoleChangedHandler);

// Subscribe to role changes for remote participants
 const subscribeToRemoteParticipant = (remoteParticipant) => {
 	remoteParticipant.on('roleChanged', () => {
 	    console.log(remoteParticipant.role);
 	});
 }
Anda dapat mempelajari selengkapnya tentang peran peserta panggilan ruang dalam dokumentasi konsep ruangan.
Bergabung dengan panggilan Ruang
Untuk mengikuti mulai cepat ini, Anda dapat mengunduh mulai cepat Panggilan Ruang di GitHub.
Menyiapkan
Membuat proyek Xcode
Di Xcode, buat proyek iOS baru dan pilih templat Aplikasi Tampilan Tunggal. Tutorial ini menggunakan kerangka kerja SwiftUI, jadi Anda harus mengatur Bahasa ke Swift dan Antarmuka Pengguna ke SwiftUI.

Menginstal CocoaPods
Gunakan panduan ini untuk menginstal CocoaPods di Mac Anda.
Memasang paket dan dependensi dengan CocoaPods
Untuk membuat Podfile untuk aplikasi Anda, buka terminal dan navigasikan ke folder proyek dan jalankan pod init.
Tambahkan kode berikut ke dalam Podfile dan simpan:
platform :ios, '13.0'
use_frameworks!

target 'roomsquickstart' do
  pod 'AzureCommunicationCalling', '~> 2.5.0'
end
Jalankan penginstalan pod.
.xcworkspaceBuka file dengan Xcode.
Minta akses ke mikrofon dan kamera
Untuk mengakses mikrofon dan kamera perangkat, Anda perlu memperbarui Daftar Properti Informasi aplikasi Anda dengan NSMicrophoneUsageDescription dan NSCameraUsageDescription. Atur nilai terkait ke string yang akan disertakan dalam dialog yang digunakan sistem untuk meminta akses dari pengguna.
Info.plist Klik kanan entri pohon proyek dan pilih Buka Sebagai > Kode Sumber. Tambahkan baris berikut ke bagian <dict> tingkat atas, lalu simpan file.
<key>NSMicrophoneUsageDescription</key>
<string>Need microphone access for VOIP calling.</string>
<key>NSCameraUsageDescription</key>
<string>Need camera access for video calling</string>
Menyiapkan kerangka kerja aplikasi
Buka file proyek ContentView.swift Anda dan tambahkan deklarasi impor ke bagian atas file untuk mengimpor pustaka AzureCommunicationCalling dan AVFoundation. AVFoundation digunakan untuk mengambil izin akses audio dari kode.
import AzureCommunicationCalling
import AVFoundation
Model objek
Kelas dan antarmuka berikut menangani beberapa fitur utama Azure Communication Services Calling SDK for iOS.
| Nama | Deskripsi |
|---|---|
| CallClient | CallClient adalah titik masuk utama ke Calling SDK. |
| CallAgent | CallAgent digunakan untuk memulai dan mengelola panggilan. |
| CommunicationTokenCredential | CommunicationTokenCredential digunakan sebagai kredensial token untuk menginstansiasi CallAgent. |
| CommunicationIdentifier | CommunicationIdentifier digunakan untuk mewakili identitas pengguna, dan dapat memiliki salah satu nilai berikut: CommunicationUserIdentifier/Telepon NumberIdentifier/CallingApplication. |
| RoomCallLocator | RoomCallLocator digunakan oleh CallAgent untuk bergabung dengan panggilan Ruang |
Membuat Agen Panggilan
Mengganti implementasi struktur ContentView dengan beberapa kontrol UI sederhana yang mengaktifkan pengguna untuk memulai dan mengakhiri panggilan. Kami akan melampirkan logika bisnis ke kontrol ini dalam mulai cepat ini.
struct ContentView: View {
    @State var roomId: String = ""
    @State var callObserver:CallObserver?
    @State var previewRenderer: VideoStreamRenderer? = nil
    @State var previewView: RendererView? = nil
    @State var sendingLocalVideo: Bool = false
    @State var speakerEnabled: Bool = false
    @State var muted: Bool = false
    @State var callClient: CallClient?
    @State var call: Call?
    @State var callHandler: CallHandler?
    @State var callAgent: CallAgent?
    @State var deviceManager: DeviceManager?
    @State var localVideoStreams: [LocalVideoStream]?
    @State var callState: String = "Unknown"
    @State var showAlert: Bool = false
    @State var alertMessage: String = ""
    @State var participants: [[Participant]] = [[]]

    var body: some View {
        NavigationView {
            ZStack {
                if (call == nil) {
                    Form {
                        Section {
                            TextField("Room ID", text: $roomId)
                            Button(action: joinRoomCall) {
                                Text("Join Room Call")
                            }
                        }
                    }
                    .navigationBarTitle("Rooms Quickstart")
                } else {
                    ZStack {
                        VStack {
                            ForEach(participants, id:\.self) { array in
                                HStack {
                                    ForEach(array, id:\.self) { participant in
                                        ParticipantView(self, participant)
                                    }
                                }
                                .frame(maxWidth: .infinity, maxHeight: 200, alignment: .topLeading)
                            }
                        }
                        .background(Color.black)
                        .frame(maxWidth: .infinity, maxHeight: .infinity, alignment: .topLeading)
                        VStack {
                            if (sendingLocalVideo) {
                                HStack {
                                    RenderInboundVideoView(view: $previewView)
                                        .frame(width:90, height:160)
                                        .padding(10)
                                        .background(Color.green)
                                }
                                .frame(maxWidth: .infinity, alignment: .trailing)
                            }
                            HStack {
                                Button(action: toggleMute) {
                                    HStack {
                                        Text(muted ? "Unmute" : "Mute")
                                    }
                                    .frame(width:80)
                                    .padding(.vertical, 10)
                                    .background(Color(.lightGray))
                                }
                                Button(action: toggleLocalVideo) {
                                    HStack {
                                        Text(sendingLocalVideo ? "Video-Off" : "Video-On")
                                    }
                                    .frame(width:80)
                                    .padding(.vertical, 10)
                                    .background(Color(.lightGray))
                                }
                            }
                            .frame(maxWidth: .infinity, alignment: .leading)
                            .padding(.horizontal, 10)
                            .padding(.vertical, 5)
                            HStack {
                                Button(action: leaveRoomCall) {
                                    HStack {
                                        Text("Leave Room Call")
                                    }
                                    .frame(width:80)
                                    .padding(.vertical, 10)
                                    .background(Color(.red))
                                }
                            }
                            .frame(maxWidth: .infinity, alignment: .leading)
                            .padding(.horizontal, 10)
                            .padding(.vertical, 5)
                            HStack {
                                Text("Status:")
                                Text(callState)
                            }
                            .padding(.vertical, 10)
                        }
                        .frame(maxWidth: .infinity, maxHeight: .infinity, alignment: .bottomLeading)
                    }
                }
            }
        }
        .onAppear{
            // Authenticate the client
            // Initialize the CallAgent and access Device Manager
            // Ask for permissions
        }
    }
}

//Functions and Observers

struct HomePageView_Previews: PreviewProvider {
    static var previews: some View {
        HomePageView()
    }
}
Mengautentikasi klien
Untuk menginisialisasi instans CallAgent, kita memerlukan Token Akses Pengguna yang akan memungkinkan kita untuk bergabung dengan panggilan Kamar.
Setelah Anda memiliki token, tambahkan kode berikut ke onAppear panggilan balik di ContentView.swift. Anda perlu mengganti <USER ACCESS TOKEN> dengan token akses pengguna yang valid untuk sumber daya Anda:
var userCredential: CommunicationTokenCredential?
do {
    userCredential = try CommunicationTokenCredential(token: "<USER ACCESS TOKEN>")
} catch {
    print("ERROR: It was not possible to create user credential.")
    return
}
Menginisialisasi CallAgent dan mengakses Manajer Perangkat
Untuk membuat instans CallAgent dari CallClient, gunakan metode callClient.createCallAgent yang secara asinkron mengembalikan objek CallAgent setelah dimulai. DeviceManager memungkinkan Anda menghitung perangkat lokal yang dapat digunakan dalam panggilan untuk mentransmisikan aliran audio/video. DeviceManager juga memungkinkan Anda untuk meminta izin akses dari pengguna untuk mengakses mikrofon/kamera.
self.callClient = CallClient()
self.callClient?.createCallAgent(userCredential: userCredential!) { (agent, error) in
    if error != nil {
        print("ERROR: It was not possible to create a call agent.")
        return
    } else {
        self.callAgent = agent
        print("Call agent successfully created.")
        self.callAgent!.delegate = callHandler
        self.callClient?.getDeviceManager { (deviceManager, error) in
            if (error == nil) {
                print("Got device manager instance")
                self.deviceManager = deviceManager
            } else {
                print("Failed to get device manager instance")
            }
        }
    }
}
Meminta izin
Kita perlu menambahkan kode berikut ke panggilan balik onAppear guna meminta izin audio dan video.
AVAudioSession.sharedInstance().requestRecordPermission { (granted) in
    if granted {
        AVCaptureDevice.requestAccess(for: .video) { (videoGranted) in
            /* NO OPERATION */
        }
    }
}
Bergabung dengan panggilan Ruang
Metode joinRoomCall ini diatur sebagai tindakan yang akan dilakukan saat tombol Gabung Panggilan Ruang diketuk. Dalam mulai cepat ini, panggilan hanya audio secara default tetapi dapat mengaktifkan video setelah Ruangan digabungkan.
func joinRoomCall() {
    if self.callAgent == nil {
        print("CallAgent not initialized")
        return
    }

    if (self.roomId.isEmpty) {
        print("Room ID not set")
        return
    }

    // Join a call with a Room ID
    let options = JoinCallOptions()
    let audioOptions = AudioOptions()
    audioOptions.muted = self.muted

    options.audioOptions = audioOptions

    let roomCallLocator = RoomCallLocator(roomId: roomId)
    self.callAgent!.join(with: roomCallLocator, joinCallOptions: options) { (call, error) in
        self.setCallAndObserver(call: call, error: error)
    }
}
CallObserver digunakan untuk mengelola acara panggilan tengah dan peserta jarak jauh. Kita akan mengatur pengamat dalam fungsi setCallAndOberserver.
func setCallAndObserver(call:Call!, error:Error?) {
    if (error == nil) {
        self.call = call
        self.callObserver = CallObserver(view:self)

        self.call!.delegate = self.callObserver

        if (self.call!.state == CallState.connected) {
            self.callObserver!.handleInitialCallState(call: call)
        }
    } else {
        print("Failed to get call object")
    }
}
Meninggalkan panggilan Ruangan
Metode leaveRoomCall ini diatur sebagai tindakan yang akan dilakukan saat tombol Tinggalkan Panggilan Ruang diketuk. Ini menangani meninggalkan panggilan dan membersihkan sumber daya apa pun yang dibuat.
private func leaveRoomCall() {
    if (self.sendingLocalVideo) {
        self.call!.stopVideo(stream: self.localVideoStreams!.first!) { (error) in
            if (error != nil) {
                print("Failed to stop video")
            } else {
                self.sendingLocalVideo = false
                self.previewView = nil
                self.previewRenderer?.dispose()
                self.previewRenderer = nil
            }
        }
    }
    self.call?.hangUp(options: nil) { (error) in }
    self.participants.removeAll()
    self.call?.delegate = nil
    self.call = nil
}
Menyiarkan video
Selama panggilan Ruangan, kita dapat menggunakan startVideo atau stopVideo untuk memulai atau berhenti mengirim LocalVideoStream ke peserta jarak jauh.
func toggleLocalVideo() {
    if (self.sendingLocalVideo) {
        self.call!.stopVideo(stream: self.localVideoStreams!.first!) { (error) in
            if (error != nil) {
                print("Cannot stop video")
            } else {
                self.sendingLocalVideo = false
                self.previewView = nil
                self.previewRenderer!.dispose()
                self.previewRenderer = nil
            }
        }
    } else {
        let availableCameras = self.deviceManager!.cameras
        let scalingMode:ScalingMode = .crop
        if (self.localVideoStreams == nil) {
            self.localVideoStreams = [LocalVideoStream]()
        }
        self.localVideoStreams!.append(LocalVideoStream(camera: availableCameras.first!))
        self.previewRenderer = try! VideoStreamRenderer(localVideoStream: self.localVideoStreams!.first!)
        self.previewView = try! previewRenderer!.createView(withOptions: CreateViewOptions(scalingMode:scalingMode))
        self.call!.startVideo(stream: self.localVideoStreams!.first!) { (error) in
            if (error != nil) {
                print("Cannot start video")
            }
            else {
                self.sendingLocalVideo = true
            }
        }
    }
}
Membisukan audio lokal
Selama panggilan Ruangan, kita dapat menggunakan mute atau unMute untuk mematikan suara atau menyalakan suara mikrofon kita.
func toggleMute() {
    if (self.muted) {
        call!.unmuteOutgoingAudio(completionHandler: { (error) in
            if error == nil {
                self.muted = false
            }
        })
    } else {
        call!.muteOutgoingAudio(completionHandler: { (error) in
            if error == nil {
                self.muted = true
            }
        })
    }
}
Menangani pembaruan panggilan
Untuk menangani pembaruan panggilan, terapkan CallHandler untuk menangani peristiwa pembaruan. Masukkan implementasi berikut ke dalam CallHandler.swift.
final class CallHandler: NSObject, CallAgentDelegate {
    public var owner: ContentView?

    private static var instance: CallHandler?
    static func getOrCreateInstance() -> CallHandler {
        if let c = instance {
            return c
        }
        instance = CallHandler()
        return instance!
    }

    private override init() {}

    public func callAgent(_ callAgent: CallAgent, didUpdateCalls args: CallsUpdatedEventArgs) {
        if let removedCall = args.removedCalls.first {
            owner?.call = nil
        }
    }
}
Kita perlu membuat instans CallHandler dengan menambahkan kode berikut ke onAppear panggilan balik di ContentView.swift:
self.callHandler = CallHandler.getOrCreateInstance()
self.callHandler.owner = self
Atur delegasi ke CallAgent setelah CallAgent berhasil dibuat:
self.callAgent!.delegate = callHandler
Manajemen peserta jarak jauh
Semua peserta jarak jauh diwakili oleh RemoteParticipant jenis dan tersedia melalui remoteParticipants koleksi pada instans panggilan. Kita dapat menerapkan Participant kelas untuk mengelola pembaruan pada aliran video jarak jauh peserta jarak jauh antara lain.
class Participant: NSObject, RemoteParticipantDelegate, ObservableObject {
    private var videoStreamCount = 0
    private let innerParticipant:RemoteParticipant
    private let call:Call
    private var renderedRemoteVideoStream:RemoteVideoStream?

    @Published var state:ParticipantState = ParticipantState.disconnected
    @Published var isMuted:Bool = false
    @Published var isSpeaking:Bool = false
    @Published var hasVideo:Bool = false
    @Published var displayName:String = ""
    @Published var videoOn:Bool = true
    @Published var renderer:VideoStreamRenderer? = nil
    @Published var rendererView:RendererView? = nil
    @Published var scalingMode: ScalingMode = .fit

    init(_ call: Call, _ innerParticipant: RemoteParticipant) {
        self.call = call
        self.innerParticipant = innerParticipant
        self.displayName = innerParticipant.displayName

        super.init()

        self.innerParticipant.delegate = self

        self.state = innerParticipant.state
        self.isMuted = innerParticipant.isMuted
        self.isSpeaking = innerParticipant.isSpeaking
        self.hasVideo = innerParticipant.videoStreams.count > 0
        if(self.hasVideo) {
            handleInitialRemoteVideo()
        }
    }

    deinit {
        self.innerParticipant.delegate = nil
    }

    func getMri() -> String {
        Utilities.toMri(innerParticipant.identifier)
    }

    func set(scalingMode: ScalingMode) {
        if self.rendererView != nil {
            self.rendererView!.update(scalingMode: scalingMode)
        }
        self.scalingMode = scalingMode
    }

    func handleInitialRemoteVideo() {
        renderedRemoteVideoStream = innerParticipant.videoStreams[0]
        renderer = try! VideoStreamRenderer(remoteVideoStream: renderedRemoteVideoStream!)
        rendererView = try! renderer!.createView()
    }

    func toggleVideo() {
        if videoOn {
            rendererView = nil
            renderer?.dispose()
            videoOn = false
        }
        else {
            renderer = try! VideoStreamRenderer(remoteVideoStream: innerParticipant.videoStreams[0])
            rendererView = try! renderer!.createView()
            videoOn = true
        }
    }

    func remoteParticipant(_ remoteParticipant: RemoteParticipant, didUpdateVideoStreams args: RemoteVideoStreamsEventArgs) {
        let hadVideo = hasVideo
        hasVideo = innerParticipant.videoStreams.count > 0
        if videoOn {
            if hadVideo && !hasVideo {
                // Remote user stopped sharing
                rendererView = nil
                renderer?.dispose()
            } else if hasVideo && !hadVideo {
                // remote user started sharing
                renderedRemoteVideoStream = innerParticipant.videoStreams[0]
                renderer = try! VideoStreamRenderer(remoteVideoStream: renderedRemoteVideoStream!)
                rendererView = try! renderer!.createView()
            } else if hadVideo && hasVideo {
                if args.addedRemoteVideoStreams.count > 0 {
                    if renderedRemoteVideoStream?.id == args.addedRemoteVideoStreams[0].id {
                        return
                    }

                    // remote user added a second video, so switch to the latest one
                    guard let rendererTemp = renderer else {
                        return
                    }
                    rendererTemp.dispose()
                    renderedRemoteVideoStream = args.addedRemoteVideoStreams[0]
                    renderer = try! VideoStreamRenderer(remoteVideoStream: renderedRemoteVideoStream!)
                    rendererView = try! renderer!.createView()
                } else if args.removedRemoteVideoStreams.count > 0 {
                    if args.removedRemoteVideoStreams[0].id == renderedRemoteVideoStream!.id {
                        // remote user stopped sharing video that we were rendering but is sharing
                        // another video that we can render
                        renderer!.dispose()

                        renderedRemoteVideoStream = innerParticipant.videoStreams[0]
                        renderer = try! VideoStreamRenderer(remoteVideoStream: renderedRemoteVideoStream!)
                        rendererView = try! renderer!.createView()
                    }
                }
            }
        }
    }

    func remoteParticipant(_ remoteParticipant: RemoteParticipant, didChangeDisplayName args: PropertyChangedEventArgs) {
        self.displayName = innerParticipant.displayName
    }
}

class Utilities {
    @available(*, unavailable) private init() {}

    public static func toMri(_ id: CommunicationIdentifier?) -> String {

        if id is CommunicationUserIdentifier {
            let communicationUserIdentifier = id as! CommunicationUserIdentifier
            return communicationUserIdentifier.identifier
        } else {
            return "<nil>"
        }
    }
}
Streaming video peserta jarak jauh
Kita dapat membuat ParticipantView untuk menangani penyajian aliran video peserta jarak jauh. Masukkan implementasinya ParticipantView.swift
struct ParticipantView : View, Hashable {
    static func == (lhs: ParticipantView, rhs: ParticipantView) -> Bool {
        return lhs.participant.getMri() == rhs.participant.getMri()
    }

    private let owner: HomePageView

    @State var showPopUp: Bool = false
    @State var videoHeight = CGFloat(200)
    @ObservedObject private var participant:Participant

    var body: some View {
        ZStack {
            if (participant.rendererView != nil) {
                HStack {
                    RenderInboundVideoView(view: $participant.rendererView)
                }
                .background(Color(.black))
                .frame(height: videoHeight)
                .animation(Animation.default)
            } else {
                HStack {
                    Text("No incoming video")
                }
                .background(Color(.red))
                .frame(height: videoHeight)
            }
        }
    }

    func hash(into hasher: inout Hasher) {
        hasher.combine(participant.getMri())
    }

    init(_ owner: HomePageView, _ participant: Participant) {
        self.owner = owner
        self.participant = participant
    }

    func resizeVideo() {
        videoHeight = videoHeight == 200 ? 150 : 200
    }

    func showAlert(_ title: String, _ message: String) {
        DispatchQueue.main.asyncAfter(deadline: .now() + 0.1) {
            self.owner.alertMessage = message
            self.owner.showAlert = true
        }
    }
}

struct RenderInboundVideoView: UIViewRepresentable {
    @Binding var view:RendererView!

    func makeUIView(context: Context) -> UIView {
        return UIView()
    }

    func updateUIView(_ uiView: UIView, context: Context) {
        for view in uiView.subviews {
            view.removeFromSuperview()
        }
        if (view != nil) {
            uiView.addSubview(view)
        }
    }
}
Berlangganan Peristiwa
Kita dapat menerapkan CallObserver kelas untuk berlangganan kumpulan peristiwa yang akan diberi tahu ketika nilai, seperti remoteParticipants, berubah selama panggilan.
public class CallObserver : NSObject, CallDelegate
{
    private var owner: ContentView
    private var firstTimeCallConnected: Bool = true

    init(view: ContentView) {
        owner = view
        super.init()
    }

    public func call(_ call: Call, didChangeState args: PropertyChangedEventArgs) {
        let state = CallObserver.callStateToString(state:call.state)
        owner.callState = state
        if (call.state == CallState.disconnected) {
            owner.leaveRoomCall()
        }
        else if (call.state == CallState.connected) {
            if(self.firstTimeCallConnected) {
                self.handleInitialCallState(call: call);
            }
            self.firstTimeCallConnected = false;
        }
    }

    public func handleInitialCallState(call: Call) {
        // We want to build a matrix with max 2 columns

        owner.callState = CallObserver.callStateToString(state:call.state)
        var participants = [Participant]()

        // Add older/existing participants
        owner.participants.forEach { (existingParticipants: [Participant]) in
            participants.append(contentsOf: existingParticipants)
        }
        owner.participants.removeAll()

        // Add new participants to the collection
        for remoteParticipant in call.remoteParticipants {
            let mri = Utilities.toMri(remoteParticipant.identifier)
            let found = participants.contains { (participant) -> Bool in
                participant.getMri() == mri
            }

            if !found {
                let participant = Participant(call, remoteParticipant)
                participants.append(participant)
            }
        }

        // Convert 1-D array into a 2-D array with 2 columns
        var indexOfParticipant = 0
        while indexOfParticipant < participants.count {
            var newParticipants = [Participant]()
            newParticipants.append(participants[indexOfParticipant])
            indexOfParticipant += 1
            if (indexOfParticipant < participants.count) {
                newParticipants.append(participants[indexOfParticipant])
                indexOfParticipant += 1
            }
            owner.participants.append(newParticipants)
        }
    }

    public func call(_ call: Call, didUpdateRemoteParticipant args: ParticipantsUpdatedEventArgs) {
        var participants = [Participant]()
        // Add older/existing participants
        owner.participants.forEach { (existingParticipants: [Participant]) in
            participants.append(contentsOf: existingParticipants)
        }
        owner.participants.removeAll()

        // Remove deleted participants from the collection
        args.removedParticipants.forEach { p in
            let mri = Utilities.toMri(p.identifier)
            participants.removeAll { (participant) -> Bool in
                participant.getMri() == mri
            }
        }

        // Add new participants to the collection
        for remoteParticipant in args.addedParticipants {
            let mri = Utilities.toMri(remoteParticipant.identifier)
            let found = participants.contains { (view) -> Bool in
                view.getMri() == mri
            }

            if !found {
                let participant = Participant(call, remoteParticipant)
                participants.append(participant)
            }
        }

        // Convert 1-D array into a 2-D array with 2 columns
        var indexOfParticipant = 0
        while indexOfParticipant < participants.count {
            var array = [Participant]()
            array.append(participants[indexOfParticipant])
            indexOfParticipant += 1
            if (indexOfParticipant < participants.count) {
                array.append(participants[indexOfParticipant])
                indexOfParticipant += 1
            }
            owner.participants.append(array)
        }
    }

    private static func callStateToString(state:CallState) -> String {
        switch state {
        case .connected: return "Connected"
        case .connecting: return "Connecting"
        case .disconnected: return "Disconnected"
        case .disconnecting: return "Disconnecting"
        case .none: return "None"
        default: return "Unknown"
        }
    }
}
Menjalankan kode
Anda dapat membuat dan menjalankan aplikasi di simulator iOS dengan memilih Eksekusi Produk > atau dengan menggunakan pintasan keyboard (⌘-R).
Kemampuan untuk bergabung dalam panggilan ruangan dan menampilkan peran peserta panggilan tersedia di iOS Mobile Calling SDK versi 2.5.0 ke atas.
Anda dapat mempelajari selengkapnya tentang peran peserta panggilan ruang dalam dokumentasi konsep ruangan.
Aplikasi sampel
Untuk mengikuti mulai cepat ini, Anda dapat mengunduh mulai cepat Panggilan Ruang di GitHub.
Menyiapkan proyek
Membuat aplikasi Android dengan aktivitas kosong
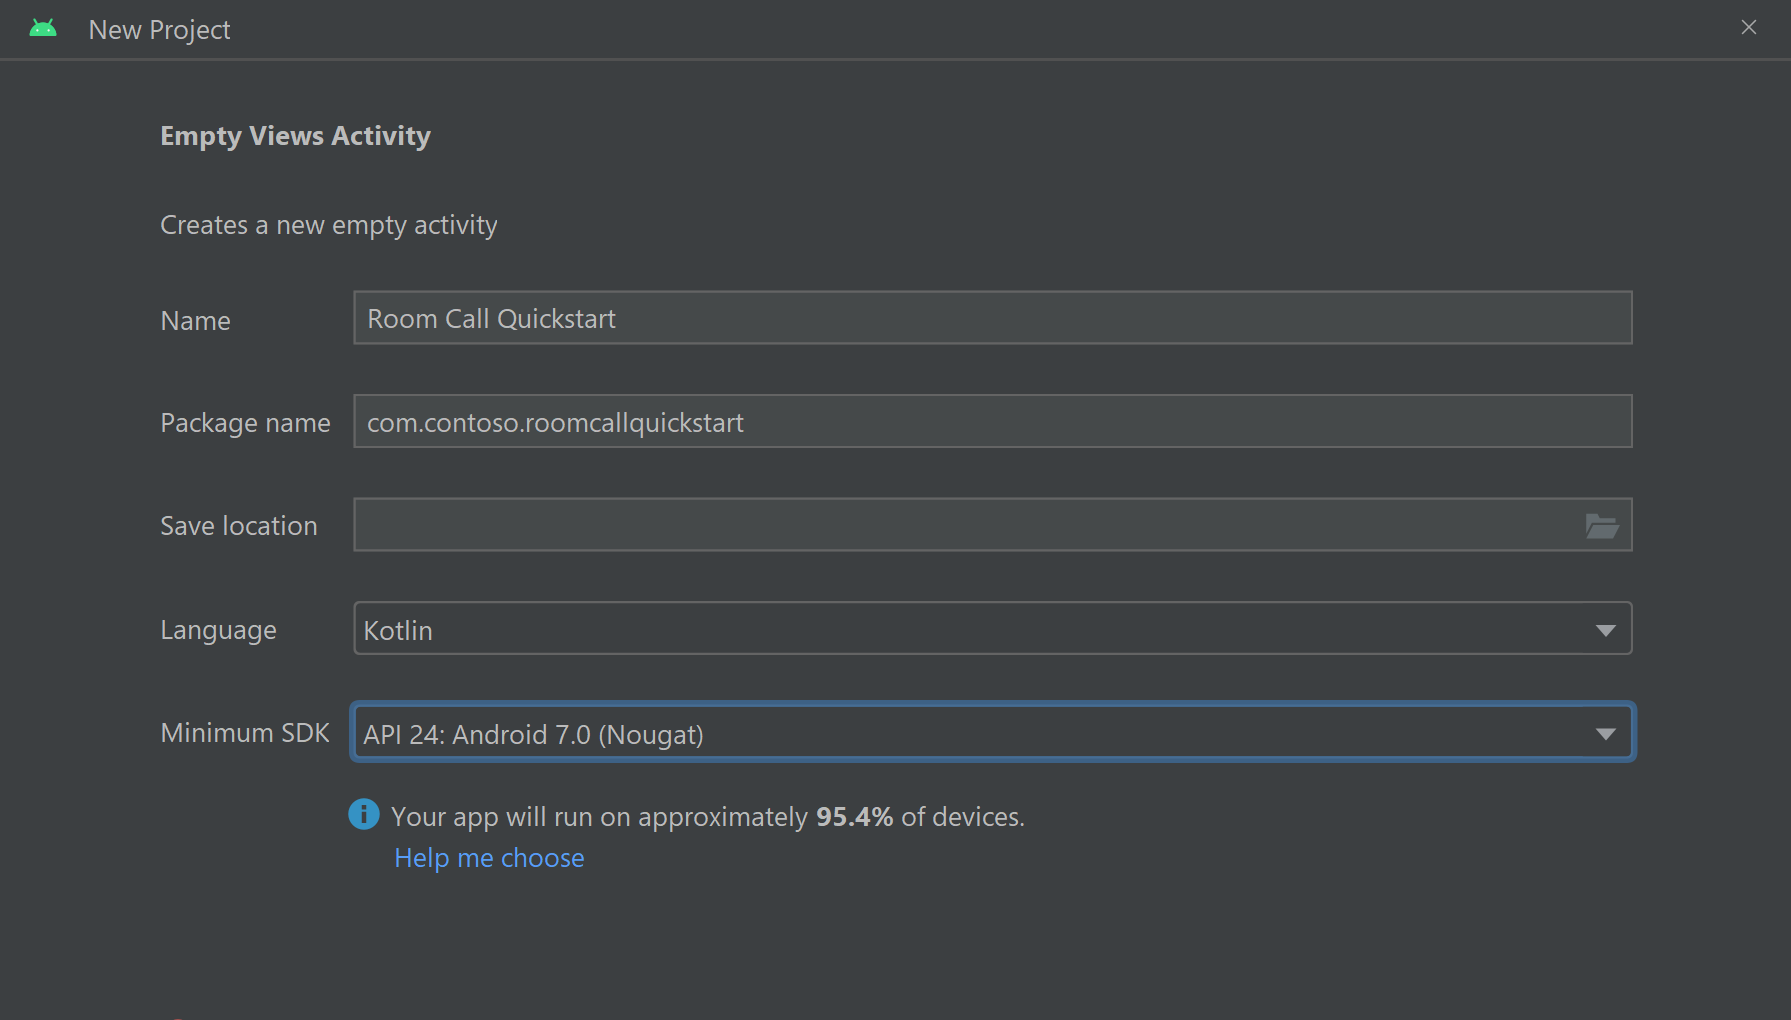
Dari Android Studio, buat proyek baru:

Beri nama mulai cepat Panggilan Ruang proyek Anda dan pilih Kotlin.
Pasang paket
Di tingkat build.gradlemodul Anda , tambahkan baris berikut ke bagian dependencies .
dependencies {
    ...
    //Ability to join a Rooms calls is available in 2.4.0 or above.
    implementation 'com.azure.android:azure-communication-calling:2.4.0'
    ...
}
Menambahkan izin ke manifes aplikasi
Untuk meminta izin yang diperlukan untuk melakukan panggilan, Anda harus terlebih dahulu mendeklarasikan izin dalam manifes aplikasi (app/src/main/AndroidManifest.xml). Salin yang berikut ini ke file manifes Anda:
<?xml version="1.0" encoding="utf-8"?>
<manifest xmlns:android="http://schemas.android.com/apk/res/android">

    <uses-feature
        android:name="android.hardware.camera"
        android:required="false" />

    <uses-permission android:name="android.permission.INTERNET" />
    <uses-permission android:name="android.permission.ACCESS_NETWORK_STATE" />
    <uses-permission android:name="android.permission.ACCESS_WIFI_STATE" />
    <uses-permission android:name="android.permission.RECORD_AUDIO" />
    <uses-permission android:name="android.permission.CAMERA" />

    <application
        android:allowBackup="true"
        android:icon="@mipmap/ic_launcher"
        android:label="@string/app_name"
        android:roundIcon="@mipmap/ic_launcher_round"
        android:supportsRtl="true"
        android:theme="@style/Theme.AppTheme">

        <!--Our Calling SDK depends on the Apache HTTP SDK.
    When targeting Android SDK 28+, this library needs to be explicitly referenced.
    See https://developer.android.com/about/versions/pie/android-9.0-changes-28#apache-p-->
        <uses-library android:name="org.apache.http.legacy" android:required="false"/>
        <activity
            android:name=".MainActivity"
            android:exported="true">
            <intent-filter>
                <action android:name="android.intent.action.MAIN" />

                <category android:name="android.intent.category.LAUNCHER" />
            </intent-filter>
        </activity>
    </application>

</manifest>
Menyiapkan tata letak untuk aplikasi
Anda memerlukan input teks untuk ID kamar, tombol untuk melakukan panggilan, dan tombol tambahan untuk menutup panggilan.
app/src/main/res/layout/activity_main.xmlBuka , dan ganti konten file dengan kode berikut:
<?xml version="1.0" encoding="utf-8"?>
<androidx.constraintlayout.widget.ConstraintLayout
    xmlns:android="http://schemas.android.com/apk/res/android"
    xmlns:app="http://schemas.android.com/apk/res-auto"
    xmlns:tools="http://schemas.android.com/tools"
    android:layout_width="match_parent"
    android:layout_height="match_parent"
    tools:context=".MainActivity">

    <TextView
        android:id="@+id/text_role"
        android:layout_width="wrap_content"
        android:layout_height="wrap_content"
        android:text="Role:"
        android:textSize="16sp"
        android:textStyle="bold"
        app:layout_constraintTop_toTopOf="parent"
        app:layout_constraintStart_toStartOf="parent"
        app:layout_constraintEnd_toEndOf="parent"
        android:layout_marginTop="16dp" />

    <TextView
        android:id="@+id/text_call_status"
        android:layout_width="wrap_content"
        android:layout_height="wrap_content"
        android:text="Call Status"
        android:textSize="16sp"
        android:textStyle="bold"
        app:layout_constraintTop_toTopOf="parent"
        app:layout_constraintStart_toStartOf="parent"
        app:layout_constraintEnd_toEndOf="parent"
        android:layout_marginTop="48dp" />

    <EditText
        android:id="@+id/room_id"
        android:layout_width="match_parent"
        android:layout_height="wrap_content"
        android:ems="10"
        android:hint="Room ID"
        android:inputType="textPersonName"
        android:layout_marginTop="100dp"
        android:layout_marginHorizontal="20dp"
        app:layout_constraintTop_toTopOf="parent"
        app:layout_constraintStart_toStartOf="parent"
        app:layout_constraintEnd_toEndOf="parent" />

    <LinearLayout
        android:layout_width="match_parent"
        android:layout_height="wrap_content"
        android:layout_marginBottom="260dp"
        android:gravity="center"
        app:layout_constraintBottom_toBottomOf="parent"
        app:layout_constraintEnd_toEndOf="parent"
        app:layout_constraintStart_toStartOf="parent">

        <Button
            android:id="@+id/call_button"
            android:layout_width="wrap_content"
            android:layout_marginEnd="32dp"
            android:layout_height="wrap_content"
            android:text="Start Call" />

        <Button
            android:id="@+id/hangup_button"
            android:layout_width="wrap_content"
            android:layout_height="wrap_content"
            android:text="Hangup" />

    </LinearLayout>

</androidx.constraintlayout.widget.ConstraintLayout>
Membuat aktivitas utama
Dengan tata letak yang dibuat, Anda dapat menambahkan logika untuk memulai panggilan Ruang. Aktivitas menangani permintaan izin runtime, membuat agen panggilan, dan melakukan panggilan saat tombol ditekan.
Metode memanggil onCreategetAllPermissions dan createAgent, dan menambahkan pengikatan untuk tombol panggilan.
Peristiwa ini hanya terjadi sekali ketika aktivitas dibuat. Untuk informasi selengkapnya tentang onCreate, lihat panduan Memahami siklus hidup aktivitas.
Buka file MainActivity.kt, dan ganti konten dengan kode berikut:
package com.contoso.roomscallquickstart

import android.Manifest
import android.annotation.SuppressLint
import android.content.pm.PackageManager
import android.media.AudioManager
import android.os.Bundle
import android.widget.Button
import android.widget.EditText
import android.widget.TextView
import android.widget.Toast
import androidx.appcompat.app.AppCompatActivity
import androidx.core.app.ActivityCompat
import com.azure.android.communication.calling.Call
import com.azure.android.communication.calling.CallAgent
import com.azure.android.communication.calling.CallClient
import com.azure.android.communication.calling.HangUpOptions
import com.azure.android.communication.calling.JoinCallOptions
import com.azure.android.communication.calling.RoomCallLocator
import com.azure.android.communication.common.CommunicationTokenCredential
import java.util.concurrent.ExecutionException

class MainActivity : AppCompatActivity() {
    private val allPermissions = arrayOf(
        Manifest.permission.RECORD_AUDIO,
        Manifest.permission.CAMERA,
        Manifest.permission.READ_PHONE_STATE
    )

    private val userToken = "<ACS_USER_TOKEN>"
    private lateinit var callAgent: CallAgent
    private var call: Call? = null

    private lateinit var roleTextView: TextView
    private lateinit var statusView: TextView

    override fun onCreate(savedInstanceState: Bundle?) {
        super.onCreate(savedInstanceState)
        setContentView(R.layout.activity_main)

        getAllPermissions()
        createCallAgent()

        val callButton: Button = findViewById(R.id.call_button)
        callButton.setOnClickListener { startCall() }

        val hangupButton: Button = findViewById(R.id.hangup_button)
        hangupButton.setOnClickListener { endCall() }

        roleTextView = findViewById(R.id.text_role)
        statusView = findViewById(R.id.text_call_status)

        volumeControlStream = AudioManager.STREAM_VOICE_CALL
    }

    /**
     * Start a call
     */
    private fun startCall() {
        if (userToken.startsWith("<")) {
            Toast.makeText(this, "Please enter token in source code", Toast.LENGTH_SHORT).show()
            return
        }

        val roomIdView: EditText = findViewById(R.id.room_id)
        val roomId = roomIdView.text.toString()
        if (roomId.isEmpty()) {
            Toast.makeText(this, "Please enter room ID", Toast.LENGTH_SHORT).show()
            return
        }

        val joinCallOptions = JoinCallOptions()

        val roomCallLocator = RoomCallLocator(roomId)
        call = callAgent.join(applicationContext, roomCallLocator, joinCallOptions)

        call?.addOnStateChangedListener { setCallStatus(call?.state.toString()) }

        call?.addOnRoleChangedListener { setRoleText(call?.callParticipantRole.toString()) }
    }

    /**
     * Ends the call previously started
     */
    private fun endCall() {
        try {
            call?.hangUp(HangUpOptions())?.get()
        } catch (e: ExecutionException) {
            Toast.makeText(this, "Unable to hang up call", Toast.LENGTH_SHORT).show()
        }
    }

    /**
     * Create the call callAgent
     */
    private fun createCallAgent() {
            try {
                val credential = CommunicationTokenCredential(userToken)
                callAgent = CallClient().createCallAgent(applicationContext, credential).get()
            } catch (ex: Exception) {
                Toast.makeText(
                    applicationContext,
                    "Failed to create call callAgent.",
                    Toast.LENGTH_SHORT
                ).show()
            }
    }

    /**
     * Request each required permission if the app doesn't already have it.
     */
    private fun getAllPermissions() {
        val permissionsToAskFor = mutableListOf<String>()
        for (permission in allPermissions) {
            if (ActivityCompat.checkSelfPermission(this, permission) != PackageManager.PERMISSION_GRANTED) {
                permissionsToAskFor.add(permission)
            }
        }
        if (permissionsToAskFor.isNotEmpty()) {
            ActivityCompat.requestPermissions(this, permissionsToAskFor.toTypedArray(), 1)
        }
    }

    /**
     * Ensure all permissions were granted, otherwise inform the user permissions are missing.
     */
    override fun onRequestPermissionsResult(
        requestCode: Int,
        permissions: Array<out String>,
        grantResults: IntArray
    ) {
        super.onRequestPermissionsResult(requestCode, permissions, grantResults)
        var allPermissionsGranted = true
        for (result in grantResults) {
            allPermissionsGranted = allPermissionsGranted && (result == PackageManager.PERMISSION_GRANTED)
        }
        if (!allPermissionsGranted) {
            Toast.makeText(this, "All permissions are needed to make the call.", Toast.LENGTH_LONG).show()
            finish()
        }
    }

    @SuppressLint("SetTextI18n")
    private fun setCallStatus(status: String?) {
        runOnUiThread {
            statusView.text = "Call Status: $status"
        }
    }
    @SuppressLint("SetTextI18n")
    private fun setRoleText(role: String?) {
        runOnUiThread {
            roleTextView.text = "Role: $role"
        }
    }
}
Catatan
Saat Anda mendesain aplikasi, pertimbangkan kapan izin ini harus diminta. Izin harus diminta saat dibutuhkan, bukan sebelumnya. Untuk informasi selengkapnya, lihat, Panduan Izin Android.
Menjalankan proyek Anda
Sebelum menjalankan proyek Anda, ganti <ACS_USER_TOKEN>MainActivity.kt dengan Token Akses Pengguna Azure Communication Services Anda.
private val userToken = "<ACS_USER_TOKEN>"
Jalankan proyek pada emulator atau perangkat fisik.
Anda akan melihat bidang untuk memasukkan ID Kamar dan tombol untuk memulai Panggilan Kamar. Masukkan ID Kamar Anda dan verifikasi status Panggilan telah berubah bersama dengan Peran Anda.
Memahami bergabung dengan panggilan Ruang
Semua kode yang telah Anda tambahkan di aplikasi Mulai Cepat memungkinkan Anda untuk berhasil memulai dan bergabung dengan panggilan ruang. Kita perlu mendalami cara kerjanya dan metode/handler apa lagi yang dapat Anda akses untuk Rooms.
Panggilan kamar digabungkan CallAgent dengan yang dibuat dengan token pengguna yang valid:
private fun createCallAgent() {
    try {
        val credential = CommunicationTokenCredential(userToken)
        callAgent = CallClient().createCallAgent(applicationContext, credential).get()
    } catch (ex: Exception) {
        Toast.makeText(
            applicationContext,
            "Failed to create call callAgent.",
            Toast.LENGTH_SHORT
        ).show()
    }
}
Menggunakan CallAgent dan RoomCallLocator, kita dapat bergabung dengan panggilan ruangan menggunakan CallAgent.join metode yang mengembalikan Call objek:
 val joinCallOptions = JoinCallOptions()
 val roomCallLocator = RoomCallLocator(roomId)
 call = callAgent.join(applicationContext, roomCallLocator, joinCallOptions)
Penyesuaian lebih lanjut di MainActivity.ktluar file termasuk berlangganan peristiwa untuk Call mendapatkan pembaruan:
call.addOnRemoteParticipantsUpdatedListener { args: ParticipantsUpdatedEvent? ->
    handleRemoteParticipantsUpdate(
        args!!
    )
}

call.addOnStateChangedListener { args: PropertyChangedEvent? ->
    this.handleCallOnStateChanged(
        args!!
    )
}
Anda dapat memperluas MainActivity.kt lebih jauh untuk menampilkan peran peserta panggilan lokal atau jarak jauh dengan menggunakan metode dan penangan ini di bawah ini.
// Get your role in the call
call.getCallParticipantRole();

// Subscribe to changes for your role in a call
private void isCallRoleChanged(PropertyChangedEvent propertyChangedEvent) {
    // handle self-role change
}

call.addOnRoleChangedListener(isCallRoleChanged);

// Subscribe to role changes for remote participants
private void isRoleChanged(PropertyChangedEvent propertyChangedEvent) {
    // handle remote participant role change
}

remoteParticipant.addOnRoleChangedListener(isRoleChanged);

// Get role of the remote participant
remoteParticipant.getCallParticipantRole();
Kemampuan untuk bergabung dalam panggilan ruangan dan menampilkan peran peserta panggilan tersedia di Android Mobile Calling SDK versi 2.4.0 ke atas.
Anda dapat mempelajari selengkapnya tentang peran peserta panggilan ruang dalam dokumentasi konsep ruangan.
Bergabung dengan panggilan ruang
Untuk bergabung dalam panggilan ruang, siapkan aplikasi windows Anda menggunakan panduan Tambahkan panggilan video ke aplikasi klien Anda. Atau, Anda dapat mengunduh mulai cepat panggilan video di GitHub.
Buat callAgent dengan token pengguna yang valid:
var creds = new CallTokenCredential("<user-token>");

CallAgentOptions callAgentOptions = new CallAgentOptions();
callAgentOptions.DisplayName = "<display-name>";
callAgent = await callClient.CreateCallAgentAsync(creds, callAgentOptions);
callAgent Gunakan dan RoomCallLocator untuk bergabung dengan panggilan ruangan, CallAgent.JoinAsync metode akan mengembalikan CommunicationCall objek:
RoomCallLocator roomCallLocator = new RoomCallLocator('<RoomId>');

CommunicationCall communicationCall = await callAgent.JoinAsync(roomCallLocator, joinCallOptions);
Berlangganan peristiwa CommunicationCall untuk mendapatkan pembaruan:
private async void CommunicationCall_OnStateChanged(object sender, PropertyChangedEventArgs args) {
	var call = sender as CommunicationCall;
	if (sender != null)
	{
		switch (call.State){
			// Handle changes in call state
		}
	}
}
Untuk menampilkan peran peserta panggilan, berlangganan perubahan peran:
private void RemoteParticipant_OnRoleChanged(object sender, Azure.Communication.Calling.WindowsClient.PropertyChangedEventArgs args)
{
    _ = Windows.ApplicationModel.Core.CoreApplication.MainView.CoreWindow.Dispatcher.RunAsync(CoreDispatcherPriority.Normal, () =>
    {
        System.Diagnostics.Trace.WriteLine("Raising Role change, new Role: " + remoteParticipant_.Role);
        PropertyChanged(this, new System.ComponentModel.PropertyChangedEventArgs("RemoteParticipantRole"));
    });
}
Kemampuan untuk bergabung dalam panggilan ruang dan menampilkan peran peserta panggilan tersedia di Windows NuGet Release versi 1.1.0 ke atas.
Anda dapat mempelajari selengkapnya tentang peran peserta panggilan ruang dalam dokumentasi konsep ruangan.
Langkah berikutnya
Di bagian ini Anda mempelajari cara:
- Menambahkan panggilan video ke aplikasi Anda
- Meneruskan pengidentifikasi ruangan ke SDK panggilan
- Bergabung dengan panggilan kamar dari aplikasi Anda
Anda mungkin juga ingin:
- Pelajari tentang konsep ruangan
- Pelajari tentang konsep panggilan suara dan video
- Pelajari tentang konsep autentikasi