通話中にビデオを管理する
Azure Communication Services SDK を使用してビデオ通話を管理する方法について説明します。 通話内のビデオの受信と送信を管理する方法について説明します。
前提条件
- アクティブなサブスクリプションが含まれる Azure アカウント。 無料でアカウントを作成できます。
- デプロイ済みの Communication Services リソース。 Communication Services リソースを作成します。
- 通話クライアントを有効にするためのユーザー アクセス トークン。 詳細については、アクセス トークンの作成と管理に関する記事を参照してください。
- 省略可能: クイックスタートを完了して、アプリケーションに音声通話を追加します
SDK のインストール
npm install コマンドを使用して、JavaScript 用の Azure Communication Services の Common SDK と Calling SDK をインストールします。
npm install @azure/communication-common --save
npm install @azure/communication-calling --save
必要なオブジェクトを初期化する
CallClient インスタンスは、ほとんどの通話操作に必要です。 新しい CallClient インスタンスを作成する際に、Logger インスタンスなどのカスタム オプションを使用してこれを構成できます。
CallClient インスタンスでは、createCallAgent を呼び出すことで CallAgent インスタンスを作成できます。 このメソッドでは、非同期的に CallAgent インスタンス オブジェクトが返されます。
createCallAgent メソッドでは、CommunicationTokenCredential が引数として使用されます。 これは、ユーザー アクセス トークンを受け取ります。
CallClient インスタンスで getDeviceManager メソッドを使用して、deviceManager にアクセスできます。
const { CallClient } = require('@azure/communication-calling');
const { AzureCommunicationTokenCredential} = require('@azure/communication-common');
const { AzureLogger, setLogLevel } = require("@azure/logger");

// Set the logger's log level
setLogLevel('verbose');

// Redirect log output to console, file, buffer, REST API, or whatever location you want
AzureLogger.log = (...args) => {
    console.log(...args); // Redirect log output to console
};

const userToken = '<USER_TOKEN>';
callClient = new CallClient(options);
const tokenCredential = new AzureCommunicationTokenCredential(userToken);
const callAgent = await callClient.createCallAgent(tokenCredential, {displayName: 'optional Azure Communication Services user name'});
const deviceManager = await callClient.getDeviceManager()
Microsoft インフラストラクチャへの SDK 接続を最適に管理する方法
Call Agent インスタンスは、(呼び出しへの参加または開始する目的で) 呼び出しを管理するのに役立ちます。 呼び出し元 SDK を機能させるには、Microsoft インフラストラクチャに接続して着信呼び出しの通知を取得し、他の呼び出しの詳細を調整する必要があります。 Call Agent には、次の 2 つの状態が考えられます。
接続済み - Connected の Call Agent connectionStatue 値は、クライアント SDK が接続されており、Microsoft インフラストラクチャから通知を受信できることを意味します。
切断済み - Disconnected の Call Agent connectionStatue 値は、SDK が正しく接続できない問題があることを示します。 Call Agent を再作成する必要があります。
invalidToken: トークンが有効期限切れであるか、無効な場合、Call Agentインスタンスはこのエラーで切断されます。connectionIssue: クライアントが Microsoft インフラストラクチャに接続する際に問題が発生した場合、多数の再試行後に、Call AgentはconnectionIssueエラーを提示します。
ローカル Call Agent が Microsoft インフラストラクチャに接続されているかどうかを確認するには、connectionState プロパティの現在の値を調べます。 アクティブな呼び出し中に、connectionStateChanged イベントをリッスンして、Call Agent の状態が接続済みから切断済みに変化するかどうかを判断できます。
const connectionState = callAgentInstance.connectionState;
console.log(connectionState); // it may return either of 'Connected' | 'Disconnected'

const connectionStateCallback = (args) => {
    console.log(args); // it will return an object with oldState and newState, each of having a value of either of 'Connected' | 'Disconnected'
    // it will also return reason, either of 'invalidToken' | 'connectionIssue'
}
callAgentInstance.on('connectionStateChanged', connectionStateCallback);
デバイス管理
Calling SDK でのビデオの使用を開始するには、デバイスを管理できることが必要になります。 デバイスを使用すると、どのデバイスで通話にオーディオとビデオを送信するかを制御できます。
deviceManager で、通話でオーディオとビデオのストリームを送信できるローカル デバイスを列挙できます。 また、deviceManager を使用して、ローカル デバイスのマイクやカメラにアクセスするためのアクセス許可を要求することもできます。
callClient.getDeviceManager() メソッドを呼び出すことによって deviceManager にアクセスできます。
const deviceManager = await callClient.getDeviceManager();
ローカル デバイスを取得する
ローカル デバイスにアクセスするには、deviceManager 列挙メソッド getCameras() と getMicrophones を使用します。 これらのメソッドは非同期アクションです。
//  Get a list of available video devices for use.
const localCameras = await deviceManager.getCameras(); // [VideoDeviceInfo, VideoDeviceInfo...]

// Get a list of available microphone devices for use.
const localMicrophones = await deviceManager.getMicrophones(); // [AudioDeviceInfo, AudioDeviceInfo...]

// Get a list of available speaker devices for use.
const localSpeakers = await deviceManager.getSpeakers(); // [AudioDeviceInfo, AudioDeviceInfo...]
既定のデバイスを設定する
使用可能なデバイスがわかったら、マイク、スピーカー、カメラの既定のデバイスを設定できます。 クライアントの既定値が設定されていない場合、Communication Services SDK ではオペレーティング システムの既定値が使用されます。
Microphone
使用されているデバイスにアクセス
// Get the microphone device that is being used.
const defaultMicrophone = deviceManager.selectedMicrophone;
使用するデバイスを設定
// Set the microphone device to use.
await deviceManager.selectMicrophone(localMicrophones[0]);
スピーカー
使用されているデバイスにアクセス
// Get the speaker device that is being used.
const defaultSpeaker = deviceManager.selectedSpeaker;
使用するデバイスを設定
// Set the speaker device to use.
await deviceManager.selectSpeaker(localSpeakers[0]);
Camera
使用されているデバイスにアクセス
// Get the camera device that is being used.
const defaultSpeaker = deviceManager.selectedSpeaker;
使用するデバイスを設定
// Set the speaker device to use.
await deviceManager.selectSpeaker(localCameras[0]);
それぞれの CallAgent が自分のマイクとスピーカーを、関連付けられた DeviceManager で選択することができます。 異なる CallAgents は異なるマイクとスピーカーを使用することをお勧めします。 同じマイクやスピーカーを共有するべきではありません。 共有が行われると、Microphone User Facing Diagnostics がトリガーされる可能性があり、ブラウザーや OS によってはマイクが動作を停止します。
ローカル ビデオ ストリーム
通話でビデオを送信できるようにするには、LocalVideoStreamオブジェクトを作成する必要があります。
const localVideoStream = new LocalVideoStream(camera);
パラメーターとして渡されるカメラは、deviceManager.getCameras() メソッドによって返される VideoDeviceInfo オブジェクトの 1 つです。
LocalVideoStream には次のプロパティがあります。
source: デバイス情報。
const source = localVideoStream.source;
mediaStreamType:Video、ScreenSharing、またはRawMediaのいずれかです。
const type: MediaStreamType = localVideoStream.mediaStreamType;
ローカル カメラのプレビュー
deviceManager と VideoStreamRenderer を使用して、ローカル カメラからのストリームのレンダリングを開始できます。
LocalVideoStream が作成されたら、それを使用して VideoStreamRenderer を設定します。 VideoStreamRendererが作成されたら、その createView() メソッドを呼び出して、ページに子として追加できるビューを取得します。
このストリームは、他の参加者には送信されません。ローカル プレビュー フィードです。
// To start viewing local camera preview
const cameras = await deviceManager.getCameras();
const camera = cameras[0];
const localVideoStream = new LocalVideoStream(camera);
const videoStreamRenderer = new VideoStreamRenderer(localVideoStream);
const view = await videoStreamRenderer.createView();
htmlElement.appendChild(view.target);
ローカル プレビューを停止する
ローカル プレビュー通話を停止するには、VideoStreamRenderer から派生したビューを破棄します。
VideoStreamRenderer が破棄されたら、プレビューを含む DOM Node から removeChild() メソッドを呼び出して、html ツリーから ビューを削除します。
// To stop viewing local camera preview
view.dispose();
htmlElement.removeChild(view.target);
カメラとマイクへのアクセス許可を要求する
アプリケーションは、アクセス許可なしでカメラやマイクを使用できません。 deviceManager を使用して、カメラやマイクへのアクセス許可を付与するようにユーザーに求めることができます。
const result = await deviceManager.askDevicePermission({audio: true, video: true});
Promise が解決されたら、メソッドは、audio と video のアクセス許可が付与されたかどうかを示す DeviceAccess オブジェクトと共に返ります。
console.log(result.audio);
console.log(result.video);
メモ
- ビデオ デバイスが接続されたり、取り外されたりすると、
videoDevicesUpdatedイベントが発生します。 - オーディオ デバイスが接続されると、
audioDevicesUpdatedイベントが発生します。 - DeviceManager が作成された当初の時点では、どのデバイスについてもアクセス許可が付与されているかどうかが認識されていないため、初めデバイス名は空であり、詳細なデバイス情報は含まれていません。 その後 DeviceManager.askPermission() API を呼び出すと、ユーザーにはデバイスのアクセスに関するプロンプトが表示されます。 そこでユーザーが [許可] を選択してアクセスを許可すると、デバイス マネージャーによりシステム上のそのデバイスが認識され、デバイス一覧が更新された後、"audioDevicesUpdated" イベントと "videoDevicesUpdated" イベントが出力されます。 ユーザーがページ表示を更新してデバイス マネージャーを作成した場合、ユーザーは以前にアクセス権を付与しているため、デバイス マネージャーではデバイスについて認識できます。 最初にデバイス一覧に入力され、'audioDevicesUpdated' イベントも 'videoDevicesUpdated' イベントも出力されません。
- スピーカーの列挙や選択は、Android の Chrome、iOS の Safari、macOS の Safari のいずれでもサポートされていません。
ビデオ カメラを使用して呼び出しを行う
重要
現在、サポートされている発信ローカル動画ストリームは 1 つだけです。
ビデオ通話を行うには、deviceManager の getCameras() メソッドを使ってローカル カメラを列挙する必要があります。
カメラを選択したら、それを使用して LocalVideoStream インスタンスを作成します。
videoOptions 内のそれを localVideoStream 配列内の項目として CallAgentstartCall メソッドに渡します。
const deviceManager = await callClient.getDeviceManager();
const cameras = await deviceManager.getCameras();
const camera = cameras[0]
const localVideoStream = new LocalVideoStream(camera);
const placeCallOptions = {videoOptions: {localVideoStreams:[localVideoStream]}};
const userCallee = { communicationUserId: '<ACS_USER_ID>' }
const call = callAgent.startCall([userCallee], placeCallOptions);
CallAgent.join()API を使用してビデオを使用して通話に参加し、Call.Accept()API を使用してビデオを受け入れて呼び出す方法も可能です。- 通話が接続されると、選択したカメラから他の参加者への動画ストリームの送信が自動的に開始されます。
通話中にローカル ビデオの送信を開始および停止する
ビデオを開始する
呼び出し中に動画を開始するには、deviceManager オブジェクトで getCameras メソッドを使用して、カメラを列挙する必要があります。
次に、目的のカメラを使用して LocalVideoStream の新しいインスタンスを作成し、その LocalVideoStream オブジェクトを既存の呼び出しオブジェクトの startVideo メソッドに渡します。
const deviceManager = await callClient.getDeviceManager();
const cameras = await deviceManager.getCameras();
const camera = cameras[0]
const localVideoStream = new LocalVideoStream(camera);
await call.startVideo(localVideoStream);
ビデオの停止
動画の送信が正常に開始されると、通話インスタンスの localVideoStreams コレクションに種類が Video の LocalVideoStream インスタンスが追加されます。
Call オブジェクトでビデオ ストリームを見つける
const localVideoStream = call.localVideoStreams.find( (stream) => { return stream.mediaStreamType === 'Video'} );
ローカル ビデオを停止する 通話中にローカルビデオを停止するには、ビデオで使用されている localVideoStream インスタンスを Call の stopVideo メソッドに渡します。
await call.stopVideo(localVideoStream);
その LocalVideoStream インスタンスで switchSource を呼び出すことで、アクティブな LocalVideoStream を保持しつつ、別のカメラ デバイスに切り替えることができます。
const cameras = await callClient.getDeviceManager().getCameras();
const camera = cameras[1];
localVideoStream.switchSource(camera);
指定したビデオ デバイスが使用できない場合は、次のようにします。
- 通話中にビデオがオフになり、
call.startVideo()を使用してビデオを開始した場合は、このメソッドによってSourceUnavailableErrorがスローされ、cameraStartFailedユーザー向け診断が true に設定されます。 localVideoStream.switchSource()メソッドの呼び出しによりcameraStartFailedが true に設定されます。 通話診断ガイドによって、通話関連の問題を診断する方法に関する追加情報が提供されます。
ローカル ビデオのオン/オフを確認するには、Call メソッド isLocalVideoStarted を使用します。これは true または false を返します。
// Check if local video is on or off
call.isLocalVideoStarted;
ローカル ビデオに対する変更をリッスンするには、isLocalVideoStartedChanged イベントをサブスクライブおよびサブスクライブ解除できます。
// Subscribe to local video event
call.on('isLocalVideoStartedChanged', () => {
    // Callback();
});
// Unsubscribe from local video event
call.off('isLocalVideoStartedChanged', () => {
    // Callback();
});
通話中に画面共有を開始および停止する
通話中に画面共有を開始するには、Call オブジェクトに対して非同期メソッド startScreenSharing() を使用します。
画面共有を開始する
// Start screen sharing
await call.startScreenSharing();
LocalVideoStream のコレクションで画面共有を見つける
画面共有の送信が正常に開始されると、通話インスタンスの localVideoStreams コレクションに種類が ScreenSharing の LocalVideoStream インスタンスが追加されます。
const localVideoStream = call.localVideoStreams.find( (stream) => { return stream.mediaStreamType === 'ScreenSharing'} );
画面共有を停止する
通話中に画面共有を停止するには、非同期 API stoptScreenSharing を使用します。
// Stop screen sharing
await call.stopScreenSharing();
画面共有の状態を確認する
画面共有がオンかオフかを確認する際は、isScreenSharingOn API を使用すると、true または false が返されます。
// Check if screen sharing is on or off
call.isScreenSharingOn;
画面共有への変更をリッスンするには、isScreenSharingOnChanged イベントをサブスクライブおよびサブスクライブ解除できます。
// Subscribe to screen share event
call.on('isScreenSharingOnChanged', () => {
    // Callback();
});
// Unsubscribe from screen share event
call.off('isScreenSharingOnChanged', () => {
    // Callback();
});
重要
Azure Communication Services のこの機能は、現在プレビュー段階にあります。
プレビューの API と SDK は、サービス レベル アグリーメントなしに提供されます。 運用環境のワークロードには使用しないことをお勧めします。 一部の機能はサポート対象ではなく、機能が制限されることがあります。
詳細については、「Microsoft Azure プレビューの追加利用規約」を確認してください。
ローカル画面共有プレビューはパブリック プレビューの段階であり、バージョン 1.15.1-beta.1+ の一部としてご利用になれます。
ローカル画面共有プレビュー
VideoStreamRenderer を使用してローカル画面共有からのストリーム レンダリングを開始できるので、画面共有ストリームとして何を送信しているのかを見ることができます。
// To start viewing local screen share preview
await call.startScreenSharing();
const localScreenSharingStream = call.localVideoStreams.find( (stream) => { return stream.mediaStreamType === 'ScreenSharing' });
const videoStreamRenderer = new VideoStreamRenderer(localScreenSharingStream);
const view = await videoStreamRenderer.createView();
htmlElement.appendChild(view.target);

// To stop viewing local screen share preview.
await call.stopScreenSharing();
view.dispose();
htmlElement.removeChild(view.target);

// Screen sharing can also be stoped by clicking on the native browser's "Stop sharing" button.
// The isScreenSharingOnChanged event will be triggered where you can check the value of call.isScreenSharingOn.
// If the value is false, then that means screen sharing is turned off and so we can go ahead and dispose the screen share preview.
// This event is also triggered for the case when stopping screen sharing via Call.stopScreenSharing() API.
call.on('isScreenSharingOnChanged', () => {
    if (!call.isScreenSharingOn) {
        view.dispose();
        htmlElement.removeChild(view.target);
    }
});
リモート参加者の動画/画面共有ストリームをレンダリングする
リモート参加者のビデオまたは画面共有をレンダリングするには、最初の手順として、レンダリングする RemoteVideoStream の参照を取得します。
これは、RemoteParticipantの配列またはビデオ ストリーム (videoStreams) を通過することによって行うことができます。 リモート参加者コレクションには、Call オブジェクトを介してアクセスします。
const remoteVideoStream = call.remoteParticipants[0].videoStreams[0];
const streamType = remoteVideoStream.mediaStreamType;
RemoteVideoStream をレンダリングするには、その isAvailableChanged イベントをサブスクライブする必要があります。 isAvailable プロパティが true に変更される場合、リモート参加者はビデオ ストリームを送信しています。
それが発生したら、VideoStreamRenderer の新しいインスタンスを作成し、非同期 createView メソッドを使用して新しい VideoStreamRendererView インスタンスを作成します。
その後、任意の UI 要素に view.target を付加できます。
リモート ストリームの使用可否が変わるたびに、VideoStreamRenderer 全体を破棄することも、特定の VideoStreamRendererView を破棄することもできます。
それらを保持する場合、ビューには空のビデオ フレームが表示されます。
// Reference to the html's div where we would display a grid of all remote video stream from all participants.
let remoteVideosGallery = document.getElementById('remoteVideosGallery');

subscribeToRemoteVideoStream = async (remoteVideoStream) => {
    let renderer = new VideoStreamRenderer(remoteVideoStream);
    let view;
    let remoteVideoContainer = document.createElement('div');
    remoteVideoContainer.className = 'remote-video-container';

    let loadingSpinner = document.createElement('div');
    // See the css example below for styling the loading spinner.
    loadingSpinner.className = 'loading-spinner';
    remoteVideoStream.on('isReceivingChanged', () => {
        try {
            if (remoteVideoStream.isAvailable) {
                const isReceiving = remoteVideoStream.isReceiving;
                const isLoadingSpinnerActive = remoteVideoContainer.contains(loadingSpinner);
                if (!isReceiving && !isLoadingSpinnerActive) {
                    remoteVideoContainer.appendChild(loadingSpinner);
                } else if (isReceiving && isLoadingSpinnerActive) {
                    remoteVideoContainer.removeChild(loadingSpinner);
                }
            }
        } catch (e) {
            console.error(e);
        }
    });

    const createView = async () => {
        // Create a renderer view for the remote video stream.
        view = await renderer.createView();
        // Attach the renderer view to the UI.
        remoteVideoContainer.appendChild(view.target);
        remoteVideosGallery.appendChild(remoteVideoContainer);
    }

    // Remote participant has switched video on/off
    remoteVideoStream.on('isAvailableChanged', async () => {
        try {
            if (remoteVideoStream.isAvailable) {
                await createView();
            } else {
                view.dispose();
                remoteVideosGallery.removeChild(remoteVideoContainer);
            }
        } catch (e) {
            console.error(e);
        }
    });

    // Remote participant has video on initially.
    if (remoteVideoStream.isAvailable) {
        try {
            await createView();
        } catch (e) {
            console.error(e);
        }
    }

    console.log(`Initial stream size: height: ${remoteVideoStream.size.height}, width: ${remoteVideoStream.size.width}`);
    remoteVideoStream.on('sizeChanged', () => {
        console.log(`Remote video stream size changed: new height: ${remoteVideoStream.size.height}, new width: ${remoteVideoStream.size.width}`);
    });
}
読み込みスピナーをリモート ビデオ ストリームにスタイル設定するための CSS。
.remote-video-container {
   position: relative;
}
.loading-spinner {
   border: 12px solid #f3f3f3;
   border-radius: 50%;
   border-top: 12px solid #ca5010;
   width: 100px;
   height: 100px;
   -webkit-animation: spin 2s linear infinite; /* Safari */
   animation: spin 2s linear infinite;
   position: absolute;
   margin: auto;
   top: 0;
   bottom: 0;
   left: 0;
   right: 0;
   transform: translate(-50%, -50%);
}
@keyframes spin {
   0% { transform: rotate(0deg); }
   100% { transform: rotate(360deg); }
}
/* Safari */
@-webkit-keyframes spin {
   0% { -webkit-transform: rotate(0deg); }
   100% { -webkit-transform: rotate(360deg); }
}
リモート動画の画質
Azure Communication Services WebJS SDK には、Optimal Video Count (OVC) という機能が用意されています (バージョン 1.15.1 以降)。
この機能を使用すると、実行時のアプリケーションに、さまざまな参加者からの着信ビデオをどれだけの数、グループ通話 (参加者が 2 人以上) の特定の時点で最適にレンダリングできるかについて知らせることができます。
この機能が公開するプロパティ optimalVideoCount は、ローカル エンドポイントのネットワークとハードウェアの機能に基づいて、呼び出し中に動的に変化します。 optimalVideoCount の値は、さまざまな参加者アプリケーションから送られるどれだけのビデオを特定の時点でレンダリングするかについて詳細に示します。 アプリケーションはこれらの変更に対処して、レンダリングされたビデオの数を、推奨事項に従って更新する必要があります。 各更新の間にはデバウンス期間 (約 10 秒) があります。
使用法optimalVideoCount 機能は通話機能です。 Call オブジェクトの feature メソッドを使用して、フィーチャー OptimalVideoCount を参照する必要があります。 その後、OptimalVideoCountCallFeature の on メソッドを使用してリスナーを設定し、optimalVideoCount が変更されたときに通知を受け取ることができます。 変更のサブスクライブを解除するには、off メソッドを呼び出すことができます。
const optimalVideoCountFeature = call.feature(Features.OptimalVideoCount);
optimalVideoCountFeature.on('optimalVideoCountChanged', () => {
    const localOptimalVideoCountVariable = optimalVideoCountFeature.optimalVideoCount;
})
使用例: アプリケーションは、グループ通話で呼び出しで最適なビデオ数の変更をサブスクライブする必要があります。 最適なビデオ数の変更は、新しいレンダラー (createView メソッド) を作成するか、ビューを破棄 (dispose) して、それに応じてアプリケーション レイアウトを更新することで処理できます。
リモート動画ストリームのプロパティ
リモート動画ストリームには次のプロパティがあります。
const id: number = remoteVideoStream.id;
id: リモート動画ストリームの ID。
const type: MediaStreamType = remoteVideoStream.mediaStreamType;
mediaStreamType:VideoまたはScreenSharingを指定できます。
const isAvailable: boolean = remoteVideoStream.isAvailable;
isAvailable: リモート参加者のエンドポイントによりストリームがアクティブに送信されているかどうかを定義します。
const isReceiving: boolean = remoteVideoStream.isReceiving;
isReceiving:リモート ビデオ ストリーム データを受信しているかどうかをアプリケーションに通知します。
次のシナリオでは、フラグが
falseに移行します。- モバイル ブラウザーのリモート参加者が、ブラウザー アプリをバックグラウンドに移動する。
- リモート参加者またはビデオを受信しているユーザーに、ビデオ品質に大きな影響を与えるネットワークの問題がある。
- macOS/iOS Safari のリモート参加者が、アドレス バーから [一時停止] を選択する。
- リモート参加者がネットワーク切断に遭っている。
- モバイルのリモート参加者がブラウザーを強制的に、または通常どおり終了する。
- モバイルまたはデスクトップのリモート参加者が、そのデバイスをロックする。 このシナリオは、リモート参加者がデスクトップ コンピューターで、スリープ状態になる場合にも適用されます。
次のシナリオでは、フラグが
trueに移行します。- モバイル ブラウザーのリモート参加者が、バックグラウンドにしていたブラウザーをフォアグラウンドに戻す。
- macOS/iOS Safari のリモート参加者が、ビデオを一時停止にした後で、アドレス バーから [再開] を選択する。
- リモート参加者が、一時的な切断の後、ネットワークに再接続する。
- モバイルのリモート参加者がデバイスのロックを解除し、モバイル ブラウザーで通話に戻る。
この機能により、リモート ビデオ ストリームのレンダリングに関するユーザー エクスペリエンスが向上します。
isReceiving フラグが false に変わると、読み込みスピナーをリモート ビデオ ストリーム上に表示できます。 読み込みスピナーの実装は必須ではありませんが、読み込みスピナーは、ユーザー エクスペリエンスの向上のために最も一般的に使用されているものです。
const size: StreamSize = remoteVideoStream.size;
size: ビデオの幅と高さに関する情報を含むストリーム サイズ。
VideoStreamRenderer のメソッドとプロパティ
await videoStreamRenderer.createView();
リモート ビデオ ストリームをレンダリングするためにアプリケーション UI に付加できる VideoStreamRendererView インスタンスを作成し、非同期 createView() メソッドを使用します。これにより、ストリームをレンダリングする準備ができたときに解決され、DOM ツリー内のどこにでも挿入できる video 要素を表す target プロパティを含むオブジェクトが返されます。
videoStreamRenderer.dispose();
videoStreamRenderer と、それに関連付けられているすべての VideoStreamRendererView インスタンスを破棄します。
VideoStreamRendererView のメソッドとプロパティ
VideoStreamRendererView を作成するときに、scalingMode と isMirrored プロパティを指定できます。 scalingMode は、Stretch、Crop、または Fit のいずれかです。 isMirrored を指定すると、レンダリングされたストリームは垂直方向に反転されます。
const videoStreamRendererView: VideoStreamRendererView = await videoStreamRenderer.createView({ scalingMode, isMirrored });
すべての VideoStreamRendererView インスタンスには、レンダリング サーフェイスを表す target プロパティがあります。 アプリケーション UI にこのプロパティを付加します。
htmlElement.appendChild(view.target);
scalingMode は、updateScalingMode メソッドを呼び出すことで更新できます。
view.updateScalingMode('Crop');
2 つの異なるカメラからの動画ストリームを、同じデスクトップ デバイスから同じ通話の中で送信します。
重要
Azure Communication Services のこの機能は、現在プレビュー段階にあります。
プレビューの API と SDK は、サービス レベル アグリーメントなしに提供されます。 運用環境のワークロードには使用しないことをお勧めします。 一部の機能はサポート対象ではなく、機能が制限されることがあります。
詳細については、「Microsoft Azure プレビューの追加利用規約」を確認してください。
同一の通話で 2 つの異なるカメラからビデオ ストリームを送信することは、デスクトップでサポートされているブラウザーでバージョン 1.17.1-beta.1 以降の一部としてサポートされています。
- ひとつのデスクトップ ブラウザー タブ/アプリの 2 つの異なるカメラから動画ストリームを、同じ通話の中で、次のコード スニペットを使用して送信できます。
// Create your first CallAgent with identity A
const callClient1 = new CallClient();
const callAgent1 = await callClient1.createCallAgent(tokenCredentialA);
const deviceManager1 = await callClient1.getDeviceManager();

// Create your second CallAgent with identity B
const callClient2 = new CallClient();
const callAgent2 = await callClient2.createCallAgent(tokenCredentialB);
const deviceManager2 = await callClient2.getDeviceManager();

// Join the call with your first CallAgent
const camera1 = await deviceManager1.getCameras()[0];
const callObj1 = callAgent1.join({ groupId: ‘123’}, { videoOptions: { localVideoStreams: [new LocalVideoStream(camera1)] } });

// Join the same call with your second CallAgent and make it use a different camera
const camera2 = (await deviceManager2.getCameras()).filter((camera) => { return camera !== camera1 })[0];
const callObj2 = callAgent2.join({ groupId: '123' }, { videoOptions: { localVideoStreams: [new LocalVideoStream(camera2)] } });

//Mute the microphone and speakers of your second CallAgent’s Call, so that there is no echos/noises.
await callObj2.muteIncomingAudio();
await callObj2.mute();
制限事項:
- これは、異なる ID を使用する 2 つの異なる
CallAgentインスタンスで行う必要があります。 このコード スニペットは、2 つの通話エージェントが使用されており、それぞれが独自の Call オブジェクトをもっている状態を示しています。 - コード例では、両方の CallAgent が同じ通話 (同じ通話 ID) に参加しています。 また、エージェントごとに異なる通話に参加し、一方の通話では 1 つのビデオ、もう一方の通話では別のビデオを送信することもできます。
- 同じカメラを両方の CallAgent で送信することはサポートされていません。 これらは 2 つの異なるカメラでなければなりません。
- 2 つの異なるカメラをひとつの CallAgent で送信することは、現在はサポートされていません。
- macOS Safari では、背景ぼかし動画エフェクト (@azure/communication-effects) から) を適用できるのはひとつのカメラだけであり、両方に同時に適用することはできません。
SDK のインストール
プロジェクトレベルの build.gradle ファイルを見つけて、buildscript と allprojects の下にあるリポジトリの一覧に「mavenCentral()」を追加します。
buildscript {
    repositories {
    ...
        mavenCentral()
    ...
    }
}
allprojects {
    repositories {
    ...
        mavenCentral()
    ...
    }
}
次に、モジュール レベルの build.gradle ファイル内で、次の行を dependencies セクションに追加します。
dependencies {
    ...
    implementation 'com.azure.android:azure-communication-calling:1.0.0'
    ...
}
必要なオブジェクトを初期化する
CallAgent インスタンスを作成するには、CallClient インスタンス上で createCallAgent メソッドを呼び出す必要があります。 この呼び出しは、CallAgent インスタンス オブジェクトを非同期に返します。
createCallAgent メソッドは、アクセス トークンをカプセル化する CommunicationUserCredential を引数として受け取ります。
DeviceManager にアクセスするには、まず callAgent インスタンスを作成する必要があります。 それから、CallClient.getDeviceManager メソッドを使用して DeviceManager を取得することができます。
String userToken = '<user token>';
CallClient callClient = new CallClient();
CommunicationTokenCredential tokenCredential = new CommunicationTokenCredential(userToken);
android.content.Context appContext = this.getApplicationContext(); // From within an activity, for instance
CallAgent callAgent = callClient.createCallAgent(appContext, tokenCredential).get();
DeviceManager deviceManager = callClient.getDeviceManager(appContext).get();
呼び出し元の表示名を設定するには、この代替メソッドを使用します。
String userToken = '<user token>';
CallClient callClient = new CallClient();
CommunicationTokenCredential tokenCredential = new CommunicationTokenCredential(userToken);
android.content.Context appContext = this.getApplicationContext(); // From within an activity, for instance
CallAgentOptions callAgentOptions = new CallAgentOptions();
callAgentOptions.setDisplayName("Alice Bob");
DeviceManager deviceManager = callClient.getDeviceManager(appContext).get();
CallAgent callAgent = callClient.createCallAgent(appContext, tokenCredential, callAgentOptions).get();
デバイス管理
通話でのビデオの使用を開始するには、デバイスを管理する方法を知る必要があります。 デバイスを使用すると、どのデバイスで通話にオーディオとビデオを送信するかを制御できます。
DeviceManager を使用すると、オーディオと動画のストリームを送信する呼び出しで使用できるローカル デバイスを列挙できます。 また、ネイティブ ブラウザー API を使用してマイクやカメラにアクセスするために、ユーザーにアクセス許可を要求することもできます。
callClient.getDeviceManager() メソッドを呼び出すことによって deviceManager にアクセスできます。
Context appContext = this.getApplicationContext();
DeviceManager deviceManager = callClient.getDeviceManager(appContext).get();
ローカル デバイスを列挙する
ローカル デバイスにアクセスするには、デバイス マネージャーで列挙メソッドを使用します。 列挙は同期アクションです。
//  Get a list of available video devices for use.
List<VideoDeviceInfo> localCameras = deviceManager.getCameras(); // [VideoDeviceInfo, VideoDeviceInfo...]
ローカル カメラのプレビュー
DeviceManager と Renderer を使用して、ローカル カメラからのストリームのレンダリングを開始できます。 このストリームは、他の参加者には送信されません。ローカル プレビュー フィードです。 これは、非同期アクションです。
VideoDeviceInfo videoDevice = <get-video-device>; // See the `Enumerate local devices` topic above
Context appContext = this.getApplicationContext();

LocalVideoStream currentVideoStream = new LocalVideoStream(videoDevice, appContext);

LocalVideoStream[] localVideoStreams = new LocalVideoStream[1];
localVideoStreams[0] = currentVideoStream;

VideoOptions videoOptions = new VideoOptions(localVideoStreams);

RenderingOptions renderingOptions = new RenderingOptions(ScalingMode.Fit);
VideoStreamRenderer previewRenderer = new VideoStreamRenderer(currentVideoStream, appContext);

VideoStreamRendererView uiView = previewRenderer.createView(renderingOptions);

// Attach the uiView to a viewable location on the app at this point
layout.addView(uiView);
ビデオ カメラを使用して 1:1 の通話を行う
警告
現在、サポートされている発信ローカル動画ストリームは 1 つだけです。動画を使って通話を行うには、deviceManagergetCameras API を使って、ローカル カメラを列挙する必要があります。
目的のカメラを選択したら、それを使用して LocalVideoStream インスタンスを構築し、それを call メソッドへの localVideoStream 配列内の項目として、videoOptions に渡します。
通話が接続されると、選択したカメラから他の参加者への動画ストリームの送信が自動的に開始されます。
Note
プライバシーに対する懸念から、動画がローカルでプレビューされていない場合に、通話に共有されることはありません。 詳細については、「ローカル カメラのプレビュー」を参照してください。
VideoDeviceInfo desiredCamera = <get-video-device>; // See the `Enumerate local devices` topic above
Context appContext = this.getApplicationContext();

LocalVideoStream currentVideoStream = new LocalVideoStream(desiredCamera, appContext);

LocalVideoStream[] localVideoStreams = new LocalVideoStream[1];
localVideoStreams[0] = currentVideoStream;

VideoOptions videoOptions = new VideoOptions(localVideoStreams);

// Render a local preview of video so the user knows that their video is being shared
Renderer previewRenderer = new VideoStreamRenderer(currentVideoStream, appContext);
View uiView = previewRenderer.createView(new CreateViewOptions(ScalingMode.FIT));

// Attach the uiView to a viewable location on the app at this point
layout.addView(uiView);

CommunicationUserIdentifier[] participants = new CommunicationUserIdentifier[]{ new CommunicationUserIdentifier("<acs user id>") };

StartCallOptions startCallOptions = new StartCallOptions();
startCallOptions.setVideoOptions(videoOptions);

Call call = callAgent.startCall(context, participants, startCallOptions);
ローカル動画の送信を開始および停止する
動画を開始するには、deviceManager オブジェクトの getCameraList API を使用して、カメラを列挙する必要があります。 次に、目的のカメラを渡して LocalVideoStream の新しいインスタンスを作成し、それを引数として startVideo API に渡します。
VideoDeviceInfo desiredCamera = <get-video-device>; // See the `Enumerate local devices` topic above
Context appContext = this.getApplicationContext();

LocalVideoStream currentLocalVideoStream = new LocalVideoStream(desiredCamera, appContext);

VideoOptions videoOptions = new VideoOptions(currentLocalVideoStream);

Future startVideoFuture = call.startVideo(appContext, currentLocalVideoStream);
startVideoFuture.get();
動画の送信が正常に開始されると、通話インスタンスの localVideoStreams コレクションに LocalVideoStream インスタンスが追加されます。
List<LocalVideoStream> videoStreams = call.getLocalVideoStreams();
LocalVideoStream currentLocalVideoStream = videoStreams.get(0); // Please make sure there are VideoStreams in the list before calling get(0).
ローカル動画を停止するには、localVideoStreams コレクションで使用可能な LocalVideoStream インスタンスを渡します。
call.stopVideo(appContext, currentLocalVideoStream).get();
LocalVideoStream インスタンスで switchSource を呼び出すことにより、動画の送信中に別のカメラ デバイスに切り替えることができます。
currentLocalVideoStream.switchSource(source).get();
リモート参加者の動画ストリームをレンダリングする
リモート参加者の動画ストリームと画面共有ストリームの一覧を取得するには、videoStreams コレクションを調べます。
List<RemoteParticipant> remoteParticipants = call.getRemoteParticipants();
RemoteParticipant remoteParticipant = remoteParticipants.get(0); // Please make sure there are remote participants in the list before calling get(0).

List<RemoteVideoStream> remoteStreams = remoteParticipant.getVideoStreams();
RemoteVideoStream remoteParticipantStream = remoteStreams.get(0); // Please make sure there are video streams in the list before calling get(0).

MediaStreamType streamType = remoteParticipantStream.getType(); // of type MediaStreamType.Video or MediaStreamType.ScreenSharing
リモート参加者からの RemoteVideoStream をレンダリングするには、OnVideoStreamsUpdated イベントをサブスクライブする必要があります。
イベント内で isAvailable プロパティが true に変更された場合、リモート参加者が現在ストリームを送信していることを示します。 それが発生したら、Renderer の新しいインスタンスを作成し、非同期 createView API を使用して新しい RendererView を作成し、お使いのアプリケーションの UI の任意の場所に view.target をアタッチします。
リモート ストリームの使用可能性が変わるたびに、レンダラー全体を破棄するか、特定の RendererView を破棄するか、それらを保持するかを選択できますが、これによって空の動画フレームが表示されます。
VideoStreamRenderer remoteVideoRenderer = new VideoStreamRenderer(remoteParticipantStream, appContext);
VideoStreamRendererView uiView = remoteVideoRenderer.createView(new RenderingOptions(ScalingMode.FIT));
layout.addView(uiView);

remoteParticipant.addOnVideoStreamsUpdatedListener(e -> onRemoteParticipantVideoStreamsUpdated(p, e));

void onRemoteParticipantVideoStreamsUpdated(RemoteParticipant participant, RemoteVideoStreamsEvent args) {
    for(RemoteVideoStream stream : args.getAddedRemoteVideoStreams()) {
        if(stream.getIsAvailable()) {
            startRenderingVideo();
        } else {
            renderer.dispose();
        }
    }
}
リモート動画ストリームのプロパティ
リモート動画ストリームにはいくつかのプロパティがあります
Id- リモート ビデオ ストリームの ID です
int id = remoteVideoStream.getId();
MediaStreamType- "Video" または "ScreenSharing" になります
MediaStreamType type = remoteVideoStream.getMediaStreamType();
isAvailable- リモート参加者のエンドポイントでストリームをアクティブに送信されているかどうかを示します
boolean availability = remoteVideoStream.isAvailable();
Renderer のメソッドとプロパティ
Renderer オブジェクトには次の API があります
- 後でアプリケーションの UI にアタッチしてリモート動画ストリームをレンダリングできる
VideoStreamRendererViewインスタンスを作成します。
// Create a view for a video stream
VideoStreamRendererView.createView()
- レンダラーと、このレンダラーに関連付けられているすべての
VideoStreamRendererViewを破棄します。 UI から関連付けられているすべてのビューを削除したときに呼び出します。
VideoStreamRenderer.dispose()
StreamSize- リモート動画ストリームのサイズ (幅と高さ)
StreamSize renderStreamSize = VideoStreamRenderer.getSize();
int width = renderStreamSize.getWidth();
int height = renderStreamSize.getHeight();
RendererView のメソッドとプロパティ
VideoStreamRendererView を作成するときに、このビューに適用される ScalingMode と mirrored のプロパティを指定できます。スケーリング モードは、'CROP' または 'FIT' のいずれかになります。
VideoStreamRenderer remoteVideoRenderer = new VideoStreamRenderer(remoteVideoStream, appContext);
VideoStreamRendererView rendererView = remoteVideoRenderer.createView(new CreateViewOptions(ScalingMode.Fit));
作成した RendererView は、次のスニペットを使用してアプリケーションの UI にアタッチできます。
layout.addView(rendererView);
後で、RendererView オブジェクトの updateScalingMode API を呼び出し、ScalingMode.CROP または ScalingMode.FIT のいずれかを引数として指定することで、スケーリング モードを更新できます。
// Update the scale mode for this view.
rendererView.updateScalingMode(ScalingMode.CROP)
システムを設定する
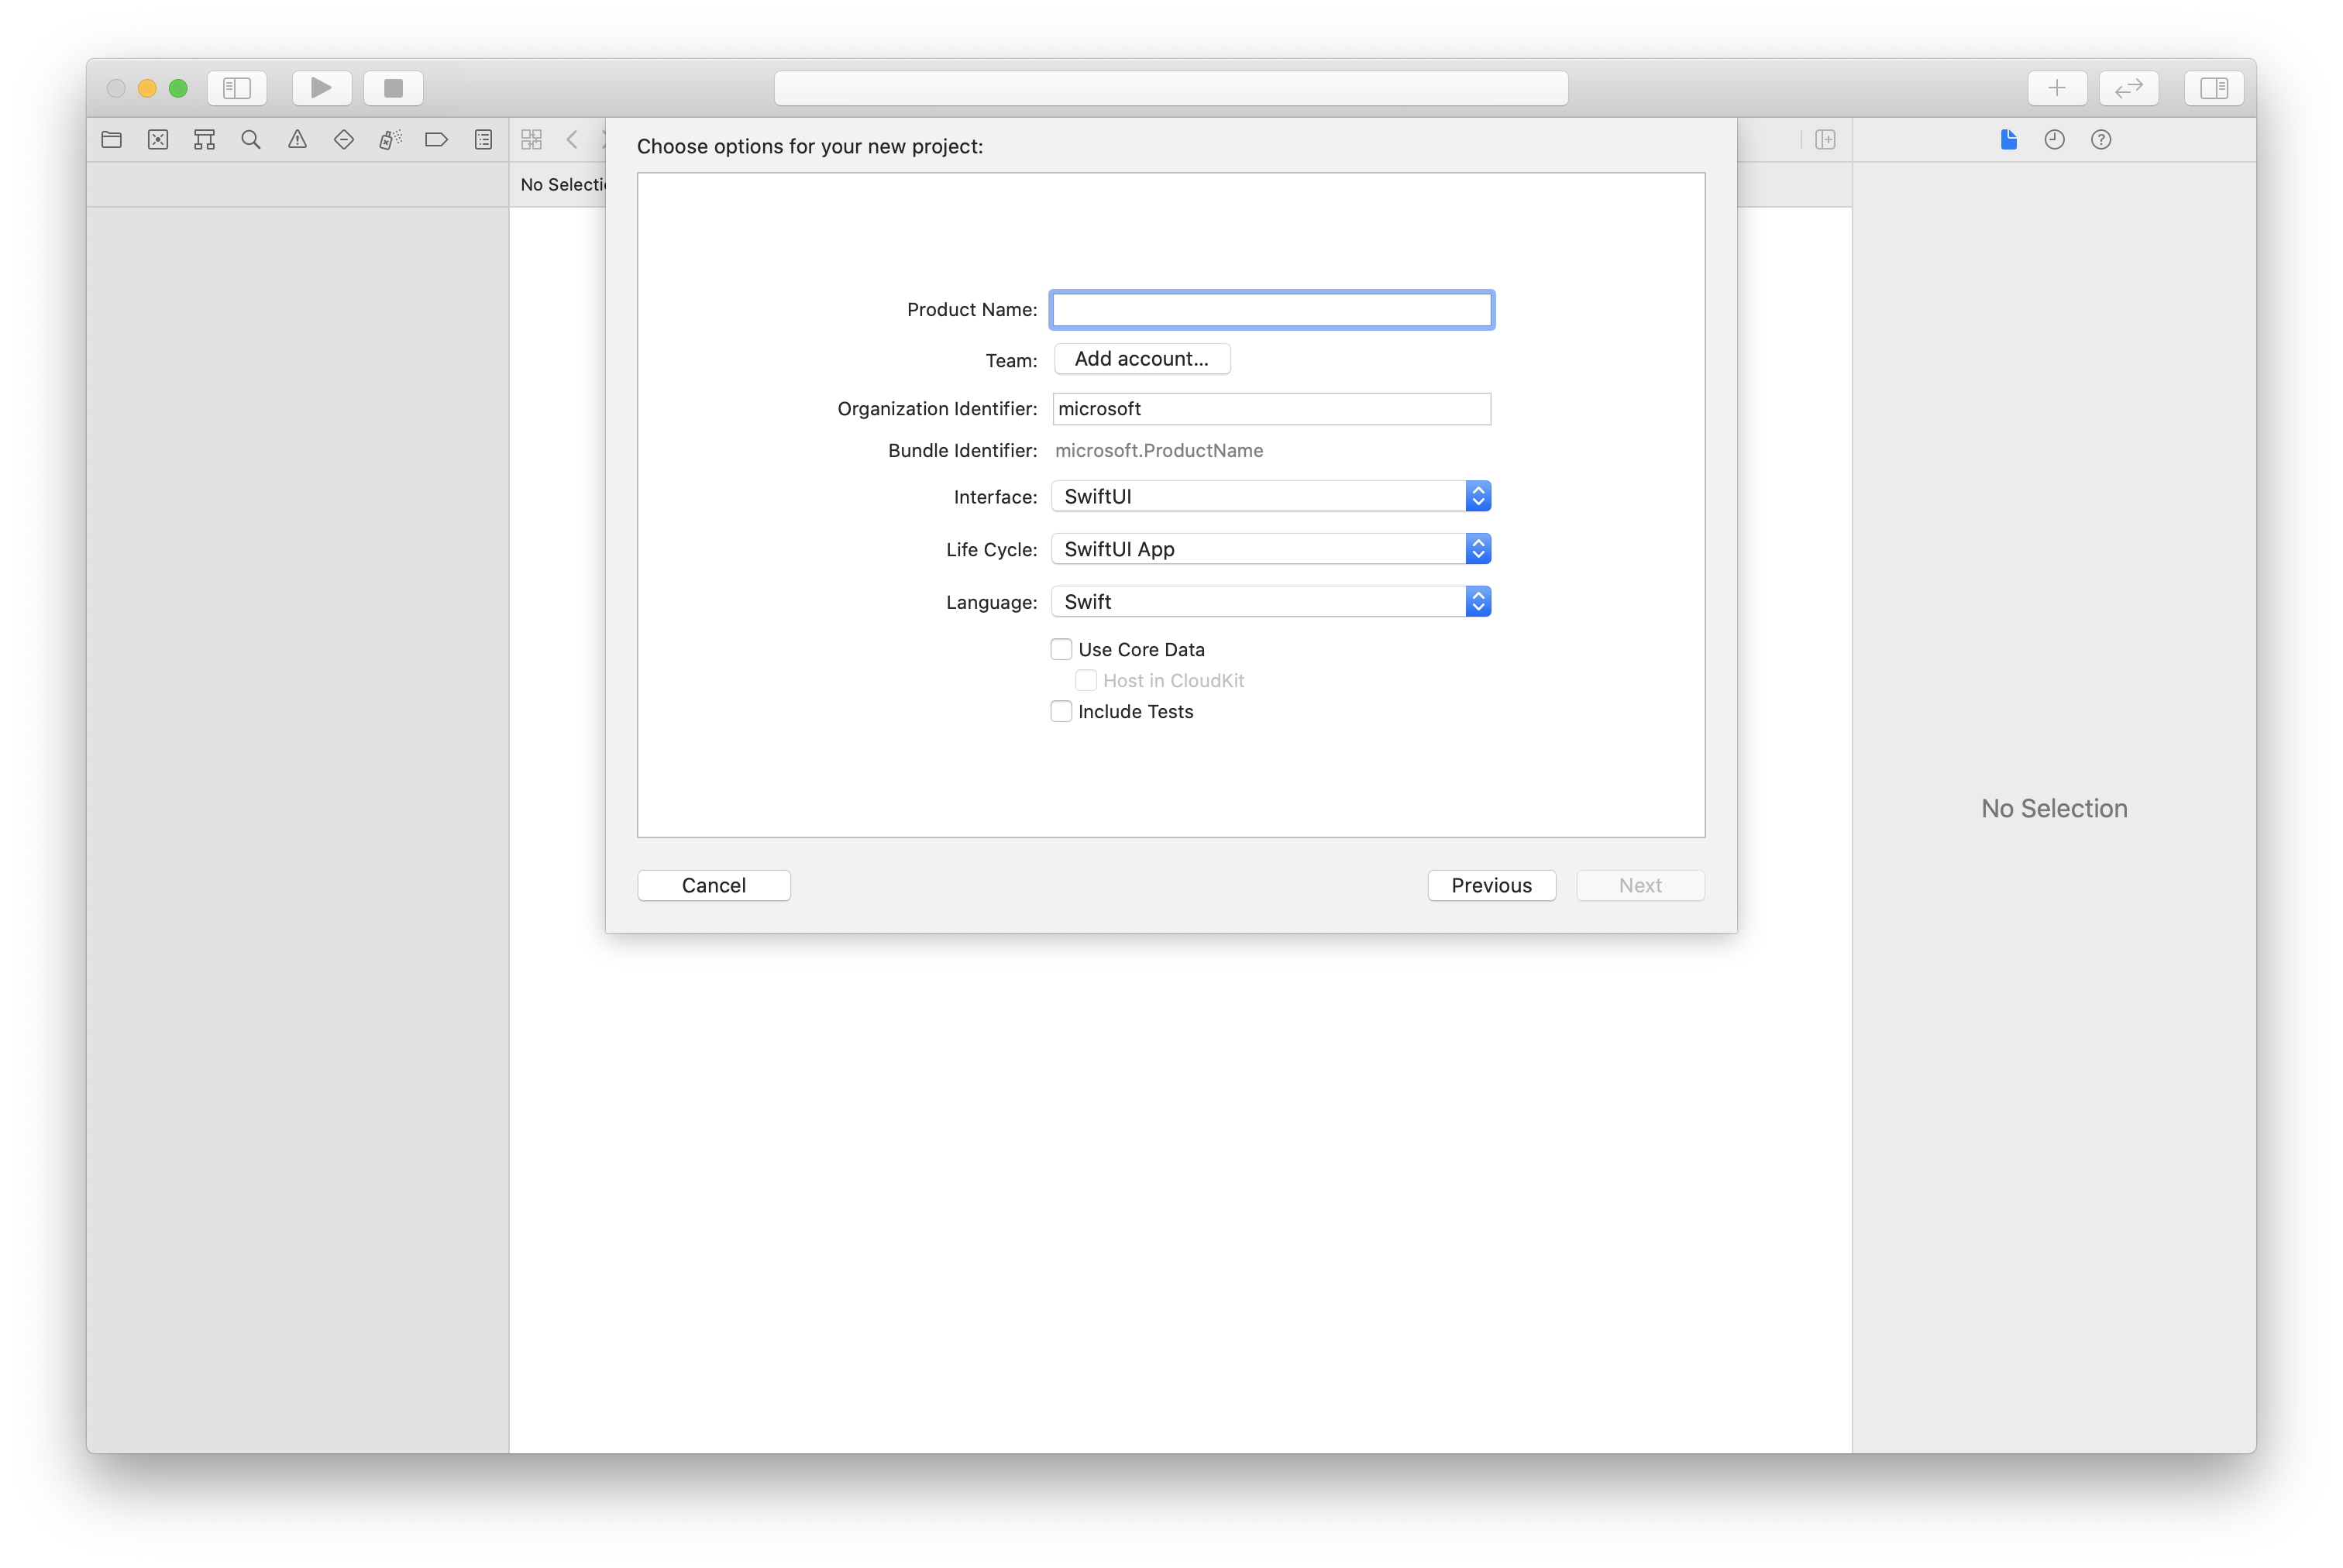
Xcode プロジェクトを作成する
Xcode で、新しい iOS プロジェクトを作成し、[単一ビュー アプリ] テンプレートを選択します。 このクイックスタートでは SwiftUI フレームワークを使用します。そのため、[Language] を Swift に、[Interface] を SwiftUI に設定する必要があります。
このクイックスタートでは、テストは作成しません。 [Include Tests] チェック ボックスはオフにしてもかまいません。
CocoaPods を使用してパッケージと依存関係をインストールする
この例のように、アプリケーション用の Podfile を作成します。
platform :ios, '13.0'
use_frameworks!
target 'AzureCommunicationCallingSample' do
    pod 'AzureCommunicationCalling', '~> 1.0.0'
end
pod installを実行します。Xcode を使用して
.xcworkspaceを開きます。
マイクへのアクセスを要求する
デバイスのマイクにアクセスするには、NSMicrophoneUsageDescription を使用してアプリの情報プロパティ一覧を更新する必要があります。 関連付けられた値を文字列に設定します。これは、システムがユーザーにアクセスを要求するために使用するダイアログ内に含まれます。
プロジェクト ツリーの [Info.plist] エントリを右クリックし、[Open As]>[Source Code] を選択します。 最上位の <dict> セクションに以下の行を追加してから、ファイルを保存します。
<key>NSMicrophoneUsageDescription</key>
<string>Need microphone access for VOIP calling.</string>
アプリのフレームワークを設定する
プロジェクトの ContentView.swift ファイルを開きます。 ファイルの先頭に import 宣言を追加して、AzureCommunicationCalling ライブラリをインポートします。 さらに、AVFoundation をインポートします。 これは、コード内のオーディオ アクセス許可要求に必要になります。
import AzureCommunicationCalling
import AVFoundation
CallAgent を初期化する
CallClient から CallAgent インスタンスを作成するには、初期化された後に CallAgent オブジェクトを非同期に返す callClient.createCallAgent メソッドを使用する必要があります。
通話クライアントを作成するには、CommunicationTokenCredential オブジェクトを渡します。
import AzureCommunication

let tokenString = "token_string"
var userCredential: CommunicationTokenCredential?
do {
    let options = CommunicationTokenRefreshOptions(initialToken: token, refreshProactively: true, tokenRefresher: self.fetchTokenSync)
    userCredential = try CommunicationTokenCredential(withOptions: options)
} catch {
    updates("Couldn't created Credential object", false)
    initializationDispatchGroup!.leave()
    return
}

// tokenProvider needs to be implemented by Contoso, which fetches a new token
public func fetchTokenSync(then onCompletion: TokenRefreshOnCompletion) {
    let newToken = self.tokenProvider!.fetchNewToken()
    onCompletion(newToken, nil)
}
作成した CommunicationTokenCredential オブジェクトを CallClient に渡し、表示名を設定します。
self.callClient = CallClient()
let callAgentOptions = CallAgentOptions()
options.displayName = " iOS Azure Communication Services User"

self.callClient!.createCallAgent(userCredential: userCredential!,
    options: callAgentOptions) { (callAgent, error) in
        if error == nil {
            print("Create agent succeeded")
            self.callAgent = callAgent
        } else {
            print("Create agent failed")
        }
})
デバイスの管理
通話でのビデオの使用を開始するには、デバイスを管理する方法を知る必要があります。 デバイスを使用すると、どのデバイスで通話にオーディオとビデオを送信するかを制御できます。
DeviceManager を使用すると、オーディオまたは動画のストリームを送信するために通話内で使用できるローカル デバイスを列挙できます。 また、マイクやカメラにアクセスするための許可をユーザーに求めることもできます。 callClient オブジェクトの deviceManager にアクセスできます。
self.callClient!.getDeviceManager { (deviceManager, error) in
        if (error == nil) {
            print("Got device manager instance")
            self.deviceManager = deviceManager
        } else {
            print("Failed to get device manager instance")
        }
    }
ローカル デバイスを列挙する
ローカル デバイスにアクセスする場合は、デバイス マネージャーで列挙メソッドを使用できます。 列挙は同期アクションです。
// enumerate local cameras
var localCameras = deviceManager.cameras // [VideoDeviceInfo, VideoDeviceInfo...]
ローカル カメラのプレビューを取得する
Renderer を使用して、ローカル カメラからのストリームのレンダリングを開始できます。 このストリームは、他の参加者には送信されません。ローカル プレビュー フィードです。 これは、非同期アクションです。
let camera: VideoDeviceInfo = self.deviceManager!.cameras.first!
let localVideoStream = LocalVideoStream(camera: camera)
let localRenderer = try! VideoStreamRenderer(localVideoStream: localVideoStream)
self.view = try! localRenderer.createView()
ローカル カメラのプレビューのプロパティを取得する
レンダラーには、レンダリングを制御できるプロパティとメソッドのセットが用意されています。
// Constructor can take in LocalVideoStream or RemoteVideoStream
let localRenderer = VideoStreamRenderer(localVideoStream:localVideoStream)
let remoteRenderer = VideoStreamRenderer(remoteVideoStream:remoteVideoStream)

// [StreamSize] size of the rendering view
localRenderer.size

// [VideoStreamRendererDelegate] an object you provide to receive events from this Renderer instance
localRenderer.delegate

// [Synchronous] create view
try! localRenderer.createView()

// [Synchronous] create view with rendering options
try! localRenderer!.createView(withOptions: CreateViewOptions(scalingMode: ScalingMode.fit))

// [Synchronous] dispose rendering view
localRenderer.dispose()
動画を使用して 1:1 の通話を行う
デバイス マネージャーのインスタンスを取得する場合は、デバイスの管理に関するセクションを参照してください。
let firstCamera = self.deviceManager!.cameras.first
self.localVideoStreams = [LocalVideoStream]()
self.localVideoStreams!.append(LocalVideoStream(camera: firstCamera!))
let videoOptions = VideoOptions(localVideoStreams: self.localVideoStreams!)

let startCallOptions = StartCallOptions()
startCallOptions.videoOptions = videoOptions

let callee = CommunicationUserIdentifier('UserId')
self.callAgent?.startCall(participants: [callee], options: startCallOptions) { (call, error) in
    if error == nil {
        print("Successfully started outgoing video call")
        self.call = call
    } else {
        print("Failed to start outgoing video call")
    }
}
リモート参加者の動画ストリームをレンダリングする
リモート参加者は、通話中に動画または画面共有を開始できます。
リモート参加者の動画共有または画面共有ストリームを処理する
リモート参加者のストリームを一覧表示するには、videoStreams コレクションを調べます。
var remoteParticipantVideoStream = call.remoteParticipants[0].videoStreams[0]
リモート動画ストリームのプロパティを取得する
var type: MediaStreamType = remoteParticipantVideoStream.type // 'MediaStreamTypeVideo'
var isAvailable: Bool = remoteParticipantVideoStream.isAvailable // indicates if remote stream is available
var id: Int = remoteParticipantVideoStream.id // id of remoteParticipantStream
リモート参加者ストリームをレンダリングする
リモート参加者ストリームのレンダリングを開始するには、次のコードを使用します。
let renderer = VideoStreamRenderer(remoteVideoStream: remoteParticipantVideoStream)
let targetRemoteParticipantView = renderer?.createView(withOptions: CreateViewOptions(scalingMode: ScalingMode.crop))
// To update the scaling mode later
targetRemoteParticipantView.update(scalingMode: ScalingMode.fit)
リモート動画レンダラーのメソッドとプロパティを取得する
// [Synchronous] dispose() - dispose renderer and all `RendererView` associated with this renderer. To be called when you have removed all associated views from the UI.
remoteVideoRenderer.dispose()
システムを設定する
Visual Studio プロジェクトの作成
UWP アプリの場合、Visual Studio 2022 で、新しい空のアプリ (ユニバーサル Windows) プロジェクトを作成します。 プロジェクト名を入力した後、10.0.17763.0 より後の Windows SDK を自由に選択できます。
WinUI 3 アプリの場合、Blank App, Packaged (WinUI 3 in Desktop) テンプレートで新しいプロジェクトを作成し、シングルページの WinUI 3 アプリを設定します。 Windows App SDK バージョン 1.3 以降が必要です。
NuGet パッケージ マネージャーを使用してパッケージと依存関係をインストールする
Calling SDK の API とライブラリは、NuGet パッケージにより一般公開されています。
次の手順では、Calling SDK NuGet パッケージを検索、ダウンロード、インストールする方法の例を示します。
- [ツール]>[NuGet パッケージ マネージャー]>[ソリューションの NuGet パッケージの管理] を選んで、NuGet パッケージ マネージャーを開きます。
- [参照] を選び、検索ボックスに「
Azure.Communication.Calling.WindowsClient」と入力します。 - [プレリリースを含める] チェック ボックスがオンになっていることを確認します。
Azure.Communication.Calling.WindowsClientパッケージを選んでから、Azure.Communication.Calling.WindowsClient1.4.0-beta.1 以降のバージョンを選びます。- 右側のタブで、Communication Services プロジェクトに対応するチェック ボックスをオンにします。
- [インストール] ボタンを選択します。
マイクへのアクセスを要求する
アプリを正常に実行するには、カメラへのアクセスが必要です。 UWP アプリでは、カメラ機能をアプリ マニフェスト ファイルで宣言する必要があります。
それを行うための手順を次に示します。
Solution Explorerパネルで、.appxmanifest拡張子が付いたファイルをダブルクリックします。- [
Capabilities] タブをクリックします。 - 機能の一覧から [
Camera] チェック ボックスをオンにします。
通話の発信と終了を行うための UI ボタンを作成する
この単純なサンプル アプリには、2 つのボタンが含まれます。 1 つは呼び出しを行い、もう 1 つは通話を終了します。 次の手順では、これらのボタンをアプリに追加する方法を示します。
Solution Explorerパネルで、UWP の場合はMainPage.xaml、WinUI 3 の場合はMainWindows.xamlという名前のファイルをダブルクリックします。- 中央のパネルで、UI プレビューの下にある XAML コードを探します。
- XAML コードを次の抜粋で変更します。
<TextBox x:Name="CalleeTextBox" PlaceholderText="Who would you like to call?" />
<StackPanel>
    <Button x:Name="CallButton" Content="Start/Join call" Click="CallButton_Click" />
    <Button x:Name="HangupButton" Content="Hang up" Click="HangupButton_Click" />
</StackPanel>
Calling SDK API を使用したアプリの設定
Calling SDK API は、2 つの異なる名前空間に含まれています。 次の手順では、これらの名前空間について C# コンパイラに通知し、Visual Studio の Intellisense がコード開発を支援できるようにします。
Solution Explorerパネルで、UWP の場合はMainPage.xaml、WinUI 3 の場合はMainWindows.xamlという名前のファイルの左側にある矢印をクリックします。MainPage.xaml.csまたはMainWindows.xaml.csという名前のファイルをダブルクリックします。- 現在の
usingステートメントの下部に次のコマンドを追加します。
using Azure.Communication.Calling.WindowsClient;
MainPage.xaml.cs または MainWindows.xaml.cs は開いたままにします。 次の手順で、さらにコードを追加します。
アプリの対話を許可する
以前に追加した UI ボタンは、発信された CommunicationCall の上で操作する必要があります。 つまり、CommunicationCall データ メンバーを MainPage または MainWindow クラスに追加する必要があります。
さらに、非同期操作の CallAgent 作成を成功させるには、CallAgent データ メンバーも同じクラスに追加する必要があります。
MainPage または MainWindow クラスに次のデータ メンバーを追加してください。
CallAgent callAgent;
CommunicationCall call;
ボタン ハンドラーを作成する
前に、2 つの UI ボタンが XAML コードに追加されました。 次のコードでは、ユーザーがボタンを選択すると実行されるハンドラーを追加します。 次のコードは、前のセクションのデータ メンバーの後に追加する必要があります。
private async void CallButton_Click(object sender, RoutedEventArgs e)
{
    // Start call
}

private async void HangupButton_Click(object sender, RoutedEventArgs e)
{
    // End the current call
}
オブジェクト モデル
UWP 用の Azure Communication Services Calling クライアント ライブラリが備える主な機能のいくつかは、以下のクラスとインターフェイスにより処理されます。
| 名前 | 説明 |
|---|---|
CallClient |
CallClient は、通話クライアント ライブラリへのメイン エントリ ポイントです。 |
CallAgent |
CallAgent は、通話を開始して参加するために使用します。 |
CommunicationCall |
CommunicationCall は、開始した、または参加した通話の管理に使用されます。 |
CommunicationTokenCredential |
CommunicationTokenCredential は、CallAgent をインスタンス化するためのトークン資格情報として使用されます。 |
CallAgentOptions |
CallAgentOptions には、呼び出し元を識別するための情報が含まれています。 |
HangupOptions |
HangupOptions は、呼び出しを終了する必要があるかどうかをすべての参加者に対して通知します。 |
ビデオ スキーマ ハンドラーの登録
XAML の MediaElement または MediaPlayerElement のような UI コンポーネントでは、アプリがローカルおよびリモートのビデオ フィードをレンダリングするための構成を登録する必要があります。
Package.appxmanifest の Package タグの間に次の内容を追加してください。
<Extensions>
    <Extension Category="windows.activatableClass.inProcessServer">
        <InProcessServer>
            <Path>RtmMvrUap.dll</Path>
            <ActivatableClass ActivatableClassId="VideoN.VideoSchemeHandler" ThreadingModel="both" />
        </InProcessServer>
    </Extension>
</Extensions>
CallAgent を初期化する
CallClient から CallAgent インスタンスを作成するには、初期化されると CallAgent オブジェクトを非同期に返す CallClient.CreateCallAgentAsync メソッドを使用する必要があります。
CallAgent を作成するには、CallTokenCredential オブジェクトと CallAgentOptions オブジェクトを渡す必要があります。 形式に誤りがあるトークンが渡されると CallTokenCredential がスローされることに注意してください。
次のコードを内部に追加し、アプリの初期化でヘルパー関数を呼び出す必要があります。
var callClient = new CallClient();
this.deviceManager = await callClient.GetDeviceManagerAsync();

var tokenCredential = new CallTokenCredential("<AUTHENTICATION_TOKEN>");
var callAgentOptions = new CallAgentOptions()
{
    DisplayName = "<DISPLAY_NAME>"
};

this.callAgent = await callClient.CreateCallAgentAsync(tokenCredential, callAgentOptions);
this.callAgent.CallsUpdated += Agent_OnCallsUpdatedAsync;
this.callAgent.IncomingCallReceived += Agent_OnIncomingCallAsync;
リソース用の有効な資格情報トークンで <AUTHENTICATION_TOKEN> を変更します。 資格情報トークンを入手する必要がある場合は、ユーザー アクセス トークンのドキュメントを参照してください。
ビデオ カメラを使用して 1:1 の通話を行う
CallAgent を作成するために必要なオブジェクトの準備ができました。 次に、CallAgent を非同期的に作成してビデオ通話を行います。
private async void CallButton_Click(object sender, RoutedEventArgs e)
{
    var callString = CalleeTextBox.Text.Trim();

    if (!string.IsNullOrEmpty(callString))
    {
        if (callString.StartsWith("8:")) // 1:1 Azure Communication Services call
        {
            this.call = await StartAcsCallAsync(callString);
        }
    }

    if (this.call != null)
    {
        this.call.RemoteParticipantsUpdated += OnRemoteParticipantsUpdatedAsync;
        this.call.StateChanged += OnStateChangedAsync;
    }
}

private async Task<CommunicationCall> StartAcsCallAsync(string acsCallee)
{
    var options = await GetStartCallOptionsAsynnc();
    var call = await this.callAgent.StartCallAsync( new [] { new UserCallIdentifier(acsCallee) }, options);
    return call;
}

var micStream = new LocalOutgoingAudioStream(); // Create a default local audio stream
var cameraStream = new LocalOutgoingVideoStreamde(this.viceManager.Cameras.FirstOrDefault() as VideoDeviceDetails); // Create a default video stream

private async Task<StartCallOptions> GetStartCallOptionsAsynnc()
{
    return new StartCallOptions() {
        OutgoingAudioOptions = new OutgoingAudioOptions() { IsMuted = true, Stream = micStream  },
        OutgoingVideoOptions = new OutgoingVideoOptions() { Streams = new OutgoingVideoStream[] { cameraStream } }
    };
}
ローカル カメラのプレビュー
必要に応じて、ローカル カメラのプレビューを設定できます。 ビデオは、MediaPlayerElement を介してレンダリングできます。
<Grid>
    <MediaPlayerElement x:Name="LocalVideo" AutoPlay="True" />
    <MediaPlayerElement x:Name="RemoteVideo" AutoPlay="True" />
</Grid>
ローカル プレビュー MediaPlayerElement を初期化するには:
private async void CameraList_SelectionChanged(object sender, SelectionChangedEventArgs e)
{
    if (cameraStream != null)
    {
        await cameraStream?.StopPreviewAsync();
        if (this.call != null)
        {
            await this.call?.StopVideoAsync(cameraStream);
        }
    }
    var selectedCamerea = CameraList.SelectedItem as VideoDeviceDetails;
    cameraStream = new LocalOutgoingVideoStream(selectedCamerea);

    var localUri = await cameraStream.StartPreviewAsync();
    LocalVideo.Source = MediaSource.CreateFromUri(localUri);

    if (this.call != null) {
        await this.call?.StartVideoAsync(cameraStream);
    }
}
リモート カメラ ストリームをレンダリングする
OnCallsUpdated イベントに応答して偶数ハンドラーを設定します。
private async void OnCallsUpdatedAsync(object sender, CallsUpdatedEventArgs args)
{
    var removedParticipants = new List<RemoteParticipant>();
    var addedParticipants = new List<RemoteParticipant>();

    foreach(var call in args.RemovedCalls)
    {
        removedParticipants.AddRange(call.RemoteParticipants.ToList<RemoteParticipant>());
    }

    foreach (var call in args.AddedCalls)
    {
        addedParticipants.AddRange(call.RemoteParticipants.ToList<RemoteParticipant>());
    }

    await OnParticipantChangedAsync(removedParticipants, addedParticipants);
}

private async void OnRemoteParticipantsUpdatedAsync(object sender, ParticipantsUpdatedEventArgs args)
{
    await OnParticipantChangedAsync(
        args.RemovedParticipants.ToList<RemoteParticipant>(),
        args.AddedParticipants.ToList<RemoteParticipant>());
}

private async Task OnParticipantChangedAsync(IEnumerable<RemoteParticipant> removedParticipants, IEnumerable<RemoteParticipant> addedParticipants)
{
    foreach (var participant in removedParticipants)
    {
        foreach(var incomingVideoStream in  participant.IncomingVideoStreams)
        {
            var remoteVideoStream = incomingVideoStream as RemoteIncomingVideoStream;
            if (remoteVideoStream != null)
            {
                await remoteVideoStream.StopPreviewAsync();
            }
        }
        participant.VideoStreamStateChanged -= OnVideoStreamStateChanged;
    }

    foreach (var participant in addedParticipants)
    {
        participant.VideoStreamStateChanged += OnVideoStreamStateChanged;
    }
}

private void OnVideoStreamStateChanged(object sender, VideoStreamStateChangedEventArgs e)
{
    CallVideoStream callVideoStream = e.CallVideoStream;

    switch (callVideoStream.StreamDirection)
    {
        case StreamDirection.Outgoing:
            OnOutgoingVideoStreamStateChanged(callVideoStream as OutgoingVideoStream);
            break;
        case StreamDirection.Incoming:
            OnIncomingVideoStreamStateChanged(callVideoStream as IncomingVideoStream);
            break;
    }
}
MediaPlayerElement でリモート ビデオ ストリームのレンダリングを開始します:
private async void OnIncomingVideoStreamStateChanged(IncomingVideoStream incomingVideoStream)
{
    switch (incomingVideoStream.State)
    {
        case VideoStreamState.Available:
            {
                switch (incomingVideoStream.Kind)
                {
                    case VideoStreamKind.RemoteIncoming:
                        var remoteVideoStream = incomingVideoStream as RemoteIncomingVideoStream;
                        var uri = await remoteVideoStream.StartPreviewAsync();

                        await Dispatcher.RunAsync(Windows.UI.Core.CoreDispatcherPriority.Normal, () =>
                        {
                            RemoteVideo.Source = MediaSource.CreateFromUri(uri);
                        });

                        /* Or WinUI 3
                        this.DispatcherQueue.TryEnqueue(() => {
                            RemoteVideo.Source = MediaSource.CreateFromUri(uri);
                            RemoteVideo.MediaPlayer.Play();
                        });
                        */

                        break;

                    case VideoStreamKind.RawIncoming:
                        break;
                }

                break;
            }
        case VideoStreamState.Started:
            break;
        case VideoStreamState.Stopping:
            break;
        case VideoStreamState.Stopped:
            if (incomingVideoStream.Kind == VideoStreamKind.RemoteIncoming)
            {
                var remoteVideoStream = incomingVideoStream as RemoteIncomingVideoStream;
                await remoteVideoStream.StopPreviewAsync();
            }
            break;
        case VideoStreamState.NotAvailable:
            break;
    }
}
通話を終了する
通話を開始したら、CommunicationCall オブジェクトの HangupAsync メソッドを使用して通話を終了する必要があります。
また、すべての参加者に対して通話を終了する必要があるかどうかを通知するために、HangupOptions のインスタンスも使用する必要があります。
次のコードを HangupButton_Click 内に追加する必要があります。
var call = this.callAgent?.Calls?.FirstOrDefault();
if (call != null)
{
    var call = this.callAgent?.Calls?.FirstOrDefault();
    if (call != null)
    {
        foreach (var localVideoStream in call.OutgoingVideoStreams)
        {
            await call.StopVideoAsync(localVideoStream);
        }

        try
        {
            if (cameraStream != null)
            {
                await cameraStream.StopPreviewAsync();
            }

            await call.HangUpAsync(new HangUpOptions() { ForEveryone = false });
        }
        catch(Exception ex)
        {
            var errorCode = unchecked((int)(0x0000FFFFU & ex.HResult));
            if (errorCode != 98) // Sample error code, sam_status_failed_to_hangup_for_everyone (98)
            {
                throw;
            }
        }
    }
}
コードの実行
Visual Studio がアプリを x64、x86、または ARM64 向けにビルドすることを確認し、F5 を押してアプリの実行を開始します。 その後、CommunicationCall ボタンをクリックして、定義された呼び出し先と通話を行います。
アプリを初めて実行すると、マイクへのアクセスを許可するようにユーザーに求めるダイアログが表示されます。