チュートリアル:Azure Notification Hubs を使用して特定の Android アプリにプッシュ通知を送信する
Note
Firebase Cloud Messaging の非推奨と移行の手順については、「Google Firebase Cloud Messaging の移行」を参照してください。
このチュートリアルでは、Azure Notification Hubs を使用して特定のデバイスで特定のアプリケーション ユーザーにプッシュ通知を送信する方法について説明します。 ASP.NET WebAPI バックエンドは、アプリ バックエンドからの登録に関するガイダンス記事に示すように、クライアントを認証したり、通知を生成したりするために使用されます。 このチュートリアルは、「チュートリアル: Azure Notification Hubs と Google Firebase Cloud Messaging を使用して Android デバイスにプッシュ通知を送信する」を完了しておきます。
このチュートリアルでは、次の手順を実行します。
- ユーザーを認証するバックエンド Web API プロジェクトを作成します。
- Android アプリケーションを更新します。
- アプリケーションをテストする
前提条件
「チュートリアル: Azure Notification Hubs と Firebase Cloud Messaging を使用して Android デバイスにプッシュ通知を送信する」を完了してください。
Web API プロジェクトを作成する
次のセクションでは、新しい ASP.NET WebAPI バックエンドの作成について説明します。 このプロセスには、主に次の 3 つの目的があります。
- クライアントの認証: クライアント要求を認証し、ユーザーを要求と関連付けるメッセージ ハンドラーを追加します。
- WebAPI バックエンドを使用した通知の登録: クライアント デバイスで通知を受信するための新しい登録を処理するコントローラーを追加します。 認証されたユーザー名はタグとして自動的に登録に追加されます。
- クライアントへの通知の送信: ユーザーがタグに関連するデバイスやクライアントにセキュリティで保護されたプッシュ通知をトリガーできるコントローラーを追加します。
次の操作を実行して、新しい ASP.NET Core 6.0 Web API バックエンドを作成します。
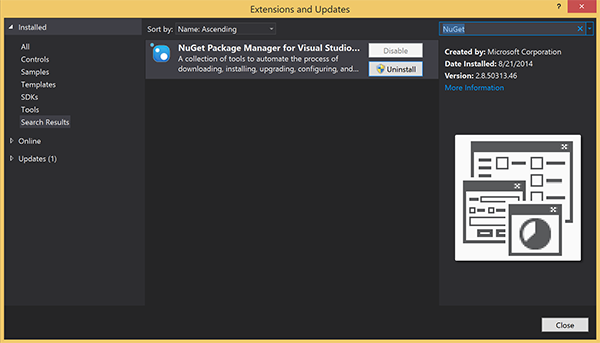
確認するには、Visual Studio を起動します。 [ツール] メニューの [拡張機能と更新プログラム] を選びます。 お使いの Visual Studio に対応した NuGet パッケージ マネージャーを探し、バージョンが最新であることを確認します。 最新バージョンでない場合は、アンインストールして、NuGet パッケージ マネージャーを再インストールしてください。
Note
Web サイトのデプロイ用に Visual Studio Azure SDK がインストールされていることを確認してください。
Visual Studio または Visual Studio Express を起動します。
[サーバー エクスプローラー] を選択し、Azure アカウントにサインインします。 アカウントの Web サイト リソースを作成するには、サインインする必要があります。
Visual Studio の [ファイル] メニューで、[新規作成]>[プロジェクト] を選択します。
検索ボックスに「Web API」と入力します。
[ASP.NET Core Web API] プロジェクト テンプレートを選択して、[次へ] を選択します。
[新しいプロジェクトの構成] ダイアログで、プロジェクトに AppBackend という名前を付けて、[次へ] を選択します。
[追加情報] ダイアログで、次を行います。
- [フレームワーク] が [.NET 6.0 (長期的なサポート)] になっていることを確認します。
- [コントローラーを使用する (最小限の API を使用する場合はオフにします)] チェック ボックスがオンになっていることを確認します。
- [OpenAPI サポートを有効にする] チェック ボックスをオフにします。
- [作成] を選択します
WeatherForecast テンプレート ファイルを削除する
- 新しい AppBackend プロジェクトからサンプル ファイルの WeatherForecast.cs と Controllers/WeatherForecastController.cs を削除します。
- Properties\launchSettings.json を開きます。
- launchUrl プロパティを weatherforcast から appbackend に変更します。
[Microsoft Azure Web App の構成] ウィンドウで、サブスクリプションを選択し、 [App Service プラン] の一覧で次のいずれかの操作を実行します。
- 作成済みの Azure App Service プランを選択します。
- [新しい App Service プランの作成] を選択し、App Service プランを作成します。
このチュートリアルではデータベースは必要ありません。 App Service プランを選択したら、 [OK] を選択して、プロジェクトを作成します。

App Service プランを構成するためのこのページが表示されない場合、チュートリアルを続行してください。 これはアプリの発行時に後で構成できます。
WebAPI バックエンドに対してクライアントを認証する
このセクションでは、新しいバックエンドに対して AuthenticationTestHandler という名前の新しいメッセージ ハンドラー クラスを作成します。 このクラスは DelegatingHandler から派生し、メッセージ ハンドラーとして追加されるため、バックエンドに送信されるすべての要求を処理できます。
ソリューション エクスプローラーで、AppBackend プロジェクトを右クリックし、 [追加] 、 [クラス] の順に選択します。
新しいクラスに「AuthenticationTestHandler.cs」という名前を付け、 [追加] を選択して、クラスを生成します。 説明を簡単にするために、このクラスでは、基本認証を使用してユーザーを認証します。 実際のアプリでは、任意の認証スキームを使用できます。
AuthenticationTestHandler.cs に次の
usingステートメントを追加します。using System.Net.Http; using System.Threading; using System.Security.Principal; using System.Net; using System.Text; using System.Threading.Tasks;AuthenticationTestHandler.cs で、
AuthenticationTestHandlerクラス定義を次のコードに置き換えます。このハンドラーは、次の 3 つの条件を満たす場合に要求を承認します。
- 要求に Authorization ヘッダーが含まれている。
- 要求に 基本 認証が使用されている。
- ユーザー名の文字列とパスワードの文字列が同じである。
それ以外の場合、要求は拒否されます。 この認証は、認証と認可の正規のアプローチではありません。 このチュートリアルのための単なる例にすぎません。
要求メッセージが認証され、
AuthenticationTestHandlerによって承認される場合、基本認証ユーザーは HttpContext の現在の要求に添付されます。 HttpContext のユーザー情報は、後で別のコントローラー (RegisterController) で使用され、通知登録の要求にタグを追加します。public class AuthenticationTestHandler : DelegatingHandler { protected override Task<HttpResponseMessage> SendAsync( HttpRequestMessage request, CancellationToken cancellationToken) { var authorizationHeader = request.Headers.GetValues("Authorization").First(); if (authorizationHeader != null && authorizationHeader .StartsWith("Basic ", StringComparison.InvariantCultureIgnoreCase)) { string authorizationUserAndPwdBase64 = authorizationHeader.Substring("Basic ".Length); string authorizationUserAndPwd = Encoding.Default .GetString(Convert.FromBase64String(authorizationUserAndPwdBase64)); string user = authorizationUserAndPwd.Split(':')[0]; string password = authorizationUserAndPwd.Split(':')[1]; if (VerifyUserAndPwd(user, password)) { // Attach the new principal object to the current HttpContext object HttpContext.Current.User = new GenericPrincipal(new GenericIdentity(user), new string[0]); System.Threading.Thread.CurrentPrincipal = System.Web.HttpContext.Current.User; } else return Unauthorized(); } else return Unauthorized(); return base.SendAsync(request, cancellationToken); } private bool VerifyUserAndPwd(string user, string password) { // This is not a real authentication scheme. return user == password; } private Task<HttpResponseMessage> Unauthorized() { var response = new HttpResponseMessage(HttpStatusCode.Forbidden); var tsc = new TaskCompletionSource<HttpResponseMessage>(); tsc.SetResult(response); return tsc.Task; } }Note
セキュリティに関する注意:
AuthenticationTestHandlerクラスは、本当の認証を提供するわけではありません。 基本認証を模倣するためだけに使用されるため、安全ではありません。 実稼働のアプリケーションとサービスでは、セキュリティで保護された認証メカニズムを実装する必要があります。メッセージ ハンドラーを登録するには、Program.cs ファイルの
Registerメソッドの末尾に次のコードを追加します。config.MessageHandlers.Add(new AuthenticationTestHandler());変更を保存します。
WebAPI バックエンドを使用して通知に登録する
このセクションでは、Notification Hubs のクライアント ライブラリを使用して、通知用にユーザーとデバイスを登録する要求を処理する新しいコントローラーを WebAPI バックエンドに追加します。 コントローラーでは、AuthenticationTestHandler で認証され、HttpContext に添付されたユーザーのユーザー タグを追加します。 タグは、"username:<actual username>" という形式の文字列になります。
ソリューション エクスプローラーで AppBackend プロジェクトを右クリックし、 [NuGet パッケージの管理] を選択します。
左側のウィンドウにある [オンライン] を選択し、 [検索] ボックスに「Microsoft.Azure.NotificationHubs」と入力します。
結果の一覧で、 [Microsoft Azure Notification Hubs] を選択してから、 [インストール] を選択します。 インストールが完了したら、NuGet パッケージ マネージャーのウィンドウを閉じます。
この操作によって、Microsoft.Azure.Notification Hubs NuGet パッケージを使用して Azure Notification Hubs SDK に参照が追加されます。
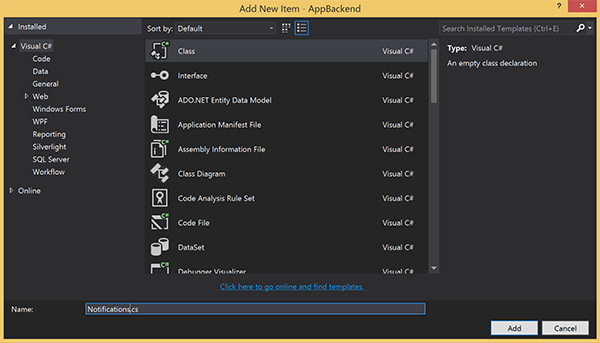
通知の送信に使用する通知ハブとの接続を表す新しいクラス ファイルを作成します。 ソリューション エクスプローラーで、Models フォルダーを右クリックし、 [追加] 、 [クラス] の順に選択します。 新しいクラスに「Notifications.cs」という名前を付け、 [追加] を選択して、クラスを生成します。
Notifications.cs で、ファイルの先頭に次の
usingステートメントを追加します。using Microsoft.Azure.NotificationHubs;Notificationsクラス定義を以下のコードに置き換えます。2 つのプレースホルダーは、通知ハブに対する (フル アクセス権を持つ) 接続文字列と、ハブ名 (Azure Portalで確認できます) に置き換えます。public class Notifications { public static Notifications Instance = new Notifications(); public NotificationHubClient Hub { get; set; } private Notifications() { Hub = NotificationHubClient.CreateClientFromConnectionString("<your hub's DefaultFullSharedAccessSignature>", "<hub name>"); } }重要
先に進む前に、ハブの名前と DefaultFullSharedAccessSignature を入力します。
次に、RegisterController という名前の新しいコントローラーを作成します。 ソリューション エクスプローラーで、Controllers フォルダーを右クリックし、 [追加] 、 [コントローラー] の順に選択します。
[API コントローラー - 空]、[追加] の順に選択します。
[コントローラー名] ボックスに「RegisterController」と入力して、新しいクラスに名前を付け、 [追加] を選択します。

RegisterController.cs に次の
usingステートメントを追加します。using Microsoft.Azure.NotificationHubs; using Microsoft.Azure.NotificationHubs.Messaging; using AppBackend.Models; using System.Threading.Tasks; using System.Web;RegisterControllerクラス定義内で、次のコードを追加します。 このコードでは、HttpContext に添付されるユーザーのユーザー タグを追加します。 ユーザーは認証され、追加したメッセージ フィルターAuthenticationTestHandlerで HttpContext に添付されます。 また、要求されたタグを登録する権限をユーザーが持っていることを確認するコードをオプションで追加することもできます。private NotificationHubClient hub; public RegisterController() { hub = Notifications.Instance.Hub; } public class DeviceRegistration { public string Platform { get; set; } public string Handle { get; set; } public string[] Tags { get; set; } } // POST api/register // This creates a registration id public async Task<string> Post(string handle = null) { string newRegistrationId = null; // make sure there are no existing registrations for this push handle (used for iOS and Android) if (handle != null) { var registrations = await hub.GetRegistrationsByChannelAsync(handle, 100); foreach (RegistrationDescription registration in registrations) { if (newRegistrationId == null) { newRegistrationId = registration.RegistrationId; } else { await hub.DeleteRegistrationAsync(registration); } } } if (newRegistrationId == null) newRegistrationId = await hub.CreateRegistrationIdAsync(); return newRegistrationId; } // PUT api/register/5 // This creates or updates a registration (with provided channelURI) at the specified id public async Task<HttpResponseMessage> Put(string id, DeviceRegistration deviceUpdate) { RegistrationDescription registration = null; switch (deviceUpdate.Platform) { case "mpns": registration = new MpnsRegistrationDescription(deviceUpdate.Handle); break; case "wns": registration = new WindowsRegistrationDescription(deviceUpdate.Handle); break; case "apns": registration = new AppleRegistrationDescription(deviceUpdate.Handle); break; case "fcm": registration = new FcmRegistrationDescription(deviceUpdate.Handle); break; default: throw new HttpResponseException(HttpStatusCode.BadRequest); } registration.RegistrationId = id; var username = HttpContext.Current.User.Identity.Name; // add check if user is allowed to add these tags registration.Tags = new HashSet<string>(deviceUpdate.Tags); registration.Tags.Add("username:" + username); try { await hub.CreateOrUpdateRegistrationAsync(registration); } catch (MessagingException e) { ReturnGoneIfHubResponseIsGone(e); } return Request.CreateResponse(HttpStatusCode.OK); } // DELETE api/register/5 public async Task<HttpResponseMessage> Delete(string id) { await hub.DeleteRegistrationAsync(id); return Request.CreateResponse(HttpStatusCode.OK); } private static void ReturnGoneIfHubResponseIsGone(MessagingException e) { var webex = e.InnerException as WebException; if (webex.Status == WebExceptionStatus.ProtocolError) { var response = (HttpWebResponse)webex.Response; if (response.StatusCode == HttpStatusCode.Gone) throw new HttpRequestException(HttpStatusCode.Gone.ToString()); } }変更を保存します。

WebAPI バックエンドから通知を送信する
このセクションでは、クライアント デバイスが通知を送信する方法を公開する新しいコントローラーを追加します。 この通知は、ASP.NET WebAPI バックエンドの Azure Notification Hubs .NET ライブラリを使用する username タグに基づいています。
前のセクションで RegisterController を作成したときと同じ方法で、NotificationsController という別の新しいコントローラーを作成します。
NotificationsController.cs に次の
usingステートメントを追加します。using AppBackend.Models; using System.Threading.Tasks; using System.Web;NotificationsController クラスに次のメソッドを追加します。
このコードでは、プラットフォーム通知サービス (PNS) の
pnsパラメーターに基づく通知の種類を送信します。to_tagの値はメッセージの ユーザー名 タグを設定するために使用します。 このタグは、アクティブな通知ハブ登録のユーザー名のタグと一致する必要があります。 通知メッセージは、POST 要求の本文からプルされ、ターゲット PNS に合わせた形式に設定されます。サポートされているデバイスで通知の受信に使用される PNS に応じて、各種形式で通知がサポートされています。 たとえば Windows デバイスの場合、別の PNS で直接はサポートされていない WNS によるトースト通知を使用することもできます。 このような場合、バックエンドが、通知を、サポートを計画しているデバイスの PNS でサポートされている形式に設定する必要があります。 その後、NotificationHubClient クラスで適切な送信 API を使用します。
public async Task<HttpResponseMessage> Post(string pns, [FromBody]string message, string to_tag) { var user = HttpContext.Current.User.Identity.Name; string[] userTag = new string[2]; userTag[0] = "username:" + to_tag; userTag[1] = "from:" + user; Microsoft.Azure.NotificationHubs.NotificationOutcome outcome = null; HttpStatusCode ret = HttpStatusCode.InternalServerError; switch (pns.ToLower()) { case "wns": // Windows 8.1 / Windows Phone 8.1 var toast = @"<toast><visual><binding template=""ToastText01""><text id=""1"">" + "From " + user + ": " + message + "</text></binding></visual></toast>"; outcome = await Notifications.Instance.Hub.SendWindowsNativeNotificationAsync(toast, userTag); break; case "apns": // iOS var alert = "{\"aps\":{\"alert\":\"" + "From " + user + ": " + message + "\"}}"; outcome = await Notifications.Instance.Hub.SendAppleNativeNotificationAsync(alert, userTag); break; case "fcm": // Android var notif = "{ \"data\" : {\"message\":\"" + "From " + user + ": " + message + "\"}}"; outcome = await Notifications.Instance.Hub.SendFcmNativeNotificationAsync(notif, userTag); break; } if (outcome != null) { if (!((outcome.State == Microsoft.Azure.NotificationHubs.NotificationOutcomeState.Abandoned) || (outcome.State == Microsoft.Azure.NotificationHubs.NotificationOutcomeState.Unknown))) { ret = HttpStatusCode.OK; } } return Request.CreateResponse(ret); }アプリケーションを実行し、ここまでの作業に問題がないことを確認するために、F5 キーを選択します。 アプリにより、Web ブラウザーが開き、ASP.NET ホーム ページに表示されます。
新しい WebAPI バックエンドを発行する
次に、このアプリを Azure の Web サイトにデプロイして、すべてのデバイスからアクセスできるようにします。
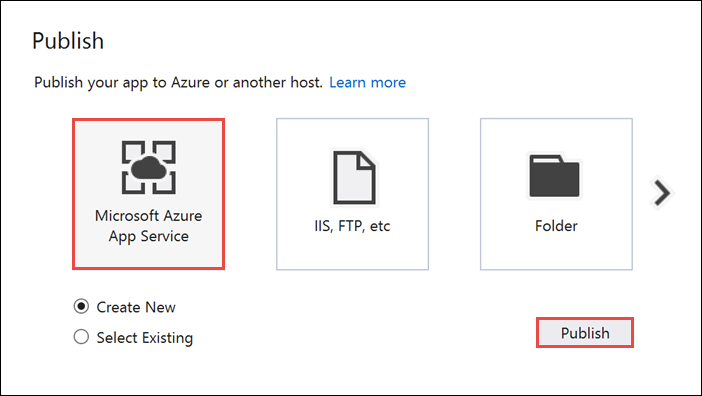
AppBackend プロジェクトを右クリックして [発行] を選択します。
発行先として [Microsoft Azure App Service] を選択し、[発行] を選択します。 [App Service の作成] ウィンドウが開きます。 このウィンドウでは、Azure で ASP.NET Web アプリを実行するために必要なすべての Azure リソースを作成できます。
[App Service の作成] ウィンドウで、Azure アカウントを選択します。 [変更の種類]>[Web アプリ] の順に選択します。 既定の Web アプリ名をそのまま保持し、 [サブスクリプション] 、 [リソース グループ] 、 [App Service プラン] の順に選択します。
[作成] を選択します
[概要] セクションの [サイト URL] プロパティをメモします。 この URL は、このチュートリアルの後半で使用する "バックエンドエンドポイント" です。
[発行] を選択します。
ウィザードの完了後に、Azure に ASP.NET Web アプリを発行してから、既定のブラウザーでアプリを開きます。 アプリケーションが Azure App Services に表示されます。
URL では、前に指定した Web アプリ名が http://<アプリ名>.azurewebsites.net という形式で使われます。
Android プロジェクトを作成する
次の手順では、「チュートリアル: Azure Notification Hubs と Google Firebase Cloud Messaging を使用して Android デバイスにプッシュ通知を送信する」を完了しておきます。
res/layout/activity_main.xmlファイルを開いて、その内容を次の定義に置き換えます。これにより、ユーザーとしてログインするための新しい EditText コントロールが追加されます。 また、送信する通知の一部となるユーザー名のタグのフィールドが追加されます。
<RelativeLayout xmlns:android="http://schemas.android.com/apk/res/android" xmlns:tools="http://schemas.android.com/tools" android:layout_width="match_parent" android:layout_height="match_parent" tools:context=".MainActivity"> <EditText android:id="@+id/usernameText" android:layout_width="match_parent" android:layout_height="wrap_content" android:ems="10" android:hint="@string/usernameHint" android:layout_above="@+id/passwordText" android:layout_alignParentEnd="true" /> <EditText android:id="@+id/passwordText" android:layout_width="match_parent" android:layout_height="wrap_content" android:ems="10" android:hint="@string/passwordHint" android:inputType="textPassword" android:layout_above="@+id/buttonLogin" android:layout_alignParentEnd="true" /> <Button android:id="@+id/buttonLogin" android:layout_width="wrap_content" android:layout_height="wrap_content" android:text="@string/loginButton" android:onClick="login" android:layout_above="@+id/toggleButtonFCM" android:layout_centerHorizontal="true" android:layout_marginBottom="24dp" /> <ToggleButton android:layout_width="wrap_content" android:layout_height="wrap_content" android:textOn="WNS on" android:textOff="WNS off" android:id="@+id/toggleButtonWNS" android:layout_toLeftOf="@id/toggleButtonFCM" android:layout_centerVertical="true" /> <ToggleButton android:layout_width="wrap_content" android:layout_height="wrap_content" android:textOn="FCM on" android:textOff="FCM off" android:id="@+id/toggleButtonFCM" android:checked="true" android:layout_centerHorizontal="true" android:layout_centerVertical="true" /> <ToggleButton android:layout_width="wrap_content" android:layout_height="wrap_content" android:textOn="APNS on" android:textOff="APNS off" android:id="@+id/toggleButtonAPNS" android:layout_toRightOf="@id/toggleButtonFCM" android:layout_centerVertical="true" /> <EditText android:layout_width="match_parent" android:layout_height="wrap_content" android:id="@+id/editTextNotificationMessageTag" android:layout_below="@id/toggleButtonFCM" android:layout_centerHorizontal="true" android:hint="@string/notification_message_tag_hint" /> <EditText android:layout_width="match_parent" android:layout_height="wrap_content" android:id="@+id/editTextNotificationMessage" android:layout_below="@+id/editTextNotificationMessageTag" android:layout_centerHorizontal="true" android:hint="@string/notification_message_hint" /> <Button android:layout_width="wrap_content" android:layout_height="wrap_content" android:text="@string/send_button" android:id="@+id/sendbutton" android:onClick="sendNotificationButtonOnClick" android:layout_below="@+id/editTextNotificationMessage" android:layout_centerHorizontal="true" /> <TextView android:layout_width="wrap_content" android:layout_height="wrap_content" android:text="Hello World!" android:id="@+id/text_hello" /> </RelativeLayout>res/values/strings.xmlファイルを開き、send_buttonの定義をsend_buttonの文字列を再定義する次の行に置き換え、その他のコントロールの文字列を追加します。<string name="usernameHint">Username</string> <string name="passwordHint">Password</string> <string name="loginButton">1. Sign in</string> <string name="send_button">2. Send Notification</string> <string name="notification_message_hint">Notification message</string> <string name="notification_message_tag_hint">Recipient username</string>これで、
main_activity.xmlのグラフィカル レイアウトは次の図のようになります。
MainActivityクラスと同じパッケージにRegisterClientという新しいクラスを作成します。 新しいクラス ファイルに次のコードを使用します。import java.io.IOException; import java.io.UnsupportedEncodingException; import java.util.Set; import org.apache.http.HttpResponse; import org.apache.http.HttpStatus; import org.apache.http.client.ClientProtocolException; import org.apache.http.client.HttpClient; import org.apache.http.client.methods.HttpPost; import org.apache.http.client.methods.HttpPut; import org.apache.http.client.methods.HttpUriRequest; import org.apache.http.entity.StringEntity; import org.apache.http.impl.client.DefaultHttpClient; import org.apache.http.util.EntityUtils; import org.json.JSONArray; import org.json.JSONException; import org.json.JSONObject; import android.content.Context; import android.content.SharedPreferences; import android.util.Log; public class RegisterClient { private static final String PREFS_NAME = "ANHSettings"; private static final String REGID_SETTING_NAME = "ANHRegistrationId"; private String Backend_Endpoint; SharedPreferences settings; protected HttpClient httpClient; private String authorizationHeader; public RegisterClient(Context context, String backendEndpoint) { super(); this.settings = context.getSharedPreferences(PREFS_NAME, 0); httpClient = new DefaultHttpClient(); Backend_Endpoint = backendEndpoint + "/api/register"; } public String getAuthorizationHeader() { return authorizationHeader; } public void setAuthorizationHeader(String authorizationHeader) { this.authorizationHeader = authorizationHeader; } public void register(String handle, Set<String> tags) throws ClientProtocolException, IOException, JSONException { String registrationId = retrieveRegistrationIdOrRequestNewOne(handle); JSONObject deviceInfo = new JSONObject(); deviceInfo.put("Platform", "fcm"); deviceInfo.put("Handle", handle); deviceInfo.put("Tags", new JSONArray(tags)); int statusCode = upsertRegistration(registrationId, deviceInfo); if (statusCode == HttpStatus.SC_OK) { return; } else if (statusCode == HttpStatus.SC_GONE){ settings.edit().remove(REGID_SETTING_NAME).commit(); registrationId = retrieveRegistrationIdOrRequestNewOne(handle); statusCode = upsertRegistration(registrationId, deviceInfo); if (statusCode != HttpStatus.SC_OK) { Log.e("RegisterClient", "Error upserting registration: " + statusCode); throw new RuntimeException("Error upserting registration"); } } else { Log.e("RegisterClient", "Error upserting registration: " + statusCode); throw new RuntimeException("Error upserting registration"); } } private int upsertRegistration(String registrationId, JSONObject deviceInfo) throws UnsupportedEncodingException, IOException, ClientProtocolException { HttpPut request = new HttpPut(Backend_Endpoint+"/"+registrationId); request.setEntity(new StringEntity(deviceInfo.toString())); request.addHeader("Authorization", "Basic "+authorizationHeader); request.addHeader("Content-Type", "application/json"); HttpResponse response = httpClient.execute(request); int statusCode = response.getStatusLine().getStatusCode(); return statusCode; } private String retrieveRegistrationIdOrRequestNewOne(String handle) throws ClientProtocolException, IOException { if (settings.contains(REGID_SETTING_NAME)) return settings.getString(REGID_SETTING_NAME, null); HttpUriRequest request = new HttpPost(Backend_Endpoint+"?handle="+handle); request.addHeader("Authorization", "Basic "+authorizationHeader); HttpResponse response = httpClient.execute(request); if (response.getStatusLine().getStatusCode() != HttpStatus.SC_OK) { Log.e("RegisterClient", "Error creating registrationId: " + response.getStatusLine().getStatusCode()); throw new RuntimeException("Error creating Notification Hubs registrationId"); } String registrationId = EntityUtils.toString(response.getEntity()); registrationId = registrationId.substring(1, registrationId.length()-1); settings.edit().putString(REGID_SETTING_NAME, registrationId).commit(); return registrationId; } }プッシュ通知を登録するために、このコンポーネントはアプリケーション バックエンドにアクセスするのに必要な REST 呼び出しを実装します。 「 アプリ バックエンドからの登録 」で説明しているとおり、Notification Hubs によって作成された registrationIdsもローカルに格納されます。 [サインイン] ボタンをクリックすると、ローカル ストレージに格納されている承認トークンが使用されます。
MainActivityクラスで、RegisterClientクラスのフィールドと ASP.NET バックエンドのエンドポイントの文字列を追加します。<Enter Your Backend Endpoint>を、前に取得した実際のバックエンド エンドポイントに必ず置き換えてください。 たとえば、「http://mybackend.azurewebsites.net」のように入力します。private RegisterClient registerClient; private static final String BACKEND_ENDPOINT = "<Enter Your Backend Endpoint>"; FirebaseInstanceId fcm; String FCM_token = null;MainActivityクラスのonCreateメソッドで、hubフィールドの初期化とregisterWithNotificationHubsメソッドの呼び出しを削除するか、またはコメントにします。 その後RegisterClientクラスのインスタンスを初期化するコードを追加します。 メソッドには次の行が含まれています。@Override protected void onCreate(Bundle savedInstanceState) { super.onCreate(savedInstanceState); mainActivity = this; FirebaseService.createChannelAndHandleNotifications(getApplicationContext()); fcm = FirebaseInstanceId.getInstance(); registerClient = new RegisterClient(this, BACKEND_ENDPOINT); setContentView(R.layout.activity_main); }次の
importステートメントをMainActivity.javaファイルに追加します。import android.util.Base64; import android.view.View; import android.widget.EditText; import android.widget.Button; import android.widget.ToggleButton; import java.io.UnsupportedEncodingException; import android.content.Context; import java.util.HashSet; import android.widget.Toast; import org.apache.http.client.ClientProtocolException; import java.io.IOException; import org.apache.http.HttpStatus; import android.os.AsyncTask; import org.apache.http.HttpResponse; import org.apache.http.client.methods.HttpPost; import org.apache.http.entity.StringEntity; import org.apache.http.impl.client.DefaultHttpClient; import android.app.AlertDialog; import android.content.DialogInterface; import com.google.firebase.iid.FirebaseInstanceId; import com.google.firebase.iid.InstanceIdResult; import com.google.android.gms.tasks.OnSuccessListener; import java.util.concurrent.TimeUnit;onStart メソッドのコードを次のコードに置き換えます。
super.onStart();
Button sendPush = (Button) findViewById(R.id.sendbutton);
sendPush.setEnabled(false);
その後、 [サインイン] ボタン クリック イベントとプッシュ通知の送信を処理する次のメソッドを追加します。
public void login(View view) throws UnsupportedEncodingException {
    this.registerClient.setAuthorizationHeader(getAuthorizationHeader());

    final Context context = this;
    new AsyncTask<Object, Object, Object>() {
        @Override
        protected Object doInBackground(Object... params) {
            try {

                FirebaseInstanceId.getInstance().getInstanceId().addOnSuccessListener(new OnSuccessListener<InstanceIdResult>() {
                    @Override
                    public void onSuccess(InstanceIdResult instanceIdResult) {
                        FCM_token = instanceIdResult.getToken();
                        Log.d(TAG, "FCM Registration Token: " + FCM_token);
                    }
                });
                TimeUnit.SECONDS.sleep(1);
                registerClient.register(FCM_token, new HashSet<String>());
            } catch (Exception e) {
                DialogNotify("MainActivity - Failed to register", e.getMessage());
                return e;
            }
            return null;
        }

        protected void onPostExecute(Object result) {
            Button sendPush = (Button) findViewById(R.id.sendbutton);
            sendPush.setEnabled(true);
            Toast.makeText(context, "Signed in and registered.",
                    Toast.LENGTH_LONG).show();
        }
    }.execute(null, null, null);
}

private String getAuthorizationHeader() throws UnsupportedEncodingException {
    EditText username = (EditText) findViewById(R.id.usernameText);
    EditText password = (EditText) findViewById(R.id.passwordText);
    String basicAuthHeader = username.getText().toString()+":"+password.getText().toString();
    basicAuthHeader = Base64.encodeToString(basicAuthHeader.getBytes("UTF-8"), Base64.NO_WRAP);
    return basicAuthHeader;
}

/**
    * This method calls the ASP.NET WebAPI backend to send the notification message
    * to the platform notification service based on the pns parameter.
    *
    * @param pns     The platform notification service to send the notification message to. Must
    *                be one of the following ("wns", "fcm", "apns").
    * @param userTag The tag for the user who will receive the notification message. This string
    *                must not contain spaces or special characters.
    * @param message The notification message string. This string must include the double quotes
    *                to be used as JSON content.
    */
public void sendPush(final String pns, final String userTag, final String message)
        throws ClientProtocolException, IOException {
    new AsyncTask<Object, Object, Object>() {
        @Override
        protected Object doInBackground(Object... params) {
            try {

                String uri = BACKEND_ENDPOINT + "/api/notifications";
                uri += "?pns=" + pns;
                uri += "&to_tag=" + userTag;

                HttpPost request = new HttpPost(uri);
                request.addHeader("Authorization", "Basic "+ getAuthorizationHeader());
                request.setEntity(new StringEntity(message));
                request.addHeader("Content-Type", "application/json");

                HttpResponse response = new DefaultHttpClient().execute(request);

                if (response.getStatusLine().getStatusCode() != HttpStatus.SC_OK) {
                    DialogNotify("MainActivity - Error sending " + pns + " notification",
                            response.getStatusLine().toString());
                    throw new RuntimeException("Error sending notification");
                }
            } catch (Exception e) {
                DialogNotify("MainActivity - Failed to send " + pns + " notification ", e.getMessage());
                return e;
            }

            return null;
        }
    }.execute(null, null, null);
}
[サインイン] ボタンの
loginハンドラーは、入力ユーザー名とパスワードを使用して基本的な認証トークン (これは、認証スキームで使用される任意のトークンを表します) を生成してから、RegisterClientを使用して登録用のバックエンドを呼び出します。sendPushメソッドでは、バックエンドを呼び出して、ユーザーのタグに基づいてユーザーにセキュリティて保護された通知をトリガーします。sendPushがターゲットとするプラットフォーム通知サービスは渡されるpns文字列によって異なります。MainActivityクラスに次のDialogNotifyメソッドを追加します。protected void DialogNotify(String title, String message) { AlertDialog alertDialog = new AlertDialog.Builder(MainActivity.this).create(); alertDialog.setTitle(title); alertDialog.setMessage(message); alertDialog.setButton(AlertDialog.BUTTON_NEUTRAL, "OK", new DialogInterface.OnClickListener() { public void onClick(DialogInterface dialog, int which) { dialog.dismiss(); } }); alertDialog.show(); }MainActivityクラスでsendNotificationButtonOnClickメソッドを更新して、次のようにユーザーが選択したプラットフォーム通知サービスでsendPushメソッドを呼び出します。/** * Send Notification button click handler. This method sends the push notification * message to each platform selected. * * @param v The view */ public void sendNotificationButtonOnClick(View v) throws ClientProtocolException, IOException { String nhMessageTag = ((EditText) findViewById(R.id.editTextNotificationMessageTag)) .getText().toString(); String nhMessage = ((EditText) findViewById(R.id.editTextNotificationMessage)) .getText().toString(); // JSON String nhMessage = "\"" + nhMessage + "\""; if (((ToggleButton)findViewById(R.id.toggleButtonWNS)).isChecked()) { sendPush("wns", nhMessageTag, nhMessage); } if (((ToggleButton)findViewById(R.id.toggleButtonFCM)).isChecked()) { sendPush("fcm", nhMessageTag, nhMessage); } if (((ToggleButton)findViewById(R.id.toggleButtonAPNS)).isChecked()) { sendPush("apns", nhMessageTag, nhMessage); } }build.gradleファイルで、buildTypesセクションの後のandroidセクションに次の行を追加します。useLibrary 'org.apache.http.legacy'API レベル 28 (Android 9.0) 以降をターゲットとするアプリの場合は、
AndroidManifest.xmlの<application>要素内に次の宣言を追加します。<uses-library android:name="org.apache.http.legacy" android:required="false" />プロジェクトをビルドします。
アプリケーションをテストする
デバイスまたは Android Studio を使用したエミュレーターでアプリケーションを実行します。
Android アプリケーションで、ユーザー名とパスワードを入力します。 どちらも同じ文字列値にする必要があり、空白や特殊文字が含まれることはありません。
Android アプリケーションで、 [サインイン] をクリックします。 「Signed in and registered (サインインおよび登録済み) 」というトースト メッセージが表示されるまで待機します。 これは、 [Send Notification] (通知の送信) ボタンを有効にします。

トグル ボタンをクリックして、アプリを実行し、ユーザーを登録したすべてのプラットフォームを有効にします。
通知メッセージを受信するユーザーの名前を入力します。 そのユーザーは、ターゲット デバイスで通知登録されている必要があります。
プッシュ通知メッセージとしてユーザーが受信するメッセージを入力します。
[Send Notification (通知の送信)] をクリックします。 一致するユーザー名のタグで登録されている各デバイスがプッシュ通知を受信します。
次のステップ
このチュートリアルでは、タグが登録に関連付けられている特定のユーザーにプッシュ通知を送信する方法を学習しました。 場所に基づいたプッシュ通知を送信する方法を学習するには、次のチュートリアルに進んでください。