How to: Personalize the Visual Studio IDE and the editor
Applies to: ![]() Visual Studio
Visual Studio ![]() Visual Studio for Mac
Visual Studio for Mac
Note
This article applies to Visual Studio 2017. If you're looking for the latest Visual Studio documentation, see Visual Studio documentation. We recommend upgrading to the latest version of Visual Studio. Download it here
In this how-to article, we'll customize the Visual Studio color theme from the blue theme to the dark theme. Then, we'll customize the colors for two different types of text in the code editor.
If you haven't already installed Visual Studio, go to the Visual Studio downloads page to install it for free.
Set the color theme for the IDE
The default color theme for Visual Studio's user interface is Blue. Let's change it to Dark.
On the menu bar, which is the row of menus such as File and Edit, choose Tools > Options.
On the Environment > General options page, change the Color theme selection to Dark, and then choose OK.
The color theme for the entire Visual Studio development environment (IDE) changes to Dark.
Tip
You can install additional predefined themes by installing the Visual Studio Color Theme Editor from the Visual Studio Marketplace. After you install this tool, additional color themes appear in the Color theme drop-down list.
Change text colors in the editor
Now we'll customize some text colors for the editor. First, let's create a new XML file to see the default colors.
From the menu bar, choose File > New > File.
In the New File dialog box, under the General category, choose XML File, and then choose Open.
Paste the following XML below the line that contains
<?xml version="1.0" encoding="utf-8"?>.<Catalog> <Book id="bk101"> <Author>Garghentini, Davide</Author> <Title>XML Developer's Guide</Title> <Genre>Computer</Genre> <Price>44.95</Price> <PublishDate>2000-10-01</PublishDate> <Description> An in-depth look at creating applications with XML. </Description> </Book> <Book id="bk102"> <Author>Garcia, Debra</Author> <Title>Midnight Rain</Title> <Genre>Fantasy</Genre> <Price>5.95</Price> <PublishDate>2000-12-16</PublishDate> <Description> A former architect battles corporate zombies, an evil sorceress, and her own childhood to become queen of the world. </Description> </Book> </Catalog>Notice that the line numbers are a turquoise-blue color, and the XML attributes (such as
id="bk101") are a light blue color. We're going to change the text color for these items.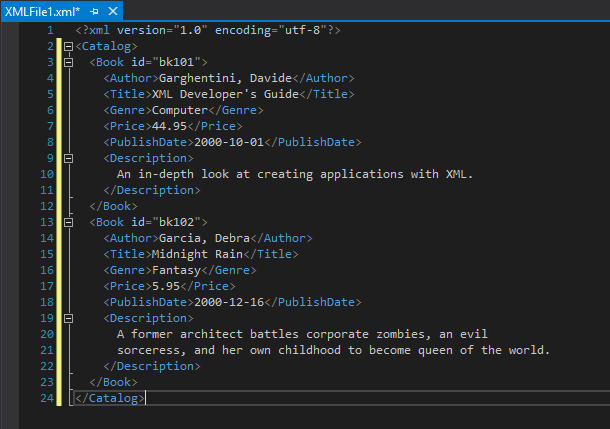
To open the Options dialog box, choose Tools > Options from the menu bar.
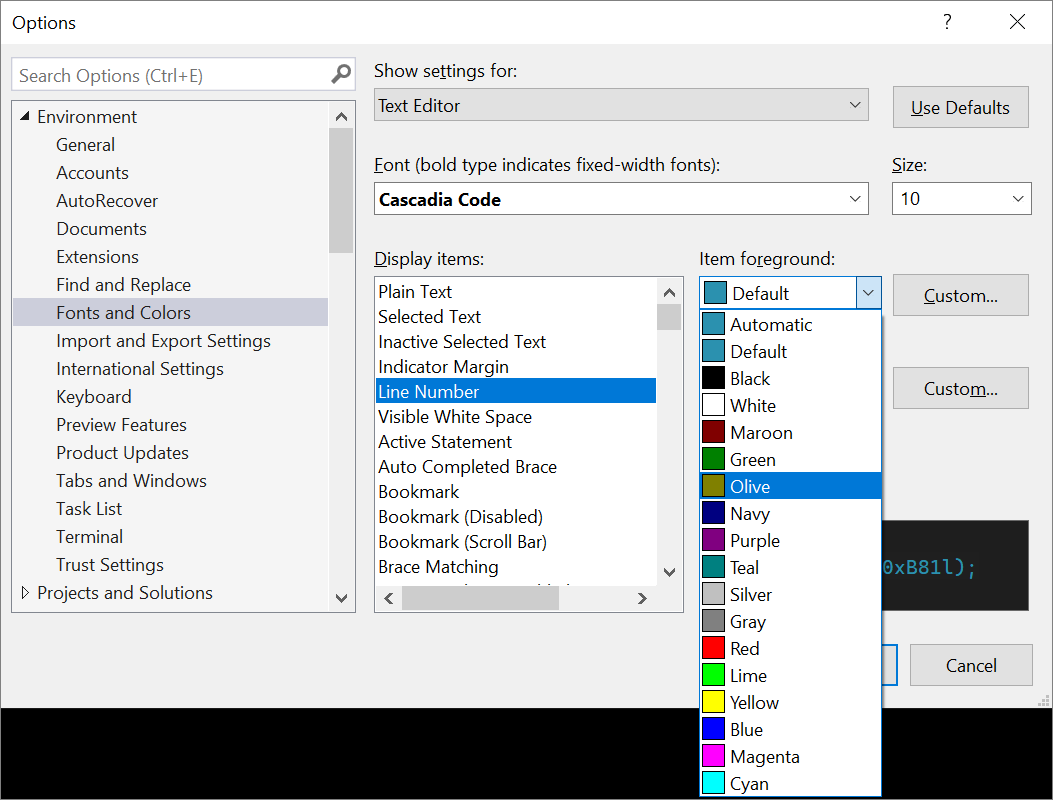
Under Environment, choose the Fonts and Colors category.
Notice that the text under Show settings for says Text Editor—this is what we want. Expand the drop-down list just to see the extensive list of places where you can customize fonts and text color.
To change the color of the line numbers text, in the Display items list, choose Line Number. In the Item foreground box, choose Olive.
Some languages have their own specific fonts and colors settings. If you are a C++ developer and you want to change the color used for functions, for example, you can look for C++ Functions in the Display items list.
Before we exit out of the dialog box, let's also change the color of XML attributes. In the Display items list, scroll down to XML Attribute and select it. In the Item foreground box, choose Lime. Choose OK to save our selections and close the dialog box.
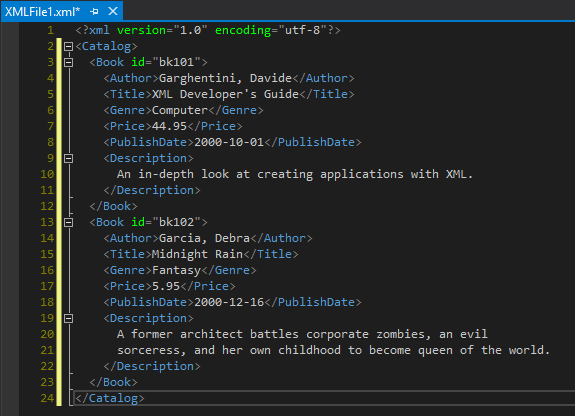
The line numbers are now an olive color, and the XML attributes are a bright, lime green. If you open another file type, such as a C++ or C# code file, you'll see that the line numbers also appear in the olive color.
We explored just a couple ways of customizing the colors in Visual Studio. We hope that you'll explore the other customization options in the Options dialog box, to truly make Visual Studio your own.