Step 5: Authenticate users in Django
Applies to: ![]() Visual Studio
Visual Studio ![]() Visual Studio for Mac
Visual Studio for Mac
Note
This article applies to Visual Studio 2017. If you're looking for the latest Visual Studio documentation, see Visual Studio documentation. We recommend upgrading to the latest version of Visual Studio. Download it here
Previous step: Use the full Django Web Project template
Because authentication is a common need for web apps, the "Django Web Project" template includes a basic authentication flow. (The "Polls Django Web Project" template discussed in step 6 of this tutorial also includes the same flow.) When you use any of the Django project templates, Visual Studio includes all the necessary modules for authentication in the Django project's settings.py.
In this step, you learn:
- How to use the authentication flow provided in the Visual Studio templates (step 5-1)
Step 5-1: Use the authentication flow
The following steps exercise the authentication flow and describe the parts of the project:
If you've not already followed the instructions in the readme.html file in the project root to create a super user (administrator) account, do so now.
Run the app from Visual Studio using Debug > Start Debugging (F5). When the app appears in the browser, observe that Log in appears on the upper right of the nav bar.

Open templates/app/layout.html and observe that the
<div class="navbar ...>element contains the{% include app/loginpartial.html %}tag. The{% include %}tag instructs Django's template system to pull in the contents of the included file at this point in the containing template.Open templates/app/loginpartial.html and observe how it uses the conditional tag
{% if user.is_authenticated %}along with an{% else %}tag to render different UI elements depending on whether the user is authenticated:{% if user.is_authenticated %} <form id="logoutForm" action="/logout" method="post" class="navbar-right"> {% csrf_token %} <ul class="nav navbar-nav navbar-right"> <li><span class="navbar-brand">Hello {{ user.username }}!</span></li> <li><a href="javascript:document.getElementById('logoutForm').submit()">Log off</a></li> </ul> </form> {% else %} <ul class="nav navbar-nav navbar-right"> <li><a href="{% url 'login' %}">Log in</a></li> </ul> {% endif %}As no user is authenticated when you first start the app, the template code renders only the "Log in" link to the relative "login" path. As specified in urls.py (as shown in the previous section), that route is mapped to the
django.contrib.auth.views.loginview and the view receives the following data:{ 'template_name': 'app/login.html', 'authentication_form': app.forms.BootstrapAuthenticationForm, 'extra_context': { 'title': 'Log in', 'year': datetime.now().year, } }Here,
template_nameidentifies the template for the login page, in this case templates/app/login.html. Theextra_contextproperty is added to the default context data given to the template. Finally,authentication_formspecifies a form class to use with the login; in the template it appears as theformobject. The default value isAuthenticationForm(fromdjango.contrib.auth.views); the Visual Studio project template instead uses the form defined in the app's forms.py file:from django import forms from django.contrib.auth.forms import AuthenticationForm from django.utils.translation import ugettext_lazy as _ class BootstrapAuthenticationForm(AuthenticationForm): """Authentication form which uses boostrap CSS.""" username = forms.CharField(max_length=254, widget=forms.TextInput({ 'class': 'form-control', 'placeholder': 'User name'})) password = forms.CharField(label=_("Password"), widget=forms.PasswordInput({ 'class': 'form-control', 'placeholder':'Password'}))As you can see, the form class derives from
AuthenticationFormand specifically overrides the username and password fields to add placeholder text. The Visual Studio template includes this explicit code on the assumption that you likely want to customize the form, such as adding password strength validation.When you navigate to the login page, then, the app renders the login.html template. The variables
{{ form.username }}and{{ form.password }}render theCharFieldforms fromBootstrapAuthenticationForm. There's also a built-in section to show validation errors, and a ready-made element for social logins if you choose to add those services.{% extends "app/layout.html" %} {% block content %} <h2>{{ title }}</h2> <div class="row"> <div class="col-md-8"> <section id="loginForm"> <form action="." method="post" class="form-horizontal"> {% csrf_token %} <h4>Use a local account to log in.</h4> <hr /> <div class="form-group"> <label for="id_username" class="col-md-2 control-label">User name</label> <div class="col-md-10"> {{ form.username }} </div> </div> <div class="form-group"> <label for="id_password" class="col-md-2 control-label">Password</label> <div class="col-md-10"> {{ form.password }} </div> </div> <div class="form-group"> <div class="col-md-offset-2 col-md-10"> <input type="hidden" name="next" value="/" /> <input type="submit" value="Log in" class="btn btn-default" /> </div> </div> {% if form.errors %} <p class="validation-summary-errors">Please enter a correct user name and password.</p> {% endif %} </form> </section> </div> <div class="col-md-4"> <section id="socialLoginForm"></section> </div> </div> {% endblock %}When you submit the form, Django attempts to authenticate your credentials (such as the super user's credentials). If authentication fails, you remain on the current page however,
form.errorsis set to true. If authentication is successful, Django navigates to the relative URL in the "next" field,<input type="hidden" name="next" value="/" />, which in this case is the home page (/).Now, when the home page is rendered again, the
user.is_authenticatedproperty is true when the loginpartial.html template is rendered. As a result, you see a Hello (username) message and Log off. You can useuser.is_authenticatedin other parts of the app to check authentication.
You need to retrieve user-specific permissions from your database to check whether the authenticated user is authorized to access specific resources. For more information, see Using the Django authentication system (Django docs).
The super user or administrator, in particular, is authorized to access the built-in Django administrator interfaces using the relative URLs "/admin/" and "/admin/doc/." To enable these interfaces, follow the steps below:
Install the docutils Python package into your environment. A great way to install is to add "docutils" to your requirements.txt file. Then, go to Solution Explorer, expand the project, expand the Python Environments node, and then right-click the environment you're using and select Install from requirements.txt.
Open the Django project's urls.py file and remove the default comments from the following entries:
from django.conf.urls import include
from django.contrib import admin
admin.autodiscover()

# ...
urlpatterns = [
    # ...
    url(r'^admin/doc/', include('django.contrib.admindocs.urls')),
    url(r'^admin/', include(admin.site.urls)),
]
In the Django project's settings.py file, go to the
INSTALLED_APPScollection and add'django.contrib.admindocs'.When you restart the app, you can navigate to "/admin/" and "/admin/doc/" and perform tasks like creating more user accounts.

The final part to the authentication flow is logging off. As you can see in loginpartial.html, the Log off link simply does a POST to the relative URL "/login", which is handled by the built-in view
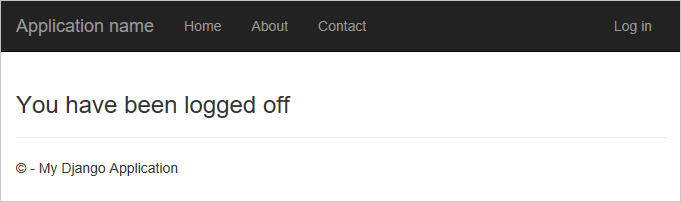
django.contrib.auth.views.logout. This view doesn't display any UI and just navigates to the home page (as shown in urls.py for the "^logout$" pattern). If you want to display a logoff page, first change the URL pattern as follows to add a "template_name" property and remove the "next_page" property:url(r'^logout$', django.contrib.auth.views.logout, { 'template_name': 'app/loggedoff.html', # 'next_page': '/', }, name='logout')Then create templates/app/loggedoff.html with the following (minimal) contents:
{% extends "app/layout.html" %}
{% block content %}
<h3>You have been logged off</h3>
{% endblock %}
The result appears as below:
When you're all done, stop the server and once again commit your changes to source control.
Question: What is the purpose of the {% csrf_token %} tag that appears in the <form> elements?
Answer: The {% csrf_token %} tag includes Django's built-in cross-site request forgery (csrf) protection (Django docs). You usually add this tag to any element that involves POST, PUT, or DELETE request methods, such as a form. The template rendering function (render) then inserts the necessary protection.
Next steps
Go deeper
- User authentication in Django (docs.djangoproject.com)
- Tutorial source code on GitHub: Microsoft/python-sample-vs-learning-django