Configure and validate exclusions for Microsoft Defender for Endpoint on macOS
Applies to:
- Microsoft Defender for Endpoint Plan 1
- Microsoft Defender for Endpoint Plan 2
- Microsoft Defender XDR
Want to experience Defender for Endpoint? Sign up for a free trial.
This article provides information on how to define exclusions that apply to on-demand scans, and real-time protection and monitoring.
Important
The exclusions described in this article don't apply to other Defender for Endpoint on Mac capabilities, including endpoint detection and response (EDR). Files that you exclude using the methods described in this article can still trigger EDR alerts and other detections.
You can exclude certain files, folders, processes, and process-opened files from Defender for Endpoint on Mac scans.
Exclusions can be useful to avoid incorrect detections on files or software that are unique or customized to your organization. They can also be useful for mitigating performance issues caused by Defender for Endpoint on Mac.
To narrow down which process and/or path and/or extension you need to exclude, please use real-time-protection-statistics.
Warning
Defining exclusions lowers the protection offered by Defender for Endpoint on Mac. You should always evaluate the risks that are associated with implementing exclusions, and you should only exclude files that you are confident are not malicious.
Supported exclusion types
The following table shows the exclusion types supported by Defender for Endpoint on Mac.
| Exclusion | Definition | Examples |
|---|---|---|
| File extension | All files with the extension, anywhere on the machine | .test |
| File | A specific file identified by the full path | /var/log/test.log |
| Folder | All files under the specified folder (recursively) | /var/log/ |
| Process | A specific process (specified either by the full path or file name) and all files opened by it | /bin/cat |
File, folder, and process exclusions support the following wildcards:
| Wildcard | Description | Examples |
|---|---|---|
| * | Matches any number of any characters including none (note if this wildcard is not used at the end of the path then it will substitute only one folder) | /var/*/tmp includes any file in /var/abc/tmp and its subdirectories, and /var/def/tmp and its subdirectories. It does not include /var/abc/log or /var/def/log
|
| ? | Matches any single character | file?.log includes file1.log and file2.log, but not file123.log |
Note
When using the * wildcard at the end of the path, it will match all files and subdirectories under the parent of the wildcard.
The product attempts to resolve firmlinks when evaluating exclusions. Firmlink resolution does not work when the exclusion contains wildcards or the target file (on the Data volume) does not exist.
Best practices for adding antimalware exclusions for Microsoft Defender for Endpoint on macOS.
Write down why an exclusion was added to a central location where only SecOps and/or Security Administrator have access.
e.g. Submitter, date, app name, reason, and exclusion information.
Make sure to have an expiration date* for the exclusions
*except for apps that the ISV stated that there is no additional tweaking that could be done to prevent the false positive or higher cpu utilization from occurring.
Avoid migrating 3rd party antimalware exclusions since they may no longer be applicable nor applicable to Microsoft Defender for Endpoint on macOS.
Order of exclusions to consider top (more secure) to bottom (least secure):
Indicators - Certificate - allow
- Add an extended validation (EV) code signing.
Indicators - File hash - allow
- If a process or daemon doesn't change often, e.g. the app doesn't have a monthly security update.
Path & Process
Process
Path
Extension
How to configure the list of exclusions
From the Microsoft Defender for Endpoint Security Settings management console
- Login to the Microsoft Defender portal.
- Go to Configuration management > Endpoint Security Policies > Create new Policy
- Select Platform: macOS
- Select Template: Microsoft Defender Antivirus exclusions
- Select Create Policy
- Enter a name and description and select Next
- Expand Antivirus engine
- Select Add
- Select Path or File extension or File name
- Select Configure instance and add the exclusions as needed
- Select Next
- Assign the exclusion to a group and Select Next
- Select Save
From the management console
For more information on how to configure exclusions from JAMF, Intune, or another management console, see Set preferences for Defender for Endpoint on Mac.
From the user interface
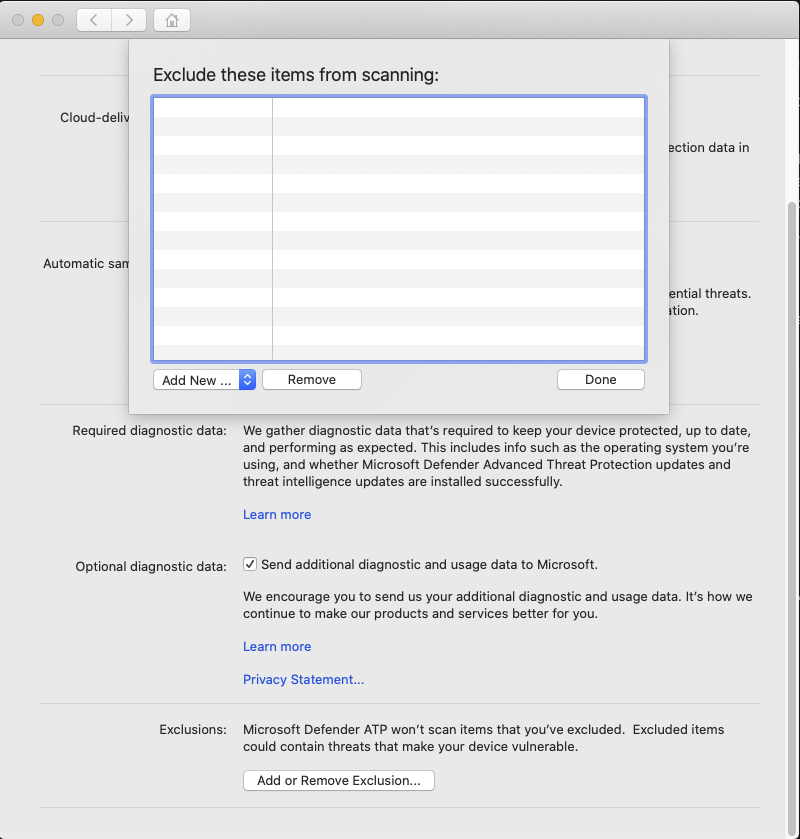
Open the Defender for Endpoint application and navigate to Manage settings > Add or Remove Exclusion..., as shown in the following screenshot:
Select the type of exclusion that you wish to add and follow the prompts.

Validate exclusions lists with the EICAR test file
You can validate that your exclusion lists are working by using curl to download a test file.
In the following Bash snippet, replace test.txt with a file that conforms to your exclusion rules. For example, if you have excluded the .testing extension, replace test.txt with test.testing. If you are testing a path, ensure that you run the command within that path.
curl -o test.txt https://secure.eicar.org/eicar.com.txt
If Defender for Endpoint on Mac reports malware, then the rule is not working. If there is no report of malware, and the downloaded file exists, then the exclusion is working. You can open the file to confirm that the contents are the same as what is described on the EICAR test file website.
If you do not have Internet access, you can create your own EICAR test file. Write the EICAR string to a new text file with the following Bash command:
echo 'X5O!P%@AP[4\PZX54(P^)7CC)7}$EICAR-STANDARD-ANTIVIRUS-TEST-FILE!$H+H*' > test.txt
You can also copy the string into a blank text file and attempt to save it with the file name or in the folder you are attempting to exclude.
Allow threats
In addition to excluding certain content from being scanned, you can also configure the product not to detect some classes of threats (identified by the threat name). You should exercise caution when using this functionality, as it can leave your device unprotected.
To add a threat name to the allowed list, execute the following command:
mdatp threat allowed add --name [threat-name]
The threat name associated with a detection on your device can be obtained using the following command:
mdatp threat list
For example, to add EICAR-Test-File (not a virus) (the threat name associated with the EICAR detection) to the allowed list, execute the following command:
mdatp threat allowed add --name "EICAR-Test-File (not a virus)"
Tip
Do you want to learn more? Engage with the Microsoft Security community in our Tech Community: Microsoft Defender for Endpoint Tech Community.
피드백
출시 예정: 2024년 내내 콘텐츠에 대한 피드백 메커니즘으로 GitHub 문제를 단계적으로 폐지하고 이를 새로운 피드백 시스템으로 바꿀 예정입니다. 자세한 내용은 다음을 참조하세요. https://aka.ms/ContentUserFeedback
다음에 대한 사용자 의견 제출 및 보기