데이터 기반 스타일 식(Android SDK)
참고 항목
Azure Maps Android SDK 사용 중지
이제 Android용 Azure Maps 네이티브 SDK는 더 이상 사용되지 않으며 2025년 3월 31일에 사용 중지됩니다. 서비스 중단을 방지하려면 2025년 3월 31일까지 Azure Maps 웹 SDK로 마이그레이션하세요. 자세한 내용은 Azure Maps Android SDK 마이그레이션 가이드를 참조하세요.
식을 사용하면 데이터 원본의 각 도형에 정의된 속성을 관찰하는 스타일 지정 옵션에 비즈니스 논리를 적용할 수 있습니다. 식은 데이터 원본 또는 계층의 데이터를 필터링할 수 있습니다. 식은 if문과 같은 조건부 논리로 구성될 수 있습니다. 또한 문자열 연산자, 논리 연산자, 수학 연산자를 사용하여 데이터를 조작하는 데 사용할 수 있습니다.
데이터 기반 스타일은 스타일 지정에 대한 비즈니스 논리를 구현하는 데 필요한 코드의 양을 줄여 줍니다. 계층과 사용되는 경우 별도의 스레드에서 렌더링 시 식이 평가됩니다. 이 기능은 UI 스레드에서 비즈니스 논리를 평가하는 것과 비교하여 향상된 성능을 제공합니다.
Azure Maps Android SDK는 Azure Maps 웹 SDK와 동일한 거의 모든 스타일 식을 지원하므로 데이터 기반 스타일 식(웹 SDK)에 설명된 모든 동일한 개념을 Android 앱으로 전달할 수 있습니다. Azure Maps Android SDK의 모든 스타일 식은 com.microsoft.azure.maps.mapcontrol.options.Expression 네임스페이스에서 사용할 수 있습니다. 다양한 유형의 스타일 식이 있습니다.
| 식의 형식 | 설명 |
|---|---|
| 부울 식 | 부울 식은 부울 비교를 평가하기 위한 부울 연산자 식 집합을 제공합니다. |
| 색 식 | 색 식을 사용하면 색 값을 보다 쉽게 만들고 조작할 수 있습니다. |
| 조건 식 | 조건부 식은 if 문과 같은 논리 연산을 제공합니다. |
| 데이터 식 | 기능의 속성 데이터에 대한 액세스를 제공합니다. |
| 보간 및 단계 식 | 보간 및 단계 식은 보간 곡선이나 단계 함수를 따라 값을 계산하는 데 사용할 수 있습니다. |
| JSON 기반 식 | Android SDK에서는 웹 SDK용으로 만든 원시 JSON 기반 식의 스타일을 쉽게 다시 사용할 수 있습니다. |
| 계층별 식 | 단일 계층에만 적용되는 특수 식입니다. |
| 수학 식 | 식 프레임워크 내에서 데이터 기반 계산을 수행하는 수치 연산자를 제공합니다. |
| 문자열 연산자 식 | 문자열 연산자 식은 사례를 연결하고 변환하는 등의 문자열에 대해 변환 작업을 수행합니다. |
| Type 식 | 형식 식은 문자열, 숫자, 부울 값 등의 다양한 데이터 형식을 테스트하고 변환하는 도구를 제공합니다. |
| 변수 바인딩 식 | 변수 바인딩 식은 계산 결과를 변수에 저장하고 저장된 값을 다시 계산할 필요 없이 식의 다른 위치에서 여러 번 참조합니다. |
| 확대/축소 식 | 렌더링 시 지도의 현재 확대/축소 수준을 검색합니다. |
참고 항목
식의 구문은 Java 및 Kotlin에서 대부분 동일합니다. 설명서를 Kotlin으로 설정했지만 Java에 대한 코드 블록이 표시되는 경우 코드는 두 언어에서 동일합니다.
문서의 이 섹션에 있는 모든 예제에서는 다음 기능을 사용하여 이러한 식을 사용할 수 있는 다양한 방법을 보여 줍니다.
{
    "type": "Feature",
    "geometry": {
        "type": "Point",
        "coordinates": [-122.13284, 47.63699]
    },
    "properties": {
        "id": 123,
        "entityType": "restaurant",
        "revenue": 12345,
        "subTitle": "Building 40",
        "temperature": 64,
        "title": "Cafeteria",
        "zoneColor": "purple",
        "abcArray": ["a", "b", "c"],
        "array2d": [["a", "b"], ["x", "y"]],
        "_style": {
            "fillColor": "red"
        }
    }
}
다음 코드는 앱에서 이 GeoJSON 기능을 수동으로 만드는 방법을 보여 줍니다.
//Create a point feature.
Feature feature = Feature.fromGeometry(Point.fromLngLat(-100, 45));

//Add properties to the feature.
feature.addNumberProperty("id", 123);
feature.addStringProperty("entityType", "restaurant");
feature.addNumberProperty("revenue", 12345);
feature.addStringProperty("subTitle", "Building 40");
feature.addNumberProperty("temperature", 64);
feature.addStringProperty("title", "Cafeteria");
feature.addStringProperty("zoneColor", "purple");

JsonArray abcArray = new JsonArray();
abcArray.add("a");
abcArray.add("b");
abcArray.add("c");

feature.addProperty("abcArray", abcArray);

JsonArray array1 = new JsonArray();
array1.add("a");
array1.add("b");

JsonArray array2 = new JsonArray();
array1.add("x");
array1.add("y");

JsonArray array2d = new JsonArray();
array2d.add(array1);
array2d.add(array2);

feature.addProperty("array2d", array2d);

JsonObject style = new JsonObject();
style.addProperty("fillColor", "red");

feature.addProperty("_style", style);
//Create a point feature.
val feature = Feature.fromGeometry(Point.fromLngLat(-100, 45))

//Add properties to the feature.
feature.addNumberProperty("id", 123)
feature.addStringProperty("entityType", "restaurant")
feature.addNumberProperty("revenue", 12345)
feature.addStringProperty("subTitle", "Building 40")
feature.addNumberProperty("temperature", 64)
feature.addStringProperty("title", "Cafeteria")
feature.addStringProperty("zoneColor", "purple")

val abcArray = JsonArray()
abcArray.add("a")
abcArray.add("b")
abcArray.add("c")

feature.addProperty("abcArray", abcArray)

val array1 = JsonArray()
array1.add("a")
array1.add("b")

val array2 = JsonArray()
array1.add("x")
array1.add("y")

val array2d = JsonArray()
array2d.add(array1)
array2d.add(array2)

feature.addProperty("array2d", array2d)

val style = JsonObject()
style.addProperty("fillColor", "red")

feature.addProperty("_style", style)
다음 코드는 JSON 개체의 문자열화된 버전을 앱의 GeoJSON 기능으로 역직렬화하는 방법을 보여 줍니다.
String featureString = "{\"type\":\"Feature\",\"geometry\":{\"type\":\"Point\",\"coordinates\":[-122.13284,47.63699]},\"properties\":{\"id\":123,\"entityType\":\"restaurant\",\"revenue\":12345,\"subTitle\":\"Building 40\",\"temperature\":64,\"title\":\"Cafeteria\",\"zoneColor\":\"purple\",\"abcArray\":[\"a\",\"b\",\"c\"],\"array2d\":[[\"a\",\"b\"],[\"x\",\"y\"]],\"_style\":{\"fillColor\":\"red\"}}}";

Feature feature = Feature.fromJson(featureString);
val featureString = "{\"type\":\"Feature\",\"geometry\":{\"type\":\"Point\",\"coordinates\":[-122.13284,47.63699]},\"properties\":{\"id\":123,\"entityType\":\"restaurant\",\"revenue\":12345,\"subTitle\":\"Building 40\",\"temperature\":64,\"title\":\"Cafeteria\",\"zoneColor\":\"purple\",\"abcArray\":[\"a\",\"b\",\"c\"],\"array2d\":[[\"a\",\"b\"],[\"x\",\"y\"]],\"_style\":{\"fillColor\":\"red\"}}}"

val feature = Feature.fromJson(featureString)
JSON 기반 식
Azure Maps 웹 SDK는 JSON 배열을 사용하여 표현되는 데이터 기반 스타일 식도 지원합니다. 이 동일한 식은 Android SDK의 네이티브 Expression 클래스를 사용하여 다시 만들 수 있습니다. 또는 이 JSON 기반 식을 JSON.stringify와 같은 웹 함수를 사용하여 문자열로 변환하고 Expression.raw(String rawExpression) 메서드에 전달할 수 있습니다. 예를 들어, 다음 JSON 식을 사용합니다.
var exp = ['get','title'];
JSON.stringify(exp); // = "['get','title']"
위 식의 문자열화된 버전은 "['get','title']"이며 다음과 같이 Android SDK로 읽을 수 있습니다.
Expression exp = Expression.raw("['get','title']")
val exp = Expression.raw("['get','title']")
이 접근 방식을 사용하면 Azure Maps를 사용하는 모바일 앱과 웹앱 간에 스타일 식을 쉽게 다시 사용할 수 있습니다.
이 비디오에서는 Azure Maps의 데이터 기반 스타일 개요를 제공합니다.
데이터 식
데이터 식은 기능의 속성 데이터에 대한 액세스를 제공합니다.
| 식 | 반환 형식 | 설명 |
|---|---|---|
accumulated() |
number | 지금까지 누적된 클러스터 속성의 값을 가져옵니다. 클러스터형 DataSource 원본의 옵션 clusterProperties에서만 사용할 수 있습니다. |
at(number | Expression, Expression) |
value | 배열에서 항목을 검색합니다. |
geometryType() |
string | 기능의 기하 도형 유형인 Point, MultiPoint, LineString, MultiLineString, Polygon, MultiPolygon을 가져옵니다. |
get(string | Expression) | get(string | Expression, Expression) |
value | 제공된 개체의 속성에서 속성 값을 가져옵니다. 요청된 속성이 없는 경우 null을 반환합니다. |
has(string | Expression) | has(string | Expression, Expression) |
부울 값 | 기능의 속성에 지정된 속성이 있는지 여부를 확인합니다. |
id() |
value | 기능 ID가 있는 경우 해당 ID를 가져옵니다. |
in(string | number | Expression, Expression) |
부울 값 | 항목이 배열에 있는지 여부를 확인합니다. |
length(string | Expression) |
number | 문자열이나 배열의 길이를 가져옵니다. |
properties() |
value | 기능 속성 개체를 가져옵니다. |
다음 웹 SDK 스타일 식은 Android SDK에서 지원되지 않습니다.
- index-of
- slice
예제
get 식을 사용하여 식에서 직접 기능의 속성에 액세스할 수 있습니다. 이 예에서는 기능의 zoneColor 값을 사용하여 거품형 계층의 색 속성을 지정합니다.
BubbleLayer layer = new BubbleLayer(source,
    //Get the zoneColor value.
    bubbleColor(get("zoneColor"))
);
val layer = BubbleLayer(source,
    //Get the zoneColor value.
    bubbleColor(get("zoneColor"))
)
모든 점 피쳐에 zoneColor 속성이 있으면 위의 예는 제대로 작동합니다. 그렇지 않으면 색이 "black"으로 대체될 가능성이 높습니다. 대체 색을 수정하려면 switchCase 식을 has 식과 함께 사용하여 속성이 있는지 확인합니다. 속성이 없으면 대체 색을 반환합니다.
BubbleLayer layer = new BubbleLayer(source,
    bubbleColor(
        //Use a conditional case expression.
        switchCase(
            //Check to see if feature has a "zoneColor"
            has("zoneColor"),

            //If it does, use it.
            get("zoneColor"),

            //If it doesn't, default to blue.
            literal("blue")
        )
    )
);
val layer = BubbleLayer(source,
    bubbleColor(
        //Use a conditional case expression.
        switchCase(
            //Check to see if feature has a "zoneColor"
            has("zoneColor"),

            //If it does, use it.
            get("zoneColor"),

            //If it doesn't, default to blue.
            literal("blue")
        )
    )
)
거품 및 기호 계층은 기본적으로 데이터 원본에 있는 모든 도형의 좌표를 렌더링합니다. 이 동작은 다각형의 꼭짓점 또는 선을 강조 표시할 수 있습니다. 계층의 filter 옵션을 사용하면 부울 식 내에서 geometryType 식을 사용하여 렌더링하는 기능의 기하 도형 유형을 제한할 수 있습니다. 다음 예에서는 Point 기능만 렌더링되도록 거품형 계층을 제한합니다.
BubbleLayer layer = new BubbleLayer(source,
    filter(eq(geometryType(), "Point"))
);
val layer = BubbleLayer(source,
    filter(eq(geometryType(), "Point"))
)
다음 예에서는 Point 및 MultiPoint 기능을 모두 렌더링할 수 있습니다.
BubbleLayer layer = new BubbleLayer(source,
    filter(any(eq(geometryType(), "Point"), eq(geometryType(), "MultiPoint")))
);
val layer = BubbleLayer(source,
    filter(any(eq(geometryType(), "Point"), eq(geometryType(), "MultiPoint")))
)
마찬가지로 다각형의 윤곽선이 선 계층에서 렌더링됩니다. 선 계층에서 이 동작을 사용하지 않도록 설정하려면 LineString 및 MultiLineString 기능만 허용하는 필터를 추가합니다.
다음은 데이터 식을 사용하는 방법에 대한 추가 예입니다.
//Get item [2] from an array "properties.abcArray[1]" = "c"
at(2, get("abcArray"))

//Get item [0][1] from a 2D array "properties.array2d[0][1]" = "b"
at(1, at(0, get("array2d")))

//Check to see if a value is in an array "properties.abcArray.indexOf('a') !== -1" = true
in("a", get("abcArray"))

//Get the length of an array "properties.abcArray.length" = 3
length(get("abcArray"))

//Get the value of a subproperty "properties._style.fillColor" = "red"
get("fillColor", get("_style"))

//Check that "fillColor" exists as a subproperty of "_style".
has("fillColor", get("_style"))
수학 식
수학 식은 식 프레임워크 내에서 데이터 기반 계산을 수행하는 수치 연산자를 제공합니다.
| 식 | 반환 형식 | 설명 |
|---|---|---|
abs(number | Expression) |
number | 지정된 숫자의 절대 값을 계산합니다. |
acos(number | Expression) |
number | 지정된 숫자의 아크코사인을 계산합니다. |
asin(number | Expression) |
number | 지정된 숫자의 아크사인을 계산합니다. |
atan(number | Expression) |
number | 지정된 숫자의 아크탄젠트를 계산합니다. |
ceil(number | Expression) |
number | 숫자를 다음 정수로 반올림합니다. |
cos(number | Expression) |
number | 지정된 숫자의 코사인을 계산합니다. |
division(number, number) | division(Expression, Expression) |
number | 첫 번째 숫자를 두 번째 숫자로 나눕니다. 웹 SDK 해당 식: / |
e() |
number | 산술 상수 e를 반환합니다. |
floor(number | Expression) |
number | 숫자를 이전 정수로 내림합니다. |
log10(number | Expression) |
number | 지정된 숫자의 밑이 10인 로그를 계산합니다. |
log2(number | Expression) |
number | 지정된 숫자의 밑이 2인 로그를 계산합니다. |
ln(number | Expression) |
number | 지정된 숫자의 자연 로그를 계산합니다. |
ln2() |
number | 산술 상수 ln(2)를 반환합니다. |
max(numbers... | expressions...) |
number | 지정된 숫자 집합의 최대 수를 계산합니다. |
min(numbers... | expressions...) |
number | 지정된 숫자 집합의 최소 수를 계산합니다. |
mod(number, number) | mod(Expression, Expression) |
number | 첫 번째 숫자를 두 번째 숫자로 나눈 나머지를 계산합니다. 웹 SDK 해당 식: % |
pi() |
number | 산술 상수 PI를 반환합니다. |
pow(number, number) | pow(Expression, Expression) |
number | 두 번째 숫자로 거듭제곱한 첫 번째 값을 계산합니다. |
product(numbers... | expressions...) |
number | 지정된 숫자를 서로 곱합니다. 웹 SDK 해당 식: * |
round(number | Expression) |
number | 가장 가까운 정수로 반올림합니다. 중간값은 0에서 멀어지는 쪽으로 반올림됩니다. 예를 들어 round(-1.5)는 -2로 계산됩니다. |
sin(number | Expression) |
number | 지정된 숫자의 사인을 계산합니다. |
sqrt(number | Expression) |
number | 지정된 숫자의 제곱근을 계산합니다. |
subtract(number | Expression |
number | 0에서 지정된 숫자만큼 뺍니다. |
subtract(number | Expression, number | Expression) |
number | 첫 번째 숫자에서 두 번째 숫자만큼 뺍니다. |
sum(numbers... | expressions...) |
number | 지정된 숫자의 총량을 계산합니다. |
tan(number | Expression) |
number | 지정된 숫자의 탄젠트를 계산합니다. |
부울 식
부울 식은 부울 비교를 평가하기 위한 부울 연산자 식 집합을 제공합니다.
값을 비교할 때 비교는 엄격하게 형식화됩니다. 다른 형식의 값은 항상 동일하지 않은 것으로 간주됩니다. 구문 분석 시 형식이 다른 것으로 알려진 사례는 잘못된 것으로 간주되며 구문 분석 오류를 생성합니다.
| 식 | 반환 형식 | 설명 |
|---|---|---|
all(Expression...) |
부울 값 | 모든 입력이 true이면 true을 반환하고 그렇지 않으면 false를 반환합니다. |
any(Expression...) |
부울 값 | 입력이 true이면 true을 반환하고 그렇지 않으면 false를 반환합니다. |
eq(Expression compareOne, Expression | boolean | number | string compareTwo) | eq(Expression compareOne, Expression | string compareTwo, Expression collator) |
부울 값 | 입력 값이 같으면 true이고, 그렇지 않으면 false를 반환합니다. 인수는 둘 다 문자열이거나 둘 다 숫자여야 합니다. |
gt(Expression compareOne, Expression | boolean | number | string compareTwo) | gt(Expression compareOne, Expression | string compareTwo, Expression collator) |
부울 값 | 첫 번째 매개 변수가 두 번째 매개 변수보다 엄격하게 크면 true를 반환하고, 그렇지 않으면 false를 반환합니다. 인수는 둘 다 문자열이거나 둘 다 숫자여야 합니다. |
gte(Expression compareOne, Expression | boolean | number | string compareTwo) | gte(Expression compareOne, Expression | string compareTwo, Expression collator) |
부울 값 | 첫 번째 매개 변수가 두 번째 매개 변수보다 크거나 동일하면 true를 반환하고, 그렇지 않으면 false를 반환합니다. 인수는 둘 다 문자열이거나 둘 다 숫자여야 합니다. |
lt(Expression compareOne, Expression | boolean | number | string compareTwo) | lt(Expression compareOne, Expression | string compareTwo, Expression collator) |
부울 값 | 첫 번째 매개 변수가 두 번째 매개 변수보다 엄격하게 작으면 true를 반환하고, 그렇지 않으면 false를 반환합니다. 인수는 둘 다 문자열이거나 둘 다 숫자여야 합니다. |
lte(Expression compareOne, Expression | boolean | number | string compareTwo) | lte(Expression compareOne, Expression | string compareTwo, Expression collator) |
부울 값 | 첫 번째 매개 변수가 두 번째 매개 변수보다 작거나 동일하면 true를 반환하고, 그렇지 않으면 false를 반환합니다. 인수는 둘 다 문자열이거나 둘 다 숫자여야 합니다. |
neq(Expression compareOne, Expression | boolean | number | string compareTwo) | neq(Expression compareOne, Expression | string compareTwo, Expression collator) |
부울 값 | 입력 값이 같지 않으면 true를 반환하고, 그렇지 않으면 false를 반환합니다. |
not(Expression | boolean) |
부울 값 | 논리 부정. 입력이 false이면 true를 반환하고, 입력이 true이면 false를 반환합니다. |
조건부 식
조건부 식은 if 문과 같은 논리 연산을 제공합니다.
다음 식은 입력 데이터에 대해 조건부 논리 연산을 수행합니다. 예를 들어 switchCase 식은 "if/then/else" 논리를 제공하며 match 식은 "switch 문"과 유사합니다.
Switch case 식
switchCase 식은 "if/then/else" 논리를 제공하는 조건식의 유형입니다. 이 유형의 식은 부울 조건 목록을 통해 단계를 진행합니다. True로 평가할 첫 번째 부울 조건의 출력 값을 반환합니다.
다음 의사 코드에서는 switchCase 식의 구조를 정의합니다.
switchCase(
    condition1: boolean expression,
    output1: value,
    condition2: boolean expression,
    output2: value,
    ...,
    fallback: value
)
예제
다음 예에서는 true로 평가되고 연결된 값을 반환하는 부울 조건을 찾을 때까지 다양한 부울 조건을 단계별로 실행합니다. 부울 조건이 true로 계산되지 않으면 대체 값이 반환됩니다.
BubbleLayer layer = new BubbleLayer(source,
    bubbleColor(
        switchCase(
            //Check to see if the first boolean expression is true, and if it is, return its assigned result.
            //If it has a zoneColor property, use its value as a color.
            has("zoneColor"), toColor(get("zoneColor")),

            //Check to see if the second boolean expression is true, and if it is, return its assigned result.
            //If it has a temperature property with a value greater than or equal to 100, make it red.
            all(has("temperature"), gte(get("temperature"), 100)), color(Color.RED),

            //Specify a default value to return. In this case green.
            color(Color.GREEN)
        )
    )
);
val layer = BubbleLayer(source,
    bubbleColor(
        switchCase(
            //Check to see if the first boolean expression is true, and if it is, return its assigned result.
            //If it has a zoneColor property, use its value as a color.
            has("zoneColor"), toColor(get("zoneColor")),

            //Check to see if the second boolean expression is true, and if it is, return its assigned result.
            //If it has a temperature property with a value greater than or equal to 100, make it red.
            all(has("temperature"), gte(get("temperature"), 100)), color(Color.RED),

            //Specify a default value to return. In this case green.
            color(Color.GREEN)
        )
    )
)
Match 식
match 식은 논리와 같은 switch 문을 제공하는 조건식의 유형입니다. 입력은 문자열이나 숫자를 반환하는 get( "entityType") 등의 모든 식일 수 있습니다. 각 중지에는 값이 모든 문자열 또는 모든 숫자여야 하는 단일 리터럴 값 또는 리터럴 값의 배열인 레이블이 있어야 합니다. 배열의 값이 일치하는 경우 입력이 일치합니다. 각 중지 레이블은 고유해야 합니다. 입력 유형이 레이블의 유형과 일치하지 않는 경우 결과는 기본 대체 값이 됩니다.
다음 의사 코드에서는 match 식의 구조를 정의합니다.
match(Expression input, Expression defaultOutput, Expression.Stop... stops)
예제
다음 예에서는 거품형 계층에서 Point 기능의 entityType 속성을 검색하여 일치 항목을 찾습니다. 일치 항목이 발견되면 지정된 값이 반환되거나 대체 값이 반환됩니다.
BubbleLayer layer = new BubbleLayer(source,
    bubbleColor(
        match(
            //Get the input value to match.
            get("entityType"),

            //Specify a default value to return if no match is found.
            color(Color.BLACK),

            //List the values to match and the result to return for each match.

            //If value is "restaurant" return "red".
            stop("restaurant", color(Color.RED)),

            //If value is "park" return "green".
            stop("park", color(Color.GREEN))
        )
    )
);
val layer = BubbleLayer(source,
    bubbleColor(
        match(
            //Get the input value to match.
            get("entityType"),

            //Specify a default value to return if no match is found.
            color(Color.BLACK),

            //List the values to match and the result to return for each match.

            //If value is "restaurant" return "red".
            stop("restaurant", color(Color.RED)),

            //If value is "park" return "green".
            stop("park", color(Color.GREEN))
        )
    )
)
다음 예에서는 배열을 사용하여 모두 동일한 값을 반환해야 하는 레이블 집합을 나열합니다. 이 방법은 각 레이블을 개별적으로 나열하는 것보다 훨씬 효율적입니다. 이 경우 entityType 속성이 "restaurant" 또는 "grocery_store"이면 색 "red"가 반환됩니다.
BubbleLayer layer = new BubbleLayer(source,
    bubbleColor(
        match(
            //Get the input value to match.
            get("entityType"),

            //Specify a default value to return if no match is found.
            color(Color.BLACK),

            //List the values to match and the result to return for each match.

            //If value is "restaurant" or "grocery_store" return "red".
            stop(Arrays.asList("restaurant", "grocery_store"), color(Color.RED)),

            //If value is "park" return "green".
            stop("park", color(Color.GREEN))
        )
    )
);
val layer = BubbleLayer(source,
    bubbleColor(
        match(
            //Get the input value to match.
            get("entityType"),

            //Specify a default value to return if no match is found.
            color(Color.BLACK),

            //List the values to match and the result to return for each match.

            //If value is "restaurant" or "grocery_store" return "red".
            stop(arrayOf("restaurant", "grocery_store"), color(Color.RED)),

            //If value is "park" return "green".
            stop("park", color(Color.GREEN))
        )
    )
)
Coalesce 식
coalesce 식에서는 null이 아닌 첫 번째 값을 가져와 값을 반환할 때까지 식 집합을 단계별로 실행합니다.
다음 의사 코드에서는 coalesce 식의 구조를 정의합니다.
coalesce(Expression... input)
예제
다음 예에서는 coalesce 식을 사용하여 기호 계층의 textField 옵션을 설정합니다. title 속성이 기능에서 누락되었거나 null로 설정된 경우에는 식이 subTitle 속성을 찾으려고 시도하고, 누락되었거나 null인 경우에는 빈 문자열로 대체합니다.
SymbolLayer layer = new SymbolLayer(source,
    textField(
        coalesce(
            //Try getting the title property.
            get("title"),

            //If there is no title, try getting the subTitle.
            get("subTitle"),

            //Default to an empty string.
            literal("")
        )
    )
);
val layer = SymbolLayer(source,
    textField(
        coalesce(
            //Try getting the title property.
            get("title"),

            //If there is no title, try getting the subTitle.
            get("subTitle"),

            //Default to an empty string.
            literal("")
        )
    )
)
Type 식
형식 식은 문자열, 숫자, 부울 값 등의 다양한 데이터 형식을 테스트하고 변환하는 도구를 제공합니다.
| 식 | 반환 형식 | 설명 |
|---|---|---|
array(Expression) |
Object[] | 입력이 배열임을 어설션합니다. |
bool(Expression) |
부울 값 | 입력 값이 부울임을 어설션합니다. |
collator(boolean caseSensitive, boolean diacriticSensitive) | collator(boolean caseSensitive, boolean diacriticSensitive, java.util.Locale locale) | collator(Expression caseSensitive, Expression diacriticSensitive) | collator(Expression caseSensitive, Expression diacriticSensitive, Expression locale) |
병합기 | 로캘 종속적인 비교 작업에 사용할 병합기를 반환합니다. 대/소문자 구분 및 분음 부호 구분 옵션은 기본적으로 false로 설정됩니다. 로캘 인수는 사용할 로캘의 IETF 언어 태그를 지정합니다. 제공되지 않으면 기본 로캘이 사용됩니다. 요청한 로캘을 사용할 수 없는 경우 병합기는 시스템 정의 대체 로캘을 사용합니다. 해결된 로캘을 사용하여 로캘 대체 동작의 결과를 테스트합니다. |
literal(boolean \| number \| string \| Object \| Object[]) |
부울 | 숫자 | 문자열 | 개체 | 개체[] | 리터럴 배열 또는 개체 값을 반환합니다. 배열이나 개체가 식으로 계산되지 않도록 하려면 이 식을 사용합니다. 배열 또는 개체를 식에서 반환해야 하는 경우 이 작업이 필요합니다. |
number(Expression) |
number | 입력 값이 숫자임을 어설션합니다. |
object(Expression) |
Object | 입력 값이 개체임을 어설션합니다. |
string(Expression) |
string | 입력 값이 문자열임을 어설션합니다. |
toArray(Expression) |
Object[] | 식을 JSON 개체 배열로 변환합니다. |
toBool(Expression) |
부울 값 | 입력 값을 부울로 변환합니다. |
toNumber(Expression) |
number | 가능한 경우 입력 값을 숫자로 변환합니다. |
toString(Expression) |
string | 입력 값을 문자열로 변환합니다. |
typeoOf(Expression) |
string | 지정된 값의 형식을 설명하는 문자열을 반환합니다. |
색 식
색 식을 사용하면 색 값을 보다 쉽게 만들고 조작할 수 있습니다.
| 식 | 반환 형식 | 설명 |
|---|---|---|
color(int) |
color | 색 정수 값을 색 식으로 변환합니다. |
rgb(Expression red, Expression green, Expression blue) | rgb(number red, number green, number blue) |
color | 0과 255 사이 및 알파 구성 요소 1의 빨강, 녹색 및 파랑 구성 요소에서 색 값을 만듭니다. 구성 요소가 범위를 벗어난 경우 식에 오류가 발생합니다. |
rgba(Expression red, Expression green, Expression blue, Expression alpha) | rgba(number red, number green, number blue, number alpha) |
color | 0과 255 사이 및 0과 1 사이의 알파 구성 요소의 빨간색, 녹색 및 파란색 구성 요소에서 색 값을 만듭니다. 구성 요소가 범위를 벗어난 경우 식에 오류가 발생합니다. |
toColor(Expression) |
color | 입력 값을 색으로 변환합니다. |
toRgba(Expression) |
color | 입력 색의 빨간색, 녹색, 파란색 및 알파 구성 요소를 포함하는 4개 요소 배열을 해당 순서대로 반환합니다. |
예제
다음 예에서는 255의 빨간색 값과 2.5에 temperature 속성 값을 곱하여 계산되는 녹색 및 파란색 값을 가진 RGB 색 값을 만듭니다. 온도가 변경됨에 따라 색은 빨간색의 다른 색조로 변경됩니다.
BubbleLayer layer = new BubbleLayer(source,
    bubbleColor(
        //Create a RGB color value.
        rgb(
            //Set red value to 255. Wrap with literal expression since using expressions for other values.
            literal(255f),

            //Multiple the temperature by 2.5 and set the green value.
            product(literal(2.5f), get("temperature")),

            //Multiple the temperature by 2.5 and set the blue value.
            product(literal(2.5f), get("temperature"))
        )
    )
);
val layer = BubbleLayer(source,
    bubbleColor(
        //Create a RGB color value.
        rgb(
            //Set red value to 255. Wrap with literal expression since using expressions for other values.
            literal(255f),

            //Multiple the temperature by 2.5 and set the green value.
            product(literal(2.5f), get("temperature")),

            //Multiple the temperature by 2.5 and set the blue value.
            product(literal(2.5f), get("temperature"))
        )
    )
)
모든 색 매개 변수가 숫자인 경우 literal 식으로 래핑할 필요가 없습니다. 예시:
BubbleLayer layer = new BubbleLayer(source,
    bubbleColor(
        //Create a RGB color value.
        rgb(
            255f,  //Set red value to 255.

            150f,  //Set green value to 150.

            0f     //Set blue value to 0.
        )
    )
);
val layer = BubbleLayer(source,
    bubbleColor(
        //Create a RGB color value.
        rgb(
            255f,  //Set red value to 255.

            150f,  //Set green value to 150.

            0f     //Set blue value to 0.
        )
    )
)
팁
문자열 색 값은 android.graphics.Color.parseColor 메서드를 사용하여 색으로 변환할 수 있습니다. 다음은 16진수 색 문자열을 레이어와 함께 사용할 수 있는 색 식으로 변환합니다.
color(parseColor("#ff00ff"))
문자열 연산자 식
문자열 연산자 식은 사례를 연결하고 변환하는 등의 문자열에 대해 변환 작업을 수행합니다.
| 식 | 반환 형식 | 설명 |
|---|---|---|
concat(string...) | concat(Expression...) |
string | 여러 문자열을 한 문자열로 연결합니다. 각 값은 문자열이어야 합니다. 필요한 경우 toString 형식 식을 사용하여 다른 값 형식을 문자열로 변환합니다. |
downcase(string) | downcase(Expression) |
string | 지정된 문자열을 소문자로 변환합니다. |
isSupportedScript(string) | isSupportedScript(Expression) |
부울 값 | 입력 문자열이 현재 글꼴 스택에서 지원하는 문자 집합을 사용하는지 여부를 확인합니다. 예: isSupportedScript("ಗೌರವಾರ್ಥವಾಗಿ") |
resolvedLocale(Expression collator) |
string | 제공된 병합기에서 사용하는 로캘의 IETF 언어 태그를 반환합니다. 이는 기본 시스템 로캘을 확인하거나 요청된 로캘이 성공적으로 로드되었는지 여부를 확인하는 데 사용할 수 있습니다. |
upcase(string) | upcase(Expression) |
string | 지정된 문자열을 대문자로 변환합니다. |
예제
다음 예에서는 point 기능의 temperature 속성을 문자열로 변환하고 끝에 "°F"를 연결합니다.
SymbolLayer layer = new SymbolLayer(source,
    textField(
        concat(Expression.toString(get("temperature")), literal("°F"))
    ),

    //Some additional style options.
    textOffset(new Float[] { 0f, -1.5f }),
    textSize(12f),
    textColor("white")
);
val layer = SymbolLayer(source,
    textField(
        concat(Expression.toString(get("temperature")), literal("°F"))
    ),

    //Some additional style options.
    textOffset(new Float[] { 0f, -1.5f }),
    textSize(12f),
    textColor("white")
)
위의 식은 아래 이미지에 표시된 것처럼 "64°F"라는 텍스트 맨 위에 겹쳐서 표시된 상태로 지도에 핀을 렌더링합니다.

보간 및 단계 식
보간 및 단계 식은 보간 곡선이나 단계 함수를 따라 값을 계산하는 데 사용할 수 있습니다. 이러한 식은 숫자 값을 입력으로 반환하는 식(예: get("temperature"))을 사용합니다. 입력 값은 입력 및 출력 값 쌍에 대해 평가되어 보간된 곡선이나 단계 함수에 가장 적합한 값을 결정합니다. 출력 값은 "stops"라고 합니다. 각 중지의 입력 값은 숫자여야 하며 오름차순이어야 합니다. 출력 값은 숫자, 숫자 배열 또는 색이어야 합니다.
Interpolate 식
interpolate 식은 중지 값 사이를 보간하여 연속적이고 부드러운 값 세트를 계산하는 데 사용할 수 있습니다. 색 값을 반환하는 interpolate 식은 결과 값이 선택되는 색 그라데이션을 생성합니다. interpolate 식의 형식은 다음과 같습니다.
//Stops consist of two expressions.
interpolate(Expression.Interpolator interpolation, Expression number, Expression... stops)

//Stop expression wraps two values.
interpolate(Expression.Interpolator interpolation, Expression number, Expression.Stop... stops)
interpolate 식에 사용할 수 있는 보간 방법에는 다음 세 가지 유형이 있습니다.
| 이름 | 설명 |
|---|---|
linear() |
중지 쌍 사이에 선형으로 보간합니다. |
exponential(number) | exponential(Expression) |
중지 사이에 지수로 보간합니다. “base”가 지정되고 출력이 증가하는 비율을 제어합니다. 값이 높을수록 출력은 범위의 높은 쪽 끝에서 증가합니다. 1에 가까운 “base” 값은 더 선형적으로 증가하는 출력을 생성합니다. |
cubicBezier(number x1, number y1, number x2, number y2) | cubicBezier(Expression x1, Expression y1, Expression x2, Expression y2) |
지정된 제어 지점에서 정의하는 입방형 베지어 곡선을 사용하여 보간합니다. |
stop 식의 형식은 stop(stop, value)입니다.
다음은 이 같이 다양한 유형의 보간 예제입니다.
| 선형 | 지수 | 입방형 3차원 |
|---|---|---|
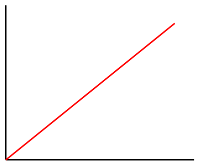 |
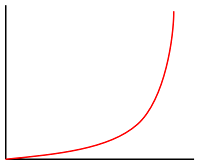 |
 |
예제
다음 예에서는 linear interpolate 식을 사용하여 point 기능의 temperature 속성을 기반으로 거품형 계층의 bubbleColor 속성을 설정합니다. temperature 값이 60 미만이면 "blue"가 반환됩니다. 60에서 70 미만 사이 값이면 yellow가 반환되고, 70에서 80 미만 사이 값이면 "orange"(#FFA500)가 반환됩니다. 80 이상의 값이면 "red"가 반환됩니다.
BubbleLayer layer = new BubbleLayer(source,
    bubbleColor(
        interpolate(
            linear(),
            get("temperature"),
            stop(50, color(Color.BLUE)),
            stop(60, color(Color.YELLOW)),
            stop(70, color(parseColor("#FFA500"))),
            stop(80, color(Color.RED))
        )
    )
);
val layer = BubbleLayer(source,
    bubbleColor(
        interpolate(
            linear(),
            get("temperature"),
            stop(50, color(Color.BLUE)),
            stop(60, color(Color.YELLOW)),
            stop(70, color(parseColor("#FFA500"))),
            stop(80, color(Color.RED))
        )
    )
)
다음 이미지는 위의 식에서 색을 선택하는 방법을 보여 줍니다.

Step 식
step 식은 stops로 정의된 조각별 상수 함수를 평가하여 불연속의 단계별 결과 값을 계산하는 데 사용할 수 있습니다.
interpolate 식의 형식은 다음과 같습니다.
step(Expression input, Expression defaultOutput, Expression... stops)

step(Expression input, Expression defaultOutput, Expression.Stop... stops)

step(Expression input, number defaultOutput, Expression... stops)

step(Expression input, number defaultOutput, Expression.Stop... stops)

step(number input, Expression defaultOutput, Expression... stops)

step(number input, Expression defaultOutput, Expression.Stop... stops)

step(number input, number defaultOutput, Expression... stops)

step(number input, number defaultOutput, Expression.Stop... stops)
Step 식은 입력 값 바로 앞에 있는 stop의 출력 값 또는 입력이 첫 번째 stop보다 작은 경우 첫 번째 입력 값을 반환합니다.
예제
다음 예에서는 step 식을 사용하여 point 기능의 temperature 속성을 기반으로 거품형 계층의 bubbleColor 속성을 설정합니다. temperature 값이 60 미만이면 "blue"가 반환됩니다. 60에서 70 미만 사이 값이면 "yellow"가 반환되고, 70에서 80 미만 사이 값이면 "orange"가 반환됩니다. 80 이상의 값이면 "red"가 반환됩니다.
BubbleLayer layer = new BubbleLayer(source,
    bubbleColor(
        step(
            get("temperature"),
            color(Color.BLUE),
            stop(60, color(Color.YELLOW)),
            stop(70, color(parseColor("#FFA500"))),
            stop(80, color(Color.RED))
        )
    )
);
val layer = BubbleLayer(source,
    bubbleColor(
        step(
            get("temperature"),
            color(Color.BLUE),
            stop(60, color(Color.YELLOW)),
            stop(70, color(parseColor("#FFA500"))),
            stop(80, color(Color.RED))
        )
    )
)
다음 이미지는 위의 식에서 색을 선택하는 방법을 보여 줍니다.

계층별 식
특정 계층에만 적용되는 특수 식입니다.
열 지도 밀도 식
열 지도 밀도 식은 열 지도 계층의 각 픽셀에 대한 열 지도 밀도 값을 검색하고 heatmapDensity로 정의됩니다. 이 값은 0에서 1 사이의 숫자입니다. interpolation 또는 step 식과 함께 사용되어 열 지도의 색을 지정하는 데 사용되는 색 그라데이션을 정의합니다. 이 식은 열 지도 계층의 heatmapColor 옵션에만 사용할 수 있습니다.
팁
보간 식에서 인덱스 0의 색상 또는 단계 색의 기본 색은 데이터가 없는 영역의 색을 정의합니다. 인덱스 0에 있는 색은 배경색을 정의하는 데 사용할 수 있습니다. 대부분 이 값을 투명 또는 반투명 검은색으로 설정하는 것을 선호합니다.
예제
이 예에서는 선형 보간 식을 사용하여 열 지도를 렌더링하기 위한 부드러운 색 그라데이션을 만듭니다.
HeatMapLayer layer = new HeatMapLayer(source,
    heatmapColor(
        interpolate(
            linear(),
            heatmapDensity(),
            stop(0, color(Color.TRANSPARENT)),
            stop(0.01, color(Color.MAGENTA)),
            stop(0.5, color(parseColor("#fb00fb"))),
            stop(1, color(parseColor("#00c3ff")))
        )
    )
);
val layer = HeatMapLayer(source,
    heatmapColor(
        interpolate(
            linear(),
            heatmapDensity(),
            stop(0, color(Color.TRANSPARENT)),
            stop(0.01, color(Color.MAGENTA)),
            stop(0.5, color(parseColor("#fb00fb"))),
            stop(1, color(parseColor("#00c3ff")))
        )
    )
)
부드러운 그라데이션을 사용하여 열 지도를 색상화하는 것 외에도 step 식을 사용하여 범위 집합 내에서 색을 지정할 수 있습니다. 열 지도를 색상화하는 step 식을 사용하여 윤곽선 또는 레이더 스타일 지도와 유사한 범위로 밀도를 시각적으로 나눕니다.
HeatMapLayer layer = new HeatMapLayer(source,
    heatmapColor(
        step(
            heatmapDensity(),
            color(Color.TRANSPARENT),
            stop(0.01, color(parseColor("#000080"))),
            stop(0.25, color(parseColor("#000080"))),
            stop(0.5, color(Color.GREEN)),
            stop(0.5, color(Color.YELLOW)),
            stop(1, color(Color.RED))
        )
    )
);
val layer = HeatMapLayer(source,
    heatmapColor(
        step(
            heatmapDensity(),
            color(Color.TRANSPARENT),
            stop(0.01, color(parseColor("#000080"))),
            stop(0.25, color(parseColor("#000080"))),
            stop(0.5, color(Color.GREEN)),
            stop(0.5, color(Color.YELLOW)),
            stop(1, color(Color.RED))
        )
    )
)
자세한 내용은 열 지도 계층 추가 설명서를 참조하세요.
선 진행률 식
선 진행률 식은 선 계층에서 그라데이션 선을 따라 진행률을 검색하고 lineProgress()로 정의됩니다. 이 값은 0에서 1 사이의 숫자입니다. interpolation 또는 step 식과 함께 사용됩니다. 이 식은 선 계층의 strokeGradient 옵션에만 사용할 수 있습니다.
참고 항목
선 계층의 strokeGradient 옵션을 사용하려면 데이터 원본의 lineMetrics 옵션을 true로 설정해야 합니다.
예제
이 예에서는 lineProgress() 식을 사용하여 선의 스트로크에 색 그라데이션을 적용합니다.
LineLayer layer = new LineLayer(source,
    strokeGradient(
        interpolate(
            linear(),
            lineProgress(),
            stop(0, color(Color.BLUE)),
            stop(0.1, color(Color.argb(255, 65, 105, 225))), //Royal Blue
            stop(0.3, color(Color.CYAN)),
            stop(0.5, color(Color.argb(255,0, 255, 0))), //Lime
            stop(0.7, color(Color.YELLOW)),
            stop(1, color(Color.RED))
        )
    )
);
val layer = LineLayer(source,
    strokeGradient(
        interpolate(
            linear(),
            lineProgress(),
            stop(0, color(Color.BLUE)),
            stop(0.1, color(Color.argb(255, 65, 105, 225))), //Royal Blue
            stop(0.3, color(Color.CYAN)),
            stop(0.5, color(Color.argb(255,0, 255, 0))), //Lime
            stop(0.7, color(Color.YELLOW)),
            stop(1, color(Color.RED))
        )
    )
)
텍스트 필드 서식 식
format 식을 기호 계층의 textField 옵션과 함께 사용하여 혼합 텍스트 형식 지정을 제공할 수 있습니다. 이 식은 텍스트 필드에 추가할 formatOptions 세트와 문자열을 지정하는 하나 이상의 formatEntry 식에서 사용됩니다.
| 식 | 설명 |
|---|---|
format(Expression...) |
혼합 형식 텍스트 필드 항목에 사용할 주석이 포함된 서식 있는 텍스트를 반환합니다. |
formatEntry(Expression text) | formatEntry(Expression text, Expression.FormatOption... formatOptions) | formatEntry(String text) | formatEntry(String text, Expression.FormatOption... formatOptions) |
format 식에 사용할 형식이 지정된 문자열 항목을 반환합니다. |
다음 형식 옵션을 사용할 수 있습니다.
| 식 | 설명 |
|---|---|
formatFontScale(number) | formatFontScale(Expression) |
글꼴 크기의 스케일링 인수를 지정합니다. 지정된 경우 이 값은 개별 문자열의 textSize 속성을 재정의합니다. |
formatTextFont(string[]) | formatTextFont(Expression) |
렌더링할 때 텍스트에 적용할 색을 지정합니다. |
예제
다음 예에서는 굵은 글꼴을 추가하고 기능 title 속성의 글꼴 크기를 확장하여 텍스트 필드의 서식을 지정합니다. 또한 이 예에서는 줄 바꿈에서 축소된 글꼴 크기를 사용하여 기능의 subTitle 속성을 추가합니다.
SymbolLayer layer = new SymbolLayer(source,
    textField(
        format(
            //Bold the title property and scale its font size up.
            formatEntry(
                get("title"),
                formatTextFont(new String[] { "StandardFont-Bold" }),
                formatFontScale(1.25)),

            //Add a new line without any formatting.
            formatEntry("\n"),

            //Scale the font size down of the subTitle property.
            formatEntry(
                get("subTitle"),
                formatFontScale(0.75))
        )
    )
);
val layer = SymbolLayer(source,
    textField(
        format(
            //Bold the title property and scale its font size up.
            formatEntry(
                get("title"),
                formatTextFont(arrayOf("StandardFont-Bold")),
                formatFontScale(1.25)),

            //Add a new line without any formatting.
            formatEntry("\n"),

            //Scale the font size down of the subTitle property.
            formatEntry(
                get("subTitle"),
                formatFontScale(0.75))
        )
    )
)
이 계층은 다음 이미지와 같이 점 피쳐를 렌더링합니다.

확대/축소 식
zoom 식은 렌더링 시 지도의 현재 확대/축소 수준을 검색하는 데 사용되고 zoom()으로 정의됩니다. 이 식은 지도의 최소 및 최대 확대/축소 수준 범위 사이의 숫자를 반환합니다. 웹 및 Android용 Azure Maps 대화형 지도 컨트롤은 25개의 확대/축소 수준(0-24)을 지원합니다. zoom 식을 사용하면 지도의 확대/축소 수준의 변경에 따라 스타일을 동적으로 수정할 수 있습니다. zoom 식과는 interpolate 및 step 식만 사용할 수 있습니다.
예제
기본적으로 열 지도 계층에 렌더링되는 데이터 요소의 반경에는 모든 확대/축소 수준에 대한 고정 픽셀 반경이 있습니다. 지도의 확대/축소 수준이 변경되면 데이터가 함께 집계되고 열 지도 계층이 다르게 보입니다. 각 데이터 포인트가 지도의 동일한 실제 영역을 포함하도록 각 확대/축소 수준에 대한 반경의 크기를 조정하는 데 zoom 식을 사용할 수 있습니다. 열 지도 계층이 더 정적이고 일관성 있어 보입니다. 지도의 각 확대/축소 수준에는 이전 확대/축소 수준과 비교했을 때 가로 및 세로로 두 배의 픽셀이 있습니다. 확대/축소 수준마다 두 배가 되도록 반경을 조정하면 모든 확대/축소 수준에서 일관되게 보이는 열 지도가 생성됩니다. base 2 exponential interpolation 식과 함께 zoom 식 사용하여 이를 수행할 수 있습니다. 최소 확대/축소 수준에 대해 픽셀 반경이 설정되고 아래와 같이 2 * Math.pow(2, minZoom - maxZoom)처럼 계산된 최대 확대/축소 수준에 대해 배율이 조정된 반경이 사용됩니다.
HeatMapLayer layer = new HeatMapLayer(source,
    heatmapRadius(
        interpolate(
            exponential(2),
            zoom(),

            //For zoom level 1 set the radius to 2 pixels.
            stop(1, 2),

            //Between zoom level 1 and 19, exponentially scale the radius from 2 pixels to 2 * (maxZoom - minZoom)^2 pixels.
            stop(19, 2 * Math.pow(2, 19 - 1))
        )
    )
);
val layer = HeatMapLayer(source,
    heatmapRadius(
        interpolate(
            exponential(2),
            zoom(),

            //For zoom level 1 set the radius to 2 pixels.
            stop(1, 2),

            //Between zoom level 1 and 19, exponentially scale the radius from 2 pixels to 2 * (maxZoom - minZoom)^2 pixels.
            stop(19, 2 * Math.pow(2, 19 - 1))
        )
    )
)
변수 바인딩 식
변수 바인딩 식은 계산 결과를 변수에 저장합니다. 따라서 계산 결과를 식의 다른 위치에서 여러 번 참조할 수 있습니다. 많은 계산을 포함하는 식에 대한 유용한 최적화입니다.
| 식 | 반환 형식 | 설명 |
|---|---|---|
let(Expression... input) |
결과를 반환하는 자식 식에서 var 식에 사용할 변수로 하나 이상의 값을 저장합니다. |
|
var(Expression expression) | var(string variableName) |
Object | let 식을 사용하여 만든 변수를 참조합니다. |
예제
이 예에서는 온도 비율을 기준으로 수익을 계산하는 식을 사용한 다음 case 식을 사용하여 이 값에 대한 다양한 부울 연산을 계산합니다. let 식은 한 번만 계산하면 되는 온도 비율을 기준으로 수익을 저장하는 데 사용됩니다. var 식은 변수를 다시 계산하지 않고도 필요한 만큼 자주 참조합니다.
BubbleLayer layer = new BubbleLayer(source,
    bubbleColor(
        let(
            //Divide the point features `revenue` property by the `temperature` property and store it in a variable called `ratio`.
            literal("ratio"), division(get("revenue"), get("temperature")),

            //Evaluate the child expression in which the stored variable will be used.
            switchCase(
                //Check to see if the ratio is less than 100, return 'red'.
                lt(var("ratio"), 100), color(Color.RED),

                //Check to see if the ratio is less than 200, return 'green'.
                lt(var("ratio"), 200), color(Color.GREEN),

                //Return `blue` for values greater or equal to 200.
                color(Color.BLUE)
            )
        )
    )
);
val layer = BubbleLayer(source,
    bubbleColor(
        let(
            //Divide the point features `revenue` property by the `temperature` property and store it in a variable called `ratio`.
            literal("ratio"), division(get("revenue"), get("temperature")),

            //Evaluate the child expression in which the stored variable will be used.
            switchCase(
                //Check to see if the ratio is less than 100, return 'red'.
                lt(var("ratio"), 100), color(Color.RED),

                //Check to see if the ratio is less than 200, return 'green'.
                lt(var("ratio"), 200), color(Color.GREEN),

                //Return `blue` for values greater or equal to 200.
                color(Color.BLUE)
            )
        )
    )
)
다음 단계
식을 지원하는 계층에 관해 자세히 알아보세요.