빠른 시작: Azure Stack Hub에서 PowerShell을 사용하여 Linux 서버 VM 만들기
Azure Stack Hub PowerShell을 사용하여 Ubuntu Server 20.04 LTS VM(가상 머신)을 만들 수 있습니다. 이 문서에서는 가상 머신을 만들고 사용합니다. 이 문서에서는 다음 방법도 보여줍니다.
- 원격 클라이언트를 사용하여 VM에 연결합니다.
- NGINX 웹 서버를 설치하고 기본 홈페이지를 봅니다.
- 사용하지 않는 리소스를 정리합니다.
사전 요구 사항
Azure Stack Hub Marketplace의 Linux 이미지입니다. Azure Stack Hub Marketplace에는 기본적으로 Linux 이미지가 없습니다. Azure Stack Hub 운영자가 필요한 Ubuntu Server 20.04 LTS 이미지를 제공하도록 합니다. 운영자는 Azure에서 Azure Stack Hub로 Marketplace 항목 다운로드의 지침을 사용할 수 있습니다.
Azure Stack Hub는 리소스를 만들고 관리하기 위해 특정 버전의 Azure CLI가 필요합니다.
- Azure Stack Hub에 대해 PowerShell을 구성하지 않은 경우 Azure Stack Hub용 PowerShell 설치를 참조하세요.
- Azure Stack Hub PowerShell이 설정되면 Azure Stack Hub 환경에 연결합니다. 자세한 내용은 PowerShell을 사용자로 사용하여 Azure Stack Hub에 연결을 참조하세요.
Windows 사용자 프로필의 .ssh 디렉터리에 저장된 이름이 id_rsa.pub인 공용 SSH(Secure Shell) 키입니다. SSH 키를 만드는 방법에 대한 자세한 내용은 Azure Stack Hub에서 SSH 키 쌍 사용을 참조하세요.
리소스 그룹 만들기
리소스 그룹은 Azure Stack Hub 리소스를 배포하고 관리할 수 있는 논리적 컨테이너입니다. 리소스 그룹을 만들려면 다음 코드 블록을 실행합니다.
참고
다음 코드 예제의 모든 변수에 대한 값을 할당했습니다. 그러나 고유한 값을 할당할 수 있습니다.
# Create variables to store the location and resource group names.
$location = "local"
$ResourceGroupName = "myResourceGroup"

New-AzResourceGroup `
  -Name $ResourceGroupName `
  -Location $location
스토리지 리소스 만들기
부팅 진단 출력을 저장하는 데 사용할 스토리지 계정을 만듭니다.
# Create variables to store the storage account name and the storage account SKU information
$StorageAccountName = "mystorageaccount"
$SkuName = "Standard_LRS"

# Create a new storage account
$StorageAccount = New-AzStorageAccount `
  -Location $location `
  -ResourceGroupName $ResourceGroupName `
  -Type $SkuName `
  -Name $StorageAccountName

Set-AzCurrentStorageAccount `
  -StorageAccountName $storageAccountName `
  -ResourceGroupName $resourceGroupName
네트워킹 리소스 만들기
가상 네트워크, 서브넷 및 공용 IP 주소를 만듭니다. 이러한 리소스는 VM에 대한 네트워크 연결을 제공하는 데 사용됩니다.
# Create a subnet configuration
$subnetConfig = New-AzVirtualNetworkSubnetConfig `
  -Name mySubnet `
  -AddressPrefix 192.168.1.0/24

# Create a virtual network
$vnet = New-AzVirtualNetwork `
  -ResourceGroupName $ResourceGroupName `
  -Location $location `
  -Name MyVnet `
  -AddressPrefix 192.168.0.0/16 `
  -Subnet $subnetConfig

# Create a public IP address and specify a DNS name
$pip = New-AzPublicIpAddress `
  -ResourceGroupName $ResourceGroupName `
  -Location $location `
  -AllocationMethod Static `
  -IdleTimeoutInMinutes 4 `
  -Name "mypublicdns$(Get-Random)"
네트워크 보안 그룹 및 네트워크 보안 그룹 규칙 만들기
네트워크 보안 그룹은 인바운드 및 아웃바운드 규칙을 사용하여 VM을 보호합니다. 들어오는 원격 데스크톱 연결을 허용하도록 포트 3389에 대한 인바운드 규칙을 만들고 포트 80에 대한 인바운드 규칙을 만들어 들어오는 웹 트래픽을 허용합니다.
# Create variables to store the network security group and rules names.
$nsgName = "myNetworkSecurityGroup"
$nsgRuleSSHName = "myNetworkSecurityGroupRuleSSH"
$nsgRuleWebName = "myNetworkSecurityGroupRuleWeb"


# Create an inbound network security group rule for port 22
$nsgRuleSSH = New-AzNetworkSecurityRuleConfig -Name $nsgRuleSSHName -Protocol Tcp `
-Direction Inbound -Priority 1000 -SourceAddressPrefix * -SourcePortRange * -DestinationAddressPrefix * `
-DestinationPortRange 22 -Access Allow

# Create an inbound network security group rule for port 80
$nsgRuleWeb = New-AzNetworkSecurityRuleConfig -Name $nsgRuleWebName -Protocol Tcp `
-Direction Inbound -Priority 1001 -SourceAddressPrefix * -SourcePortRange * -DestinationAddressPrefix * `
-DestinationPortRange 80 -Access Allow

# Create a network security group
$nsg = New-AzNetworkSecurityGroup -ResourceGroupName $ResourceGroupName -Location $location `
-Name $nsgName -SecurityRules $nsgRuleSSH,$nsgRuleWeb
VM에 대한 네트워크 카드 만들기
네트워크 카드 VM을 서브넷, 네트워크 보안 그룹 및 공용 IP 주소에 연결합니다.
# Create a virtual network card and associate it with public IP address and NSG
$nic = New-AzNetworkInterface `
  -Name myNic `
  -ResourceGroupName $ResourceGroupName `
  -Location $location `
  -SubnetId $vnet.Subnets[0].Id `
  -PublicIpAddressId $pip.Id `
  -NetworkSecurityGroupId $nsg.Id
VM 만들기
VM 구성을 만듭니다. 이 구성에는 VM을 배포할 때 사용할 설정(예: 사용자 자격 증명, 크기 및 VM 이미지)이 포함됩니다.
# Define a credential object
$UserName='demouser'
$securePassword = ConvertTo-SecureString ' ' -AsPlainText -Force
$cred = New-Object System.Management.Automation.PSCredential ($UserName, $securePassword)

# Create the VM configuration object
$VmName = "VirtualMachinelatest"
$VmSize = "Standard_D1"
$VirtualMachine = New-AzVMConfig `
  -VMName $VmName `
  -VMSize $VmSize

$VirtualMachine = Set-AzVMOperatingSystem `
  -VM $VirtualMachine `
  -Linux `
  -ComputerName "MainComputer" `
  -Credential $cred

$VirtualMachine = Set-AzVMSourceImage `
  -VM $VirtualMachine `
  -PublisherName "Canonical" `
  -Offer "UbuntuServer" `
  -Skus "20.04-LTS" `
  -Version "latest"

# Set the operating system disk properties on a VM
$VirtualMachine = Set-AzVMOSDisk `
  -VM $VirtualMachine `
  -CreateOption FromImage | `
  Set-AzVMBootDiagnostic -ResourceGroupName $ResourceGroupName `
  -StorageAccountName $StorageAccountName -Enable |`
  Add-AzVMNetworkInterface -Id $nic.Id

# Configure SSH keys
$sshPublicKey = Get-Content "$env:USERPROFILE\.ssh\id_rsa.pub"

# Add the SSH key to the VM
Add-AzVMSshPublicKey -VM $VirtualMachine `
 -KeyData $sshPublicKey `
 -Path "/home/$UserName/.ssh/authorized_keys"

# Create the VM
New-AzVM `
  -ResourceGroupName $ResourceGroupName `
 -Location $location `
  -VM $VirtualMachine
VM 빠른 만들기: 전체 스크립트
참고
이 단계는 기본적으로 이전 코드가 함께 병합되지만 인증을 위한 SSH 키가 아닌 암호를 사용하는 것입니다.
## Create a resource group

<#
A resource group is a logical container where you can deploy and manage Azure Stack Hub resources. From your development kit or the Azure Stack Hub integrated system, run the following code block to create a resource group. Though we've assigned values for all the variables in this article, you can use these values or assign new ones.
#>

# Edit your variables, if required

# Create variables to store the location and resource group names
$location = "local"
$ResourceGroupName = "myResourceGroup"

# Create variables to store the storage account name and the storage account SKU information
$StorageAccountName = "mystorageaccount"
$SkuName = "Standard_LRS"

# Create variables to store the network security group and rules names
$nsgName = "myNetworkSecurityGroup"
$nsgRuleSSHName = "myNetworkSecurityGroupRuleSSH"
$nsgRuleWebName = "myNetworkSecurityGroupRuleWeb"

# Create variable for VM password
$VMPassword = 'Password123!'

# End of variables - no need to edit anything past that point to deploy a single VM

# Create a resource group
New-AzResourceGroup `
  -Name $ResourceGroupName `
  -Location $location

## Create storage resources

# Create a storage account, and then create a storage container for the Ubuntu Server 20.04 LTS image

# Create a new storage account
$StorageAccount = New-AzStorageAccount `
  -Location $location `
  -ResourceGroupName $ResourceGroupName `
  -Type $SkuName `
  -Name $StorageAccountName

Set-AzCurrentStorageAccount `
  -StorageAccountName $storageAccountName `
  -ResourceGroupName $resourceGroupName

# Create a storage container to store the VM image
$containerName = 'osdisks'
$container = New-AzureStorageContainer `
  -Name $containerName `
  -Permission Blob


## Create networking resources

# Create a virtual network, a subnet, and a public IP address, resources that are used provide network connectivity to the VM

# Create a subnet configuration
$subnetConfig = New-AzVirtualNetworkSubnetConfig `
  -Name mySubnet `
  -AddressPrefix 192.168.1.0/24

# Create a virtual network
$vnet = New-AzVirtualNetwork `
  -ResourceGroupName $ResourceGroupName `
  -Location $location `
  -Name MyVnet `
  -AddressPrefix 192.168.0.0/16 `
  -Subnet $subnetConfig

# Create a public IP address and specify a DNS name
$pip = New-AzPublicIpAddress `
  -ResourceGroupName $ResourceGroupName `
  -Location $location `
  -AllocationMethod Static `
  -IdleTimeoutInMinutes 4 `
  -Name "mypublicdns$(Get-Random)"


### Create a network security group and a network security group rule

<#
The network security group secures the VM by using inbound and outbound rules. Create an inbound rule for port 3389 to allow incoming Remote Desktop connections and an inbound rule for port 80 to allow incoming web traffic.
#>

# Create an inbound network security group rule for port 22
$nsgRuleSSH = New-AzNetworkSecurityRuleConfig -Name $nsgRuleSSHName -Protocol Tcp `
-Direction Inbound -Priority 1000 -SourceAddressPrefix * -SourcePortRange * -DestinationAddressPrefix * `
-DestinationPortRange 22 -Access Allow

# Create an inbound network security group rule for port 80
$nsgRuleWeb = New-AzNetworkSecurityRuleConfig -Name $nsgRuleWebName -Protocol Tcp `
-Direction Inbound -Priority 1001 -SourceAddressPrefix * -SourcePortRange * -DestinationAddressPrefix * `
-DestinationPortRange 80 -Access Allow

# Create a network security group
$nsg = New-AzNetworkSecurityGroup -ResourceGroupName $ResourceGroupName -Location $location `
-Name $nsgName -SecurityRules $nsgRuleSSH,$nsgRuleWeb

### Create a network card for the VM

# The network card connects the VM to a subnet, network security group, and public IP address.

# Create a virtual network card and associate it with public IP address and NSG
$nic = New-AzNetworkInterface `
  -Name myNic `
  -ResourceGroupName $ResourceGroupName `
  -Location $location `
  -SubnetId $vnet.Subnets[0].Id `
  -PublicIpAddressId $pip.Id `
  -NetworkSecurityGroupId $nsg.Id

## Create a VM
<#
Create a VM configuration. This configuration includes the settings used when deploying the VM. For example: user credentials, size, and the VM image.
#>

# Define a credential object
$UserName='demouser'
$securePassword = ConvertTo-SecureString $VMPassword -AsPlainText -Force
$cred = New-Object System.Management.Automation.PSCredential ($UserName, $securePassword)

# Create the VM configuration object
$VmName = "VirtualMachinelatest"
$VmSize = "Standard_D1"
$VirtualMachine = New-AzVMConfig `
  -VMName $VmName `
  -VMSize $VmSize

$VirtualMachine = Set-AzVMOperatingSystem `
  -VM $VirtualMachine `
  -Linux `
  -ComputerName "MainComputer" `
  -Credential $cred

$VirtualMachine = Set-AzVMSourceImage `
  -VM $VirtualMachine `
  -PublisherName "Canonical" `
  -Offer "UbuntuServer" `
  -Skus "20.04-LTS" `
  -Version "latest"

$osDiskName = "OsDisk"
$osDiskUri = '{0}vhds/{1}-{2}.vhd' -f `
  $StorageAccount.PrimaryEndpoints.Blob.ToString(),`
  $vmName.ToLower(), `
  $osDiskName

# Set the operating system disk properties on a VM
$VirtualMachine = Set-AzVMOSDisk `
  -VM $VirtualMachine `
  -Name $osDiskName `
  -VhdUri $OsDiskUri `
  -CreateOption FromImage | `
  Add-AzVMNetworkInterface -Id $nic.Id

# Create the VM
New-AzVM `
  -ResourceGroupName $ResourceGroupName `
 -Location $location `
  -VM $VirtualMachine
VM에 연결
VM을 배포한 후 VM에 대한 SSH 연결을 구성합니다. VM의 공용 IP 주소를 얻으려면 Get-AzPublicIpAddress 명령을 사용합니다.
Get-AzPublicIpAddress -ResourceGroupName myResourceGroup | Select IpAddress
SSH가 설치된 클라이언트 시스템에서 다음 명령을 사용하여 VM에 연결합니다. Windows에서 작업하는 경우 PuTTY 를 사용하여 연결을 만들 수 있습니다.
ssh <Public IP Address>
메시지가 표시되면 azureuser로 로그인합니다. SSH 키를 만들 때 암호를 사용한 경우 암호를 제공해야 합니다.
NGINX 웹 서버 설치
패키지 리소스를 업데이트하고 최신 NGINX 패키지를 설치하려면 다음 스크립트를 실행합니다.
#!/bin/bash

# update package source
apt-get -y update

# install NGINX
apt-get -y install nginx
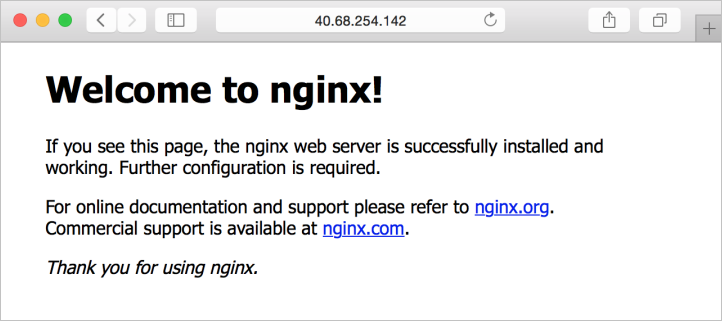
NGINX 시작 페이지 보기
NGINX 웹 서버가 설치되고 VM에서 포트 80이 열려 있으면 VM의 공용 IP 주소를 사용하여 웹 서버에 액세스할 수 있습니다. 웹 브라우저를 열고 로 http://<public IP address>이동합니다.
리소스 정리
Remove-AzResourceGroup 명령을 사용하여 더 이상 필요하지 않은 리소스를 클린 수 있습니다. 리소스 그룹 및 모든 해당 리소스를 삭제하려면 다음 명령을 실행합니다.
Remove-AzResourceGroup -Name myResourceGroup
다음 단계
이 빠른 시작에서는 기본 Linux 서버 VM을 배포했습니다. Azure Stack Hub VM에 대해 자세히 알아보려면 Azure Stack Hub의 VM에 대한 고려 사항으로 이동하세요.
피드백
출시 예정: 2024년 내내 콘텐츠에 대한 피드백 메커니즘으로 GitHub 문제를 단계적으로 폐지하고 이를 새로운 피드백 시스템으로 바꿀 예정입니다. 자세한 내용은 다음을 참조하세요. https://aka.ms/ContentUserFeedback
다음에 대한 사용자 의견 제출 및 보기