자동 크기 조정은 애플리케이션의 로드를 처리하기 위해 적절한 양의 리소스를 자동으로 실행합니다. 온라인 엔드포인트는 Azure Monitor 자동 크기 조정 기능과의 통합을 통해 자동 크기 조정을 지원합니다.
Azure Monitor 자동 크기 조정은 다양한 규칙 집합을 지원합니다. 메트릭 기반 조정(예: CPU 사용률 >70%), 일정 기반 조정(예: 최대 업무 시간에 대한 조정 규칙) 또는 조합을 구성할 수 있습니다. 자세한 내용은 Microsoft Azure의 자동 크기 조정 개요를 참조하세요.
현재 Azure CLI, REST, ARM 또는 브라우저 기반 Azure Portal을 사용하여 자동 크기 조정을 관리할 수 있습니다. Python SDK와 같은 다른 Azure Machine Learning SDK는 시간이 지남에 따라 지원을 추가합니다.
자동 크기 조정을 사용하려면 자동 크기 조정을 관리하는 ID에 microsoft.insights/autoscalesettings/write 역할을 할당해야 합니다. 이 작업을 허용하는 기본 제공 또는 사용자 지정 역할을 사용할 수 있습니다. Azure Machine Learning의 역할 관리에 대한 일반적인 지침은 사용자 및 역할 관리를 참조하세요. Azure Monitor의 자동 크기 조정 설정에 대한 자세한 내용은 Microsoft.Insights 자동 크기 조정을 참조하세요.
자동 크기 조정 프로필 정의
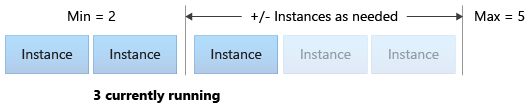
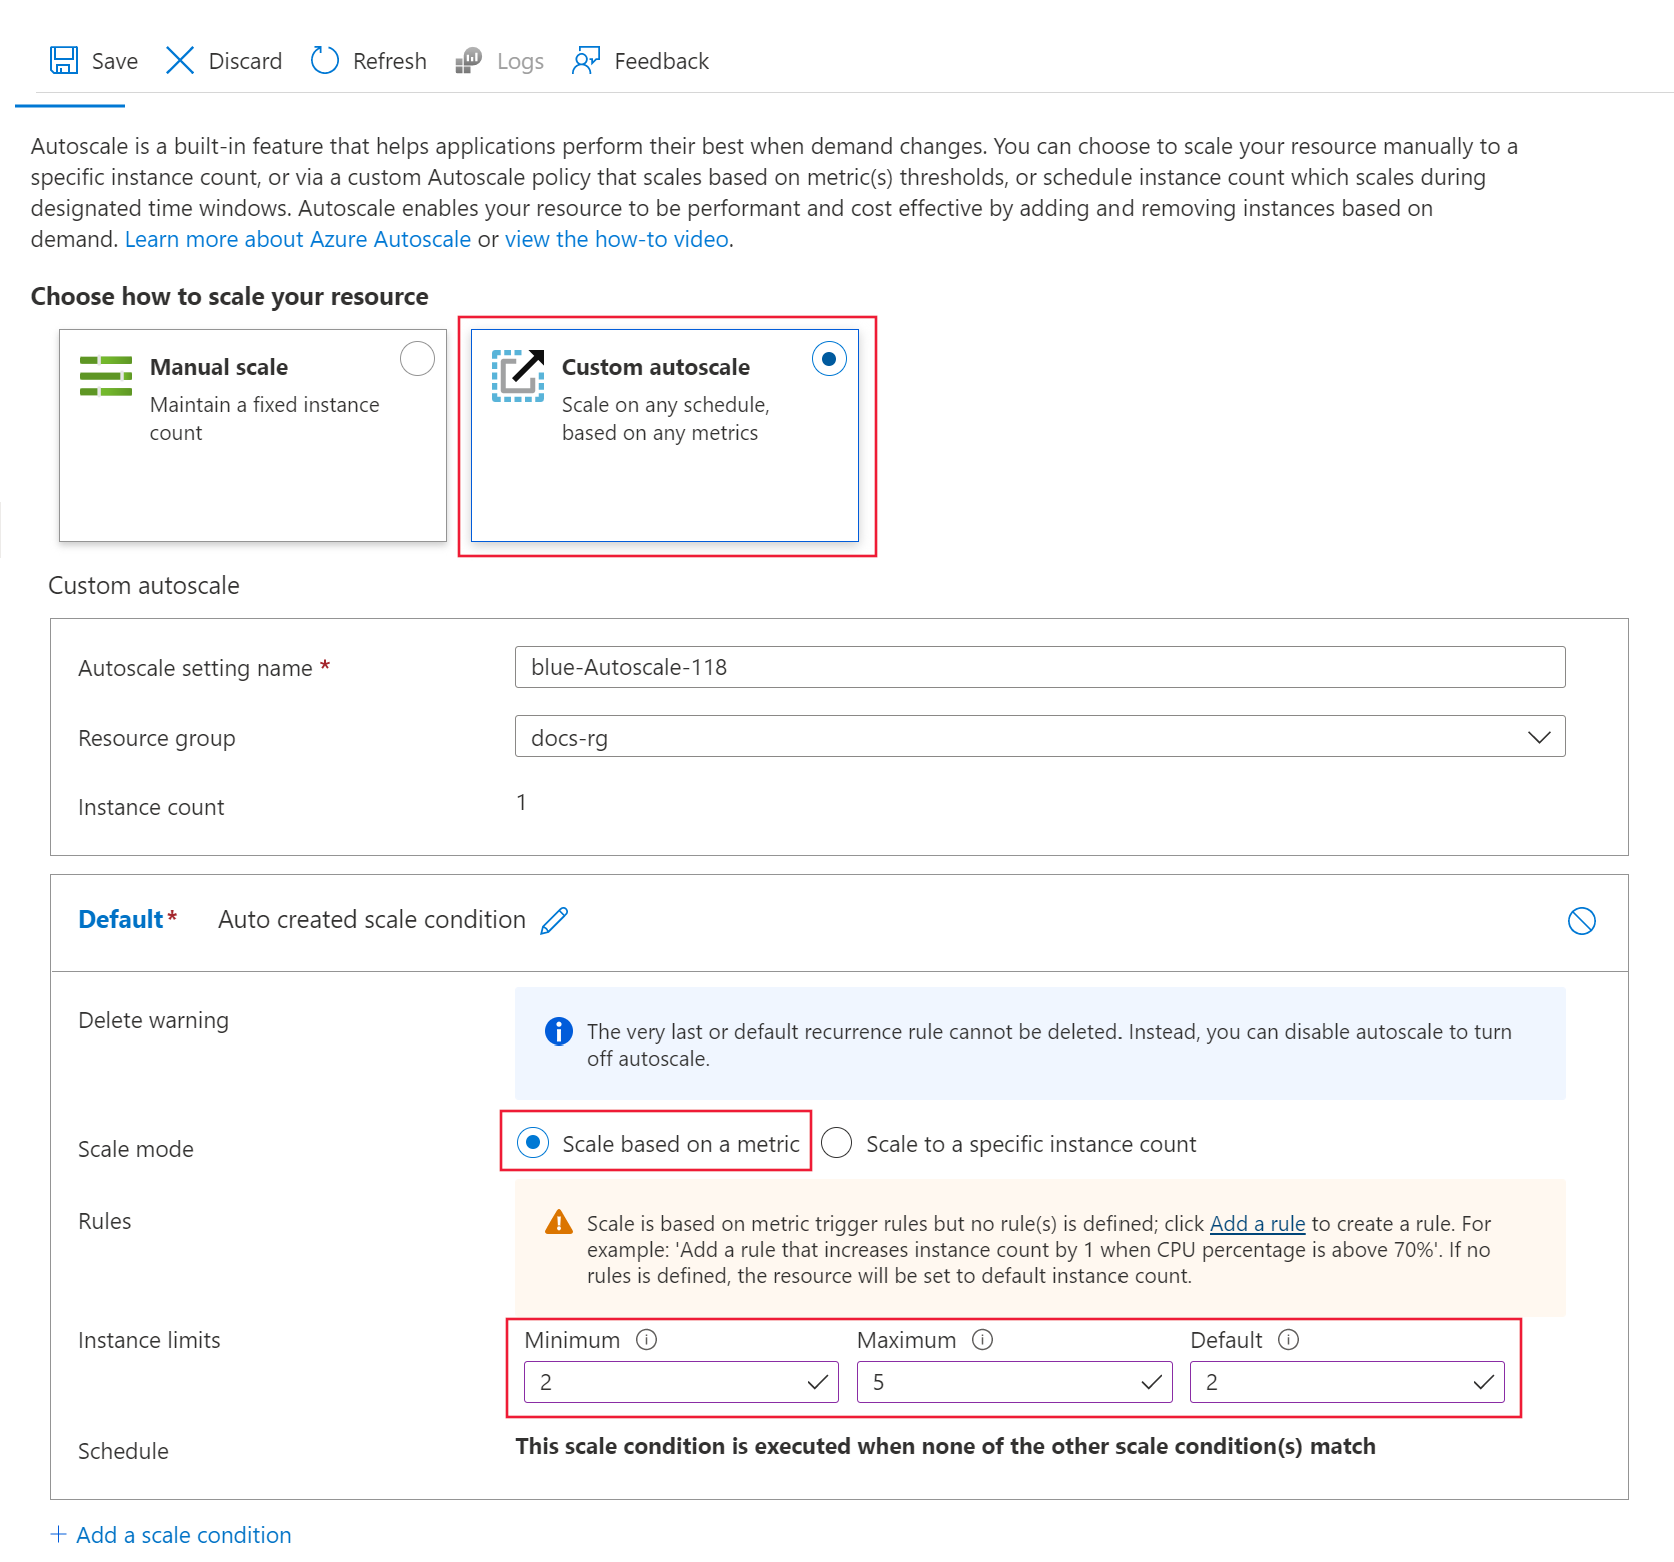
엔드포인트에 대한 자동 크기 조정을 사용하도록 설정하려면 먼저 자동 크기 조정 프로필을 정의합니다. 이 프로필은 기본, 최소, 최대 확장 집합 용량을 정의합니다. 다음 예에서는 기본 및 최소 용량을 2개의 VM 인스턴스로 설정하고 최대 용량을 5개로 설정합니다.
# set your existing endpoint name
ENDPOINT_NAME=your-endpoint-name
DEPLOYMENT_NAME=blue
다음으로 배포 및 엔드포인트의 Azure Resource Manager ID를 가져옵니다.
# ARM id of the deployment
DEPLOYMENT_RESOURCE_ID=$(az ml online-deployment show -e $ENDPOINT_NAME -n $DEPLOYMENT_NAME -o tsv --query "id")
# ARM id of the deployment. todo: change to --query "id"
ENDPOINT_RESOURCE_ID=$(az ml online-endpoint show -n $ENDPOINT_NAME -o tsv --query "properties.\"azureml.onlineendpointid\"")
# set a unique name for autoscale settings for this deployment. The below will append a random number to make the name unique.
AUTOSCALE_SETTINGS_NAME=autoscale-$ENDPOINT_NAME-$DEPLOYMENT_NAME-`echo $RANDOM`
from azure.ai.ml import MLClient
from azure.identity import DefaultAzureCredential
from azure.mgmt.monitor import MonitorManagementClient
from azure.mgmt.monitor.models import AutoscaleProfile, ScaleRule, MetricTrigger, ScaleAction, Recurrence, RecurrentSchedule
import random
import datetime
# Set a unique name for autoscale settings for this deployment. The below will append a random number to make the name unique.
autoscale_settings_name = f"autoscale-{endpoint_name}-{deployment_name}-{random.randint(0,1000)}"

mon_client.autoscale_settings.create_or_update(
    resource_group,
    autoscale_settings_name,
    parameters = {
        "location" : endpoint.location,
        "target_resource_uri" : deployment.id,
        "profiles" : [
            AutoscaleProfile(
                name="my-scale-settings",
                capacity={
                    "minimum" : 2,
                    "maximum" : 5,
                    "default" : 2
                },
                rules = []
            )
        ]
    }
)
az monitor autoscale rule create \
  --autoscale-name $AUTOSCALE_SETTINGS_NAME \
  --condition "CpuUtilizationPercentage > 70 avg 5m" \
  --scale out 2
규칙은 my-scale-settings 프로필의 일부입니다(autoscale-name은 프로필의 name과 일치). condition 인수의 값은 "VM 인스턴스 간의 평균 CPU 소비가 5분 동안 70%를 초과할 때" 규칙이 트리거되어야 한다고 말합니다. 해당 조건이 충족되면 두 개의 VM 인스턴스가 추가로 할당됩니다.
규칙 섹션에서 규칙 추가를 선택합니다. 스케일링 규칙 페이지가 표시됩니다. 다음 정보를 사용하여 이 페이지의 필드를 채웁니다.
메트릭 이름을 CPU 사용률로 설정합니다.
연산자를 미만으로 설정하고 메트릭 임계값을 30으로 설정합니다.
시간(분)을 5로 설정합니다.
연산자를 다음을 기준으로 개수 줄이기로 설정하고 인스턴스 개수를 1로 설정합니다.
마지막으로 추가 단추를 선택하여 규칙을 만듭니다.
스케일 아웃 및 스케일 인 규칙이 모두 있는 경우 규칙은 다음 스크린샷과 유사하게 표시됩니다. 평균 CPU 로드가 5분 동안 70%를 초과하면 최대 5개까지 노드를 2개 더 할당하도록 지정했습니다. CPU 부하가 5분 동안 30% 미만이면 단일 노드를 최소 2개까지 해제해야 합니다.
엔드포인트 지표를 기반으로 조정 규칙 만들기
배포에 적용된 이전 규칙입니다. 이제 엔드포인트에 적용되는 규칙을 추가합니다. 이 예에서 요청 대기 시간이 5분 동안 평균 70밀리초보다 크면 다른 노드를 할당합니다.
# delete the autoscaling profile
az monitor autoscale delete -n "$AUTOSCALE_SETTINGS_NAME"

# delete the endpoint
az ml online-endpoint delete --name $ENDPOINT_NAME --yes --no-wait
 Azure CLI ml 확장 v2(현재)