빠른 시작: Azure Machine Learning 시작
적용 대상:  Python SDK azure-ai-ml v2(현재)
이 자습서는 Azure Machine Learning Service에서 가장 많이 사용되는 기능 중 일부를 소개합니다. 여기서는 모델을 만들기, 등록 및 배포하게 됩니다. 이 자습서는 Azure Machine Learning의 핵심 개념과 가장 일반적인 사용에 익숙해지는 데 도움이 됩니다.
확장 가능한 컴퓨팅 리소스에서 학습 작업을 실행한 후 배포하고 최종적으로 배포를 테스트하는 방법을 알아봅니다.
데이터 준비를 처리하고 모델을 학습 및 등록하는 학습 스크립트를 만듭니다. 모델을 학습한 후에는 모델을 엔드포인트로 배포한 다음 유추을 위해 엔드포인트를 호출합니다.
수행할 단계는 다음과 같습니다.
- Azure Machine Learning 작업 영역에 대한 핸들 설정
- 학습 스크립트 만들기
- 확장 가능한 컴퓨팅 리소스인 컴퓨팅 클러스터 만들기
- 적절한 작업 환경으로 구성된 컴퓨팅 클러스터에서 학습 스크립트를 실행할 명령 작업을 만들고 실행합니다.
- 학습 스크립트의 출력 보기
- 새로 학습된 모델을 엔드포인트로 배포
- 유추를 위해 Azure Machine Learning 엔드포인트 호출
이 빠른 시작의 단계 개요를 보려면 이 동영상을 시청합니다.
필수 조건
-
Azure Machine Learning을 사용하려면 먼저 작업 영역이 필요합니다. 작업 영역이 없으면 시작하는 데 필요한 리소스 만들기를 완료하여 작업 영역을 만들고 사용 방법에 대해 자세히 알아봅니다.
-
스튜디오에 로그인하고 아직 열려 있지 않은 경우 작업 영역을 선택합니다.
-
작업 영역에서 Notebook을 열거나 만듭니다.
커널 설정
아직 컴퓨팅 인스턴스가 없는 경우 열린 Notebook 위 상단 표시줄에서 컴퓨팅 인스턴스를 만듭니다.

컴퓨팅 인스턴스가 중지된 경우 컴퓨팅 시작을 선택하고 실행될 때까지 기다립니다.

오른쪽 위에 있는 커널이
Python 3.10 - SDK v2인지 확인합니다. 그렇지 않은 경우 드롭다운을 사용하여 이 커널을 선택합니다.
인증이 필요하다는 배너가 표시되면 인증을 선택합니다.


Important
이 자습서의 나머지 부분에는 자습서 Notebook의 셀이 포함되어 있습니다. 새 Notebook을 복사/붙여넣거나, 복제한 경우 지금 Notebook으로 전환합니다.
작업 영역에 대한 핸들 만들기
코드를 살펴보기 전에 작업 영역을 참조할 수 있는 방법이 필요합니다. 작업 영역은 Azure Machine Learning의 최상위 리소스로, Azure Machine Learning을 사용할 때 만든 모든 아티팩트를 사용할 수 있는 중앙 집중식 환경을 제공합니다.
작업 영역 핸들에 대해 ml_client를 만듭니다. 그런 다음 ml_client를 사용하여 리소스와 작업을 관리하게 됩니다.
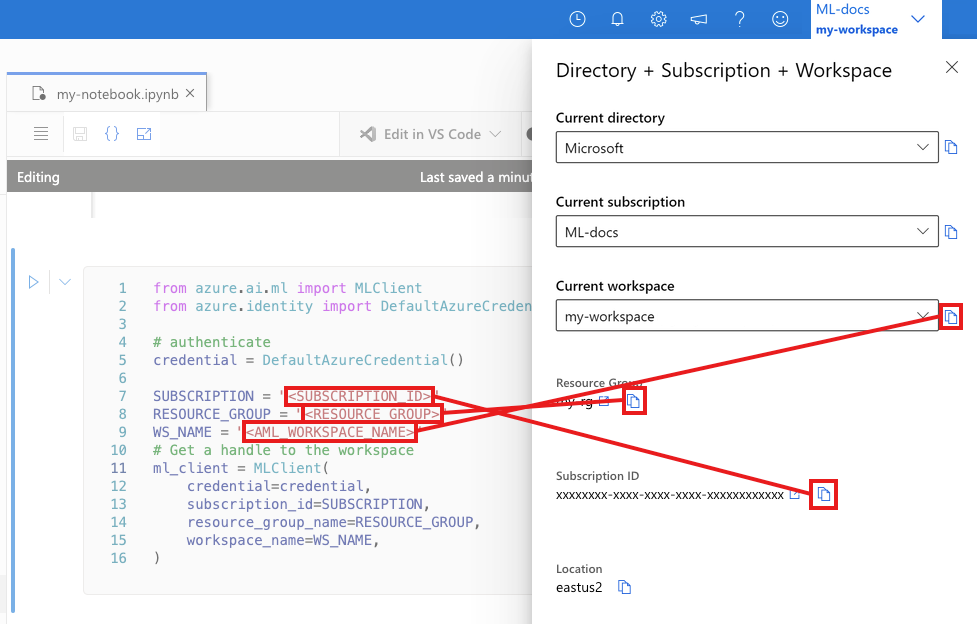
다음 셀에 구독 ID, 리소스 그룹 이름 및 작업 영역 이름을 입력합니다. 이러한 값을 찾으려면 다음을 수행합니다.
- 오른쪽 위 Azure Machine Learning 스튜디오 도구 모음에서 작업 영역 이름을 선택합니다.
- 작업 영역, 리소스 그룹 및 구독 ID의 값을 코드에 복사합니다.
- 하나의 값을 복사하고 해당 영역을 닫고 붙여넣은 후 다음 값으로 돌아와야 합니다.
from azure.ai.ml import MLClient
from azure.identity import DefaultAzureCredential

# authenticate
credential = DefaultAzureCredential()

SUBSCRIPTION="<SUBSCRIPTION_ID>"
RESOURCE_GROUP="<RESOURCE_GROUP>"
WS_NAME="<AML_WORKSPACE_NAME>"
# Get a handle to the workspace
ml_client = MLClient(
    credential=credential,
    subscription_id=SUBSCRIPTION,
    resource_group_name=RESOURCE_GROUP,
    workspace_name=WS_NAME,
)
참고 항목
MLClient를 만들면 작업 영역에 연결되지 않습니다. 클라이언트 초기화는 지연되어 처음 호출이 필요할 때까지 기다립니다(이는 다음 코드 셀에서 발생합니다).
# Verify that the handle works correctly.
# If you ge an error here, modify your SUBSCRIPTION, RESOURCE_GROUP, and WS_NAME in the previous cell.
ws = ml_client.workspaces.get(WS_NAME)
print(ws.location,":", ws.resource_group)
학습 스크립트 만들기
먼저 학습 스크립트인 main.py Python 파일을 만들어 보겠습니다.
우선 스크립트의 원본 폴더를 만듭니다.
import os

train_src_dir = "./src"
os.makedirs(train_src_dir, exist_ok=True)
이 스크립트는 데이터의 전처리를 처리하여 테스트 및 학습 데이터로 분할합니다. 그런 다음, 이 데이터를 사용하여 트리 기반 모델을 학습시키고 출력 모델을 반환합니다.
MLFlow는 파이프라인 실행 중에 매개 변수와 메트릭을 기록하는 데 사용됩니다.
아래 셀은 IPython 매직을 사용하여 방금 만든 디렉터리에 학습 스크립트를 씁니다.
%%writefile {train_src_dir}/main.py
import os
import argparse
import pandas as pd
import mlflow
import mlflow.sklearn
from sklearn.ensemble import GradientBoostingClassifier
from sklearn.metrics import classification_report
from sklearn.model_selection import train_test_split

def main():
    """Main function of the script."""

    # input and output arguments
    parser = argparse.ArgumentParser()
    parser.add_argument("--data", type=str, help="path to input data")
    parser.add_argument("--test_train_ratio", type=float, required=False, default=0.25)
    parser.add_argument("--n_estimators", required=False, default=100, type=int)
    parser.add_argument("--learning_rate", required=False, default=0.1, type=float)
    parser.add_argument("--registered_model_name", type=str, help="model name")
    args = parser.parse_args()

    # Start Logging
    mlflow.start_run()

    # enable autologging
    mlflow.sklearn.autolog()

    ###################
    #<prepare the data>
    ###################
    print(" ".join(f"{k}={v}" for k, v in vars(args).items()))

    print("input data:", args.data)

    credit_df = pd.read_csv(args.data, header=1, index_col=0)

    mlflow.log_metric("num_samples", credit_df.shape[0])
    mlflow.log_metric("num_features", credit_df.shape[1] - 1)

    train_df, test_df = train_test_split(
        credit_df,
        test_size=args.test_train_ratio,
    )
    ####################
    #</prepare the data>
    ####################

    ##################
    #<train the model>
    ##################
    # Extracting the label column
    y_train = train_df.pop("default payment next month")

    # convert the dataframe values to array
    X_train = train_df.values

    # Extracting the label column
    y_test = test_df.pop("default payment next month")

    # convert the dataframe values to array
    X_test = test_df.values

    print(f"Training with data of shape {X_train.shape}")

    clf = GradientBoostingClassifier(
        n_estimators=args.n_estimators, learning_rate=args.learning_rate
    )
    clf.fit(X_train, y_train)

    y_pred = clf.predict(X_test)

    print(classification_report(y_test, y_pred))
    ###################
    #</train the model>
    ###################

    ##########################
    #<save and register model>
    ##########################
    # Registering the model to the workspace
    print("Registering the model via MLFlow")
    mlflow.sklearn.log_model(
        sk_model=clf,
        registered_model_name=args.registered_model_name,
        artifact_path=args.registered_model_name,
    )

    # Saving the model to a file
    mlflow.sklearn.save_model(
        sk_model=clf,
        path=os.path.join(args.registered_model_name, "trained_model"),
    )
    ###########################
    #</save and register model>
    ###########################

    # Stop Logging
    mlflow.end_run()

if __name__ == "__main__":
    main()
이 스크립트에서 볼 수 있듯이 모델이 학습되면 모델 파일이 저장되고 작업 영역에 등록됩니다. 이제 엔드포인트를 유추할 때 등록된 모델을 사용할 수 있습니다.
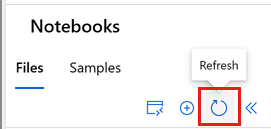
파일에서 새 폴더와 스크립트를 보려면 새로 고침을 선택해야 할 수도 있습니다.
명령 구성
이제 원하는 작업을 수행할 수 있는 스크립트와 스크립트를 실행할 컴퓨팅 클러스터가 있으므로 명령줄 작업을 실행할 수 있는 범용 명령을 사용하게 됩니다. 이 명령줄 작업은 시스템 명령을 직접 호출하거나 스크립트를 실행할 수 있습니다.
여기서는 입력 데이터, 분할 비율, 학습 속도 및 등록된 모델 이름을 지정하기 위한 입력 변수를 만듭니다. 명령 스크립트는 다음을 수행합니다.
- 학습 스크립트에 필요한 소프트웨어와 런타임 라이브러리를 정의하는 환경을 사용합니다. Azure Machine Learning은 일반적인 교육 및 유추 시나리오에 유용한 많은 큐레이팅된 환경 또는 바로 사용 가능한 환경을 제공합니다. 여기서는 이러한 환경 중 하나를 사용하게 됩니다. 자습서: Azure Machine Learning에서 모델 학습에서는 사용자 지정 환경을 만드는 방법을 알아봅니다.
- 명령줄 작업 자체를 구성합니다. 이 경우에는
python main.py입니다. 입력/출력은${{ ... }}표기법을 통해 명령에서 액세스할 수 있습니다. - 이 샘플에서는 인터넷에 있는 파일의 데이터에 액세스합니다.
- 컴퓨팅 리소스가 지정되지 않았으므로 자동으로 만들어진 서버리스 컴퓨팅 클러스터에서 스크립트가 실행됩니다.
from azure.ai.ml import command
from azure.ai.ml import Input

registered_model_name = "credit_defaults_model"

job = command(
    inputs=dict(
        data=Input(
            type="uri_file",
            path="https://azuremlexamples.blob.core.windows.net/datasets/credit_card/default_of_credit_card_clients.csv",
        ),
        test_train_ratio=0.2,
        learning_rate=0.25,
        registered_model_name=registered_model_name,
    ),
    code="./src/",  # location of source code
    command="python main.py --data ${{inputs.data}} --test_train_ratio ${{inputs.test_train_ratio}} --learning_rate ${{inputs.learning_rate}} --registered_model_name ${{inputs.registered_model_name}}",
    environment="AzureML-sklearn-1.0-ubuntu20.04-py38-cpu@latest",
    display_name="credit_default_prediction",
)
작업 제출
이제 Azure Machine Learning에서 실행할 작업을 제출할 차례입니다. 이번에는 ml_client에서 create_or_update를 사용합니다.
ml_client.create_or_update(job)
작업 출력 보기 및 작업 완료 대기
이전 셀의 출력에서 링크를 선택하여 Azure Machine Learning 스튜디오에서 작업을 봅니다.
이 작업의 출력은 Azure Machine Learning 스튜디오에서 다음과 같이 표시됩니다. 메트릭, 출력 등과 같은 다양한 세부 정보에 대한 탭을 살펴봅니다. 작업이 완료되면 학습 결과로 작업 영역에 모델이 등록됩니다.
Important
계속하려면 이 Notebook으로 돌아가기 전에 작업 상태가 완료될 때까지 기다립니다. 이 작업을 실행하는 데 2~3분이 걸립니다. 컴퓨팅 클러스터가 0개 노드로 축소되었고 사용자 지정 환경이 아직 빌드 중인 경우 더 오래 걸릴 수 있습니다(최대 10분).
모델을 온라인 엔드포인트로 배포
이제 Azure 클라우드(online endpoint)에서 기계 학습 모델을 웹 서비스로 배포합니다.
기계 학습 서비스를 배포하려면 등록한 모델을 사용합니다.
새 온라인 엔드포인트 만들기
이제 등록된 모델이 있으므로 온라인 엔드포인트를 만들 차례입니다. 엔드포인트 이름은 전체 Azure 지역에서 고유해야 합니다. 이 자습서에서는 UUID를 사용하여 고유한 이름을 만듭니다.
import uuid

# Creating a unique name for the endpoint
online_endpoint_name = "credit-endpoint-" + str(uuid.uuid4())[:8]
엔드포인트 만들기:
# Expect the endpoint creation to take a few minutes
from azure.ai.ml.entities import (
    ManagedOnlineEndpoint,
    ManagedOnlineDeployment,
    Model,
    Environment,
)

# create an online endpoint
endpoint = ManagedOnlineEndpoint(
    name=online_endpoint_name,
    description="this is an online endpoint",
    auth_mode="key",
    tags={
        "training_dataset": "credit_defaults",
        "model_type": "sklearn.GradientBoostingClassifier",
    },
)

endpoint = ml_client.online_endpoints.begin_create_or_update(endpoint).result()

print(f"Endpoint {endpoint.name} provisioning state: {endpoint.provisioning_state}")
참고 항목
엔드포인트 만들기에는 몇 분 정도 걸릴 것으로 예상됩니다.
엔드포인트가 만들어지면 아래와 같이 검색할 수 있습니다.
endpoint = ml_client.online_endpoints.get(name=online_endpoint_name)

print(
    f'Endpoint "{endpoint.name}" with provisioning state "{endpoint.provisioning_state}" is retrieved'
)
엔드포인트에 모델 배포
엔드포인트가 만들어지면 항목 스크립트를 사용하여 모델을 배포합니다. 각 엔드포인트에 여러 배포가 있을 수 있습니다. 이러한 배포에 대한 직접 트래픽은 규칙을 사용하여 지정할 수 있습니다. 여기에서 들어오는 트래픽의 100%를 처리하는 단일 배포를 만듭니다. 배포에 대한 색상 이름을 임의적으로 선택했습니다(예: 파란색, 녹색, 빨간색 배포).
Azure Machine Learning 스튜디오의 모델 페이지에서 등록된 모델의 최신 버전을 확인할 수 있습니다. 또는 아래 코드에서 사용할 최신 버전 번호를 검색합니다.
# Let's pick the latest version of the model
latest_model_version = max(
    [int(m.version) for m in ml_client.models.list(name=registered_model_name)]
)
print(f'Latest model is version "{latest_model_version}" ')
최신 버전의 모델을 배포합니다.
# picking the model to deploy. Here we use the latest version of our registered model
model = ml_client.models.get(name=registered_model_name, version=latest_model_version)

# Expect this deployment to take approximately 6 to 8 minutes.
# create an online deployment.
# if you run into an out of quota error, change the instance_type to a comparable VM that is available.
# Learn more on https://azure.microsoft.com/pricing/details/machine-learning/.
blue_deployment = ManagedOnlineDeployment(
    name="blue",
    endpoint_name=online_endpoint_name,
    model=model,
    instance_type="Standard_DS3_v2",
    instance_count=1,
)

blue_deployment = ml_client.begin_create_or_update(blue_deployment).result()
참고 항목
이 배포에는 약 6~8분이 소요될 것으로 예상됩니다.
배포가 완료되면 테스트할 준비가 된 것입니다.
샘플 쿼리를 사용하여 테스트
모델이 엔드포인트에 배포되면 모델을 사용하여 유추를 실행할 수 있습니다.
스코어 스크립트의 run 메서드에서 예상한 디자인에 따라 샘플 요청 파일을 작성합니다.
deploy_dir = "./deploy"
os.makedirs(deploy_dir, exist_ok=True)
%%writefile {deploy_dir}/sample-request.json
{
  "input_data": {
    "columns": [0,1,2,3,4,5,6,7,8,9,10,11,12,13,14,15,16,17,18,19,20,21,22],
    "index": [0, 1],
    "data": [
            [20000,2,2,1,24,2,2,-1,-1,-2,-2,3913,3102,689,0,0,0,0,689,0,0,0,0],
            [10, 9, 8, 7, 6, 5, 4, 3, 2, 1, 10, 9, 8, 7, 6, 5, 4, 3, 2, 1, 10, 9, 8]
        ]
  }
}
# test the blue deployment with some sample data
ml_client.online_endpoints.invoke(
    endpoint_name=online_endpoint_name,
    request_file="./deploy/sample-request.json",
    deployment_name="blue",
)
리소스 정리
엔드포인트를 사용하지 않으려면 엔드포인트를 삭제하여 리소스 사용을 중지합니다. 엔드포인트를 삭제하기 전에 다른 배포에서 엔드포인트를 사용하고 있지 않은지 확인합니다.
참고 항목
전체 삭제에는 약 20분 정도 소요됩니다.
ml_client.online_endpoints.begin_delete(name=online_endpoint_name)
컴퓨팅 인스턴스 중지
지금 사용하지 않으려면 컴퓨팅 인스턴스를 중지합니다.
- 스튜디오의 왼쪽 탐색 영역에서 컴퓨팅을 선택합니다.
- 맨 위 탭에서 컴퓨팅 인스턴스를 선택합니다.
- 목록에서 컴퓨팅 인스턴스를 선택합니다.
- 맨 위의 도구 모음에서 중지를 선택합니다.
모든 리소스 삭제
Important
사용자가 만든 리소스는 다른 Azure Machine Learning 자습서 및 방법 문서의 필수 구성 요소로 사용할 수 있습니다.
사용자가 만든 리소스를 사용하지 않으려면 요금이 발생하지 않도록 해당 리소스를 삭제합니다.
Azure Portal 맨 왼쪽에서 리소스 그룹을 선택합니다.
목록에서 만든 리소스 그룹을 선택합니다.
리소스 그룹 삭제를 선택합니다.
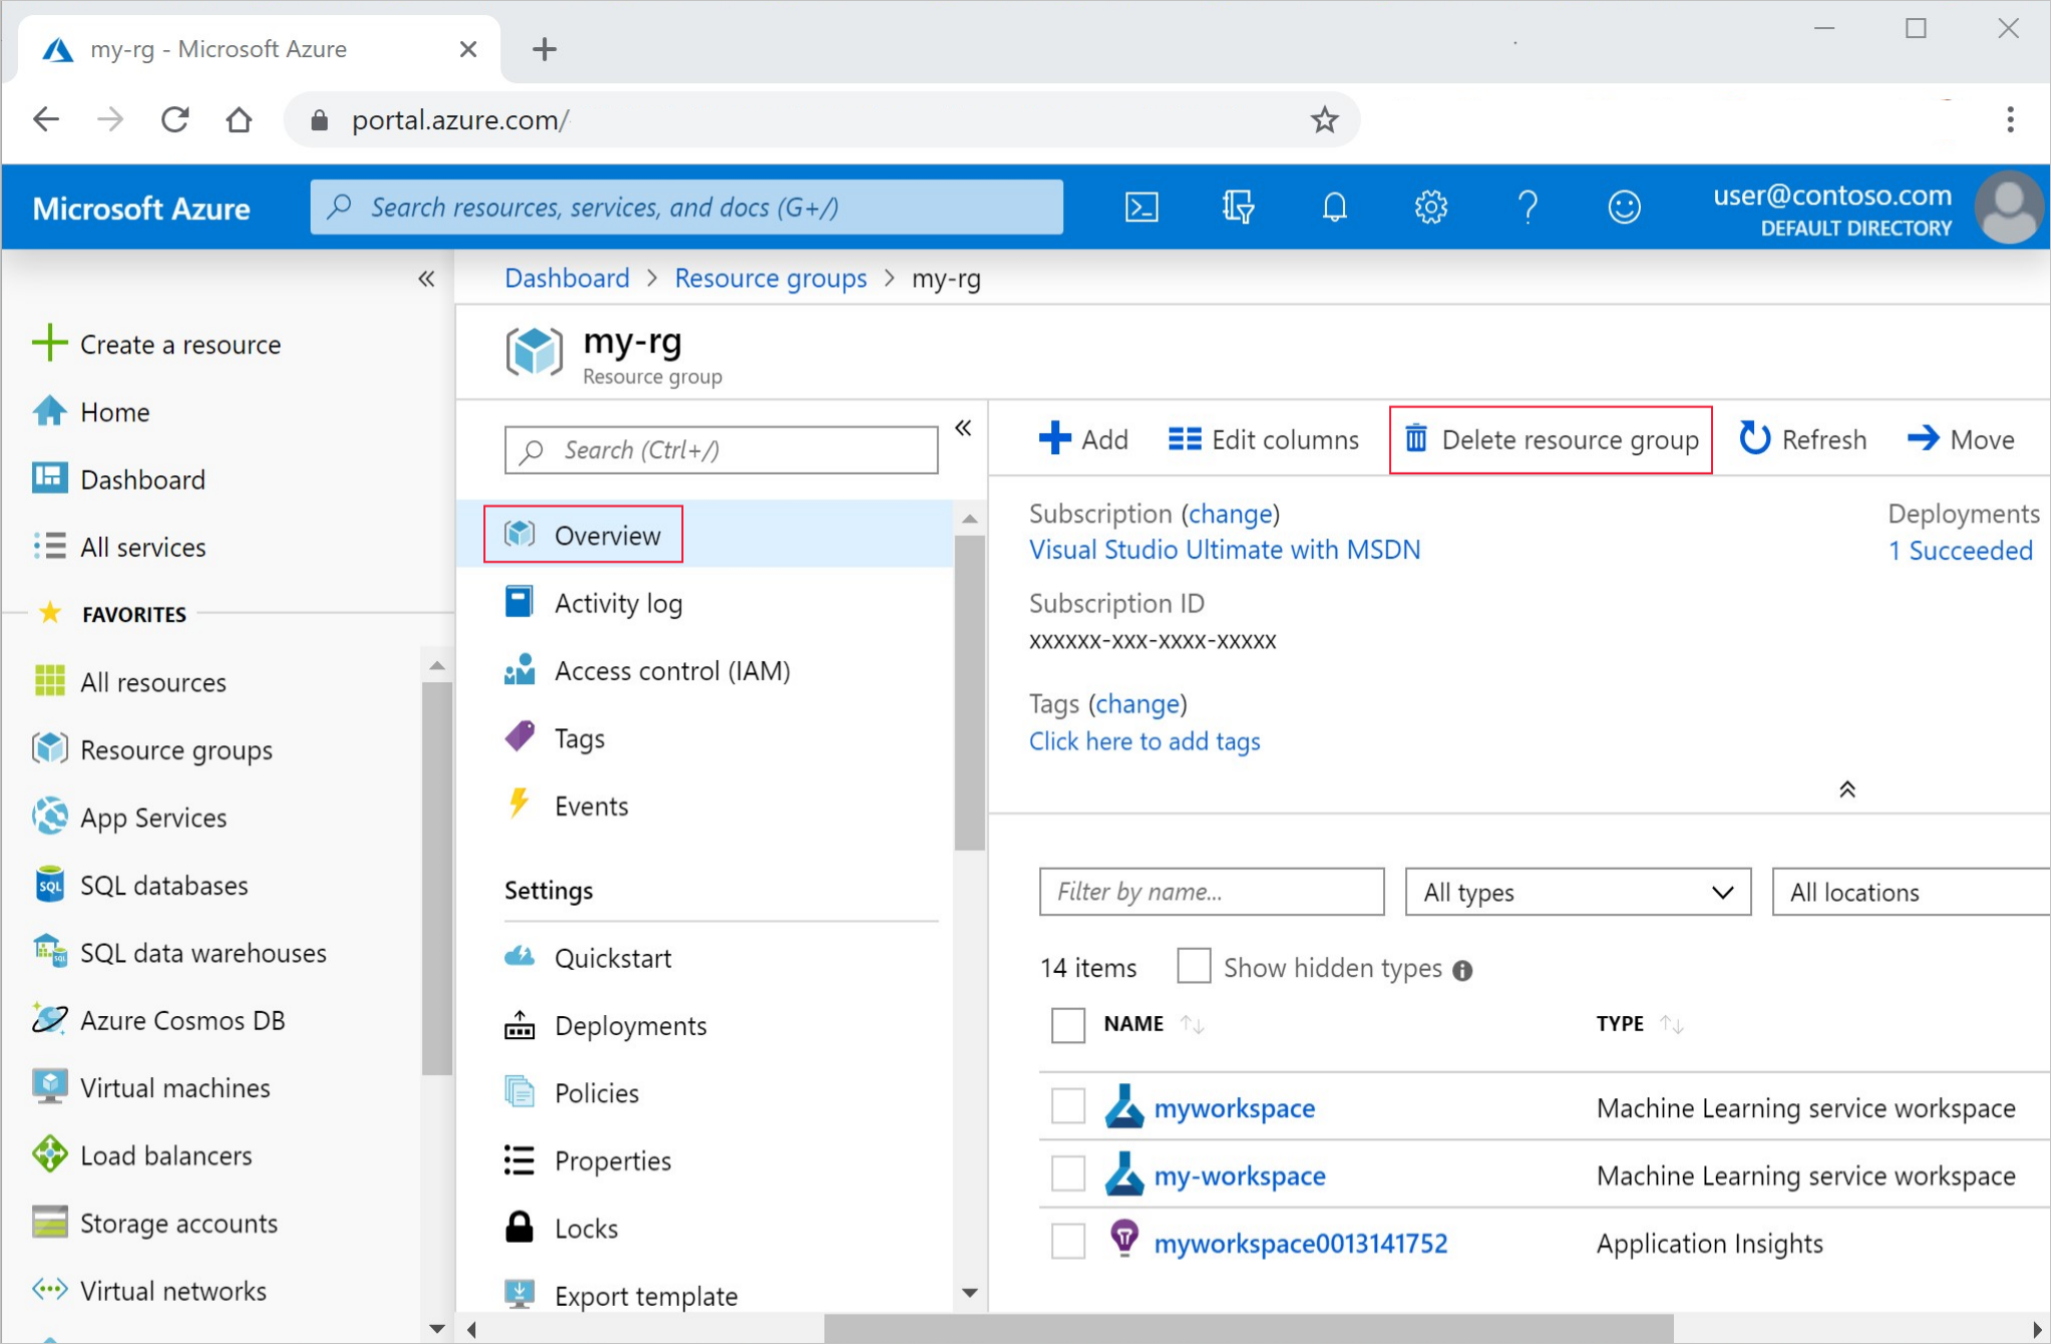
리소스 그룹 이름을 입력합니다. 그런 다음 삭제를 선택합니다.
다음 단계
이제 모델 학습 및 배포와 관련된 내용을 알았으니 다음 자습서에서 프로세스에 대해 자세히 알아봅니다.
| 자습서 | 설명 |
|---|---|
| Azure Machine Learning에서 데이터 업로드, 액세스 및 탐색 | 대용량 데이터를 클라우드에 저장하고 Notebooks 및 스크립트에서 검색 |
| 클라우드 워크스테이션에서 모델 개발 | 기계 학습 모델 프로토타이핑 및 개발 시작 |
| Azure Machine Learning에서 모델 학습 | 모델 학습에 대한 세부 정보 살펴보기 |
| 모델을 온라인 엔드포인트로 배포 | 모델 배포에 대한 세부 정보를 살펴봅니다. |
| 프로덕션 기계 학습 파이프라인 만들기 | 전체 기계 학습 작업을 다단계 워크플로로 분할합니다. |