Notification Hubs 및 Bing Spatial Data를 사용하여 위치 기반 푸시 알림 보내기
이 자습서에서는 Azure Notification Hubs 및 Bing 공간 데이터로 위치 기반 푸시 알림을 전달하는 방법을 알아봅니다.
이 자습서에서 수행하는 단계는 다음과 같습니다.
- 데이터 원본 설정
- UWP 애플리케이션 설정
- 백 엔드 설정
- UWP(유니버설 Windows 플랫폼) 앱에서 푸시 알림 테스트
필수 조건
- Azure 구독. Azure 구독이 아직 없는 경우 시작하기 전에 Azure 체험 계정을 만듭니다.
- Visual Studio 2015 업데이트 1 이상(Community Edition)
- 최신 버전의 Azure SDK.
- Bing 맵 개발자 센터 계정 (무료로 만들거나 Microsoft 계정으로 연결할 수 있음).
데이터 원본 설정
Bing 맵 개발자 센터에 로그인합니다.
위쪽 탐색 모음에서 데이터 원본을 선택하고, 데이터 원본 관리를 선택합니다.
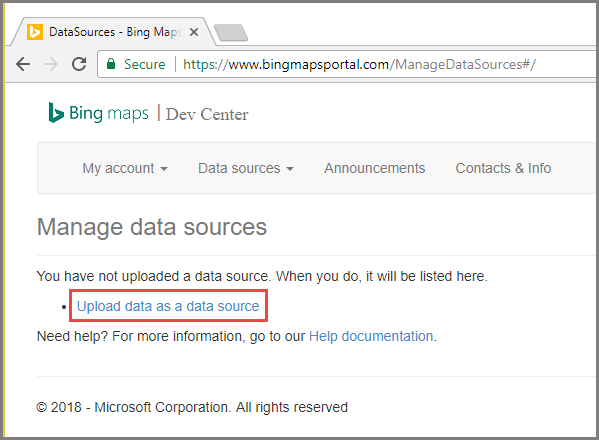
기존 데이터 원본이 없는 경우 데이터 원본 만들기에 대한 링크가 표시됩니다. 데이터 원본으로 데이터 업로드를 선택합니다. 데이터 원본>데이터 업로드 메뉴를 사용할 수도 있습니다.
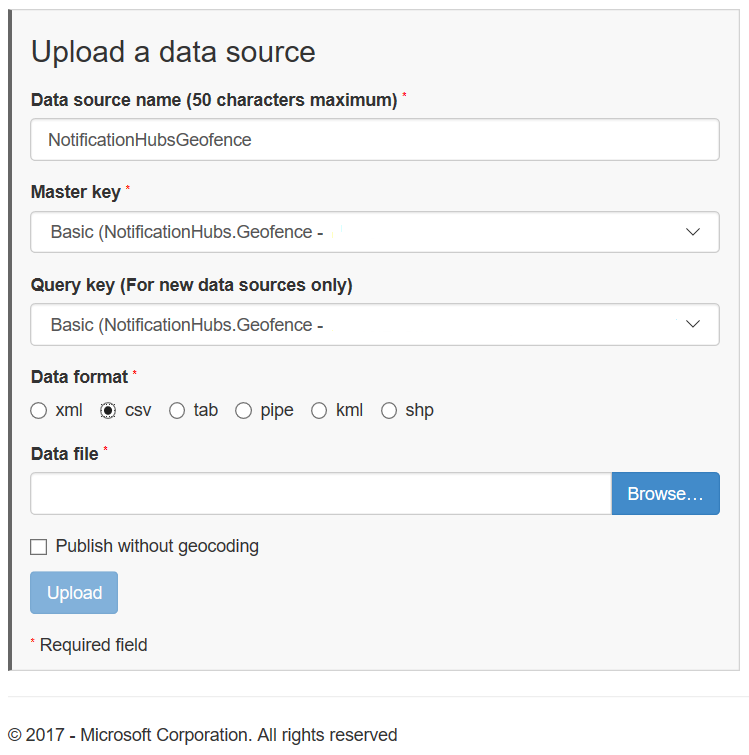
다음 콘텐츠로 하드 드라이브에
NotificationHubsGeofence.pipe파일을 만듭니다. 이 자습서에서는 San Francisco 해안 영역을 둘러싸는 파이프 기반 샘플 파일을 사용합니다.Bing Spatial Data Services, 1.0, TestBoundaries EntityID(Edm.String,primaryKey)|Name(Edm.String)|Longitude(Edm.Double)|Latitude(Edm.Double)|Boundary(Edm.Geography) 1|SanFranciscoPier|||POLYGON ((-122.389825 37.776598,-122.389438 37.773087,-122.381885 37.771849,-122.382186 37.777022,-122.389825 37.776598))파이프 파일은 이 엔터티를 나타냅니다.
데이터 원본 업로드 페이지에서 다음 작업을 수행합니다.
데이터 형식에 대해 파이프를 선택합니다.
이전 단계에서 만든
NotificationHubGeofence.pipe파일을 찾아 선택합니다.업로드 단추를 선택합니다.
참고 항목
쿼리 키와 다른 마스터 키에 대한 새 키를 지정하라는 메시지가 표시될 수 있습니다. 대시보드를 통해 새 키를 만들고 데이터 원본 업로드 페이지를 새로 고칩니다.
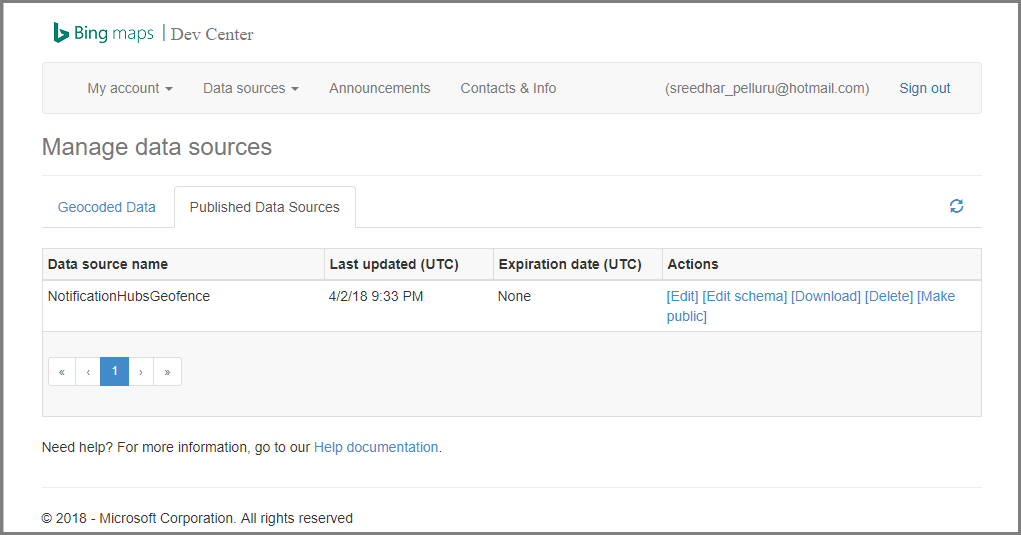
데이터 파일을 업로드하면 데이터 원본을 게시하는지 확인해야 합니다. 이전에 했던 것처럼 데이터 원본 ->데이터 원본 관리를 선택합니다.
목록에서 데이터 원본을 선택하고, 동작 열에서 게시를 선택합니다.
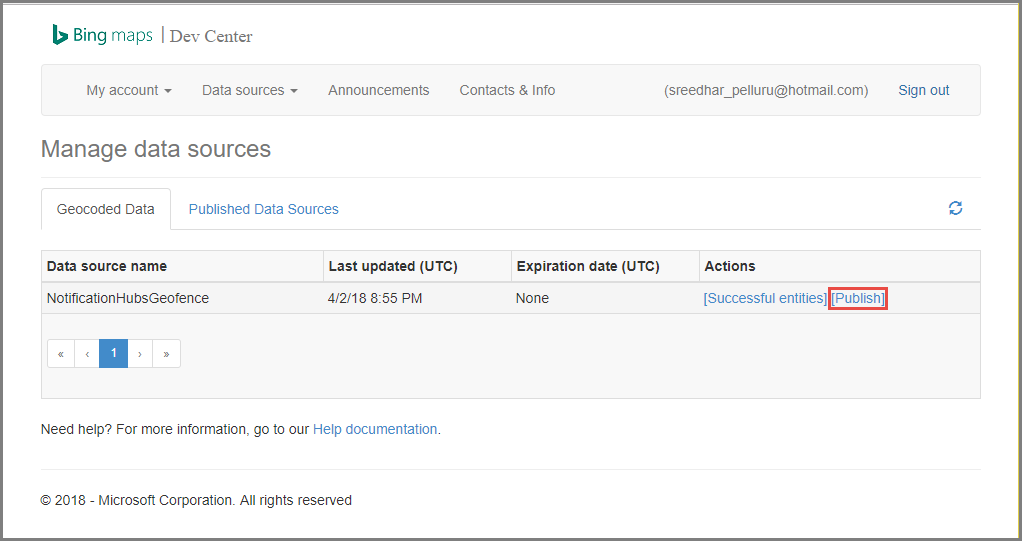
게시된 데이터 원본 탭으로 전환하고, 목록에 데이터 원본이 표시되는지 확인합니다.
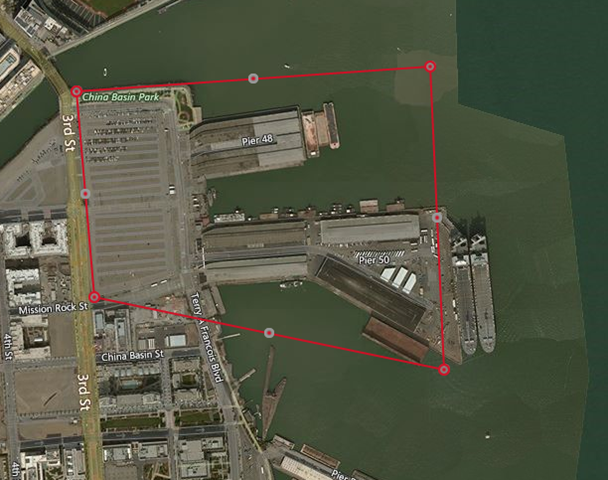
편집을 선택합니다. 데이터에 도입한 위치가(한 눈에) 표시됩니다.
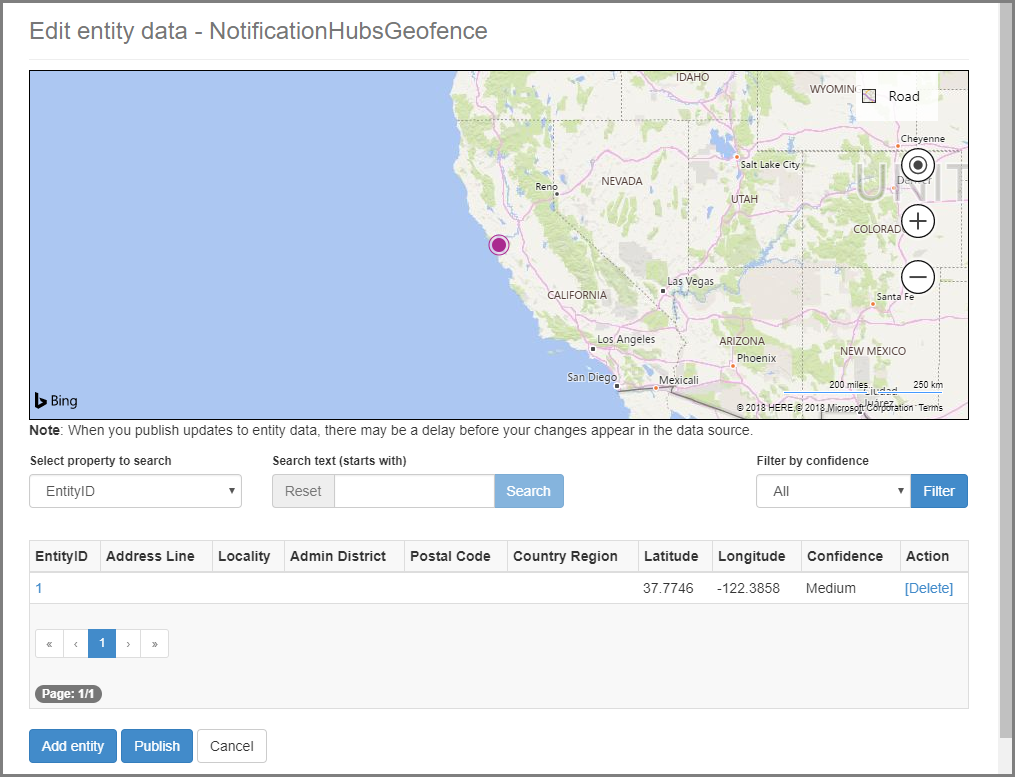
이 시점에서 포털은 사용자가 만든 지역 구분에 대한 경계를 보여주지 않습니다. 지정된 위치가 오른쪽 주변에 있다는 것을 확인하기만 하면 됩니다.
이제 데이터 원본에 대한 모든 요구 사항을 갖추었습니다. Bing 맵 개발자 센터에서 API 호출에 대한 요청 URL의 세부 정보를 얻으려면 데이터 원본을 선택하고 데이터 원본 정보를 선택합니다.
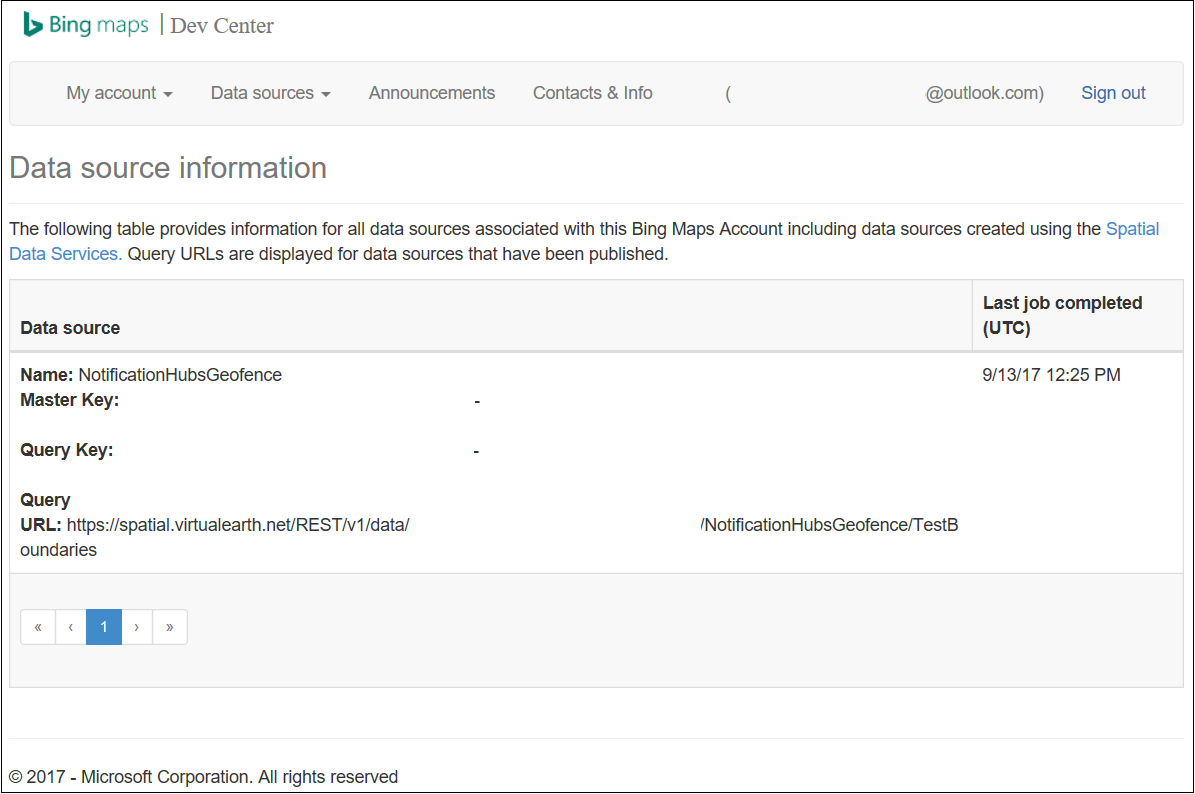
쿼리 URL은 디바이스가 현재 위치의 경계 내에 있는지 여부를 확인하기 위해 쿼리를 실행할 수 있는 엔드포인트입니다. 이 검사를 수행하려면 추가된 다음 매개 변수를 사용하여 쿼리 URL에 대한 가져오기 호출을 실행합니다.
?spatialFilter=intersects(%27POINT%20LONGITUDE%20LATITUDE)%27)&$format=json&key=QUERY_KEYBing 맵은 디바이스가 지역 구분 내에 있는지 여부를 확인하기 위해 자동으로 계산을 수행합니다. 브라우저(또는 cURL)를 통해 요청을 실행하면 표준 JSON 응답을 받습니다.
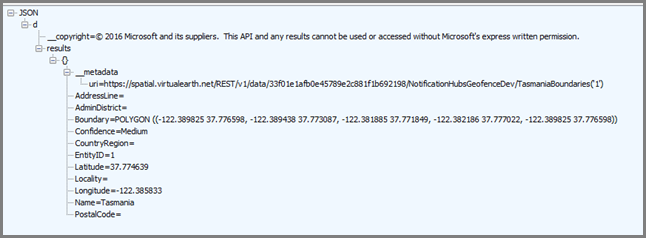
지점이 실제로 지정된 경계 내에 있는 경우에만 이 응답이 발생합니다. 그렇지 않은 경우 빈 결과 버킷을 받습니다.

UWP 애플리케이션 설정
Visual Studio에서 비어 있는 앱(유니버설 Windows)형식의 새 프로젝트를 시작합니다.
프로젝트 생성이 완료되면 앱 자체에 대한 테스트 도구가 있어야 합니다. 이제 지역 구분 인프라에 모든 항목을 설정해 보겠습니다. 이 솔루션에 대해 Bing 서비스를 사용하기 때문에 특정 위치 프레임을 쿼리할 수 있는 공용 REST API 엔드포인트가 있습니다.
http://spatial.virtualearth.net/REST/v1/data/다음 매개 변수를 지정하여 작동시킵니다.
데이터 원본 ID 및 데이터 원본 이름 – Bing 맵 API에서 데이터 원본은 작업하는 위치 및 업무 시간 등 다양하게 버킷 구성된 메타데이터를 포함합니다.
엔터티 이름 – 알림에 대한 참조 지점으로 사용하려는 엔터티.
Bing 맵 API 키 – Bing 개발자 센터 계정을 만들 경우 이전에 얻은 키입니다.
이제 데이터 원본을 준비했으므로 UWP 애플리케이션에서 작업을 시작할 수 있습니다.
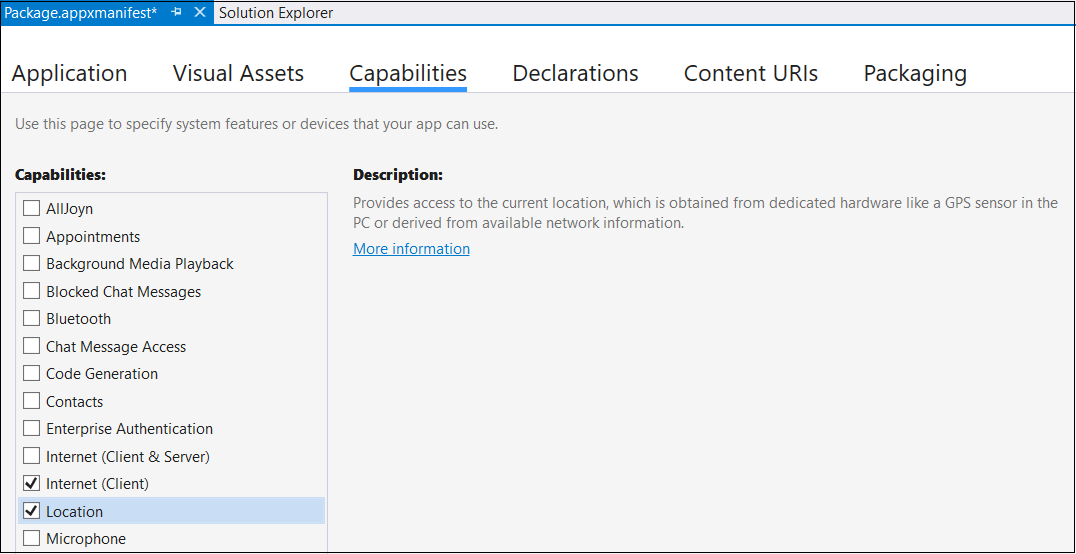
애플리케이션에 대한 위치 서비스를 사용하도록 설정합니다. 솔루션 탐색기에서
Package.appxmanifest파일을 엽니다.
방금 연 패키지 속성 탭에서 기능 탭으로 전환하고, 위치를 선택합니다.
솔루션에
Core라는 새 폴더를 만들고,LocationHelper.cs라는 새 파일을 추가합니다.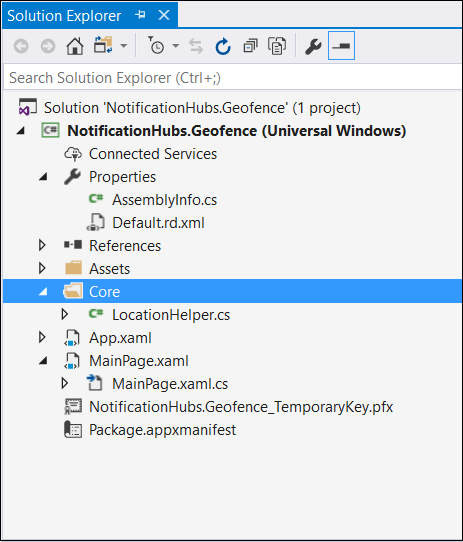
LocationHelper클래스에는 시스템 API를 통해 사용자 위치를 가져오는 코드가 있습니다.using System; using System.Threading.Tasks; using Windows.Devices.Geolocation; namespace NotificationHubs.Geofence.Core { public class LocationHelper { private static readonly uint AppDesiredAccuracyInMeters = 10; public async static Task<Geoposition> GetCurrentLocation() { var accessStatus = await Geolocator.RequestAccessAsync(); switch (accessStatus) { case GeolocationAccessStatus.Allowed: { Geolocator geolocator = new Geolocator { DesiredAccuracyInMeters = AppDesiredAccuracyInMeters }; return await geolocator.GetGeopositionAsync(); } default: { return null; } } } } }UWP 앱에서 사용자의 위치 가져오기에 대해 자세히 알아보려면 사용자의 위치 가져오기를 참조하세요.
위치 취득이 실제로 작동하는지 확인하려면 기본 페이지(
MainPage.xaml.cs)의 코드 쪽을 엽니다.MainPage생성자에서Loaded이벤트에 대한 새 이벤트 처리기를 만듭니다.public MainPage() { this.InitializeComponent(); this.Loaded += MainPage_Loaded; }이벤트 처리기의 구현은 다음과 같습니다.
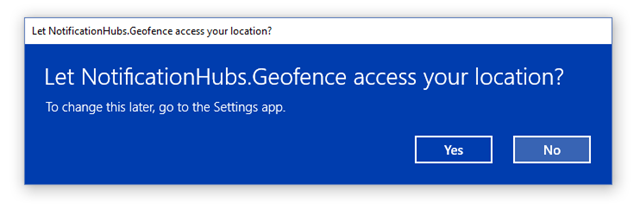
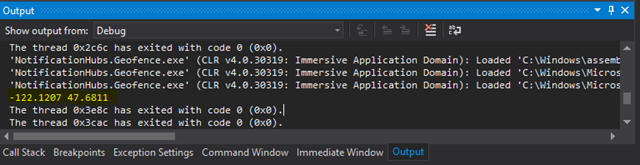
private async void MainPage_Loaded(object sender, RoutedEventArgs e)
{
    var location = await LocationHelper.GetCurrentLocation();

    if (location != null)
    {
        Debug.WriteLine(string.Concat(location.Coordinate.Longitude,
            " ", location.Coordinate.Latitude));
    }
}
애플리케이션을 실행하고 사용자의 위치에 액세스할 수 있도록 허용합니다.
애플리케이션이 시작되면 출력 창에서 좌표를 볼 수 있어야 합니다.
이제 위치 취득이 작동합니다. 로드됨 이벤트 처리기를 더 이상 사용하지 않기 때문에 원하는 경우 삭제할 수 있습니다.
다음 단계는 변경된 위치를 파악하는 작업입니다.
LocationHelper클래스에서PositionChanged에 대한 이벤트 처리기를 추가합니다.geolocator.PositionChanged += Geolocator_PositionChanged;구현은 출력 창에서 위치 좌표를 보여줍니다.
private static async void Geolocator_PositionChanged(Geolocator sender, PositionChangedEventArgs args)
{
    await CoreApplication.MainView.CoreWindow.Dispatcher.RunAsync(CoreDispatcherPriority.Normal, () =>
    {
        Debug.WriteLine(string.Concat(args.Position.Coordinate.Longitude, " ", args.Position.Coordinate.Latitude));
    });
}
백 엔드 설정
GitHub에서 .NET 백 엔드 샘플을 다운로드합니다.
다운로드가 완료되면
NotifyUsers폴더를 연 다음, Visual Studio에서NotifyUsers.sln파일을 엽니다.AppBackend프로젝트를 시작 프로젝트 로 설정하고 시작합니다.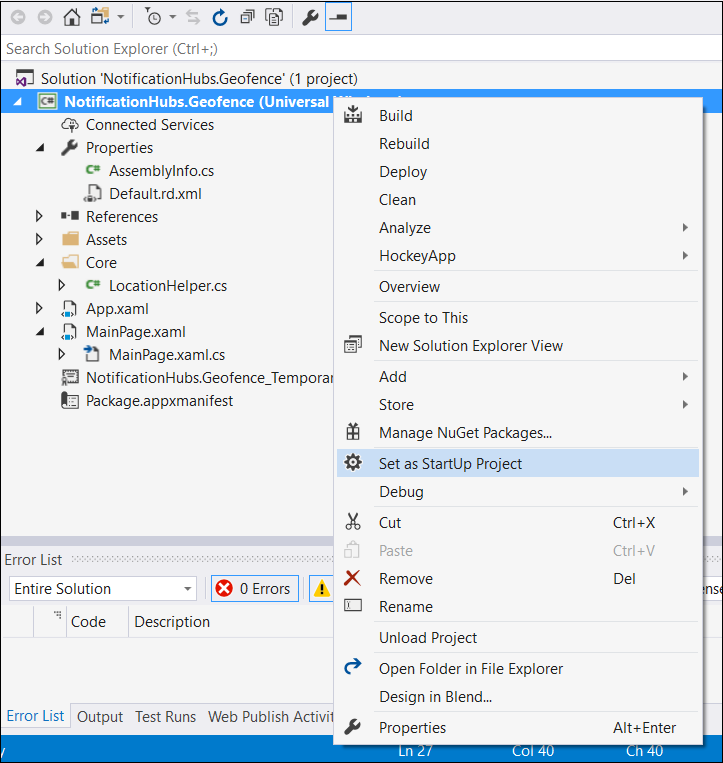
프로젝트는 이미 대상 디바이스에 푸시 알림을 전송하도록 구성되었으므로 두 가지가 필요합니다. 알림 허브에 맞는 연결 문자열을 지정하고 사용자가 지역 구분 내에 있는 경우 알림을 보내도록 경계 식별을 추가합니다.
연결 문자열을 구성하려면
Models폴더에서Notifications.cs를 엽니다.NotificationHubClient.CreateClientFromConnectionString함수는 Azure Portal에서 얻을 수 있는 알림 허브에 대한 정보를 포함해야 합니다(설정에서 액세스 정책 페이지를 살펴봄). 업데이트된 구성 파일을 저장합니다.Bing 맵 API 결과에 대한 모델을 만듭니다.
Models폴더를 열고 추가>클래스를 선택하는 것이 가장 쉬운 방법입니다. 이 EventHandler의 이름을GeofenceBoundary.cs로 지정합니다. 완료되면 첫 번째 섹션에서 가져온 API 응답에서 JSON을 복사합니다. Visual Studio에서 편집>선택하여 붙여넣기>JSON을 클래스로 붙여넣기를 사용합니다.이러한 방식으로 의도한 대로 개체를 역직렬화하도록 합니다. 결과 클래스 집합은 다음 클래스와 유사합니다.
namespace AppBackend.Models
{
    public class Rootobject
    {
        public D d { get; set; }
    }

    public class D
    {
        public string __copyright { get; set; }
        public Result[] results { get; set; }
    }

    public class Result
    {
        public __Metadata __metadata { get; set; }
        public string EntityID { get; set; }
        public string Name { get; set; }
        public float Longitude { get; set; }
        public float Latitude { get; set; }
        public string Boundary { get; set; }
        public string Confidence { get; set; }
        public string Locality { get; set; }
        public string AddressLine { get; set; }
        public string AdminDistrict { get; set; }
        public string CountryRegion { get; set; }
        public string PostalCode { get; set; }
    }

    public class __Metadata
    {
        public string uri { get; set; }
    }
}
다음으로
Controllers>NotificationsController.cs을 엽니다. 대상 경도 및 위도에 대한 계정에 게시 호출을 업데이트합니다. 이를 수행하려면 함수 시그니처latitude및longitude라는 두 문자열을 추가합니다.public async Task<HttpResponseMessage> Post(string pns, [FromBody]string message, string to_tag, string latitude, string longitude)ApiHelper.cs이라는 프로젝트 내에서 새 클래스를 만들고 Bing에 연결하는 데 사용하여 지점 경계 교차점을 확인합니다. 다음 코드에 나와 있는 것처럼IsPointWithinBounds함수를 구현합니다.public class ApiHelper { public static readonly string ApiEndpoint = "{YOUR_QUERY_ENDPOINT}?spatialFilter=intersects(%27POINT%20({0}%20{1})%27)&$format=json&key={2}"; public static readonly string ApiKey = "{YOUR_API_KEY}"; public static bool IsPointWithinBounds(string longitude,string latitude) { var json = new WebClient().DownloadString(string.Format(ApiEndpoint, longitude, latitude, ApiKey)); var result = JsonConvert.DeserializeObject<Rootobject>(json); if (result.d.results != null && result.d.results.Count() > 0) { return true; } else { return false; } } }Important
API 엔드포인트를 앞의 Bing 개발자 센터에서 얻은 쿼리 URL로 대체하도록 합니다(API 키에도 동일하게 적용).
쿼리에 대한 결과가 있는 경우, 즉, 지정된 지점이 지역 구분의 경계 내에 있으므로 함수는
true을 반환합니다. 결과가 없는 경우 Bing은 지점이 조회 프레임 외부에 있다고 알리므로 함수는false를 반환합니다.NotificationsController.cs에서 전환 문 앞을 검사합니다.if (ApiHelper.IsPointWithinBounds(longitude, latitude)) { switch (pns.ToLower()) { case "wns": //// Windows 8.1 / Windows Phone 8.1 var toast = @"<toast><visual><binding template=""ToastText01""><text id=""1"">" + "From " + user + ": " + message + "</text></binding></visual></toast>"; outcome = await Notifications.Instance.Hub.SendWindowsNativeNotificationAsync(toast, userTag); // Windows 10 specific Action Center support toast = @"<toast><visual><binding template=""ToastGeneric""><text id=""1"">" + "From " + user + ": " + message + "</text></binding></visual></toast>"; outcome = await Notifications.Instance.Hub.SendWindowsNativeNotificationAsync(toast, userTag); break; } }
UWP 앱에서 푸시 알림 테스트
UWP 앱에서 이제 알림을 테스트할 수 있어야 합니다.
LocationHelper클래스 내에서 새 함수SendLocationToBackend를 만듭니다.public static async Task SendLocationToBackend(string pns, string userTag, string message, string latitude, string longitude) { var POST_URL = "http://localhost:8741/api/notifications?pns=" + pns + "&to_tag=" + userTag + "&latitude=" + latitude + "&longitude=" + longitude; using (var httpClient = new HttpClient()) { try { await httpClient.PostAsync(POST_URL, new StringContent("\"" + message + "\"", System.Text.Encoding.UTF8, "application/json")); } catch (Exception ex) { Debug.WriteLine(ex.Message); } } }참고 항목
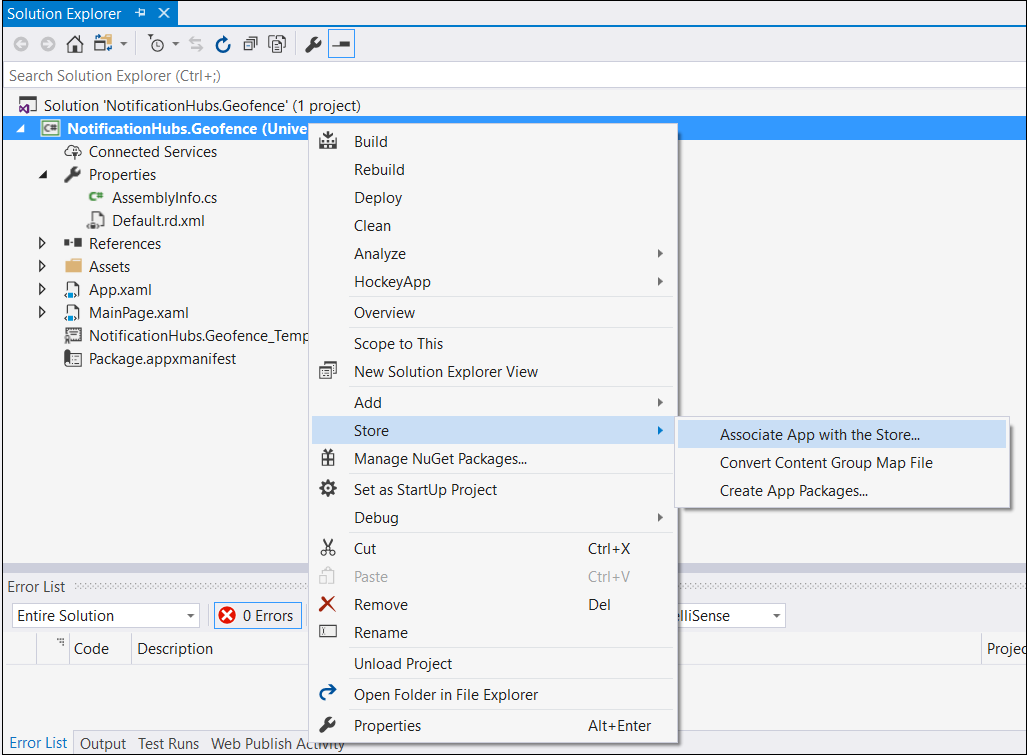
POST_URL을 배포된 웹 애플리케이션의 위치로 설정합니다. 이제 로컬에서 실행해도 되지만 공용 버전을 배포할 경우 외부 공급자로 호스트해야 합니다.푸시 알림을 위해 UWP 앱을 등록합니다. Visual Studio에서 프로젝트>저장>스토어와 앱 연결을 선택합니다.
개발자 계정에 로그인하면 기존 앱을 선택하거나 새로 만들고 해당 앱과 패키지를 연결해야 합니다.
개발자 센터로 이동하고 만든 앱을 엽니다. 서비스>푸시 알림>라이브 서비스 사이트를 선택합니다.

사이트에서 애플리케이션 암호 및 패키지 SID를 적어둡니다. Azure Portal에서 알림 허브를 열고, 설정>Notification Services>WNS(Windows)를 선택하고 필수 필드에 정보를 입력해야 합니다.
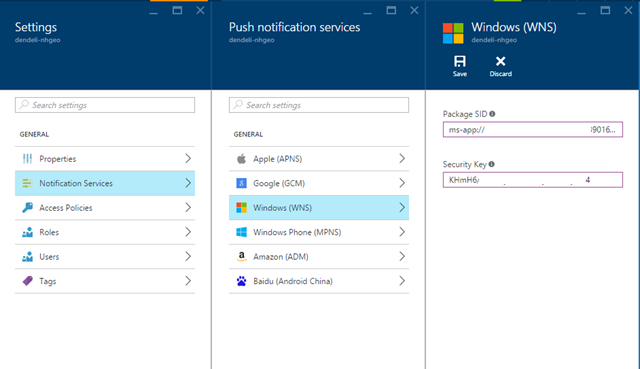
저장을 선택합니다.
솔루션 탐색기에서 참조를 열고 NuGet 패키지 관리를 선택합니다. Microsoft Azure Service Bus 관리된 라이브러리에 참조를 추가합니다.
WindowsAzure.Messaging.Managed를 검색하고 프로젝트에 추가합니다.
테스트하기 위해
MainPage_Loaded이벤트 처리기를 다시 한 번 만들고, 이 코드 조각을 추가합니다.var channel = await PushNotificationChannelManager.CreatePushNotificationChannelForApplicationAsync(); var hub = new NotificationHub("HUB_NAME", "HUB_LISTEN_CONNECTION_STRING"); var result = await hub.RegisterNativeAsync(channel.Uri); // Displays the registration ID so you know it was successful if (result.RegistrationId != null) { Debug.WriteLine("Reg successful."); }코드는 알림 허브로 앱을 등록합니다. 준비가 되었습니다.
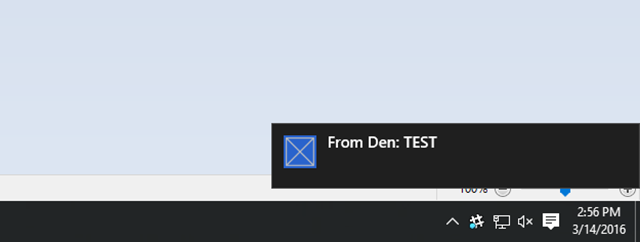
LocationHelper의Geolocator_PositionChanged처리기 내부에 강제로 지역 구분 내부의 위치를 배치하는 테스트 코드의 조각을 추가할 수 있습니다.await LocationHelper.SendLocationToBackend("wns", "TEST_USER", "TEST", "37.7746", "-122.3858");실제 좌표(현재 경계 내에 없을 수 있음)를 전달하지 않고 미리 정의된 테스트 값을 사용하기 때문에 업데이트에 표시된 알림을 확인합니다.
다음 단계
솔루션이 프로덕션을 준비하도록 수행해야 하는 두 가지 단계가 있습니다.
- 먼저 지역 구분이 동적인지 확인해야 합니다. 기존 데이터 원본 내에서 새 경계를 업로드할 수 있도록 Bing API와 함께 몇 가지 작업이 필요합니다. 자세한 내용은 Bing 공간 Data Services API 설명서를 참조하세요.
- 둘째, 맞는 참가자에게 배달했는지 확인하기 위해 작업을 수행하는 경우 태그 지정을 통해 대상을 지정할 수 있습니다.
이 자습서에 표시된 솔루션은 다양한 대상 플랫폼이 있을 수 있는 시나리오를 설명하므로 시스템 관련 기능에 대해 지역 구분을 제한하지 않습니다. 즉, 유니버설 Windows 플랫폼은 지역 구분을 기본으로 검색하는 기능을 제공합니다.