Application Gateway에서 Web Application Firewall v2 사용자 지정 규칙 만들기 및 사용
Azure Application Gateway의 WAF(Web Application Firewall) v2는 웹 애플리케이션을 보호합니다. 이 보호 기능은 OWASP(Open Web Application Security Project) CRS(핵심 규칙 집합)를 통해 제공됩니다. 경우에 따라 특정 요구 사항을 충족하기 위해 사용자 지정 규칙을 만들어야 할 수도 있습니다. WAF 사용자 지정 규칙에 대한 자세한 내용은 사용자 지정 웹 애플리케이션 방화벽 규칙 개요를 참조하세요.
이 문서에서는 v2 WAF에서 만들고 사용할 수 있는 몇 가지 사용자 지정 규칙의 예를 보여줍니다. Azure PowerShell을 사용하여 사용자 지정 규칙으로 WAF를 배포하는 방법을 알아보려면 Azure PowerShell을 사용하여 Web Application Firewall 사용자 지정 규칙 구성을 참조하세요.
이 문서에 표시된 JSON 코드 조각은 ApplicationGatewayWebApplicationFirewallPolicies 리소스에서 파생됩니다.
참고 항목
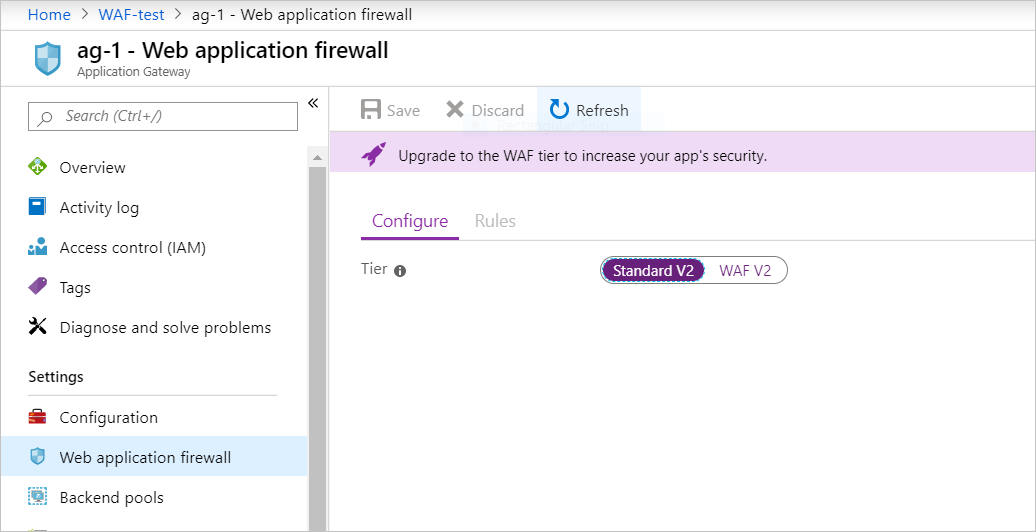
Application Gateway에서 WAF 계층을 사용하지 않는 경우 Application Gateway를 WAF 계층으로 업그레이드하는 옵션이 오른쪽 창에 표시됩니다.
예 1
웹 사이트 크롤링에서 차단하려는 evilbot이라는 봇이 있음을 알고 있습니다. 이 경우 요청 헤더에서 User-Agent evilbot을 차단합니다.
논리: p
$variable = New-AzApplicationGatewayFirewallMatchVariable `
   -VariableName RequestHeaders `
   -Selector User-Agent

$condition = New-AzApplicationGatewayFirewallCondition `
   -MatchVariable $variable `
   -Operator Contains `
   -MatchValue "evilbot" `
   -Transform Lowercase `
   -NegationCondition $False

$rule = New-AzApplicationGatewayFirewallCustomRule `
   -Name blockEvilBot `
   -Priority 2 `
   -RuleType MatchRule `
   -MatchCondition $condition `
   -Action Block `
   -State Enabled
해당 JSON은 다음과 같습니다.
{
  "customRules": [
    {
      "name": "blockEvilBot",
      "priority": 2,
      "ruleType": "MatchRule",
      "action": "Block",
      "state": "Enabled",
      "matchConditions": [
        {
          "matchVariables": [
            {
              "variableName": "RequestHeaders",
              "selector": "User-Agent"
            }
          ],
          "operator": "Contains",
          "negationConditon": false,
          "matchValues": [
            "evilbot"
          ],
          "transforms": [
            "Lowercase"
          ]
        }
      ]
    }
  ]
}
이 사용자 지정 규칙을 사용하여 배포된 WAF를 보려면 Azure PowerShell을 사용하여 웹 애플리케이션 방화벽 사용자 지정 규칙 구성을 참조하세요.
예 1a
정규식을 사용하여 동일한 작업을 수행할 수 있습니다.
$variable = New-AzApplicationGatewayFirewallMatchVariable `
   -VariableName RequestHeaders `
   -Selector User-Agent

$condition = New-AzApplicationGatewayFirewallCondition `
   -MatchVariable $variable `
   -Operator Regex `
   -MatchValue "evilbot" `
   -Transform Lowercase `
   -NegationCondition $False

$rule = New-AzApplicationGatewayFirewallCustomRule `
   -Name blockEvilBot `
   -Priority 2 `
   -RuleType MatchRule `
   -MatchCondition $condition `
   -Action Block `
   -State Enabled
해당 JSON:
{
  "customRules": [
    {
      "name": "blockEvilBot",
      "priority": 2,
      "ruleType": "MatchRule",
      "action": "Block",
      "state": "Enabled",
      "matchConditions": [
        {
          "matchVariables": [
            {
              "variableName": "RequestHeaders",
              "selector": "User-Agent"
            }
          ],
          "operator": "Regex",
          "negationConditon": false,
          "matchValues": [
            "evilbot"
          ],
          "transforms": [
            "Lowercase"
          ]
        }
      ]
    }
  ]
}
예제 2
GeoMatch 연산자를 사용하여 미국에서만 트래픽을 허용하고 관리형 규칙을 적용하려고 합니다.
$variable = New-AzApplicationGatewayFirewallMatchVariable `
   -VariableName RemoteAddr `

$condition = New-AzApplicationGatewayFirewallCondition `
   -MatchVariable $variable `
   -Operator GeoMatch `
   -MatchValue "US" `
   -Transform Lowercase `
   -NegationCondition $True

$rule = New-AzApplicationGatewayFirewallCustomRule `
   -Name "allowUS" `
   -Priority 2 `
   -RuleType MatchRule `
   -MatchCondition $condition `
   -Action Block `
   -State Enabled
해당 JSON:
{
  "customRules": [
    {
      "name": "allowUS",
      "priority": 2,
      "ruleType": "MatchRule",
      "action": "Block",
      "state": "Enabled",
      "matchConditions": [
        {
          "matchVariables": [
            {
              "variableName": "RemoteAddr"
            }
          ],
          "operator": "GeoMatch",
          "negationConditon": true,
          "matchValues": [
            "US"
          ],
          "transforms": [
            "Lowercase"
          ]
        }
      ]
    }
  ]
}
예 3
198.168.5.0/24 범위의 IP 주소로 들어오는 모든 요청을 차단하려고 합니다.
이 예제에서는 IP 주소 범위로 들어오는 모든 트래픽을 차단합니다. 규칙 이름은 myrule1이고 우선 순위는 10으로 설정됩니다.
논리: p
$variable1 = New-AzApplicationGatewayFirewallMatchVariable `
   -VariableName RemoteAddr

$condition1 = New-AzApplicationGatewayFirewallCondition `
   -MatchVariable $variable1 `
   -Operator IPMatch `
   -MatchValue "192.168.5.0/24" `
   -NegationCondition $False

$rule = New-AzApplicationGatewayFirewallCustomRule `
   -Name myrule1 `
   -Priority 10 `
   -RuleType MatchRule `
   -MatchCondition $condition1 `
   -Action Block `
   -State Enabled
해당 JSON은 다음과 같습니다.
{
  "customRules": [
    {
      "name": "myrule1",
      "priority": 10,
      "ruleType": "MatchRule",
      "action": "Block",
      "state": "Enabled",
      "matchConditions": [
        {
          "matchVariables": [
            {
              "variableName": "RemoteAddr"
            }
          ],
          "operator": "IPMatch",
          "negationConditon": false,
          "matchValues": [
            "192.168.5.0/24"
          ],
          "transforms": []
        }
      ]
    }
  ]
}
해당 CRS 규칙: SecRule REMOTE_ADDR "@ipMatch 192.168.5.0/24" "id:7001,deny"
예시 4
이 예제에서는 User-Agent evilbot 및 192.168.5.0/24 범위의 트래픽을 차단하려고 합니다. 이 작업을 수행하려면 2개의 개별 일치 조건을 만든 다음, 둘 다 동일한 규칙에 둘 수 있습니다. 이 구성을 사용하면 User-Agent 헤더에 있는 두 evilbot및 192.168.5.0/24 범위의 IP 주소가 모두 일치하는 경우 요청이 차단됩니다.
논리: p 및 q
$variable1 = New-AzApplicationGatewayFirewallMatchVariable `
   -VariableName RemoteAddr

 $variable2 = New-AzApplicationGatewayFirewallMatchVariable `
   -VariableName RequestHeaders `
   -Selector User-Agent

$condition1 = New-AzApplicationGatewayFirewallCondition `
   -MatchVariable $variable1 `
   -Operator IPMatch `
   -MatchValue "192.168.5.0/24" `
   -NegationCondition $False

$condition2 = New-AzApplicationGatewayFirewallCondition `
   -MatchVariable $variable2 `
   -Operator Contains `
   -MatchValue "evilbot" `
   -Transform Lowercase `
   -NegationCondition $False

 $rule = New-AzApplicationGatewayFirewallCustomRule `
   -Name myrule `
   -Priority 10 `
   -RuleType MatchRule `
   -MatchCondition $condition1, $condition2 `
   -Action Block `
   -State Enabled
해당 JSON은 다음과 같습니다.
{
  "customRules": [
    {
      "name": "myrule",
      "priority": 10,
      "ruleType": "MatchRule",
      "action": "Block",
      "state": "Enabled",
      "matchConditions": [
        {
          "matchVariables": [
            {
              "variableName": "RemoteAddr"
            }
          ],
          "operator": "IPMatch",
          "negationConditon": false,
          "matchValues": [
            "192.168.5.0/24"
          ],
          "transforms": []
        },
        {
          "matchVariables": [
            {
              "variableName": "RequestHeaders",
              "selector": "User-Agent"
            }
          ],
          "operator": "Contains",
          "negationConditon": false,
          "matchValues": [
            "evilbot"
          ],
          "transforms": [
            "Lowercase"
          ]
        }
      ]
    }
  ]
}
예제 5
이 예제에서는 요청이 IP 주소 범위 192.168.5.0/24를 벗어나거나 사용자 에이전트 문자열이 chrome이 아닌 경우(사용자가 chrome 브라우저를 사용하지 않음) 차단하려고 합니다. 이 논리는 or를 사용하기 때문에 다음 예제에서 볼 수 있듯이 두 조건은 별도의 규칙에 있습니다. myrule1 및 myrule2는 모두 트래픽을 차단하기 위해 일치해야 합니다.
논리: not(p 및 q) = not p or not q.
$variable1 = New-AzApplicationGatewayFirewallMatchVariable `
   -VariableName RemoteAddr

$variable2 = New-AzApplicationGatewayFirewallMatchVariable `
   -VariableName RequestHeaders `
   -Selector User-Agent

$condition1 = New-AzApplicationGatewayFirewallCondition `
   -MatchVariable $variable1 `
   -Operator IPMatch `
   -MatchValue "192.168.5.0/24" `
   -NegationCondition $True

$condition2 = New-AzApplicationGatewayFirewallCondition `
   -MatchVariable $variable2 `
   -Operator Contains `
   -MatchValue "chrome" `
   -Transform Lowercase `
   -NegationCondition $True

$rule1 = New-AzApplicationGatewayFirewallCustomRule `
   -Name myrule1 `
   -Priority 10 `
   -RuleType MatchRule `
   -MatchCondition $condition1 `
   -Action Block `
   -State Enabled

$rule2 = New-AzApplicationGatewayFirewallCustomRule `
   -Name myrule2 `
   -Priority 20 `
   -RuleType MatchRule `
   -MatchCondition $condition2 `
   -Action Block `
   -State Enabled
해당 JSON:
{
  "customRules": [
    {
      "name": "myrule1",
      "priority": 10,
      "ruleType": "MatchRule",
      "action": "Block",
      "state": "Enabled",
      "matchConditions": [
        {
          "matchVariables": [
            {
              "variableName": "RemoteAddr"
            }
          ],
          "operator": "IPMatch",
          "negationConditon": true,
          "matchValues": [
            "192.168.5.0/24"
          ],
          "transforms": []
        }
      ]
    },
    {
      "name": "myrule2",
      "priority": 20,
      "ruleType": "MatchRule",
      "action": "Block",
      "state": "Enabled",
      "matchConditions": [
        {
          "matchVariables": [
            {
              "variableName": "RequestHeaders",
              "selector": "User-Agent"
            }
          ],
          "operator": "Contains",
          "negationConditon": true,
          "matchValues": [
            "chrome"
          ],
          "transforms": [
            "Lowercase"
          ]
        }
      ]
    }
  ]
}
예제 6
알려진 특정 사용자 에이전트의 요청만 허용하려고 합니다.
여기서 사용되는 논리는 or이고 모든 값이 User-Agent 헤더에 있으므로 모든 MatchValues는 쉼표로 구분된 목록에 있을 수 있습니다.
논리: p or q or r
$variable = New-AzApplicationGatewayFirewallMatchVariable `
   -VariableName RequestHeaders `
   -Selector User-Agent
$condition = New-AzApplicationGatewayFirewallCondition `
   -MatchVariable $variable `
   -Operator Equal `
   -MatchValue @('user1', 'user2') `
   -NegationCondition $True

$rule = New-AzApplicationGatewayFirewallCustomRule `
   -Name BlockUnknownUserAgents `
   -Priority 2 `
   -RuleType MatchRule `
   -MatchCondition $condition `
   -Action Block `
   -State Enabled
해당 JSON:
{
  "customRules": [
    {
      "name": "BlockUnknownUserAgents",
      "priority": 2,
      "ruleType": "MatchRule",
      "action": "Block",
      "state": "Enabled",
      "matchConditions": [
        {
          "matchVariables": [
            {
              "variableName": "RequestHeaders",
              "selector": "User-Agent"
            }
          ],
          "operator": "Equal",
          "negationConditon": true,
          "matchValues": [
            "user1",
            "user2"
          ],
          "transforms": []
        }
      ]
    }
  ]
}
예제 7
Application Gateway 앞에 배포된 Azure Front Door를 보는 것은 드문 일이 아닙니다. Application Gateway에서 수신한 트래픽이 Front Door 배포에서 들어오는지 확인하기 위해 X-Azure-FDID 헤더에 예상된 고유 값이 포함되어 있는지 확인하는 것이 가장 좋습니다. Azure Front Door를 사용하여 애플리케이션에 대한 액세스를 보호하는 방법에 대한 자세한 내용은 Azure Front Door로만 백 엔드에 대한 액세스를 잠그는 방법을 참조하세요.
논리: p 아님
$expectedFDID = "xxxxxxxx-xxxx-xxxx-xxxx-xxxxxxxxxxxx"
$variable = New-AzApplicationGatewayFirewallMatchVariable `
   -VariableName RequestHeaders `
   -Selector X-Azure-FDID

$condition = New-AzApplicationGatewayFirewallCondition `
   -MatchVariable $variable `
   -Operator Equal `
   -MatchValue $expectedFDID `
   -Transform Lowercase `
   -NegationCondition $True

$rule = New-AzApplicationGatewayFirewallCustomRule `
   -Name blockNonAFDTraffic `
   -Priority 2 `
   -RuleType MatchRule `
   -MatchCondition $condition `
   -Action Block `
   -State Enabled
해당 JSON은 다음과 같습니다.
{
  "customRules": [
    {
      "name": "blockNonAFDTraffic",
      "priority": 2,
      "ruleType": "MatchRule",
      "action": "Block",
      "state": "Enabled",
      "matchConditions": [
        {
          "matchVariables": [
            {
              "variableName": "RequestHeaders",
              "selector": "X-Azure-FDID"
            }
          ],
          "operator": "Equal",
          "negationConditon": true,
          "matchValues": [
            "xxxxxxxx-xxxx-xxxx-xxxx-xxxxxxxxxxxx"
          ],
          "transforms": [
            "Lowercase"
          ]
        }
      ]
    }
  ]
}
다음 단계
사용자 지정 규칙을 만든 후에는 WAF 로그를 보는 방법을 알아볼 수 있습니다. 자세한 내용은 Application Gateway 진단을 참조하세요.