Git command reference
TFS 2017 | TFS 2015
Visual Studio 2019 | Visual Studio 2017 | Visual Studio 2015
Visual Studio's Team Explorer lets you do most common Git tasks that you'll need for your daily work. From the Visual Studio View menu, open Team Explorer or use the Ctrl+, Ctrl+M hotkey.
Team Explorer and the Git command-line work great together. When you make updates and run commands through one interface, you'll see those changes reflected in the other.
Git Installation instructions are available if you don't have Git installed on your computer.
Tip
Windows users: If you aren't using Visual Studio, install Git for Windows to set up the Git Credential Manager. The credential manager makes it easy to authenticate with Azure Repos.
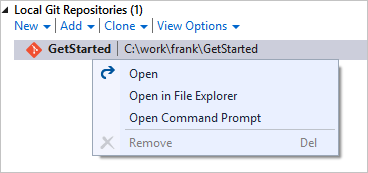
While in Visual Studio, open a command prompt in your repo from Team Explorer's Connect view. Right-click your local repo and select Open Command Prompt
Important
Some commands require having specific Git permissions in Azure Repos to complete.
Repos
How do I?
Git command-line
Visual Studio
Create a repo in a new folder
git init foldername
Select the Connect button ( ![]() ) in Team Explorer to open the Connect view, then select New under Local Git repositories
) in Team Explorer to open the Connect view, then select New under Local Git repositories
Create a repo with code in an existing folder
git init foldernamegit add --allgit commit -m "Initial commit"
Create the repo from the command line, then open Team Explorer's Connect view and select Add under Local Git repositories
Create a repo from an existing Visual Studio solution
git init foldernamecd foldernamegit add --allgit commit -m "Initial commit"
Open the solution and select Publish (  ) from the status bar in the lower right.
Create a new repo in your Project
Not applicable
From the web, select Repos (or Code if you haven't enabled the new navigation preview), then select the drop-down next to the current repo name and choose New Repository...
Clone a repo into a local folder
git clone URL foldername
Select Clone under Local Git repositories in Team Explorer's Connect view
Clone a repo in your Project
git clone URL foldername
Open the Connect view in Team Explorer and right-click the Git repo in your Project under the account name. Select Clone...
Add an existing repo to Visual Studio
Not applicable
Open the solution file in Visual Studio (this will automatically add the repo to Team Explorer) or select Add under Local Git repositories in the Connect view
Delete the Git repo and history, but keep the current version of the files
Delete the hidden .git folder created at the root of the repo
Delete the hidden .git folder created at the root of the repo from Windows Explorer or the command line
Delete a local repo and all files
Delete the folder containing your repo from your computer's filesystem
Close any open solutions using files in the repo, then delete the folder containing your repo from your computer's filesystem.
Delete a repo in your Project
Not applicable
Not applicable, instead see Delete an existing repo
Add a remote
git remote add name url
Open the repository using the Connect view in Team Explorer, then open the Settings view in Team Explorer. Select Repository Settings, and select Add under Remotes
Update a remote
git remote set-url name url
Open the repository using the Connect view in Team Explorer, then open the Settings view in Team Explorer. Select Repository Settings, and select Edit under Remotes
For additional information, see the following resources:
- Create a new repo
- Clone an existing repo
- Share your code in Git with the command line
- Share your code in Git with Visual Studio
- Create a new repo in your Project
- Delete a repo in your Project
Branches
How do I?
Git command-line
Visual Studio
Create a new branch
git branch branchname
Open the Branches view in Team Explorer, then right-click a branch and choose New Local Branch From...
Swap to a different branch
git checkout branchname
Open the Branches view in Team Explorer, then double click a local branch. Alternatively, click the current branch name from the status bar and select a different branch.
Create and switch to a new branch
git checkout -b branchname
Open the Branches view in Team Explorer, then right-click a branch and choose New Local Branch From...
Delete a local branch
git branch -d branchname
Open the Branches view in Team Explorer, then right-click the branch and select Delete. You must be checked out to a different branch than the one you want to delete.
Delete a remote branch
git push origin --delete branchname
Open the Branches view in Team Explorer, expand the remote that has the branch you want to delete. Right-click the remote and select Delete Branch from Remote
Lock a branch, preventing updates to it
Not applicable.
From the web, select the Branches tab while viewing your repo. Select the ... next to the branch you want to lock and choose Lock. Unlock the branch with Unlock.
Set a default branch in your Azure DevOps repo
Not applicable.
Select the settings icon on the web ( ![]() ), then select the Version Control tab. Select your Git repository, then select the ... next to the branch name and choose Set as default branch.
), then select the Version Control tab. Select your Git repository, then select the ... next to the branch name and choose Set as default branch.
Set a compare branch for pull requests in Azure DevOps repo
Not applicable.
From the web, select the Branches tab while viewing your repo. Select the ... next to the branch you want to lock and choose Compare branch.
For additional information, see the following resources:
- Create and manage your work in branches
- Managing your Git branches in Azure DevOps Services/TFS
- Delete a Git branch on your Azure DevOps Services/TFS repo
- Lock and unlock an Azure DevOps Services/TFS branch
Commits
How do I?
Git command-line
Visual Studio
Create a new commit
git commit -m "message"
Open the Changes view in Team Explorer. Stage changes by right-clicking on the modified files and selecting Stage. Enter a commit message and select Commit Staged.
Amend the last commit with staged changes
git commit --amend -m "Updated message"
Open the Changes view in Team Explorer, stage your changes, then select Amend Previous Commit from the Actions drop-down.
Stage all file changes
git add --all
Open the Changes view in Team Explorer. Select the + icon in the Changes list to stage all changes for the next commit.
Stage a specific file change
git add filename
Open the Changes view in Team Explorer. Stage changes by right-clicking on the changed file and selecting Stage.
Review unstaged changes
git status --untracked
Open the Changes view in Team Explorer. Unstaged changes are listed under Changes section.
Delete a file
git rm filenamegit commit -m "filename"
Delete the file through Solution Explorer, the command line, or any other means. Right-click the deleted file in Team Explorer's Changes view and select Stage. Select Commit Staged to commit the deletion.
Move a file
git mv filenamegit commit -m "Moved filename"
Move a file from one location to another in your repo through Solution Explorer, the command line, or any other means. Right-click the moved file in Team Explorer's Changes view and select Stage . Select Commit Staged to commit the move.
Tag a commit
git tag -a tagname -m "description"
Open the Changes view in Team Explorer, then choose View history..." from the Action drop-down. Locate the commit in the History view, then right-click and select Create Tag
To learn more, see Save your work with commits.
Compare files and versions
How do I?
Git command-line
Visual Studio
Compare the current contents of a single file and the contents in the last commit
git diff HEAD filename
Right-click the change in the Changes view in Team Explorer and select Compare with unmodified.
Compare your current version with a branch
git diff branchname
Right-click a file in Solution Explorer and select View History..., then select both on the latest commit on your current branch and the latest commit on the remote branch. Right-click and select Compare
Compare changes between two branches
git diff branchname1 branchname2
Right-click a file in Solution Explorer and select View History..., then select the most recent commits for both branches. Right-click and select Compare
To learn more, see Compare versions and review history.
Sync changes
How do I?
Git command-line
Visual Studio
Download new branches and commits from a remote repo, but do not merge them into your local branches
git fetch
Open the Sync view from Team Explorer and select Fetch.
Merge updates from a remote repo into your local repo
git pull remote branchname
While working on the branch in your local repo, open the Sync view in Team Explorer, then select Pull.
Publish a local branch to a remote repo
git push -u remote branchname
Open the Sync view in Team Explorer and select Publish under Outgoing Commits.
Synchronize your local branch with a remote branch, pushing your local changes and pulling remote ones
git pull remote branchname
git push -u remote branchname
Open the Sync view in Team Explorer. Select Sync.
Force push a branch, rewriting the remote branch history with the history of your current branch
git push --force -u origin remote_branchname
Use command line
For additional information, see the following resources:
Merge and rebase
How do I?
Git command-line
Visual Studio
Merge a branch into the current branch
git merge branchname
In the Team Explorer Branches view, right-click the branch you want to merge and select Merge From... Verify the options set and select Merge.
Merge a remote branch into the current branch
git pull origin branchname
In the Team Explorer Branches view, right-click the remote branch you want to merge and select Merge From... Verify the options set and select Merge.
Rebase your current branch onto the history of another branch
git rebase branchname
In the Team Explorer Branches view, right-click the branch you want to rebase your current branch changes onto and select Rebase Onto...
Do an interactive rebase of the last n commits
git rebase -i HEAD~n (Linux and macOS)git rebase -i "HEAD^n" (Windows)
Not applicable
Cherry-pick a commit into the current branch
git cherry-pick commitID
Open the Changes view in Team Explorer, then choose View history... from the Action drop-down. Locate the commit in the History view, then right-click and select Cherry-pick
For additional information, see the following resources:
Undo
Warning
If you are not an experienced Git user, exercise caution when using the reset command. Learn more
How do I?
Git command-line
Visual Studio
Revert all changes and roll back to the most recent commit
git reset --hard HEAD
Open the Changes view in Team Explorer. Select **Actions and choose View History from the drop-down. Right-click the commit where the branch is currently located and select Reset and Delete changes....
Revert staging of files, but keep file changes
git reset --mixed HEAD
Open the Changes view in Team Explorer. Select **Actions and choose View History from the drop-down. Right-click the commit where the branch is currently located and select Reset and Keep changes....
Delete untracked files
git clean -f
In the Changes view in Team Explorer, right-click the files to remove under Changes marked with [add] and select Delete.
Reset your local branch to the most recent commit on a remote branch
git reset --hard remote/branchname
(for example, git reset --hard origin/main)
Right-click the branch from Team Explorer's Branches view and select Reset and Delete changes....
Revert a commit pushed to a remote repository
git revert commitID
Open the Changes view in Team Explorer. Select **Actions and choose View History from the drop-down. Right-click the commit to revert and select Revert.