Microsoft Entra 인증을 사용하여 연결

이 문서에서는 Microsoft JDBC Driver for SQL Server에서 Microsoft Entra 인증 기능을 사용하는 Java 애플리케이션을 개발하는 방법을 설명합니다.
Microsoft Entra 인증을 사용할 수 있습니다. 이것은 Microsoft Entra ID의 ID를 사용하여 Azure SQL Database, Azure SQL Managed Instance 및 Azure Synapse Analytics에 연결하는 메커니즘입니다. Microsoft Entra 인증을 사용하여 데이터베이스 사용자의 ID를 중앙에서 관리하고 SQL Server 인증 대신 사용할 수 있습니다. JDBC 드라이버를 사용하면 JDBC 연결 스트링에서 Azure SQL에 연결할 Microsoft Entra 자격 증명을 지정할 수 있습니다. Microsoft Entra 인증을 구성하는 방법에 대한 자세한 내용은 Microsoft Entra 인증을 사용하여 Azure SQL로 커넥트 방문하세요.
Microsoft JDBC Driver for SQL Server에서 Microsoft Entra 인증을 지원하는 연결 속성은 다음과 같습니다.
- 인증: 이 속성을 사용하여 연결에 사용할 SQL 인증 방법을 지정합니다.
가능한 값은 다음과 같습니다.
ActiveDirectoryManagedIdentity
- 드라이버 버전 8.3.1 이후,
authentication=ActiveDirectoryMSI를 사용하여 “ID” 지원을 사용하도록 설정된 Azure 리소스에서 Azure SQL Database/Synapse Analytics에 연결할 수 있습니다. 필요에 따라 이 인증 모드와 함께 연결/데이터 원본 속성에 msiClientId를 지정할 수 있습니다.msiClientId에는 연결 설정을 위한 accessToken을 획득하는 데 사용할 관리 ID의 클라이언트 ID가 포함되어야 합니다. 드라이버 버전 v12.2 이후,authentication=ActiveDirectoryManagedIdentity를 사용하여 “ID” 지원을 사용하도록 설정된 Azure 리소스에서 Azure SQL Database/Synapse Analytics에 연결할 수도 있습니다. 필요에 따라 이제 관리 ID의 클라이언트 ID를 속성에user설정할 수도 있습니다. 자세한 내용은 ActiveDirectoryManagedIdentity 인증을 사용하여 연결을 참조하세요.
- 드라이버 버전 8.3.1 이후,
ActiveDirectoryDefault
- 드라이버 버전 12.2
authentication=ActiveDirectoryDefault부터 Azure ID 클라이언트 라이브러리에서 DefaultAzureCredential을 통해 Azure SQL/Synapse Analytics에 연결하는 데 사용할 수 있습니다. 자세한 내용은 ActiveDirectoryDefault 인증 모드를 사용하여 연결을 참조하세요.
- 드라이버 버전 12.2
ActiveDirectoryIntegrated
- 드라이버 버전 6.0 이후,
authentication=ActiveDirectoryIntegrated를 사용하여 통합 인증을 통해 Azure SQL/Synapse Analytics에 연결할 수 있습니다. 이 인증 모드를 사용하려면 온-프레미스 ADFS(Active Directory Federation Services)를 클라우드의 Microsoft Entra ID와 페더레이션해야 합니다. 설정되면 네이티브 라이브러리mssql-jdbc_auth-<version>-<arch>.dll을 애플리케이션 클래스 경로에 추가하거나 플랫폼 간 인증 지원을 위한 Kerberos 티켓을 설정하여 연결할 수 있습니다. 도메인 가입 머신에 로그인한 경우 자격 증명을 제공하지 않고도 Azure SQL/Azure Synapse Analytics에 액세스할 수 있습니다. 자세한 내용은 ActiveDirectoryIntegrated 인증 모드를 사용하여 연결을 참조하세요.
- 드라이버 버전 6.0 이후,
ActiveDirectoryPassword
- 드라이버 버전 v6.0 이후,
authentication=ActiveDirectoryPassword를 사용하여 Microsoft Entra 사용자 이름 및 암호를 통해 Azure SQL/Synapse Analytics에 연결할 수 있습니다. 자세한 내용은 ActiveDirectoryPassword 인증 모드를 사용하여 연결을 참조하세요.
- 드라이버 버전 v6.0 이후,
ActiveDirectoryInteractive
- 드라이버 버전 9.2 이후,
authentication=ActiveDirectoryInteractive를 사용하여 대화형 인증 흐름(다단계 인증)을 통해 Azure SQL/Synapse Analytics에 연결할 수 있습니다. 자세한 내용은 ActiveDirectoryInteractive 인증 모드를 사용하여 연결을 참조하세요.
- 드라이버 버전 9.2 이후,
ActiveDirectoryServicePrincipal
- 드라이버 버전 9.2 이후,
authentication=ActiveDirectoryServicePrincipal은 userName 속성에 애플리케이션/클라이언트 ID를 지정하고 암호 속성에서 서비스 주체 ID의 비밀을 지정하여 Azure SQL/Synapse Analytics에 연결하는 데 사용할 수 있습니다. 자세한 내용은 ActiveDirectoryServicePrincipal 인증 모드를 사용하여 연결을 참조하세요.
- 드라이버 버전 9.2 이후,
ActiveDirectoryServicePrincipalCertificate
- 드라이버 버전 12.4 이후,
authentication=ActiveDirectoryServicePrincipalCertificate은 userName 속성에 애플리케이션/클라이언트 ID를 지정하고clientCertificate속성에서 서비스 주체 인증서의 위치를 지정하여 Azure SQL Database/Synapse Analytics에 연결하는 데 사용할 수 있습니다. 자세한 내용은 ActiveDirectoryServicePrincipalCertificate 인증 모드를 사용하여 연결을 참조하세요.
- 드라이버 버전 12.4 이후,
SqlPassword
authentication=SqlPassword를 사용하여 사용자 이름/사용자 및 암호 속성을 사용하여 SQL Server에 연결합니다.
NotSpecified
- 이러한 인증 방법이 필요하지 않을 경우
authentication=NotSpecified를 사용하거나 기본값으로 둡니다.
- 이러한 인증 방법이 필요하지 않을 경우
accessToken: 액세스 토큰을 사용하여 SQL Database에 연결하려면 이 연결 속성을 사용합니다.
accessToken은 DriverManager 클래스에서getConnection()메서드의 Properties 매개 변수를 사용하여 설정할 수 있습니다. 연결 URL에서는 사용할 수 없습니다.
자세한 내용은 연결 속성 설정 페이지에서 인증 속성을 참조하세요.
클라이언트 설치 요구 사항
기본 드라이버 시스템 요구 사항 외에도 다음 인증 모드에는 더 많은 요구 사항이 있습니다.
다음 표에서는 각 인증 모드 및 드라이버 버전에 필요한 라이브러리 종속성을 나열합니다. 종속성의 종속성도 필요합니다.
| 인증 옵션 | 드라이버 버전 | 라이브러리 종속성 |
|---|---|---|
ActiveDirectoryPasswordActiveDirectoryIntegrated |
6.0 | Adal4j 1.3.0 |
ActiveDirectoryPasswordActiveDirectoryIntegrated |
6.2.2 - 6.4 | Adal4j 1.4.0 |
ActiveDirectoryPasswordActiveDirectoryIntegrated |
7.0 | Adal4j 1.6.0 |
ActiveDirectoryPasswordActiveDirectoryIntegrated |
7.2 | Adal4j 1.6.3Client-Runtime-for-AutoRest 1.6.5 |
ActiveDirectoryPasswordActiveDirectoryIntegrated |
7.4 - 8.2 | Adal4jl4j 1.6.4Client-Runtime-for-AutoRest 1.7.0 |
ActiveDirectoryPasswordActiveDirectoryIntegrated |
8.4 | Adal4j 1.6.5Client-Runtime-for-AutoRest 1.7.4 |
ActiveDirectoryPasswordActiveDirectoryIntegratedActiveDirectoryInteractiveActiveDirectoryServicePrincipal |
9.2 | msal4j 1.7.1 |
ActiveDirectoryPasswordActiveDirectoryIntegratedActiveDirectoryInteractiveActiveDirectoryServicePrincipal |
9.4 | msal4j 1.10.1 |
ActiveDirectoryPasswordActiveDirectoryIntegratedActiveDirectoryInteractiveActiveDirectoryServicePrincipal |
10.2 | msal4j 1.11.0 |
ActiveDirectoryPasswordActiveDirectoryIntegratedActiveDirectoryInteractiveActiveDirectoryServicePrincipal |
11.2 | msal4j 1.11.3 |
ActiveDirectoryPasswordActiveDirectoryIntegratedActiveDirectoryInteractiveActiveDirectoryServicePrincipal |
12.2 | msal4j 1.13.3 |
ActiveDirectoryManagedIdentityActiveDirectoryMSI |
12.2 | azure-identity 1.7.0 |
ActiveDirectoryPasswordActiveDirectoryIntegratedActiveDirectoryInteractiveActiveDirectoryServicePrincipal |
12.4 | msal4j 1.13.8 |
ActiveDirectoryManagedIdentityActiveDirectoryMSI |
12.4 | azure-identity 1.9.0 |
ActiveDirectoryPasswordActiveDirectoryIntegratedActiveDirectoryInteractiveActiveDirectoryServicePrincipal |
12.6 | msal4j 1.14.1 |
ActiveDirectoryManagedIdentityActiveDirectoryMSI |
12.6 | azure-identity 1.11.1 |
ActiveDirectoryManagedIdentity 인증 모드를 사용하여 연결
이 인증 모드는 버전 7.2부터 지원됩니다. 그것을 사용하려면 authentication=ActiveDirectoryMSI를 지정합니다. 버전 12.2부터 authentication=ActiveDirectoryManagedIdentity도 지정할 수 있습니다.
클라이언트 설정 요구 사항에 나열된 라이브러리 종속성 요구 사항 외에도 이 기능에는 다음과 같은 요구 사항이 있습니다.
대상 데이터베이스에는 CONNECT 권한이 있는 포함된 데이터베이스 사용자가 있어야 합니다. 포함된 사용자는 Azure Resource의 시스템이 할당한 관리 ID 또는 사용자가 할당한 관리 ID 또는 관리 ID가 속한 그룹 중 하나를 나타내야 합니다.
클라이언트 환경은 Azure 리소스여야 하며 "ID" 기능 지원이 사용하도록 설정되어 있어야 합니다. 다음 표에서는 각 JDBC 드라이버 버전에서 지원하는 Azure 서비스를 나열합니다.
다음 예제에서는 authentication=ActiveDirectoryManagedIdentity 모드를 사용하는 방법을 보여줍니다. 관리 ID에 대해 구성된 Azure 리소스 내에서 이 예제를 실행합니다.
예제를 실행하려면 다음 줄에서 서버/데이터베이스 이름을 자신의 서버/데이터베이스 이름으로 바꿉니다.
ds.setServerName("msentra-managed-demo.database.windows.net"); // replace 'msentra-managed-demo' with your server name
ds.setDatabaseName("demo"); // replace with your database name
//Optional
ds.setMSIClientId("94de34e9-8e8c-470a-96df-08110924b814"); // Replace with Client ID of user-assigned managed identity to be used
ActiveDirectoryMSI 인증 모드를 사용하는 예제는 다음과 같습니다.
import java.sql.Connection;
import java.sql.ResultSet;
import java.sql.Statement;

import com.microsoft.sqlserver.jdbc.SQLServerDataSource;

public class MsEntraMSI {
    public static void main(String[] args) throws Exception {

        SQLServerDataSource ds = new SQLServerDataSource();
        ds.setServerName("msentra-managed-demo.database.windows.net"); // Replace with your server name
        ds.setDatabaseName("demo"); // Replace with your database name
        ds.setAuthentication("ActiveDirectoryMSI");
        // Optional
        ds.setMSIClientId("94de34e9-8e8c-470a-96df-08110924b814"); // Replace with Client ID of user-assigned managed identity to be used

        try (Connection connection = ds.getConnection();
                Statement stmt = connection.createStatement();
                ResultSet rs = stmt.executeQuery("SELECT SUSER_SNAME()")) {
            if (rs.next()) {
                System.out.println("You have successfully logged on as: " + rs.getString(1));
            }
        }
    }
}
다음 예제는 authentication=ActiveDirectoryManagedIdentity 모드의 사용 방법을 보여줍니다.
import java.sql.Connection;
import java.sql.ResultSet;
import java.sql.Statement;

import com.microsoft.sqlserver.jdbc.SQLServerDataSource;

public class MSEntraManagedIdentity {
    public static void main(String[] args) throws Exception {

        SQLServerDataSource ds = new SQLServerDataSource();
        ds.setServerName("msentra-managed-demo.database.windows.net"); // Replace with your server name
        ds.setDatabaseName("demo"); // Replace with your database name
        ds.setAuthentication("ActiveDirectoryManagedIdentity"); // ActiveDirectoryManagedIdentity for JDBC driver version v12.2.0+
        // Optional
        ds.setUser("94de34e9-8e8c-470a-96df-08110924b814"); // Replace with Client ID of User-Assigned Managed Identity to be used

        try (Connection connection = ds.getConnection();
                Statement stmt = connection.createStatement();
                ResultSet rs = stmt.executeQuery("SELECT SUSER_SNAME()")) {
            if (rs.next()) {
                System.out.println("You have successfully logged on as: " + rs.getString(1));
            }
        }
    }
}
Azure Virtual Machine의 이 예제에서는 시스템이 할당한 관리 ID 또는 사용자가 할당한 관리 ID(msiClientId 또는 user가 관리 ID의 클라이언트 ID로 지정된 경우)에서 액세스 토큰을 가져오고 가져온 그 액세스 토큰을 사용하여 연결을 설정합니다. 연결이 설정되면 다음과 같은 메시지가 표시됩니다.
You have successfully logged on as: <your Managed Identity username>
ActiveDirectoryDefault 인증 모드를 사용하여 연결
ActiveDirectoryDefault 인증 옵션은 Azure ID 클라이언트 라이브러리의 DefaultAzureCredential 연결된 구현을 TokenCredential 사용합니다. 자격 증명은 일반적으로 사용되는 인증 방법을 함께 연결하여 결합합니다.
ActiveDirectoryDefault 인증을 사용하려면 관리 ID용 Azure ID 클라이언트 라이브러리에 대한 런타임 종속성이 필요합니다. 라이브러리 버전 세부 정보는 클라이언트 설정 요구 사항을 참조 하세요.
다음 표에서는 각 JDBC 드라이버 버전에 대한 자격 증명 체인을 나열 DefaultAzureCredential 합니다.
| 드라이버 버전 | azure-identity 버전 문서 | DefaultAzureCredential 체인 |
|---|---|---|
| 12.2 | azure-identity 1.7.0 | 환경 관리 ID IntelliJ Azure CLI Azure PowerShell |
| 12.4 | azure-identity 1.9.0 | 환경 워크로드 ID 관리 ID Azure Developer CLI IntelliJ Azure CLI Azure PowerShell |
| 12.6 | azure-identity 1.11.1 | 환경 워크로드 ID 관리 ID Azure Developer CLI IntelliJ Azure CLI Azure PowerShell |
Environment 자격 증명을 구성하도록 설정할 수 있는 변수가 많이 있습니다. Environment 자격 증명을 포함하여 DefaulAzureCredential 체인을 구성하는 방법에 대한 자세한 내용은 이전 표에 연결된 Azure ID 문서의 관련 버전을 참조하세요.
Windows에서 IntellijCredential을 사용하려면 환경 변수 INTELLIJ_KEEPASS_PATH를 keepass 파일의 위치로 설정합니다. 예들 들어 INTELLIJ_KEEPASS_PATH=C:\user\your\path\to\the\keepass\file입니다.
DefaultAzureCredential에 테넌트를 더 많이 제공하기 위해 ADDITIONALLY_ALLOWED_TENANTS 환경 변수를 사용합니다. 이 변수는 쉼표로 구분된 목록을 가져옵니다. 예를 들어 ADDITIONALLY_ALLOWED_TENANTS=<your-tenant-id-0>,<your-tenant-id-1>,<your-tenant-id-2>,...
다음 예제에서는 DefaultAzureCredential 내에서 AzureCliCredential와 함께 authentication=ActiveDirectoryDefault 모드를 사용하는 방법을 보여줍니다.
먼저 다음 명령을 사용하여 Azure CLI에 로그인합니다.
az loginAzure CLI에 성공적으로 로그인한 후 다음 코드를 실행합니다.
import java.sql.Connection;
import java.sql.ResultSet;
import java.sql.Statement;

import com.microsoft.sqlserver.jdbc.SQLServerDataSource;

public class MSEntraDefault {
    public static void main(String[] args) throws Exception {

        SQLServerDataSource ds = new SQLServerDataSource();
        ds.setServerName("msentra-managed-demo.database.windows.net"); // Replace with your server name
        ds.setDatabaseName("demo"); // Replace with your database name
        ds.setAuthentication("ActiveDirectoryDefault");

        try (Connection connection = ds.getConnection();
                Statement stmt = connection.createStatement();
                ResultSet rs = stmt.executeQuery("SELECT SUSER_SNAME()")) {
            if (rs.next()) {
                System.out.println("You have successfully logged on as: " + rs.getString(1));
            }
        }
    }
}
ActiveDirectoryIntegrated 인증 모드를 사용하여 연결
SQL Server의 Microsoft JDBC 드라이버에서 ActiveDirectoryIntegrated 인증을 사용하는 방법에는 두 가지가 있습니다.
- Windows에서는 다운로드한 패키지의
mssql-jdbc_auth-<version>-<arch>.dll을 시스템 경로의 위치에 복사할 수 있습니다. - 버전 6.4부터 DLL을 사용할 수 없는 경우 Kerberos 티켓을 구성할 수 있습니다. 이 메서드는 여러 플랫폼(Windows, Linux, macOS)에서 지원됩니다. 자세한 내용은 Windows, Linux, macOS에서 Kerberos 티켓 설정을 참조하세요.
클라이언트 설정 요구 사항의 필수 종속 라이브러리가 있는지 확인합니다.
다음 예제에서는 authentication=ActiveDirectoryIntegrated 모드를 사용하는 방법을 보여줍니다. 이 예제는 Microsoft Entra ID와 페더레이션된 기본 조인된 컴퓨터에서 실행됩니다. Windows 사용자를 나타내는 데이터베이스 사용자가 데이터베이스에 존재해야 하며 CONNECT 권한이 있어야 합니다.
예제를 실행하기 전에 다음 줄에서 서버/데이터베이스 이름을 자신의 서버/데이터베이스 이름으로 바꿉니다.
ds.setServerName("msentra-managed-demo.database.windows.net"); // replace 'msentra-managed-demo' with your server name
ds.setDatabaseName("demo"); // replace with your database name
ActiveDirectoryIntegrated 인증 모드를 사용하는 예제는 다음과 같습니다.
import java.sql.Connection;
import java.sql.ResultSet;
import java.sql.Statement;

import com.microsoft.sqlserver.jdbc.SQLServerDataSource;

public class MSEntraIntegrated {
    public static void main(String[] args) throws Exception {

        SQLServerDataSource ds = new SQLServerDataSource();
        ds.setServerName("msentra-managed-demo.database.windows.net"); // Replace with your server name
        ds.setDatabaseName("demo"); // Replace with your database name
        ds.setAuthentication("ActiveDirectoryIntegrated");

        try (Connection connection = ds.getConnection();
                Statement stmt = connection.createStatement();
                ResultSet rs = stmt.executeQuery("SELECT SUSER_SNAME()")) {
            if (rs.next()) {
                System.out.println("You have successfully logged on as: " + rs.getString(1));
            }
        }
    }
}
이 예제를 실행하면 클라이언트 플랫폼에서 자동으로 Kerberos 티켓이 사용되며 암호가 필요하지 않습니다. 연결이 설정되면 다음과 같은 메시지가 표시됩니다.
You have successfully logged on as: <your domain user name>
Windows, Linux 및 macOS에서 Kerberos 티켓 설정
현재 사용자를 Windows 도메인 계정에 연결하는 Kerberos 티켓을 설정해야 합니다. 다음은 주요 단계에 대한 요약입니다.
Windows
참고 항목
Windows에서는 다운로드한 패키지의 mssql-jdbc_auth-<version>-<arch>.dll을 이 Kerberos 구성 단계 대신 사용할 수 있습니다. 이러한 단계는 DLL을 사용할 수 없는 경우에만 필요합니다.
JDK는 kinit와 함께 제공되며,이를 사용하여 Microsoft Entra ID와 페더레이션된 도메인 가입 컴퓨터의 KDC(키 배포 센터)에서 TGT를 가져올 수 있습니다.
1단계: 허용 티켓 검색
실행 위치: Windows
작업:
kinit username@DOMAIN.COMPANY.COM명령을 사용하여 KDC에서 TGT를 가져옵니다. 그러면 도메인 암호를 입력하라는 메시지가 표시됩니다.- 사용 가능한 티켓을 보려면
klist를 사용합니다. kinit이 성공하면krbtgt/DOMAIN.COMPANY.COM@ DOMAIN.COMPANY.COM에 티켓이 보입니다.
참고 항목
애플리케이션에서 KDC를 찾기 위해
-Djava.security.krb5.conf를 사용하여.ini파일을 지정해야 할 수 있습니다.
Linux 및 macOS
요구 사항
Kerberos 도메인 컨트롤러를 쿼리하기 위해 Windows 도메인에 가입된 머신에 액세스할 수 있어야 합니다.
1단계: Kerberos KDC 찾기
실행 위치: Windows 명령줄
작업:
nltest /dsgetdc:DOMAIN.COMPANY.COM(사용자의 작업에 매핑되는 위치DOMAIN.COMPANY.COM기본 이름)샘플 출력
DC: \\co1-red-dc-33.domain.company.com
Address: \\2111:4444:2111:33:1111:ecff:ffff:3333
...
The command completed successfully
추출할 정보 DC 이름(이 경우
co1-red-dc-33.domain.company.com)
2단계: krb5.conf에서 KDC 구성
실행 위치: Linux/macOS
작업: 선택한 편집기에서
/etc/krb5.conf를 편집합니다. 다음 키 구성[libdefaults] default_realm = DOMAIN.COMPANY.COM [realms] DOMAIN.COMPANY.COM = { kdc = co1-red-dc-28.domain.company.com }krb5.conf파일을 저장하고 종료합니다.참고 항목
도메인은 모두 대문자여야 합니다.
단계 3: 허용 티켓 검색 테스트
- 실행 위치: Linux/macOS
- 작업:
kinit username@DOMAIN.COMPANY.COM명령을 사용하여 KDC에서 TGT를 가져옵니다. 그러면 도메인 암호를 입력하라는 메시지가 표시됩니다.- 사용 가능한 티켓을 보려면
klist를 사용합니다. kinit이 성공하면krbtgt/DOMAIN.COMPANY.COM@ DOMAIN.COMPANY.COM에 티켓이 보입니다.
ActiveDirectoryPassword 인증 모드를 사용하여 연결
다음 예제에서는 authentication=ActiveDirectoryPassword 모드를 사용하는 방법을 보여줍니다.
예제 빌드 및 실행:
클라이언트 설정 요구 사항의 필수 종속 라이브러리가 있는지 확인합니다.
다음 코드 줄을 찾아 서버/데이터베이스 이름을 자신의 서버/데이터베이스 이름으로 바꿉니다.
ds.setServerName("msentra-managed-demo.database.windows.net"); // replace 'msentra-managed-demo' with your server name
ds.setDatabaseName("demo"); // replace with your database name
다음 코드 줄을 찾습니다. 사용자 이름을 연결하려는 Microsoft Entra 사용자의 이름으로 바꿉니다.
ds.setUser("bob@example.com"); // replace with your user name
ds.setPassword("password");     // replace with your password
ActiveDirectoryPassword 인증 모드를 사용하는 예제는 다음과 같습니다.
import java.sql.Connection;
import java.sql.ResultSet;
import java.sql.Statement;

import com.microsoft.sqlserver.jdbc.SQLServerDataSource;

public class MSEntraUserPassword {

    public static void main(String[] args) throws Exception{

        SQLServerDataSource ds = new SQLServerDataSource();
        ds.setServerName("msentra-managed-demo.database.windows.net"); // Replace with your server name
        ds.setDatabaseName("demo"); // Replace with your database
        ds.setUser("bob@example.com"); // Replace with your user name
        ds.setPassword("password"); // Replace with your password
        ds.setAuthentication("ActiveDirectoryPassword");

        try (Connection connection = ds.getConnection();
                Statement stmt = connection.createStatement();
                ResultSet rs = stmt.executeQuery("SELECT SUSER_SNAME()")) {
            if (rs.next()) {
                System.out.println("You have successfully logged on as: " + rs.getString(1));
            }
        }
    }
}
연결이 설정된 경우 다음 메시지가 출력으로 표시됩니다.
You have successfully logged on as: <your user name>
ActiveDirectoryInteractive 인증 모드를 사용하여 연결
다음 예제에서는 authentication=ActiveDirectoryInteractive 모드를 사용하는 방법을 보여줍니다.
예제 빌드 및 실행:
클라이언트 설정 요구 사항의 필수 종속 라이브러리가 있는지 확인합니다.
다음 코드 줄을 찾아 서버/데이터베이스 이름을 자신의 서버/데이터베이스 이름으로 바꿉니다.
ds.setServerName("msentra-managed-demo.database.windows.net"); // replace 'msentra-managed-demo' with your server name
ds.setDatabaseName("demo"); // replace with your database name
다음 코드 줄을 찾습니다. 사용자 이름을 연결하려는 Microsoft Entra 사용자의 이름으로 바꿉니다.
ds.setUser("bob@example.com"); // replace with your user name
ActiveDirectoryInteractive 인증 모드를 사용하는 예제는 다음과 같습니다.
import java.sql.Connection;
import java.sql.ResultSet;
import java.sql.Statement;

import com.microsoft.sqlserver.jdbc.SQLServerDataSource;

public class MSEntraInteractive {
    public static void main(String[] args) throws Exception{

        SQLServerDataSource ds = new SQLServerDataSource();
        ds.setServerName("msentra-managed-demo.database.windows.net"); // Replace with your server name
        ds.setDatabaseName("demo"); // Replace with your database
        ds.setAuthentication("ActiveDirectoryInteractive");

        // Optional login hint
        ds.setUser("bob@example.com"); // Replace with your user name

        try (Connection connection = ds.getConnection();
                Statement stmt = connection.createStatement();
                ResultSet rs = stmt.executeQuery("SELECT SUSER_SNAME()")) {
            if (rs.next()) {
                System.out.println("You have successfully logged on as: " + rs.getString(1));
            }
        }
    }
}
프로그램을 실행하면 사용자를 인증하기 위한 브라우저가 표시됩니다. 표시되는 내용은 Microsoft Entra ID가 구성된 방식에 따라 달라집니다. 휴대폰을 통한 사용자 이름, 암호, PIN 또는 두 번째 디바이스 인증에 대한 다단계 인증 프롬프트를 포함하거나 포함하지 않을 수 있습니다. 동일한 프로그램에서 대화형 인증 요청을 여러 번 수행하는 경우, 인증 라이브러리가 이전에 캐시된 인증 토큰을 다시 사용할 수 있으면 후속 요청에서 사용자에게 메시지를 표시하지 않을 수 있습니다.
다단계 인증을 요구하도록 Microsoft Entra ID를 구성하는 방법은 클라우드에서 Microsoft Entra 다단계 인증 시작을 참조하세요.
이러한 대화 상자의 스크린샷은 Microsoft Entra 다단계 인증 사용을 참조하세요.
사용자 인증이 성공적으로 완료되면 브라우저에 다음과 같은 메시지가 표시됩니다.
Authentication complete. You can close the browser and return to the application.
이 메시지는 사용자 인증의 성공만을 나타내며, 반드시 서버 연결의 성공을 의미하지는 않습니다. 애플리케이션으로 돌아가서, 서버에 대한 연결이 설정된 경우 다음 메시지가 출력으로 표시되어야 합니다.
You have successfully logged on as: <your user name>
ActiveDirectoryServicePrincipal 인증 모드를 사용하여 연결
다음 예제에서는 authentication=ActiveDirectoryServicePrincipal 모드를 사용하는 방법을 보여줍니다.
예제 빌드 및 실행:
클라이언트 설정 요구 사항의 필수 종속 라이브러리가 있는지 확인합니다.
다음 코드 줄을 찾아 서버/데이터베이스 이름을 자신의 서버/데이터베이스 이름으로 바꿉니다.
ds.setServerName("msentra-managed-demo.database.windows.net"); // replace 'msentra-managed-demo' with your server name
ds.setDatabaseName("demo"); // replace with your database name
다음 코드 줄을 찾습니다.
principalId값을, 연결하려는 Microsoft Entra 서비스 주체의 애플리케이션 ID/클라이언트 ID로 바꿉니다.principalSecret값을 비밀로 바꿉니다.String principalId = "1846943b-ad04-4808-aa13-4702d908b5c1"; // Replace with your Microsoft Entra service principal ID. String principalSecret = "..."; // Replace with your Microsoft Entra principal secret.버전 10.2 이상에서는
setUser및setPassword를 사용하고 버전 9.4 이하에서는setAADSecurePrincipalId및setAADSecurePrincipalSecret를 사용하여 주체 ID와 주체 비밀을 설정합니다.
ActiveDirectoryServicePrincipal 인증 모드를 사용하는 예제는 다음과 같습니다.
import java.sql.Connection;
import java.sql.ResultSet;
import java.sql.Statement;
import com.microsoft.sqlserver.jdbc.SQLServerDataSource;
public class MSEntraServicePrincipal {
public static void main(String[] args) throws Exception{
String principalId = "1846943b-ad04-4808-aa13-4702d908b5c1"; // Replace with your Microsoft Entra service principal ID.
String principalSecret = "..."; // Replace with your Microsoft Entra principal secret.
SQLServerDataSource ds = new SQLServerDataSource();
ds.setServerName("msentra-managed-demo.database.windows.net"); // Replace with your server name
ds.setDatabaseName("demo"); // Replace with your database
ds.setAuthentication("ActiveDirectoryServicePrincipal");
ds.setUser(principalId); // setAADSecurePrincipalId for JDBC Driver 9.4 and below
ds.setPassword(principalSecret); // setAADSecurePrincipalSecret for JDBC Driver 9.4 and below
try (Connection connection = ds.getConnection();
Statement stmt = connection.createStatement();
ResultSet rs = stmt.executeQuery("SELECT SUSER_SNAME()")) {
if (rs.next()) {
System.out.println("You have successfully logged on as: " + rs.getString(1));
}
}
}
}
연결이 설정된 경우 다음 메시지가 출력으로 표시됩니다.
You have successfully logged on as: <your app/client ID>
ActiveDirectoryServicePrincipalCertificate 인증 모드를 사용하여 연결
다음 예제에서는 authentication=ActiveDirectoryServicePrincipalCertificate 모드를 사용하는 방법을 보여줍니다.
예제 빌드 및 실행:
클라이언트 설정 요구 사항의 필수 종속 라이브러리가 있는지 확인합니다.
다음 코드 줄을 찾아 서버/데이터베이스 이름을 자신의 서버/데이터베이스 이름으로 바꿉니다.
ds.setServerName("msentra-managed-demo.database.windows.net"); // replace 'msentra-managed-demo' with your server name
ds.setDatabaseName("demo"); // replace with your database name
다음 코드 줄을 찾습니다.
principalId값을, 연결하려는 Microsoft Entra 서비스 주체의 애플리케이션 ID/클라이언트 ID로 바꿉니다.clientCertificate의 값을 서비스 주체 인증서의 위치로 바꿉니다.String principalId = "1846943b-ad04-4808-aa13-4702d908b5c1"; // Replace with your Microsoft Entra service principal ID. String clientCertificate = "..."; // Replace with the location for your Microsoft Entra service principal certificate.위의 인증서에 암호가 필요한 경우 버전 10.2 이상에서는
setPassword을 사용하여 주체 비밀번호를 설정하고 버전 9.4 이하에서setAADSecurePrincipalSecret를 사용하여 설정합니다.위의 인증서에 연결된 프라이빗 키가 있는 경우
setClientKey을 사용하여 프라이빗 키를 설정합니다. 이 키에 암호가 필요한 경우setClientKeyPassword을 사용하여 프라이빗 키에 암호를 설정합니다.
ActiveDirectoryServicePrincipalCertificate 인증 모드를 사용하는 예제는 다음과 같습니다.
import java.sql.Connection;
import java.sql.ResultSet;
import java.sql.Statement;

import com.microsoft.sqlserver.jdbc.SQLServerDataSource;

public class MSEntraServicePrincipalCertificate {
    public static void main(String[] args) throws Exception{
        String principalId = "1846943b-ad04-4808-aa13-4702d908b5c1"; // Replace with your Microsoft Entra service principal ID.
        String clientCertificate = "..."; // Replace with the location of your service principal certificate.

        SQLServerDataSource ds = new SQLServerDataSource();
        ds.setServerName("msentra-managed-demo.database.windows.net"); // Replace with your server name
        ds.setDatabaseName("demo"); // Replace with your database
        ds.setAuthentication("ActiveDirectoryServicePrincipalCertificate");
        ds.setUser(principalId); // setAADSecurePrincipalId for JDBC Driver 9.4 and below
        ds.setClientCertificate(clientCertificate);

        try (Connection connection = ds.getConnection();
             Statement stmt = connection.createStatement();
             ResultSet rs = stmt.executeQuery("SELECT SUSER_SNAME()")) {
            if (rs.next()) {
                System.out.println("You have successfully logged on as: " + rs.getString(1));
            }
        }
    }
}
연결이 설정된 경우 다음 메시지가 출력으로 표시됩니다.
You have successfully logged on as: <your app/client ID>
액세스 키를 사용하여 연결
애플리케이션/서비스는 Microsoft Entra ID에서 액세스 토큰을 검색하고 이를 사용하여 Azure SQL Database, Azure SQL Managed Instance, Azure Synapse Analytics에 연결할 수 있습니다.
참고 항목
accessToken은 DriverManager 클래스에서 getConnection() 메서드의 Properties 매개 변수를 사용하여 설정할 수 있습니다. 연결 문자열에서는 사용할 수 없습니다. 드라이버 버전 12.2부터 사용자는 연결 풀링 시나리오에서 토큰 갱신을 위해 드라이버에 accessToken 콜백을 구현하고 제공할 수 있습니다. 표준 JDBC 연결 풀링 클래스를 사용하기 위해서는 커넥트온 풀링 시나리오에서 연결 풀 구현이 필요합니다.
다음 예제에는 액세스 토큰 기반 인증을 사용하여 Azure에 연결하는 간단한 Java 애플리케이션이 포함되어 있습니다.
예제 빌드 및 실행:
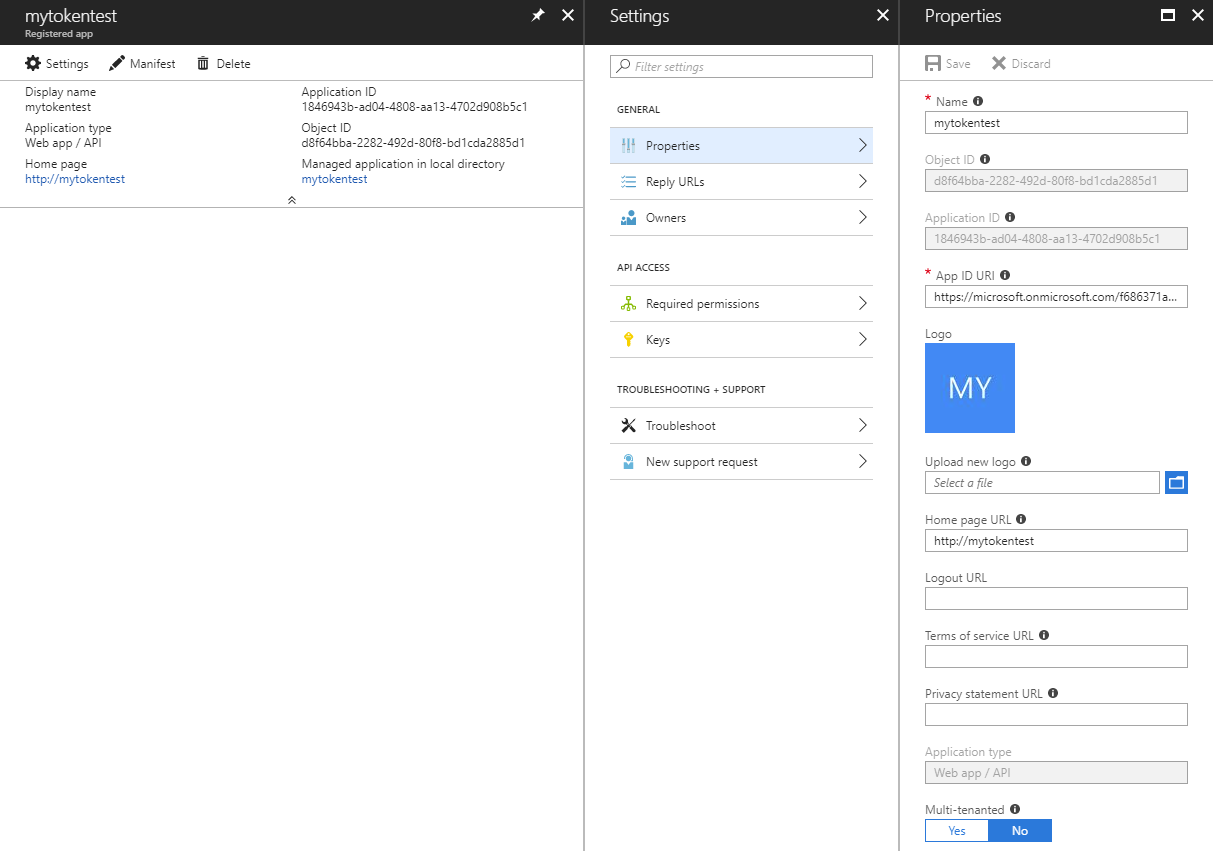
Microsoft Entra ID로 애플리케이션에 대한 서비스 주체 계정을 만듭니다.
- Azure Portal에 로그인합니다.
- 왼쪽 탐색 창에서 Microsoft Entra ID로 이동합니다.
- 앱 등록을 선택합니다.
- 새 등록을 선택합니다.
- 애플리케이션에
mytokentest을 식별 이름으로 입력합니다. - 애플리케이션을 사용할 수 있는 지원되는 계정 유형에 대한 기본 선택을 그대로 둡니다.
- 하단에서 등록을 선택합니다.
- 로그온 URL이 필요하지 않습니다. 아무거나 제공:
https://mytokentest. - 하단에서
Create을 선택합니다. - 등록을 선택하면 앱이 즉시 만들어지고 해당 리소스 페이지로 이동됩니다.
- Essentials 상자에서 애플리케이션(클라이언트) ID를 찾아 복사합니다. 나중에 이 값을 사용하도록 애플리케이션을 구성합니다.
- 왼쪽 탐색 패널에서 인증서 및 비밀을 선택합니다. 클라이언트 암호 (0) 탭에서 새 클라이언트 암호를 선택합니다. 암호에 대한 설명을 입력하고 (기본 만료를 그대로 두고) 만료를 선택합니다. 아래쪽에서 추가를 선택합니다. 중요 이 페이지를 떠나기 전에 클라이언트 암호에 대해 생성된 값을 복사합니다. 페이지를 떠난 후에는 볼 수 없습니다. 이 값은 클라이언트 비밀입니다.
- Microsoft Entra ID의 앱 등록 창으로 돌아가 엔드포인트 탭을 찾습니다.
OAuth 2.0 token endpoint아래의 URL을 복사합니다. 이 URL은 STS URL입니다.
데이터베이스에 Microsoft Entra 관리자로 커넥트 T-SQL 명령을 사용하여 애플리케이션 주체에 대해 포함된 데이터베이스 사용자를 프로비전합니다. Microsoft Entra 관리자 및 포함된 데이터베이스 사용자를 만드는 방법에 대한 자세한 내용은 Microsoft Entra 인증을 사용하여 연결을 참조하세요.
CREATE USER [mytokentest] FROM EXTERNAL PROVIDER예제를 실행하는 클라이언트 컴퓨터에서 Java용 MSAL(Microsoft Authentication Library) 라이브러리를 다운로드합니다. MSAL은 이 특정 예제를 실행하는 데만 필요합니다. 예제에서는 이 라이브러리의 API를 사용하여 Microsoft Entra ID에서 액세스 토큰을 검색합니다. 액세스 토큰이 이미 있는 경우 이 단계를 건너뛰고 예제에서 액세스 토큰을 검색하는 섹션을 제거할 수 있습니다.
다음 예제에서는 STS URL, 클라이언트 ID, 클라이언트 암호, 서버 및 데이터베이스 이름을 자신의 값으로 바꿉니다.
import java.sql.Connection;
import java.sql.ResultSet;
import java.sql.Statement;
import java.util.concurrent.Executors;
import java.util.concurrent.Future;
import com.microsoft.sqlserver.jdbc.SQLServerDataSource;

// The microsoft-authentication-library-for-java is needed to retrieve the access token in this example.
import com.microsoft.aad.msal4j.ClientCredentialFactory;
import com.microsoft.aad.msal4j.ClientCredentialParameters;
import com.microsoft.aad.msal4j.ConfidentialClientApplication;
import com.microsoft.aad.msal4j.IAuthenticationResult;
import com.microsoft.aad.msal4j.IClientCredential;

public class MSEntraTokenBased {

    public static void main(String[] args) throws Exception {

        // Retrieve the access token from Microsoft Entra ID.
        String spn = "https://database.windows.net/";
        String stsurl = "https://login.microsoftonline.com/..."; // Replace with your STS URL.
        String clientId = "1846943b-ad04-4808-aa13-4702d908b5c1"; // Replace with your client ID.
        String clientSecret = "..."; // Replace with your client secret.

        String scope = spn +  "/.default";
        Set<String> scopes = new HashSet<>();
        scopes.add(scope);

        ExecutorService executorService = Executors.newSingleThreadExecutor();
        IClientCredential credential = ClientCredentialFactory.createFromSecret(clientSecret);
        ConfidentialClientApplication clientApplication = ConfidentialClientApplication
            .builder(clientId, credential).executorService(executorService).authority(stsurl).build();
        CompletableFuture<IAuthenticationResult> future = clientApplication
            .acquireToken(ClientCredentialParameters.builder(scopes).build());

        IAuthenticationResult authenticationResult = future.get();
        String accessToken = authenticationResult.accessToken();

        System.out.println("Access Token: " + accessToken);

        // Connect with the access token.
        SQLServerDataSource ds = new SQLServerDataSource();

        ds.setServerName("msentra-managed-demo.database.windows.net"); // Replace with your server name.
        ds.setDatabaseName("demo"); // Replace with your database name.
        ds.setAccessToken(accessToken);

        try (Connection connection = ds.getConnection();
                Statement stmt = connection.createStatement();
                ResultSet rs = stmt.executeQuery("SELECT SUSER_SNAME()")) {
            if (rs.next()) {
                System.out.println("You have successfully logged on as: " + rs.getString(1));
            }
        }
    }
}
연결이 성공하면 다음 메시지가 출력됩니다.
Access Token: <your access token>
You have successfully logged on as: <your client ID>
액세스 토큰 콜백을 사용하여 연결
액세스 토큰 속성과 마찬가지로 액세스 토큰 콜백을 사용하면 드라이버에 액세스 토큰을 제공하는 메서드를 등록할 수 있습니다. 속성에 대한 이 콜백의 이점은 토큰이 만료될 때 드라이버가 새 액세스 토큰을 요청할 수 있다는 것입니다. 예를 들어 새 연결을 만드는 연결 풀은 새 만료 날짜가 있는 새 토큰을 요청할 수 있습니다. 자세한 내용은 연결 풀링 사용을 참조하세요.
다음 예제에서는 accessToken 콜백을 구현하고 설정하는 방법을 보여 줍니다.
import com.microsoft.aad.msal4j.IClientCredential;
import com.microsoft.aad.msal4j.ClientCredentialFactory;
import com.microsoft.aad.msal4j.ConfidentialClientApplication;
import com.microsoft.aad.msal4j.IAuthenticationResult;
import com.microsoft.aad.msal4j.ClientCredentialParameters;
import java.sql.Connection;
import java.util.HashSet;
import java.util.Set;
import java.util.concurrent.CompletableFuture;
import java.util.concurrent.ExecutorService;
import java.util.concurrent.Executors;

public class MSEntraAccessTokenCallback {

    public static void main(String[] args) {

        SQLServerAccessTokenCallback callback = new SQLServerAccessTokenCallback() {
            @Override
            public SqlAuthenticationToken getAccessToken(String spn, String stsurl) {

                String clientSecret = "..."; // Replace with your client secret.
                String clientId = "1846943b-ad04-4808-aa13-4702d908b5c1"; // Replace with your client ID.

                String scope = spn + "/.default";
                Set<String> scopes = new HashSet<>();
                scopes.add(scope);

                try {
                    ExecutorService executorService = Executors.newSingleThreadExecutor();
                    IClientCredential credential = ClientCredentialFactory.createFromSecret(clientSecret);
                    ConfidentialClientApplication clientApplication = ConfidentialClientApplication
                            .builder(clientId, credential).executorService(executorService).authority(stsurl).build();
                    CompletableFuture<IAuthenticationResult> future = clientApplication
                            .acquireToken(ClientCredentialParameters.builder(scopes).build());

                    IAuthenticationResult authenticationResult = future.get();
                    String accessToken = authenticationResult.accessToken();

                    return new SqlAuthenticationToken(accessToken, authenticationResult.expiresOnDate().getTime());
                } catch (Exception e) {
                    e.printStackTrace();
                }
                return null;
            }
        };

        SQLServerDataSource ds = new SQLServerDataSource();
        ds.setServerName("msentra-managed-demo.database.windows.net"); // Replaces with your server name.
        ds.setDatabaseName("demo"); // Replace with your database name.
        ds.setAccessTokenCallback(callback);

        try (Connection connection = ds.getConnection();
                Statement stmt = connection.createStatement();
                ResultSet rs = stmt.executeQuery("SELECT SUSER_SNAME()")) {
            if (rs.next()) {
                System.out.println("You have successfully logged on as: " + rs.getString(1));
            }
        }
    }
}
연결이 성공하면 다음 메시지가 출력됩니다.
You have successfully logged on as: <your client ID>
버전 12.4부터 accessToken 콜백은 accessTokenCallbackClass 연결 스트링 속성을 통해 설정할 수 있습니다. 다음 예제는 이 속성을 사용하여 accessToken 콜백을 설정하는 방법을 보여 줍니다.
import com.microsoft.aad.msal4j.IClientCredential;
import com.microsoft.aad.msal4j.ClientCredentialFactory;
import com.microsoft.aad.msal4j.ConfidentialClientApplication;
import com.microsoft.aad.msal4j.IAuthenticationResult;
import com.microsoft.aad.msal4j.ClientCredentialParameters;
import java.sql.Connection;
import java.util.HashSet;
import java.util.Set;
import java.util.concurrent.CompletableFuture;
import java.util.concurrent.ExecutorService;
import java.util.concurrent.Executors;


public class MSEntraAccessTokenCallbackClass {
    public static class AccessTokenCallbackClass implements SQLServerAccessTokenCallback {
        @Override
        public SqlAuthenticationToken getAccessToken(String spn, String stsurl) {
            String clientSecret = "..."; // Replace with your client secret.
            String clientId = "1846943b-ad04-4808-aa13-4702d908b5c1"; // Replace with your client ID.

            String scope = spn + "/.default";
            Set<String> scopes = new HashSet<>();
            scopes.add(scope);

            try {
                ExecutorService executorService = Executors.newSingleThreadExecutor();
                IClientCredential credential = ClientCredentialFactory.createFromSecret(clientSecret);
                ConfidentialClientApplication clientApplication = ConfidentialClientApplication

                        .builder(clientId, credential).executorService(executorService).authority(stsurl).build();

                CompletableFuture<IAuthenticationResult> future = clientApplication
                        .acquireToken(ClientCredentialParameters.builder(scopes).build());

                IAuthenticationResult authenticationResult = future.get();
                String accessToken = authenticationResult.accessToken();

                return new SqlAuthenticationToken(accessToken, authenticationResult.expiresOnDate().getTime());
            } catch (Exception e) {
                e.printStackTrace();
            }
            return null;
        }
    }

    public static void main(String[] args) throws Exception {

        SQLServerDataSource ds = new SQLServerDataSource();
        ds.setServerName("msentra-managed-demo.database.windows.net"); // Replaces with your server name.
        ds.setDatabaseName("demo"); // Replace with your database name.
        ds.setAccessTokenCallbackClass(AccessTokenCallbackClass.class.getName());

        try (Connection connection = ds.getConnection();
             Statement stmt = connection.createStatement();
             ResultSet rs = stmt.executeQuery("SELECT SUSER_SNAME()")) {
            if (rs.next()) {
                System.out.println("You have successfully logged on as: " + rs.getString(1));
            }
        }
    }
}
연결이 성공하면 다음 메시지가 출력됩니다.
You have successfully logged on as: <your client ID>
다음 단계
다음 문서에서 관련 개념에 대해 자세히 알아보세요.
피드백
출시 예정: 2024년 내내 콘텐츠에 대한 피드백 메커니즘으로 GitHub 문제를 단계적으로 폐지하고 이를 새로운 피드백 시스템으로 바꿀 예정입니다. 자세한 내용은 다음을 참조하세요. https://aka.ms/ContentUserFeedback
다음에 대한 사용자 의견 제출 및 보기