연습: 명령줄을 통해 Visual Studio 확장 게시
이 연습에서는 명령줄을 사용하여 Visual Studio Marketplace에 Visual Studio 확장을 게시하는 방법을 보여줍니다. Marketplace에 확장을 추가하면 개발자는 확장 및 업데이트 대화 상자를 사용하여 신규 및 업데이트된 확장을 찾아볼 수 있습니다.
VsixPublisher.exe는 Visual Studio 확장을 Marketplace에 게시하기 위한 명령줄 도구입니다. ${VSInstallDir}\VSSDK\VisualStudioIntegration\Tools\Bin\VsixPublisher.exe에서 액세스할 수 있습니다. 이 도구에서 사용할 수 있는 명령은 publish, deletePublisher, deleteExtension, login, logout입니다.
명령
게시...
Marketplace에 확장을 게시합니다. 확장명은 vsix, exe/msi 파일 또는 링크일 수 있습니다. 동일한 버전의 확장이 이미 있는 경우 확장을 덮어씁니다. 확장이 아직 존재하지 않는 경우 새 확장이 생성됩니다.
| 명령 옵션 | 설명 |
|---|---|
| payload(필수) | 게시할 페이로드의 경로 또는 "추가 정보 URL"로 사용할 링크입니다. |
| publishManifest(필수) | 사용할 게시 매니페스트 파일의 경로입니다. |
| ignoreWarnings | 확장을 게시할 때 무시할 경고 목록입니다. 이러한 경고는 확장을 게시할 때 명령줄 메시지로 표시됩니다. (예: "VSIXValidatorWarning01, VSIXValidatorWarning02") |
| personalAccessToken | 게시자를 인증하는 데 사용되는 PAT(개인용 액세스 토큰)입니다. 제공되지 않으면 로그인한 사용자로부터 PAT를 확보합니다. |
VsixPublisher.exe publish -payload "{path to vsix}" -publishManifest "{path to vs-publish.json}" -ignoreWarnings "VSIXValidatorWarning01,VSIXValidatorWarning02"
deletePublisher
Marketplace에서 게시자를 삭제합니다.
| 명령 옵션 | 설명 |
|---|---|
| publisherName(필수) | 게시자의 이름(예: 식별자)입니다. |
| personalAccessToken(필수) | 게시자를 인증하는 데 사용되는 개인용 액세스 토큰입니다. |
VsixPublisher.exe deletePublisher -publisherName "{Publisher Name}" -personalAccessToken "{Personal Access Token}"
deleteExtension
Marketplace에서 확장을 삭제합니다.
| 명령 옵션 | 설명 |
|---|---|
| extensionName(필수) | 삭제할 확장의 이름입니다. |
| publisherName(필수) | 게시자의 이름(예: 식별자)입니다. |
| personalAccessToken | 게시자를 인증하는 데 사용되는 개인용 액세스 토큰입니다. 제공되지 않으면 로그인한 사용자로부터 PAT를 확보합니다. |
VsixPublisher.exe deleteExtension -extensionName "{Extension Name}" -publisherName "{Publisher Name}"
login
게시자를 컴퓨터에 기록합니다.
| 명령 옵션 | 설명 |
|---|---|
| personalAccessToken(필수) | 게시자를 인증하는 데 사용되는 개인용 액세스 토큰입니다. |
| publisherName(필수) | 게시자의 이름(예: 식별자)입니다. |
| overwrite | 기존 게시자를 새 개인용 액세스 토큰으로 덮어쓰도록 지정합니다. |
VsixPublisher.exe login -personalAccessToken "{Personal Access Token}" -publisherName "{Publisher Name}"
logout
컴퓨터에서 게시자를 로그아웃합니다.
| 명령 옵션 | 설명 |
|---|---|
| publisherName(필수) | 게시자의 이름(예: 식별자)입니다. |
| ignoreMissingPublisher | 지정된 게시자가 아직 로그인되지 않은 경우 도구에서 오류가 발생하지 않도록 지정합니다. |
VsixPublisher.exe logout -publisherName "{Publisher Name}"
createPublisher
주의
이 명령은 더 이상 사용할 수 없습니다. Visual Studio Marketplace로 이동하여 새 게시자를 만들 수 있습니다.
publishManifest 파일
publishManifest 파일은 publish 명령에서 사용됩니다. Marketplace가 알아야 하는 확장에 대한 모든 메타데이터를 나타냅니다. 업로드되는 확장이 VSIX 확장에서 온 경우 "identity" 속성에 "internalName" 집합만 있어야 합니다. 나머지 "identity" 속성은 vsixmanifest 파일에서 생성될 수 있기 때문입니다. 확장이 msi/exe 또는 링크 확장인 경우 사용자는 "identity" 속성에 필수 필드를 제공해야 합니다. 매니페스트의 나머지 부분에는 Marketplace 관련 정보(예: 범주, Q&A 사용 여부 등)가 포함됩니다.
VSIX 확장 publishManifest 파일 샘플:
{
    "$schema": "http://json.schemastore.org/vsix-publish",
    "categories": [ "build", "coding" ],  // The categories of the extension. Between 1 and 3 categories are required.
    "identity": {
        "internalName": "MyVsixExtension" // If not specified, we try to generate the name from the display name of the extension in the vsixmanifest file.
                                            // Required if the display name is not the actual name of the extension.
    },
    "overview": "overview.md",            // Path to the "readme" file that gets uploaded to the Marketplace. Required.
    "priceCategory": "free",              // Either "free", "trial", or "paid". Defaults to "free".
    "publisher": "MyPublisherName",       // The name of the publisher. Required.
    "private": false,                     // Specifies whether or not the extension should be public when uploaded. Defaults to false.
    "qna": true,                          // Specifies whether or not the extension should have a Q&A section. Defaults to true.
    "repo": "https://github.com/MyPublisherName/MyVsixExtension" // Not required.
}
MSI/EXE 또는 LINK publishManifest 파일 샘플:
{
    "$schema": "http://json.schemastore.org/vsix-publish",
    "categories": [ "build", "coding" ],
    "identity": {
        "description": "My extension.", // The description of the extension. Required for non-vsix extensions.
        "displayName": "My Extension",  // The display name of the extension. Required for non-vsix extensions.
        "icon": "\\path\\to\\icon.ico", // The path to an icon file (can be relative to the json file location). Required for non-vsix extensions.
        "installTargets": [             // The installation targets for the extension. Required for non-vsix extensions.
            {
                "sku": "Microsoft.VisualStudio.Community",
                "version": "[10.0, 16.0)"
            }
        ],
        "internalName": "MyExtension",
        "language": "en-US",            // The default language id of the extension. Can be in the "1033" or "en-US" format. Required for non-vsix extensions.
        "tags": [ "tag1", "tag2" ],     // The tags for the extension. Not required.
        "version": "3.7.0",             // The version of the extension. Required for non-vsix extensions.
        "vsixId": "MyExtension",        // The vsix id of the extension. Not required but useful for showing updates to installed extensions.
    },
    "overview": "overview.md",
    "priceCategory": "free",
    "publisher": "MyPublisherName",
    "private": false,
    "qna": true,
    "repo": "https://github.com/MyPublisherName/MyVsixExtension"
}
Asset 파일
Asset 파일은 추가 정보 파일에 이미지와 같은 것을 포함하기 위해 제공될 수 있습니다. 예를 들어 확장에 다음과 같은 "개요" Markdown 문서가 있는 경우:
TestExtension
...
This is test extension.

이전 예제에서 "images/testlogo.png"를 해결하기 위해 사용자는 아래와 같이 게시 매니페스트에 "assetFiles"를 제공할 수 있습니다.
{
    "assetFiles": [
        {
            "pathOnDisk": "\\path\\to\\logo.png",
            "targetPath": "images/logo.png"
        }
    ],
    // other required fields
}
게시 연습
필수 조건
이 연습을 수행하려면 Visual Studio SDK를 설치해야 합니다. 자세한 내용은 Visual Studio SDK 설치를 참조하세요.
Visual Studio 확장 만들기
이 경우 기본 VSPackage 확장을 사용하지만 모든 종류의 확장에 대해 동일한 단계가 유효합니다.
- C#에서 메뉴 명령이 있는 "TestPublish"라는 VSPackage를 만듭니다. 자세한 내용은 첫 번째 확장 만들기: Hello World를 참조하세요.
확장을 패키지합니다.
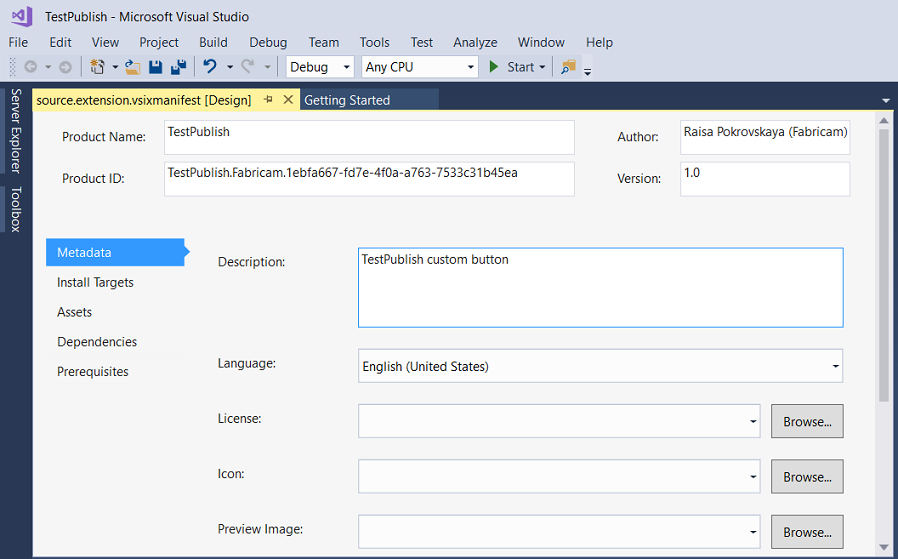
제품 이름, 작성자 및 버전에 대한 올바른 정보로 확장 vsixmanifest를 업데이트합니다.
릴리스 모드에서 확장을 빌드합니다. 이제 확장이 \bin\Release 폴더에 VSIX로 패키지됩니다.
VSIX를 두 번 클릭하여 설치를 확인할 수 있습니다.
확장 테스트
확장을 배포하기 전에 빌드 및 테스트하여 Visual Studio의 실험적 인스턴스에 올바르게 설치되었는지 확인합니다.
Visual Studio에서 디버깅을 시작하여 Visual Studio의 실험적 인스턴스를 엽니다.
실험적 인스턴스에서 도구 메뉴로 이동하여 확장 및 업데이트...를 클릭합니다. TestPublish 확장이 가운데 창에 나타나고 사용하도록 설정되어 있어야 합니다.
도구 메뉴에서 테스트 명령이 표시되는지 확인합니다.
명령줄을 통해 Marketplace에 확장 게시
확장의 릴리스 버전을 빌드했으며 최신 상태인지 확인합니다.
publishmanifest.json 및 Overview.md 파일을 만들었는지 확인합니다.
명령줄을 열고 ${VSInstallDir}\VSSDK\VisualStudioIntegration\Tools\Bin\ 디렉터리로 이동합니다.
새 확장을 게시하려면 다음 명령을 사용합니다.
VsixPublisher.exe publish -payload "{Path to vsix file}" -publishManifest "{path to publishManifest file}" -personalAccessToken "{Personal Access Token that is used to authenticate the publisher. If not provided, the pat is acquired from the logged-in users.}"확장이 성공적으로 게시되면 다음 명령줄 메시지가 표시됩니다.
Uploaded 'MyVsixExtension' to the Marketplace.Visual Studio Marketplace로 이동하여 게시한 새 확장을 확인할 수 있습니다.
Visual Studio Marketplace에서 확장 설치
확장이 게시되었으므로 이제 확장을 Visual Studio에 설치하고 테스트합니다.
Visual Studio의 도구 메뉴에서 확장 및 업데이트...를 클릭합니다.
온라인을 클릭한 다음, TestPublish를 검색합니다.
다운로드를 클릭합니다. 그러면 확장이 설치되도록 예약됩니다.
설치를 완료하려면 Visual Studio의 모든 인스턴스를 닫습니다.
확장을 제거하려면
Visual Studio Marketplace 및 컴퓨터에서 확장을 제거할 수 있습니다.
명령줄을 통해 Marketplace에서 확장 제거하기
확장을 제거하려면 다음 명령을 사용합니다.
VsixPublisher.exe deleteExtension -publisherName "TestVSIXPublisher" -extensionName "MyVsixExtension"확장이 성공적으로 삭제되면 다음 명령줄 메시지가 표시됩니다.
Removed 'MyVsixExtension' from the Marketplace.
컴퓨터에서 확장 제거하기
Visual Studio의 도구 메뉴에서 확장 및 업데이트를 클릭합니다.
"MyVsixExtension"을 선택한 다음, 제거를 클릭합니다. 그러면 확장이 제거되도록 예약됩니다.
제거를 완료하려면 Visual Studio의 모든 인스턴스를 닫습니다.