자습서: Visual Studio에서 간단한 C# 콘솔 앱 만들기(1/2부)
이 자습서에서는 Visual Studio를 사용해서 C# 콘솔 앱을 만들어 실행하고, Visual Studio IDE(통합 개발 환경)의 몇 가지 기능을 살펴봅니다. 이 자습서는 2부로 구성된 자습서 시리즈 중 제1부입니다.
이 자습서에서는 다음 작업을 완료합니다.
- Visual Studio 프로젝트를 만듭니다.
- C# 콘솔 앱 만들기
- 앱을 디버그합니다.
- 앱을 닫습니다.
- 전체 코드를 검사합니다.
2부에서는 이 앱을 확장하여 더 많은 프로젝트를 추가하고, 디버깅 요령을 알아보고, 타사 패키지를 참조합니다.
필수 조건
Visual Studio가 설치되어 있어야 합니다.
아직 Visual Studio를 설치하지 않은 경우 Visual Studio 다운로드 페이지로 이동하여 체험용으로 설치합니다.
프로젝트 만들기
시작하려면 C# 애플리케이션 프로젝트를 만듭니다. 프로젝트 형식은 필요한 모든 템플릿 파일과 함께 제공됩니다.
Visual Studio를 열고 시작 창에서 새 프로젝트 만들기를 선택합니다.

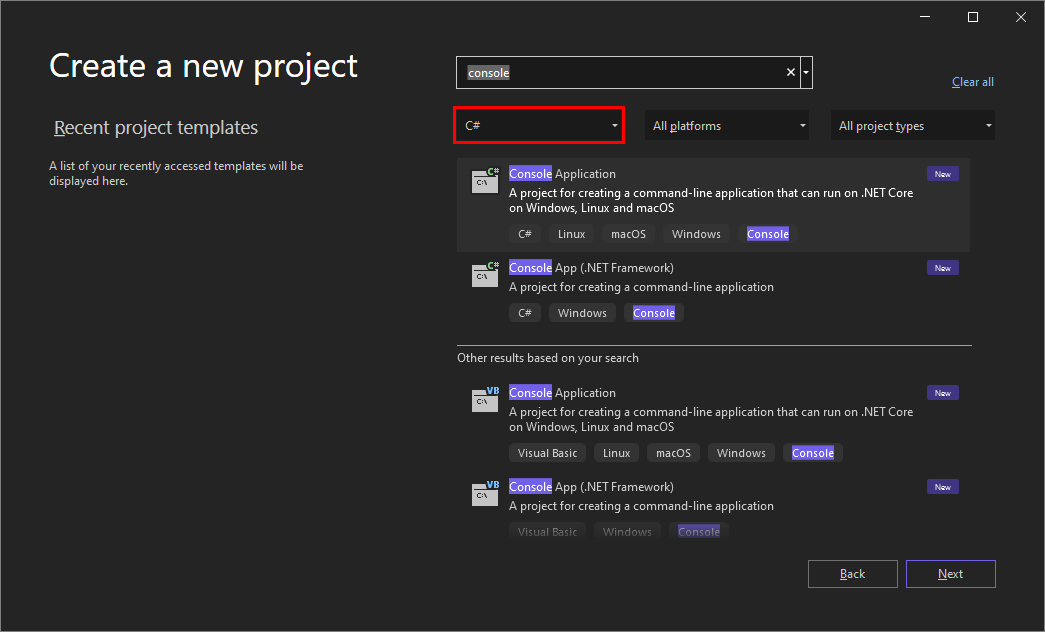
새 프로젝트 만들기 창의 언어 목록에서 C#을 선택합니다. 그런 다음, 플랫폼 목록에서 Windows를 선택하고 프로젝트 형식 목록에서 콘솔을 선택합니다.
언어, 플랫폼 및 프로젝트 형식 필터를 적용한 후 콘솔 애플리케이션 템플릿을 선택하고 다음을 선택합니다.
참고 항목
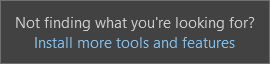
콘솔 애플리케이션 템플릿이 표시되지 않으면 추가 도구 및 기능 설치를 선택합니다.

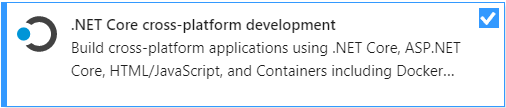
Visual Studio 설치 관리자 .NET Core 플랫폼 간 개발 워크로드를 선택합니다.
Visual Studio 설치 관리자에서 수정을 선택합니다. 작업을 저장하라는 메시지가 표시될 수 있습니다. 계속을 선택하여 워크로드를 설치합니다.
“프로젝트 만들기” 프로시저의 2단계로 돌아갑니다.
새 프로젝트 구성 창에서 프로젝트 이름 상자에 계산기를 입력합니다. 그런 후에 다음을 선택합니다.

추가 정보 창의 대상 프레임워크 필드에 .NET Core 3.1이 표시되는지 확인합니다. 그런 다음 만들기를 선택합니다.


Visual Studio는 기본 "Hello World" 코드를 포함하는 새 프로젝트를 엽니다. 편집기에서 보려면 일반적으로 Visual Studio의 오른쪽에 있는 솔루션 탐색기 창에서 Program.cs 코드 파일을 선택합니다.
기본 ‘Hello World’ 코드는 WriteLine 메서드를 호출하여 리터럴 문자열 ‘Hello World!’를 콘솔 창에 표시합니다. F5 키를 누르면 디버그 모드에서 기본 프로그램을 실행할 수 있습니다. 애플리케이션이 디버거에서 실행된 후 콘솔 창은 열린 상태로 유지됩니다. 아무 키를 눌러 콘솔 창을 닫습니다.
Visual Studio를 열고 시작 창에서 새 프로젝트 만들기를 선택합니다.
새 프로젝트 만들기 창에서 모든 언어를 선택하고 드롭다운 목록에서 C#을 선택합니다. 모든 플랫폼 목록에서 Windows를 선택하고 모든 프로젝트 형식 목록에서 콘솔을 선택합니다.
언어, 플랫폼, 프로젝트 형식 필터를 적용한 후 콘솔 앱 템플릿을 선택하고 다음을 선택합니다.
참고 항목
콘솔 앱 템플릿이 표시되지 않으면 추가 도구 및 기능 설치를 선택합니다.
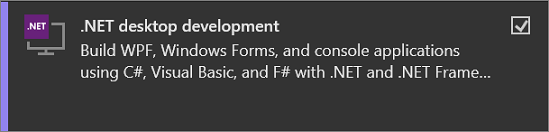
Visual Studio 설치 관리자 .NET 데스크톱 개발 워크로드를 선택합니다.
Visual Studio 설치 관리자에서 수정을 선택합니다. 작업을 저장하라는 메시지가 표시될 수 있습니다. 계속을 선택하여 워크로드를 설치합니다.
“프로젝트 만들기” 프로시저의 2단계로 돌아갑니다.
새 프로젝트 구성 창에서 프로젝트 이름 상자에 Calculator를 입력하고 다음을 선택합니다.

추가 정보 창에서 대상 프레임워크 필드에 대해 .NET 8.0을 선택합니다. 그런 다음 만들기를 선택합니다.


Visual Studio는 기본 "Hello World" 코드를 포함하는 새 프로젝트를 엽니다. 편집기에서 보려면 일반적으로 Visual Studio의 오른쪽에 있는 솔루션 탐색기 창에서 Program.cs 코드 파일을 선택합니다.
단일 코드 문은 WriteLine 메서드를 호출하여 리터럴 문자열 ‘Hello World!’를 콘솔 창에 표시합니다. F5 키를 누르면 디버그 모드에서 기본 프로그램을 실행할 수 있습니다. 애플리케이션이 디버거에서 실행된 후 콘솔 창은 열린 상태로 유지됩니다. 아무 키를 눌러 콘솔 창을 닫습니다.
참고 항목
.NET 6부터는 콘솔 템플릿을 사용하는 새 프로젝트가 이전 버전과는 다른 코드를 생성합니다. 자세한 내용은 새 C# 템플릿 생성 최상위 문 페이지를 참조하세요.
앱 만들기
이 섹션에서는 다음 작업을 완료합니다.
- C#의 몇 가지 기본 정수 수식을 알아봅니다.
- 기본 계산기 앱을 만드는 코드를 추가합니다.
- 오류를 찾고 수정하여 앱을 디버그합니다.
- 코드를 조정하여 효율을 향상합니다.
정수 계산 살펴보기
C#의 몇 가지 기본 정수 수식부터 살펴보겠습니다.
코드 편집기에서 기본 "Hello World" 코드를 삭제합니다.

구체적으로,
Console.WriteLine("Hello World!");이라는 줄을 삭제합니다.그 자리에 다음 코드를 입력합니다.
    int a = 42;
    int b = 119;
    int c = a + b;
    Console.WriteLine(c);
    Console.ReadKey();
코드를 입력할 때 Visual Studio의 IntelliSense 기능은 항목을 자동으로 완성하는 옵션을 제공합니다.

계산기 옆에 있는 녹색 시작 단추를 선택하여 프로그램을 빌드하고 실행하거나 F5 키를 누릅니다.

161인 42 + 119의 합계를 표시하는 콘솔 창이 열립니다.

(선택 사항) 연산자를 변경하여 결과를 변경할 수 있습니다. 예를 들어
int c = a + b;코드 줄의+연산자를-빼기,*곱하기,/나누기로 변경할 수 있습니다. 그런 다음, 프로그램을 실행하면 결과도 변경됩니다.콘솔 창을 닫습니다.
솔루션 탐색기의 오른쪽 창에서 Program.cs를 선택하여 코드 편집기에 파일을 표시합니다.
코드 편집기에서
Console.WriteLine("Hello World!");라는 기본 'Hello World' 코드를 바꿉니다.
줄을 다음 코드로 바꿉니다.
    int a = 42;
    int b = 119;
    int c = a + b;
    Console.WriteLine(c);
    Console.ReadKey();
코드를 입력하면 Visual Studio IntelliSense 기능이 항목을 자동으로 완성하는 옵션을 제공합니다.

앱을 빌드하고 실행하려면 F5 키를 누르거나 위쪽 도구 모음에서 이름 Calculator 옆에 있는 녹색 화살표를 선택합니다.

42 + 119의 결과인 161을 표시하는 콘솔 창이 열립니다.

콘솔 창을 닫습니다.
선택적으로 연산자를 변경하여 결과를 변경할 수 있습니다. 예를 들어
int c = a + b;코드 줄의+연산자를-빼기,*곱하기,/나누기로 변경할 수 있습니다. 앱을 실행하면 결과가 그에 따라 변경됩니다.
계산기를 만드는 코드 추가
계속해서 프로젝트에 더 복잡한 세트의 계산기 코드를 추가합니다.
코드 편집기에서 Program.cs 모든 코드를 다음 새 코드로 바꿉다.
    using System;

    namespace Calculator
    {
        class Program
        {
            static void Main(string[] args)
            {
                // Declare variables and then initialize to zero.
                int num1 = 0; int num2 = 0;

                // Display title as the C# console calculator app.
                Console.WriteLine("Console Calculator in C#\r");
                Console.WriteLine("------------------------\n");

                // Ask the user to type the first number.
                Console.WriteLine("Type a number, and then press Enter");
                num1 = Convert.ToInt32(Console.ReadLine());

                // Ask the user to type the second number.
                Console.WriteLine("Type another number, and then press Enter");
                num2 = Convert.ToInt32(Console.ReadLine());

                // Ask the user to choose an option.
                Console.WriteLine("Choose an option from the following list:");
                Console.WriteLine("\ta - Add");
                Console.WriteLine("\ts - Subtract");
                Console.WriteLine("\tm - Multiply");
                Console.WriteLine("\td - Divide");
                Console.Write("Your option? ");

                // Use a switch statement to do the math.
                switch (Console.ReadLine())
                {
                    case "a":
                        Console.WriteLine($"Your result: {num1} + {num2} = " + (num1 + num2));
                        break;
                    case "s":
                        Console.WriteLine($"Your result: {num1} - {num2} = " + (num1 - num2));
                        break;
                    case "m":
                        Console.WriteLine($"Your result: {num1} * {num2} = " + (num1 * num2));
                        break;
                    case "d":
                        Console.WriteLine($"Your result: {num1} / {num2} = " + (num1 / num2));
                        break;
                }
                // Wait for the user to respond before closing.
                Console.Write("Press any key to close the Calculator console app...");
                Console.ReadKey();
            }
        }
    }
Calculator 단추를 선택하거나 F5 키를 눌러 앱을 실행합니다.
콘솔 창이 열립니다.
콘솔 창에서 프롬프트에 따라 숫자 42와 119를 더합니다.
앱이 다음 스크린샷과 유사하게 표시될 것입니다.

코드 편집기에서 Program.cs 모든 코드를 다음 새 코드로 바꿉다.
    // Declare variables and then initialize to zero.
    int num1 = 0; int num2 = 0;

    // Display title as the C# console calculator app.
    Console.WriteLine("Console Calculator in C#\r");
    Console.WriteLine("------------------------\n");

    // Ask the user to type the first number.
    Console.WriteLine("Type a number, and then press Enter");
    num1 = Convert.ToInt32(Console.ReadLine());

    // Ask the user to type the second number.
    Console.WriteLine("Type another number, and then press Enter");
    num2 = Convert.ToInt32(Console.ReadLine());

    // Ask the user to choose an option.
    Console.WriteLine("Choose an option from the following list:");
    Console.WriteLine("\ta - Add");
    Console.WriteLine("\ts - Subtract");
    Console.WriteLine("\tm - Multiply");
    Console.WriteLine("\td - Divide");
    Console.Write("Your option? ");

    // Use a switch statement to do the math.
    switch (Console.ReadLine())
    {
        case "a":
            Console.WriteLine($"Your result: {num1} + {num2} = " + (num1 + num2));
            break;
        case "s":
            Console.WriteLine($"Your result: {num1} - {num2} = " + (num1 - num2));
            break;
        case "m":
            Console.WriteLine($"Your result: {num1} * {num2} = " + (num1 * num2));
            break;
        case "d":
            Console.WriteLine($"Your result: {num1} / {num2} = " + (num1 / num2));
            break;
    }
    // Wait for the user to respond before closing.
    Console.Write("Press any key to close the Calculator console app...");
    Console.ReadKey();
Calculator 단추를 선택하거나 F5 키를 눌러 앱을 실행합니다.
콘솔 창이 열립니다.
콘솔 창에서 프롬프트에 따라 숫자 42와 119를 더합니다.
앱이 다음 스크린샷과 유사하게 표시될 것입니다.
소수 기능 추가
이제 코드를 수정하여 기능을 추가하겠습니다.
현재 계산기 앱은 정수만 허용하고 반환합니다. 예를 들어 앱을 실행하고 42를 119로 나누면 결과가 0(영)으로 정확하지 않습니다.

소수를 처리하여 정밀도를 개선하기 위해 코드를 수정하려면
Visual Studio 편집기에서 Program.cs Ctrl+H를 눌러 찾기 및 바꾸기 컨트롤을 엽니다.
컨트롤에 int를 입력하고 바꾸기 필드에 float를 입력합니다.
컨트롤에서 대/소문자 구분 및 단어 단위로 아이콘을 선택하거나 Alt+C 및 Alt+W를 누릅니다.
모두 바꾸기 아이콘을 선택하거나 Alt+A를 눌러 찾기 및 바꾸기를 실행합니다.

계산기 앱을 다시 실행하고 숫자 42를 숫자 119로 나눕니다.
이제 앱이 0 대신 소수를 반환합니다.

이제 앱에서 소수 결과를 생성할 수 있습니다. 앱이 소수도 계산할 수 있도록 코드를 몇 가지 수정해 보겠습니다.
찾기 및 바꾸기 컨트롤을 사용하여
float변수의 각 인스턴스를double로 변경하고Convert.ToInt32메서드의 각 인스턴스를Convert.ToDouble로 변경합니다.계산기 앱을 실행하고 숫자 42.5를 숫자 119.75로 나눕니다.
이제 앱이 소수를 허용하고 해당 결과로 더 긴 소수를 반환합니다.

코드 수정 섹션에서 결과의 소수 자릿수를 줄입니다.
앱 디버그
기본 계산기 앱을 개선했지만 앱은 사용자 입력 오류와 같은 예외를 아직 처리하지 않습니다. 예를 들어 사용자가 0으로 나누거나 예기치 않은 문자를 입력하려고 하면 앱이 작동을 중지하거나 오류를 반환하거나 예기치 않은 숫자가 아닌 결과를 반환할 수 있습니다.
몇 가지 일반적인 사용자 입력 오류를 살펴보고 디버거에 나타나는 오류를 찾아 코드에서 수정하세요.
팁
디버거 및 그 작동 방식에 대한 자세한 내용은 먼저 Visual Studio 디버거 살펴보기를 참조하세요.
"0으로 나누기" 오류 해결
숫자를 0으로 나누려고 하면 콘솔 앱이 중지되고 코드 편집기에 잘못된 내용이 표시될 수 있습니다.

참고 항목
앱이 중지되지 않고 디버거가 0으로 나누기 오류를 표시하지 않는 경우도 있습니다. 대신, 앱이 무한대 기호와 같이 숫자가 아닌 결과를 예기치 않게 반환할 수 있습니다. 다음 코드 수정은 여전히 적용됩니다.
이 오류를 처리하기 위해 코드를 변경해 보겠습니다. Program.cs 코드를 다음 코드 case "d": 로 바꿉다.
            // Ask the user to enter a non-zero divisor until they do so.
                while (num2 == 0)
                {
                    Console.WriteLine("Enter a non-zero divisor: ");
                    num2 = Convert.ToInt32(Console.ReadLine());
                }
                Console.WriteLine($"Your result: {num1} / {num2} = " + (num1 / num2));
                break;
        }
코드를 바꾸면 switch 문이 있는 섹션은 다음 스크린샷과 유사하게 표시됩니다.

이제 숫자를 0으로 나누면 앱에서 다른 숫자를 요청하고 0이 아닌 숫자를 제공할 때까지 계속 요청합니다.

"format" 오류 해결
앱이 숫자를 예상할 때 알파벳 문자를 입력하면 앱이 중지됩니다. Visual Studio는 코드 편집기에서 무엇이 잘못되었는지 보여줍니다.


이 예외를 방지하려면 이전에 입력한 코드를 리팩터링할 수 있습니다.
코드 수정
program 클래스를 사용하여 모든 코드를 처리하는 대신 Calculator 및 Program 두 클래스로 앱을 나눌 수 있습니다.
Calculator 클래스는 대량 계산 작업을 처리하고 Program 클래스는 사용자 인터페이스 및 오류 처리 작업을 처리합니다.
시작하겠습니다.
Program.cs 모든 항목을 삭제하고 다음 새
Calculator클래스를 추가합니다.class Calculator { public static double DoOperation(double num1, double num2, string op) { double result = double.NaN; // Default value is "not-a-number" if an operation, such as division, could result in an error. // Use a switch statement to do the math. switch (op) { case "a": result = num1 + num2; break; case "s": result = num1 - num2; break; case "m": result = num1 * num2; break; case "d": // Ask the user to enter a non-zero divisor. if (num2 != 0) { result = num1 / num2; } break; // Return text for an incorrect option entry. default: break; } return result; } }새
Program클래스도 다음과 같이 추가합니다.class Program { static void Main(string[] args) { bool endApp = false; // Display title as the C# console calculator app. Console.WriteLine("Console Calculator in C#\r"); Console.WriteLine("------------------------\n"); while (!endApp) { // Declare variables and set to empty. string numInput1 = ""; string numInput2 = ""; double result = 0; // Ask the user to type the first number. Console.Write("Type a number, and then press Enter: "); numInput1 = Console.ReadLine(); double cleanNum1 = 0; while (!double.TryParse(numInput1, out cleanNum1)) { Console.Write("This is not valid input. Please enter an integer value: "); numInput1 = Console.ReadLine(); } // Ask the user to type the second number. Console.Write("Type another number, and then press Enter: "); numInput2 = Console.ReadLine(); double cleanNum2 = 0; while (!double.TryParse(numInput2, out cleanNum2)) { Console.Write("This is not valid input. Please enter an integer value: "); numInput2 = Console.ReadLine(); } // Ask the user to choose an operator. Console.WriteLine("Choose an operator from the following list:"); Console.WriteLine("\ta - Add"); Console.WriteLine("\ts - Subtract"); Console.WriteLine("\tm - Multiply"); Console.WriteLine("\td - Divide"); Console.Write("Your option? "); string op = Console.ReadLine(); try { result = Calculator.DoOperation(cleanNum1, cleanNum2, op); if (double.IsNaN(result)) { Console.WriteLine("This operation will result in a mathematical error.\n"); } else Console.WriteLine("Your result: {0:0.##}\n", result); } catch (Exception e) { Console.WriteLine("Oh no! An exception occurred trying to do the math.\n - Details: " + e.Message); } Console.WriteLine("------------------------\n"); // Wait for the user to respond before closing. Console.Write("Press 'n' and Enter to close the app, or press any other key and Enter to continue: "); if (Console.ReadLine() == "n") endApp = true; Console.WriteLine("\n"); // Friendly linespacing. } return; } }Calculator 단추를 선택하거나 F5 키를 눌러 앱을 실행합니다.
프롬프트에 따라 숫자 42를 숫자 119로 나눕니다. 결과는 다음 스크린샷과 유사하게 표시됩니다.


이제 콘솔 앱을 닫도록 선택할 때까지 더 많은 계산을 실행할 수 있습니다. 결과의 소수 자릿수도 줄었습니다. 잘못된 문자를 입력하면 그에 해당하는 오류 응답이 표시됩니다.
앱 닫기
아직 수행하지 않았다면 계산기 앱을 닫습니다.
Visual Studio에서 출력 창을 닫습니다.

Visual Studio에서 Ctrl+S를 눌러 앱을 저장합니다.
Git 소스 제어 추가
앱을 만들었으므로 이제 Git 리포지토리에 추가하는 것이 좋습니다. Visual Studio에서는 IDE에서 바로 사용 가능한 Git 도구를 이용해 프로세스를 쉽게 진행할 수 있습니다.
팁
Git은 가장 널리 사용되는 최신 버전 제어 시스템으로, 전문 개발자와 코딩 학습자를 비롯한 모두에게 큰 도움이 됩니다. Git을 처음 사용하는 경우 https://git-scm.com/ 웹 사이트를 먼저 참조하는 것이 좋습니다. 여기에서 참고 자료, 인기 있는 온라인 설명서, Git 기본 사항 비디오를 찾을 수 있습니다.
코드를 Git에 연결하려면 먼저 코드가 있는 새 Git 리포지토리를 다음과 같이 만들어야 합니다.
Visual Studio의 오른쪽 아래에 있는 상태 표시줄에서 소스 제어에 추가를 선택한 다음, Git를 선택합니다.

Git 리포지토리 만들기 대화 상자에서 GitHub에 로그인합니다.

리포지토리 이름은 폴더 위치를 기준으로 자동으로 입력됩니다. 새 리포지토리는 기본적으로 프라이빗입니다. 즉, 사용자 자신만 해당 리포지토리에 액세스할 수 있습니다.
팁
리포지토리가 퍼블릭인지 프라이빗인지와 관계없이, 코드의 원격 백업을 GitHub에 안전하게 저장하는 것이 가장 좋습니다. 팀으로 작업하지 않더라도 원격 리포지토리를 사용하면 어떤 컴퓨터에서든 코드를 사용할 수 있습니다.
만들기 및 밀어넣기를 선택합니다.
리포지토리를 만들면 상태 표시줄에 상태 세부 정보가 표시됩니다.

화살표가 있는 첫 번째 아이콘은 현재 분기에 있는 나가는 커밋과 들어오는 커밋의 수를 표시합니다. 이 아이콘을 이용해 들어오는 커밋을 풀하거나 나가는 커밋을 푸시할 수 있습니다. 이러한 커밋을 먼저 보도록 선택할 수도 있습니다. 이렇게 하려면 아이콘을 선택한 다음, 송신/수신 보기를 선택합니다.
연필이 있는 두 번째 아이콘은 코드에 대한 커밋되지 않은 변경의 수를 표시합니다. 이 아이콘을 선택하면 Git 변경 내용 창에서 해당 변경 내용을 확인할 수 있습니다.
앱에서 Git을 사용하는 방법을 자세히 알아보려면 Visual Studio 버전 제어 설명서를 참조하세요.
검토: 코드 완료
이 자습서에서는 계산기 앱을 많이 변경했습니다. 이제 앱은 컴퓨팅 리소스를 보다 효율적으로 처리하고 대부분의 사용자 입력 오류를 처리합니다.
전체 코드는 다음과 같습니다.
class Calculator
{
public static double DoOperation(double num1, double num2, string op)
{
double result = double.NaN; // Default value is "not-a-number" which we use if an operation, such as division, could result in an error.
// Use a switch statement to do the math.
switch (op)
{
case "a":
result = num1 + num2;
break;
case "s":
result = num1 - num2;
break;
case "m":
result = num1 * num2;
break;
case "d":
// Ask the user to enter a non-zero divisor.
if (num2 != 0)
{
result = num1 / num2;
}
break;
// Return text for an incorrect option entry.
default:
break;
}
return result;
}
}
class Program
{
    static void Main(string[] args)
    {
        bool endApp = false;
        // Display title as the C# console calculator app.
        Console.WriteLine("Console Calculator in C#\r");
        Console.WriteLine("------------------------\n");

        while (!endApp)
        {
            // Declare variables and set to empty.
            string numInput1 = "";
            string numInput2 = "";
            double result = 0;

            // Ask the user to type the first number.
            Console.Write("Type a number, and then press Enter: ");
            numInput1 = Console.ReadLine();

            double cleanNum1 = 0;
            while (!double.TryParse(numInput1, out cleanNum1))
            {
                Console.Write("This is not valid input. Please enter an integer value: ");
                numInput1 = Console.ReadLine();
            }

            // Ask the user to type the second number.
            Console.Write("Type another number, and then press Enter: ");
            numInput2 = Console.ReadLine();

            double cleanNum2 = 0;
            while (!double.TryParse(numInput2, out cleanNum2))
            {
                Console.Write("This is not valid input. Please enter an integer value: ");
                numInput2 = Console.ReadLine();
            }

            // Ask the user to choose an operator.
            Console.WriteLine("Choose an operator from the following list:");
            Console.WriteLine("\ta - Add");
            Console.WriteLine("\ts - Subtract");
            Console.WriteLine("\tm - Multiply");
            Console.WriteLine("\td - Divide");
            Console.Write("Your option? ");

            string op = Console.ReadLine();

            try
            {
                result = Calculator.DoOperation(cleanNum1, cleanNum2, op);
                if (double.IsNaN(result))
                {
                    Console.WriteLine("This operation will result in a mathematical error.\n");
                }
                else Console.WriteLine("Your result: {0:0.##}\n", result);
            }
            catch (Exception e)
            {
                Console.WriteLine("Oh no! An exception occurred trying to do the math.\n - Details: " + e.Message);
            }

            Console.WriteLine("------------------------\n");

            // Wait for the user to respond before closing.
            Console.Write("Press 'n' and Enter to close the app, or press any other key and Enter to continue: ");
            if (Console.ReadLine() == "n") endApp = true;

            Console.WriteLine("\n"); // Friendly linespacing.
        }
        return;
    }
}
다음 단계
이 자습서의 두 번째 부분을 진행합니다.
피드백
출시 예정: 2024년 내내 콘텐츠에 대한 피드백 메커니즘으로 GitHub 문제를 단계적으로 폐지하고 이를 새로운 피드백 시스템으로 바꿀 예정입니다. 자세한 내용은 다음을 참조하세요. https://aka.ms/ContentUserFeedback
다음에 대한 사용자 의견 제출 및 보기