입력 삽입을 통해 사용자 입력 시뮬레이트
Windows 애플리케이션의 키보드, 마우스, 터치, 펜, 게임 패드 등의 디바이스에서 사용자 입력을 시뮬레이션하고 자동화합니다.
개요
입력 삽입을 통해 Windows 앱에서 다양한 입력 디바이스의 입력을 시뮬레이션하고 앱의 클라이언트 영역 외, 레지스트리 편집기와 같은 관리자 권한으로 실행되는 앱에서도 해당 입력을 어디에든 직접 연결할 수 있습니다.
입력 삽입은 접근성, 테스트(임시, 자동), 원격 액세스 및 지원 기능을 포함하는 기능을 제공해야 하는 Windows 앱 및 도구에 유용합니다.
설정
Windows 앱에서 입력 삽입 API를 사용하려면 앱 매니페스트에 다음을 추가해야 합니다.
- Package.appxmanifest 파일을 마우스 오른쪽 단추로 클릭하고 코드 보기를 선택합니다.
- 다음 내용을
Package노드에 삽입합니다.xmlns:rescap="http://schemas.microsoft.com/appx/manifest/foundation/windows10/restrictedcapabilities"IgnorableNamespaces="rescap"
- 다음 내용을
Capabilities노드에 삽입합니다.<rescap:Capability Name="inputInjectionBrokered" />
중복된 사용자 입력입니다.
 |
|---|
| 터치식 입력 삽입 샘플 |
이 예에서는 입력 삽입 API(Windows.UI.Input.Preview.Injection)를 사용하여 앱의 한 지역에서 마우스 입력 이벤트를 수신 대기하고 해당 터치식 입력 이벤트를 다른 지역에서 시뮬레이션하는 방법을 설명합니다.
입력 삽입 샘플(마우스에서 터치)에서 이 샘플을 다운로드합니다.
먼저 UI(MainPage.xaml)를 설정합니다.
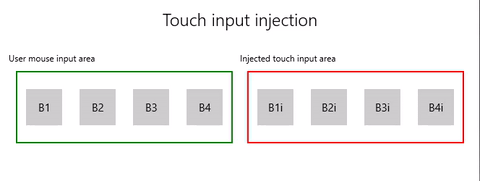
각각 네 개의 단추가 있는 두 개의 그리드 영역(하나는 마우스 입력용, 다른 하나는 삽입된 터치식 입력용)이 있습니다.
참고 항목
그리드 배경에는 값(이 경우
Transparent)이 할당되어야 합니다. 그렇지 않으면 포인터 이벤트가 검색되지 않습니다.입력 지역에서 마우스 클릭이 발견될 경우 해당 터치 이벤트가 입력 삽입 영역에 삽입됩니다. 삽입 입력으로 인한 단추 클릭은 제목 영역에 보고됩니다.
<Grid Background="{ThemeResource ApplicationPageBackgroundThemeBrush}">
    <Grid.RowDefinitions>
        <RowDefinition Height="Auto"/>
        <RowDefinition Height="Auto"/>
        <RowDefinition Height="*"/>
    </Grid.RowDefinitions>
    <StackPanel Grid.Row="0"
                Margin="10">
        <TextBlock Style="{ThemeResource TitleTextBlockStyle}"
                   Name="titleText"
                   Text="Touch input injection"
                   HorizontalTextAlignment="Center" />
        <TextBlock Style="{ThemeResource BodyTextBlockStyle}"
                   Name="statusText"
                   HorizontalTextAlignment="Center" />
    </StackPanel>
    <Grid HorizontalAlignment="Center"
                    Grid.Row="1">
        <Grid.RowDefinitions>
            <RowDefinition Height="Auto"/>
            <RowDefinition Height="*"/>
        </Grid.RowDefinitions>
        <Grid.ColumnDefinitions>
            <ColumnDefinition/>
            <ColumnDefinition/>
        </Grid.ColumnDefinitions>
        <TextBlock Grid.Column="0"
                   Grid.Row="0"
                   Style="{ThemeResource CaptionTextBlockStyle}"
                   Text="User mouse input area"/>
        <!-- Background must be set to something, otherwise pointer events are not detected. -->
        <Grid Name="ContainerInput"
              Grid.Column="0"
              Grid.Row="1"
              HorizontalAlignment="Stretch"
              Background="Transparent"
              BorderBrush="Green"
              BorderThickness="2"
              MinHeight="100" MinWidth="300"
              Margin="10">
            <Grid.ColumnDefinitions>
                <ColumnDefinition/>
                <ColumnDefinition/>
                <ColumnDefinition/>
                <ColumnDefinition/>
            </Grid.ColumnDefinitions>
            <Button Name="B1"
                    Grid.Column="0"
                    HorizontalAlignment="Center"
                    Width="50" Height="50"
                    Content="B1" />
            <Button Name="B2"
                    Grid.Column="1"
                    HorizontalAlignment="Center"
                    Width="50" Height="50"
                    Content="B2" />
            <Button Name="B3"
                    Grid.Column="2"
                    HorizontalAlignment="Center"
                    Width="50" Height="50"
                    Content="B3" />
            <Button Name="B4"
                    Grid.Column="3"
                    HorizontalAlignment="Center"
                    Width="50" Height="50"
                    Content="B4" />
        </Grid>
        <TextBlock Grid.Column="1"
                   Grid.Row="0"
                   Style="{ThemeResource CaptionTextBlockStyle}"
                   Text="Injected touch input area"/>
        <Grid Name="ContainerInject"
              Grid.Column="1"
              Grid.Row="1"
              HorizontalAlignment="Stretch"
              BorderBrush="Red"
              BorderThickness="2"
              MinHeight="100" MinWidth="300"
              Margin="10">
            <Grid.ColumnDefinitions>
                <ColumnDefinition/>
                <ColumnDefinition/>
                <ColumnDefinition/>
                <ColumnDefinition/>
            </Grid.ColumnDefinitions>
            <Button Name="B1i" Click="Button_Click_Injected"
                    Content="B1i"
                    Grid.Column="0"
                    HorizontalAlignment="Center"
                    Width="50" Height="50" />
            <Button Name="B2i" Click="Button_Click_Injected"
                    Content="B2i"
                    Grid.Column="1"
                    HorizontalAlignment="Center"
                    Width="50" Height="50" />
            <Button Name="B3i" Click="Button_Click_Injected"
                    Content="B3i"
                    Grid.Column="2"
                    HorizontalAlignment="Center"
                    Width="50" Height="50" />
            <Button Name="B4i" Click="Button_Click_Injected"
                    Content="B4i"
                    Grid.Column="3"
                    HorizontalAlignment="Center"
                    Width="50" Height="50" />
        </Grid>
    </Grid>
</Grid>
그 다음, 앱을 초기화합니다.
이 조각에서 전역 개체를 선언하고 단추 클릭 이벤트로 처리된 것으로 표시할 수 있는 마우스 입력 영역 내에서 포인터 이벤트(AddHandler)에 수신기를 선언합니다.
InputInjector 개체는 입력 데이터 전송에 대한 가상 입력 디바이스를 나타냅니다.
ContainerInput_PointerPressed처리기에서 터치 삽입 함수를 호출합니다.ContainerInput_PointerReleased처리기에서 UninitializeTouchInjection을 호출하여 InputInjector 개체를 종료합니다.public sealed partial class MainPage : Page { /// <summary> /// The virtual input device. /// </summary> InputInjector _inputInjector; /// <summary> /// Initialize the app, set the window size, /// and add pointer input handlers for the container. /// </summary> public MainPage() { this.InitializeComponent(); ApplicationView.PreferredLaunchViewSize = new Size(600, 200); ApplicationView.PreferredLaunchWindowingMode = ApplicationViewWindowingMode.PreferredLaunchViewSize; // Button handles PointerPressed/PointerReleased in // the Tapped routed event, but we need the container Grid // to handle them also. Add a handler for both // PointerPressedEvent and PointerReleasedEvent on the input Grid // and set handledEventsToo to true. ContainerInput.AddHandler(PointerPressedEvent, new PointerEventHandler(ContainerInput_PointerPressed), true); ContainerInput.AddHandler(PointerReleasedEvent, new PointerEventHandler(ContainerInput_PointerReleased), true); } /// <summary> /// PointerReleased handler for all pointer conclusion events. /// PointerPressed and PointerReleased events do not always occur /// in pairs, so your app should listen for and handle any event that /// might conclude a pointer down (such as PointerExited, PointerCanceled, /// and PointerCaptureLost). /// </summary> /// <param name="sender">Source of the click event</param> /// <param name="e">Event args for the button click routed event</param> private void ContainerInput_PointerReleased( object sender, PointerRoutedEventArgs e) { // Prevent most handlers along the event route from handling event again. e.Handled = true; // Shut down the virtual input device. _inputInjector.UninitializeTouchInjection(); } /// <summary> /// PointerPressed handler. /// PointerPressed and PointerReleased events do not always occur /// in pairs. Your app should listen for and handle any event that /// might conclude a pointer down (such as PointerExited, /// PointerCanceled, and PointerCaptureLost). /// </summary> /// <param name="sender">Source of the click event</param> /// <param name="e">Event args for the button click routed event</param> private void ContainerInput_PointerPressed( object sender, PointerRoutedEventArgs e) { // Prevent most handlers along the event route from // handling the same event again. e.Handled = true; InjectTouchForMouse(e.GetCurrentPoint(ContainerInput)); } ... }터치 입력 삽입 함수는 다음과 같습니다.
먼저 TryCreate를 호출하여 InputInjector 개체를 인스턴스화합니다.
그런 다음 InitializeTouchInjection을
Default의 InjectedInputVisualizationMode로 호출합니다.삽입 지점을 계산한 후 InjectedInputTouchInfo를 호출하여 삽입할 터치 지점 목록을 초기화합니다. 이 예에서는 마우스 입력 포인터에 해당하는 한 터치 지점을 만듭니다.
마지막으로, InjectTouchInput을 첫 번째는 포인터 아래로, 두 번째는 포인터 위로 두 번 호출합니다.
/// <summary>
/// Inject touch input on injection target corresponding
/// to mouse click on input target.
/// </summary>
/// <param name="pointerPoint">The mouse click pointer.</param>
private void InjectTouchForMouse(PointerPoint pointerPoint)
{
    // Create the touch injection object.
    _inputInjector = InputInjector.TryCreate();

    if (_inputInjector != null)
    {
        _inputInjector.InitializeTouchInjection(
            InjectedInputVisualizationMode.Default);

        // Create a unique pointer ID for the injected touch pointer.
        // Multiple input pointers would require more robust handling.
        uint pointerId = pointerPoint.PointerId + 1;

        // Get the bounding rectangle of the app window.
        Rect appBounds =
            Windows.UI.ViewManagement.ApplicationView.GetForCurrentView().VisibleBounds;

        // Get the top left screen coordinates of the app window rect.
        Point appBoundsTopLeft = new Point(appBounds.Left, appBounds.Top);

        // Get a reference to the input injection area.
        GeneralTransform injectArea =
            ContainerInject.TransformToVisual(Window.Current.Content);

        // Get the top left screen coordinates of the input injection area.
        Point injectAreaTopLeft = injectArea.TransformPoint(new Point(0, 0));

        // Get the screen coordinates (relative to the input area)
        // of the input pointer.
        int pointerPointX = (int)pointerPoint.Position.X;
        int pointerPointY = (int)pointerPoint.Position.Y;

        // Create the point for input injection and calculate its screen location.
        Point injectionPoint =
            new Point(
                appBoundsTopLeft.X + injectAreaTopLeft.X + pointerPointX,
                appBoundsTopLeft.Y + injectAreaTopLeft.Y + pointerPointY);

        // Create a touch data point for pointer down.
        // Each element in the touch data list represents a single touch contact.
        // For this example, we're mirroring a single mouse pointer.
        List<InjectedInputTouchInfo> touchData =
            new List<InjectedInputTouchInfo>
            {
                new InjectedInputTouchInfo
                {
                    Contact = new InjectedInputRectangle
                    {
                        Left = 30, Top = 30, Bottom = 30, Right = 30
                    },
                    PointerInfo = new InjectedInputPointerInfo
                    {
                        PointerId = pointerId,
                        PointerOptions =
                        InjectedInputPointerOptions.PointerDown |
                        InjectedInputPointerOptions.InContact |
                        InjectedInputPointerOptions.New,
                        TimeOffsetInMilliseconds = 0,
                        PixelLocation = new InjectedInputPoint
                        {
                            PositionX = (int)injectionPoint.X ,
                            PositionY = (int)injectionPoint.Y
                        }
                },
                Pressure = 1.0,
                TouchParameters =
                    InjectedInputTouchParameters.Pressure |
                    InjectedInputTouchParameters.Contact
            }
        };

        // Inject the touch input.
        _inputInjector.InjectTouchInput(touchData);

        // Create a touch data point for pointer up.
        touchData = new List<InjectedInputTouchInfo>
        {
            new InjectedInputTouchInfo
            {
                PointerInfo = new InjectedInputPointerInfo
                {
                    PointerId = pointerId,
                    PointerOptions = InjectedInputPointerOptions.PointerUp
                }
            }
        };

        // Inject the touch input.
        _inputInjector.InjectTouchInput(touchData);
    }
}
마지막으로, 입력 삽입 지역의 모든 단추 클릭 라우트된 이벤트를 처리하고 클릭한 단추의 이름으로 UI를 업데이트합니다.
참고 항목
토픽 샘플

Windows developer
피드백
출시 예정: 2024년 내내 콘텐츠에 대한 피드백 메커니즘으로 GitHub 문제를 단계적으로 폐지하고 이를 새로운 피드백 시스템으로 바꿀 예정입니다. 자세한 내용은 다음을 참조하세요. https://aka.ms/ContentUserFeedback
다음에 대한 사용자 의견 제출 및 보기