연습 - Xamarin.Android에서 로컬 알림 사용
이 연습에서는 Xamarin.Android 애플리케이션에서 로컬 알림을 사용하는 방법을 보여 줍니다. 로컬 알림을 만들고 게시하는 기본 사항을 보여 줍니다. 사용자가 알림 영역에서 알림을 클릭하면 두 번째 작업이 시작됩니다.
개요
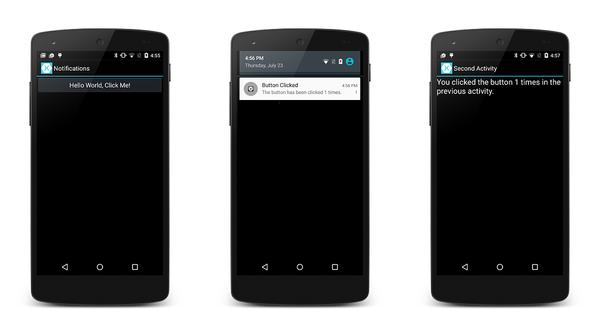
이 연습에서는 사용자가 활동에서 단추를 클릭할 때 알림을 발생시키는 Android 애플리케이션을 만듭니다. 사용자가 알림을 클릭하면 사용자가 첫 번째 활동에서 단추를 클릭한 횟수를 표시하는 두 번째 활동이 시작됩니다.
다음 스크린샷은 이 애플리케이션의 몇 가지 예를 보여 줍니다.
참고 항목
이 가이드에서는 Android 지원 라이브러리의 NotificationCompat API에 중점을 둡니다. 이러한 API는 Android 4.0(API 수준 14)과 최대 이전 버전과의 호환성을 보장합니다.
프로젝트 만들기
시작하려면 Android 앱 템플릿을 사용하여 새 Android 프로젝트를 만들어 보겠습니다. 이 프로젝트 LocalNotifications를 호출해 보겠습니다. (Xamarin.Android 프로젝트를 만드는 데 익숙하지 않은 경우 다음을 참조하세요 .Hello, Android.)
알림 채널을 만들 때 사용할 두 개의 추가 문자열 리소스가 포함되도록 리소스 파일 값/Strings.xml 편집합니다.
<?xml version="1.0" encoding="utf-8"?>

<resources>
  <string name="Hello">Hello World, Click Me!</string>
  <string name="ApplicationName">Notifications</string>

  <string name="channel_name">Local Notifications</string>
  <string name="channel_description">The count from MainActivity.</string>
</resources>
Android.Support.V4 NuGet 패키지 추가
이 연습에서는 로컬 알림을 빌드하는 데 사용합니다 NotificationCompat.Builder . 로컬 알림에 설명된 대로 사용할 NotificationCompat.Builder프로젝트에 Android 지원 라이브러리 v4 NuGet을 포함해야 합니다.
다음으로, MainActivity.cs 편집하고 코드에서 Android.Support.V4.App 형식을 사용할 수 있도록 다음 using 문을 추가해 보겠습니다.
using Android.Support.V4.App;
또한 버전이 아닌 Android.App 버전을 TaskStackBuilder 사용하고 있음을 컴파일러에 Android.Support.V4.App 명확히 해야 합니다. 모호성을 해결하려면 다음 using 문을 추가합니다.
using TaskStackBuilder = Android.Support.V4.App.TaskStackBuilder;
알림 채널 만들기
다음으로, 필요한 경우 알림 채널을 만드는 메서드 MainActivity 를 추가합니다.
void CreateNotificationChannel()
{
    if (Build.VERSION.SdkInt < BuildVersionCodes.O)
    {
        // Notification channels are new in API 26 (and not a part of the
        // support library). There is no need to create a notification
        // channel on older versions of Android.
        return;
    }

    var name = Resources.GetString(Resource.String.channel_name);
    var description = GetString(Resource.String.channel_description);
    var channel = new NotificationChannel(CHANNEL_ID, name, NotificationImportance.Default)
                  {
                      Description = description
                  };

    var notificationManager = (NotificationManager) GetSystemService(NotificationService);
    notificationManager.CreateNotificationChannel(channel);
}
이 새 메서드를 OnCreate 호출하도록 메서드를 업데이트합니다.
protected override void OnCreate(Bundle bundle)
{
    base.OnCreate(bundle);
    SetContentView(Resource.Layout.Main);

    CreateNotificationChannel();
}
알림 ID 정의
알림 및 알림 채널에 고유한 ID가 필요합니다. MainActivity.cs 편집하고 클래스에 다음 정적 인스턴스 변수를 MainActivity 추가해 보겠습니다.
static readonly int NOTIFICATION_ID = 1000;
static readonly string CHANNEL_ID = "location_notification";
internal static readonly string COUNT_KEY = "count";
알림을 생성하는 코드 추가
다음으로 단추 Click 이벤트에 대한 새 이벤트 처리기를 만들어야 합니다. MainActivity에 다음 메서드를 추가합니다.
void ButtonOnClick(object sender, EventArgs eventArgs)
{
    // Pass the current button press count value to the next activity:
    var valuesForActivity = new Bundle();
    valuesForActivity.PutInt(COUNT_KEY, count);

    // When the user clicks the notification, SecondActivity will start up.
    var resultIntent = new Intent(this, typeof(SecondActivity));

    // Pass some values to SecondActivity:
    resultIntent.PutExtras(valuesForActivity);

    // Construct a back stack for cross-task navigation:
    var stackBuilder = TaskStackBuilder.Create(this);
    stackBuilder.AddParentStack(Class.FromType(typeof(SecondActivity)));
    stackBuilder.AddNextIntent(resultIntent);

    // Create the PendingIntent with the back stack:
    var resultPendingIntent = stackBuilder.GetPendingIntent(0, (int) PendingIntentFlags.UpdateCurrent);

    // Build the notification:
    var builder = new NotificationCompat.Builder(this, CHANNEL_ID)
                  .SetAutoCancel(true) // Dismiss the notification from the notification area when the user clicks on it
                  .SetContentIntent(resultPendingIntent) // Start up this activity when the user clicks the intent.
                  .SetContentTitle("Button Clicked") // Set the title
                  .SetNumber(count) // Display the count in the Content Info
                  .SetSmallIcon(Resource.Drawable.ic_stat_button_click) // This is the icon to display
                  .SetContentText($"The button has been clicked {count} times."); // the message to display.

    // Finally, publish the notification:
    var notificationManager = NotificationManagerCompat.From(this);
    notificationManager.Notify(NOTIFICATION_ID, builder.Build());

    // Increment the button press count:
    count++;
}
MainActivity 메서드는 OnCreate 알림 채널을 만들고 메서드를 단추의 이벤트에 할당 ButtonOnClick 하기 위해 Click 호출해야 합니다(템플릿에서 제공하는 대리자 이벤트 처리기 바꾸기).
protected override void OnCreate(Bundle bundle)
{
    base.OnCreate(bundle);
    SetContentView(Resource.Layout.Main);

    CreateNotificationChannel();

    // Display the "Hello World, Click Me!" button and register its event handler:
    var button = FindViewById<Button>(Resource.Id.MyButton);
    button.Click += ButtonOnClick;
}
두 번째 작업 만들기
이제 사용자가 알림을 클릭할 때 Android에서 표시할 다른 활동을 만들어야 합니다. SecondActivity라는 다른 Android 활동을 프로젝트에 추가합니다. SecondActivity.cs 열고 해당 내용을 다음 코드로 대체합니다.
using System;
using Android.App;
using Android.OS;
using Android.Widget;

namespace LocalNotifications
{
    [Activity(Label = "Second Activity")]
    public class SecondActivity : Activity
    {
        protected override void OnCreate(Bundle bundle)
        {
            base.OnCreate(bundle);

            // Get the count value passed to us from MainActivity:
            var count = Intent.Extras.GetInt(MainActivity.COUNT_KEY, -1);

            // No count was passed? Then just return.
            if (count <= 0)
            {
                return;
            }

            // Display the count sent from the first activity:
            SetContentView(Resource.Layout.Second);
            var txtView = FindViewById<TextView>(Resource.Id.textView1);
            txtView.Text = $"You clicked the button {count} times in the previous activity.";
        }
    }
}
또한 SecondActivity에 대한 리소스 레이아웃을 만들어야 합니다. Second.axml이라는 새 Android 레이아웃 파일을 프로젝트에 추가합니다. Second.axml을 편집하고 다음 레이아웃 코드에 붙여넣습니다.
<?xml version="1.0" encoding="utf-8"?>
<LinearLayout xmlns:android="http://schemas.android.com/apk/res/android"
    android:orientation="vertical"
    android:layout_width="fill_parent"
    android:layout_height="fill_parent"
    android:minWidth="25px"
    android:minHeight="25px">
    <TextView
        android:text=""
        android:textAppearance="?android:attr/textAppearanceLarge"
        android:layout_width="fill_parent"
        android:layout_height="wrap_content"
        android:id="@+id/textView1" />
</LinearLayout>
알림 추가 아이콘
마지막으로 알림이 시작될 때 알림 영역에 표시되는 작은 아이콘을 추가합니다. 이 아이콘을 프로젝트에 복사하거나 사용자 지정 아이콘을 만들 수 있습니다. 아이콘 파일의 이름을 ic_stat_button_click.png Resources/drawable 폴더에 복사합니다. 프로젝트에 이 아이콘 파일을 포함하려면 기존 항목 추가>...를 사용해야 합니다.
애플리케이션 실행
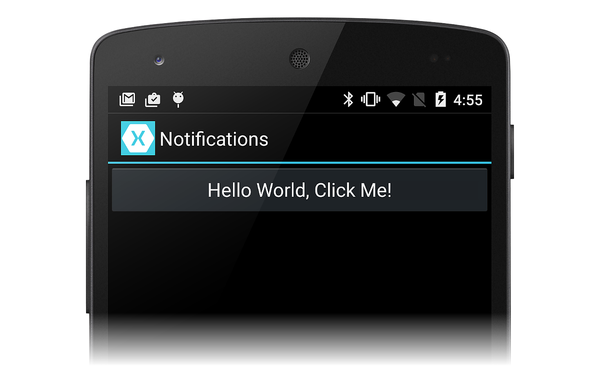
애플리케이션을 빌드 및 실행합니다. 다음 스크린샷과 유사한 첫 번째 작업이 표시됩니다.
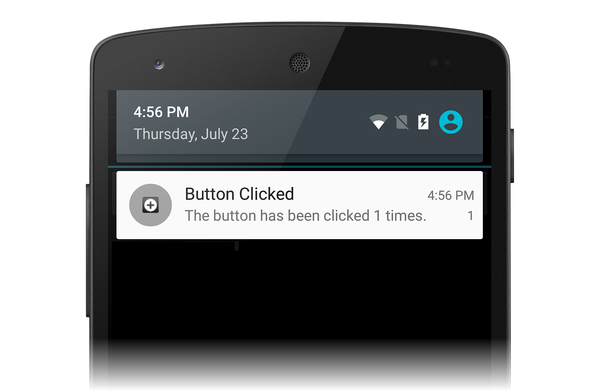
단추를 클릭하면 알림 영역에 알림의 작은 아이콘이 나타납니다.
아래로 살짝 밀고 알림 서랍을 노출하면 알림이 표시됩니다.
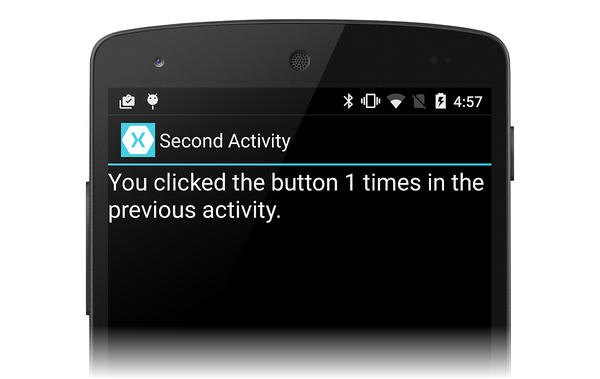
알림을 클릭하면 알림이 사라지고 다른 작업이 시작되어야 합니다. 이는 다음 스크린샷과 비슷합니다.
축하합니다! 이 시점에서 Android 로컬 알림 연습을 완료했으며 참조할 수 있는 작업 샘플이 있습니다. 여기에 표시된 것보다 많은 알림이 있으므로 자세한 정보를 원하는 경우 알림에 대한 Google 설명서를 살펴보세요.
요약
이 연습은 알림을 만들고 표시하는 데 사용됩니다 NotificationCompat.Builder . 알림과의 사용자 상호 작용에 응답하는 방법으로 두 번째 활동을 시작하는 방법에 대한 기본 예제를 보여주었으며 첫 번째 활동에서 두 번째 활동으로 데이터를 전송하는 방법을 보여 줬습니다.


