Create models and data model elements overview
In this tutorial, you'll use Visual Studio's Dynamics 365 menu to create a new model named Fleet Management tutorial. You'll also create and edit new model elements.
Prerequisites
This tutorial requires that you have access to an environment, and that you be provisioned as an administrator
Keywords
- Model - You configure your model to refer to two other models. This enables your model to reference metadata and code elements that are in other packages.
- Project - You create a project and then associate your project to your new model. You add elements to your project, which are also added to your model. Specifically, you add an extended data type (EDT). You also add a table that you populate with fields and a method.
- Designer - Each time you add an item to your project, a designer is displayed that is tailored to the item type you selected. The Properties window adjusts each time a different node of the designer is highlighted. You make updates in the designers and in the Properties window.
- EDT - Extended data type.
Create the Fleet Management tutorial model
Start Visual Studio using Run as administrator.
From the Dynamics 365 menu, select Model Management > Create model to open the Create model wizard.
Enter the following values for model parameters.
Property Value Model name FleetMgmntTutorial Model publisher Microsoft Corp Layer isv Model description This tutorial shows how to build the Fleet Management application by using the Microsoft Dynamics AX development tools. Model display name Fleet Management Tutorial Note
Your model name must be FleetMgmntTutorial. Don't use any other name. In other tutorials, you'll overwrite model elements in this model by importing a project. If the model you create in this tutorial isn't named FleetMgmntTutorial, you may not be able to correctly import the project in other tutorials.
Click Next to advance to the next page, and then select Create New Package. The model you're creating will have its own package and build its own .NET assembly.
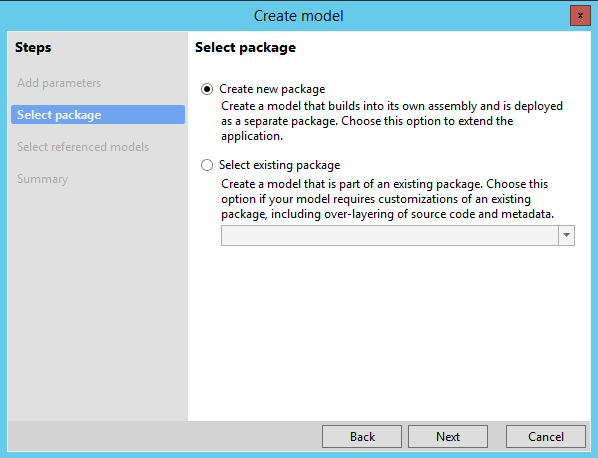
Click Next to advance to the Select referenced models step.
Select Application Platform and Application Foundation as referenced models.
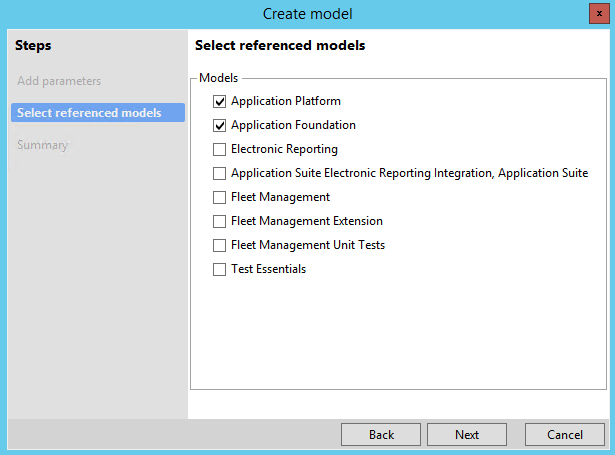
Important
Verify that you've selected the correct referenced models.
Click Next to advance to the Summary step.
Verify the information on the summary page, and then select the Create new project and Make this my default model for new projects check boxes.
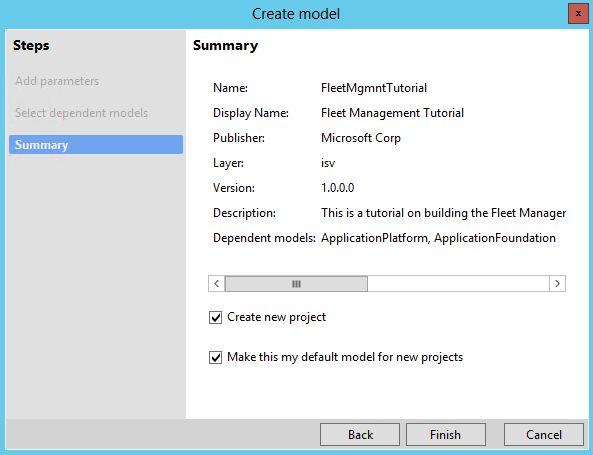
Click Finish. The New Project dialog box opens.
Under Templates, select Dynamics 365.
Select the Unified Operations template.
Enter the following values in the fields in the dialog box.
Property Value Name FMTDataModel Location C:\FMLab Solution Add to solution 
Click OK to create the project.
Create the FMTAddress extended data type
In Solution Explorer, right-click FMTDataModel, point to Add, and then click New Item.
Under Dynamics 365 Items, select Data Types.
Click EDT String to select the new item type.
In the Name field, enter FMTAddress, and then click Add.

This adds a new EDT model element to the project, and opens the EDT designer for the new element, as shown in the following illustration.
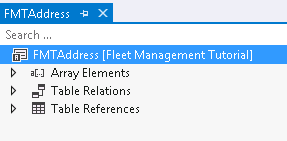
Select the root node of FMTAddress in the designer.
In the Properties window, in the Appearance section, set the following properties.
Property Value Help Text Check online help. Label Address String Size 75 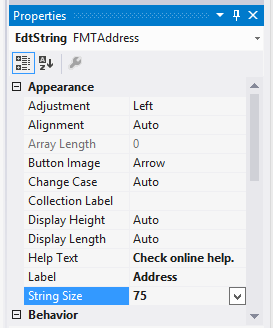
Press Ctrl+S to save the EDT.
Add existing model
Add the other required model element files to the current model and project. You can do this quickly by using the Add existing item feature.
In the Solution Explorer, right-click FMTDataModel, point to Add, and then click Existing Item.
Browse to C:\FMLab\EDT\.

Press Ctrl+A to select all of the files, and then click Add.
Create the FMTCustomer table
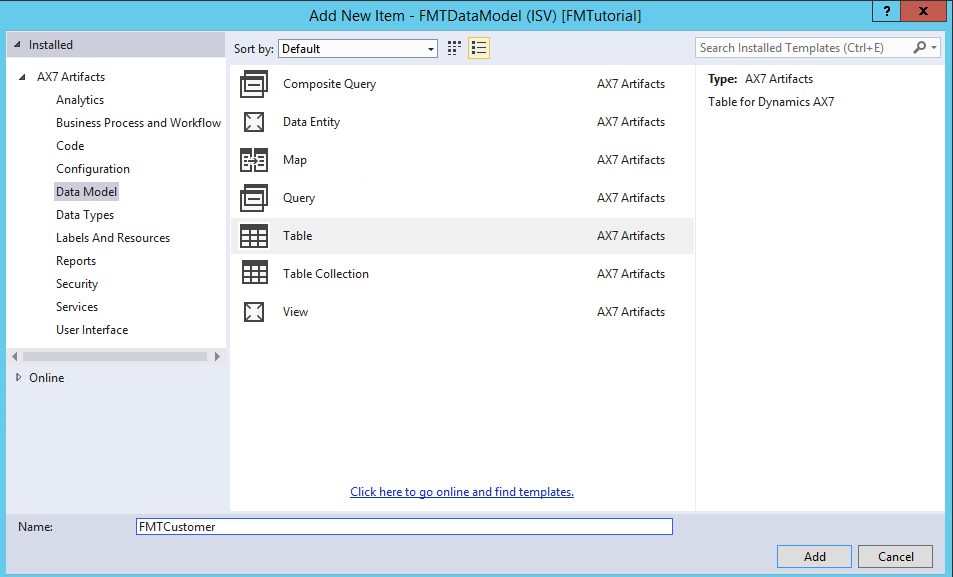
In Solution Explorer, right-click FMTDataModel, and then click Add > New Item.
In the left pane, expand Installed, expand Dynamics 365 Items and then click Data Model.
In the list of artifacts, select Table.
In the Name field, enter FMTCustomer, and then click Add. The table designer opens.
Add fields to the FMTCustomer table
In the table designer for FMTCustomer, you now add several fields to the table.
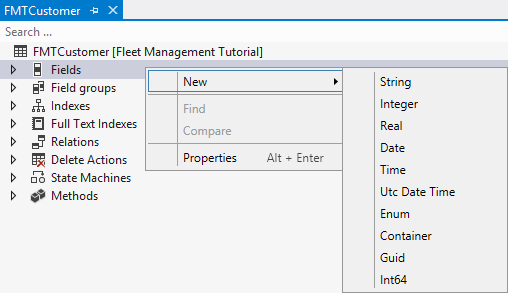
To add each field, right-click Fields, click New, and then select a type. As you add each field, you must specify the field name and certain other values in the Properties window, as described in the following table.
Type Field name Property values Date CCExpiryDate Extended Data Type = FMTCCExpiryDate String Address Extended Data Type = FMTAddressHelp Text = Help text for the address field. String CellPhone Extended Data Type = Phone String CreditCardNum Extended Data Type = FMTCreditCardNum String DriversLicense Extended Data Type = FMTDriversLicense String Email String Size = 80Label = Email String FirstName Extended Data Type = FirstName String LastName Extended Data Type = LastName String License String Size = 100Label = License String Thumbnail String Size = 100Label = Thumbnail Tip
For all new fields in the table that reference an EDT, you can create the field by simply dragging the EDT element from Solution Explorer or Application Explorer and dropping it on the Fields node of the FMTCustomer table in the designer.

Press Ctrl+S to save the new fields on the table.
Add fields to field groups
Prepare to add some of the fields to the AutoSummary field group by selecting the fields in the following list. To select multiple fields, hold down the Ctrl key while you click each field:
- Address
- CCExpiryDate
- CellPhone
- CreditCardNum
- DriversLicense
- FirstName
- LastName
Expand the Field Groups node.
Drag the selected fields to the AutoSummary node
Use the same technique to add the fields FirstName, LastName, and CellPhone to the AutoReport field group.
Save the table.
Add a method
Add the X++ method named fullName to the FMTCustomer table by right-clicking the Methods node, and then clicking New Method.
In the code editor, replace the default method code with the following code.
Tip
When you type “this.”, choose the field from the IntelliSense list.
public display FMTName fullName()
{
    return this.FirstName + ' ' + this.LastName;
}
Save the code.
Update the FMTAddress EDT
In Solution Explorer, expand the FMTDataModel project.
Right-click FMTAddress, and then click Open. The EDT designer opens.
In the EDT designer, select FMTAddress.
In the Properties window, in the Reference Table field, select FMTCustomer. Tip: Click the drop-down list, and then type the prefix "FMT" in the search box. This filters the drop-down list to only show tables that contain "FMT" in their name. Select the FMTCustomer table from the list of filtered entries.

Save the EDT.
Build the FMTDataModel project and the Fleet Management tutorial model
- In Solution Explorer, right-click FMTDataModel, and then click Rebuild.
- To do a full build of the entire model, on the Dynamics 365 menu, click Build models.
- Clear the check box for all models except for Fleet Management Tutorial.
- On the Options tab, select the Run Best practice checks check box. Note that other options available.
- On the Models tab, click Build.
- Click Close in the dialog box.
- On the Window menu, click Close All Documents, to close all open documents.
Atsiliepimai
Jau greitai: 2024 m. palaipsniui atsisakysime „GitHub“ problemų, kaip turiniui taikomo atsiliepimų mechanizmo, ir pakeisime jį nauja atsiliepimų sistema. Daugiau informacijos žr. https://aka.ms/ContentUserFeedback.
Pateikti ir peržiūrėti atsiliepimą, skirtą