Change the build output directory
You can specify the location of output generated by your project on a per-configuration basis (for debug, release, or both).
Change the build output directory
To open the project's property pages, right-click on the project node in Solution Explorer and select Properties.
Select the appropriate tab based on your project type:
- For C#, select the Build tab.
- For Visual Basic, select the Compile tab.
- For C++ or JavaScript, select the General tab.
In the configuration drop-down at the top, choose the configuration whose output file location you want to change (Debug, Release, or All Configurations).
Find the output path entry on the page—it differs depending on your project type:
- Output path for C# and JavaScript projects
- Build output path for Visual Basic projects
- Output directory for Visual C++ projects
Type in the path to generate output to (absolute, or relative to the root project directory), or choose Browse to browse to that folder.

Note
Some projects will by default include framework and runtime in the build path. To change this, right-click the project node in Solution Explorer, select Edit Project File, and add the following:
<PropertyGroup>
  <AppendTargetFrameworkToOutputPath>false</AppendTargetFrameworkToOutputPath>
  <AppendRuntimeIdentifierToOutputPath>false</AppendRuntimeIdentifierToOutputPath>
</PropertyGroup>
Tip
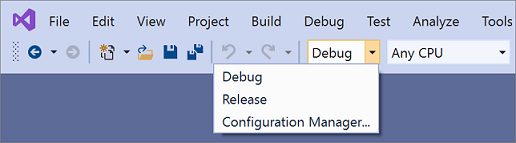
If the output is not being generated to the location that you specified, make sure you're building the corresponding configuration (for example, Debug or Release) by selecting it on the menu bar of Visual Studio.
Change the build output directory
In Visual Studio 2022, there are different Project Designer user interfaces, depending on your project type. C# .NET Framework and all Visual Basic projects use the legacy .NET Project Designer, but C# .NET Core (and .NET 5 and later) projects use the current .NET Project Designer. C++ projects use their own property pages user interface. The steps in this section depend on what Project Designer you're using.
To change the build output directory using the legacy .NET Project Designer or C++ property pages
Right-click on the project node in Solution Explorer and select Properties.
Select the appropriate tab based on your project type:
- For C#, select the Build tab.
- For Visual Basic, select the Compile tab.
- For C++ or JavaScript, select the General tab.
In the configuration drop-down at the top, choose the configuration whose output file location you want to change (Debug, Release, or All Configurations).
Find the output path entry on the page—it differs depending on your project type:
- Output path for C# and JavaScript projects
- Build output path for Visual Basic projects
- Output directory for Visual C++ projects
Type in the path to generate output to (absolute or relative to the root project directory), or choose Browse to browse to that folder instead.
Note
Some projects will by default include framework and runtime in the build path. To change this, right-click the project node in Solution Explorer, select Edit Project File, and add the following:
<PropertyGroup>
  <AppendTargetFrameworkToOutputPath>false</AppendTargetFrameworkToOutputPath>
  <AppendRuntimeIdentifierToOutputPath>false</AppendRuntimeIdentifierToOutputPath>
</PropertyGroup>
To change the build output directory using the current .NET Project Designer
Right-click on the project node in Solution Explorer and select Properties.
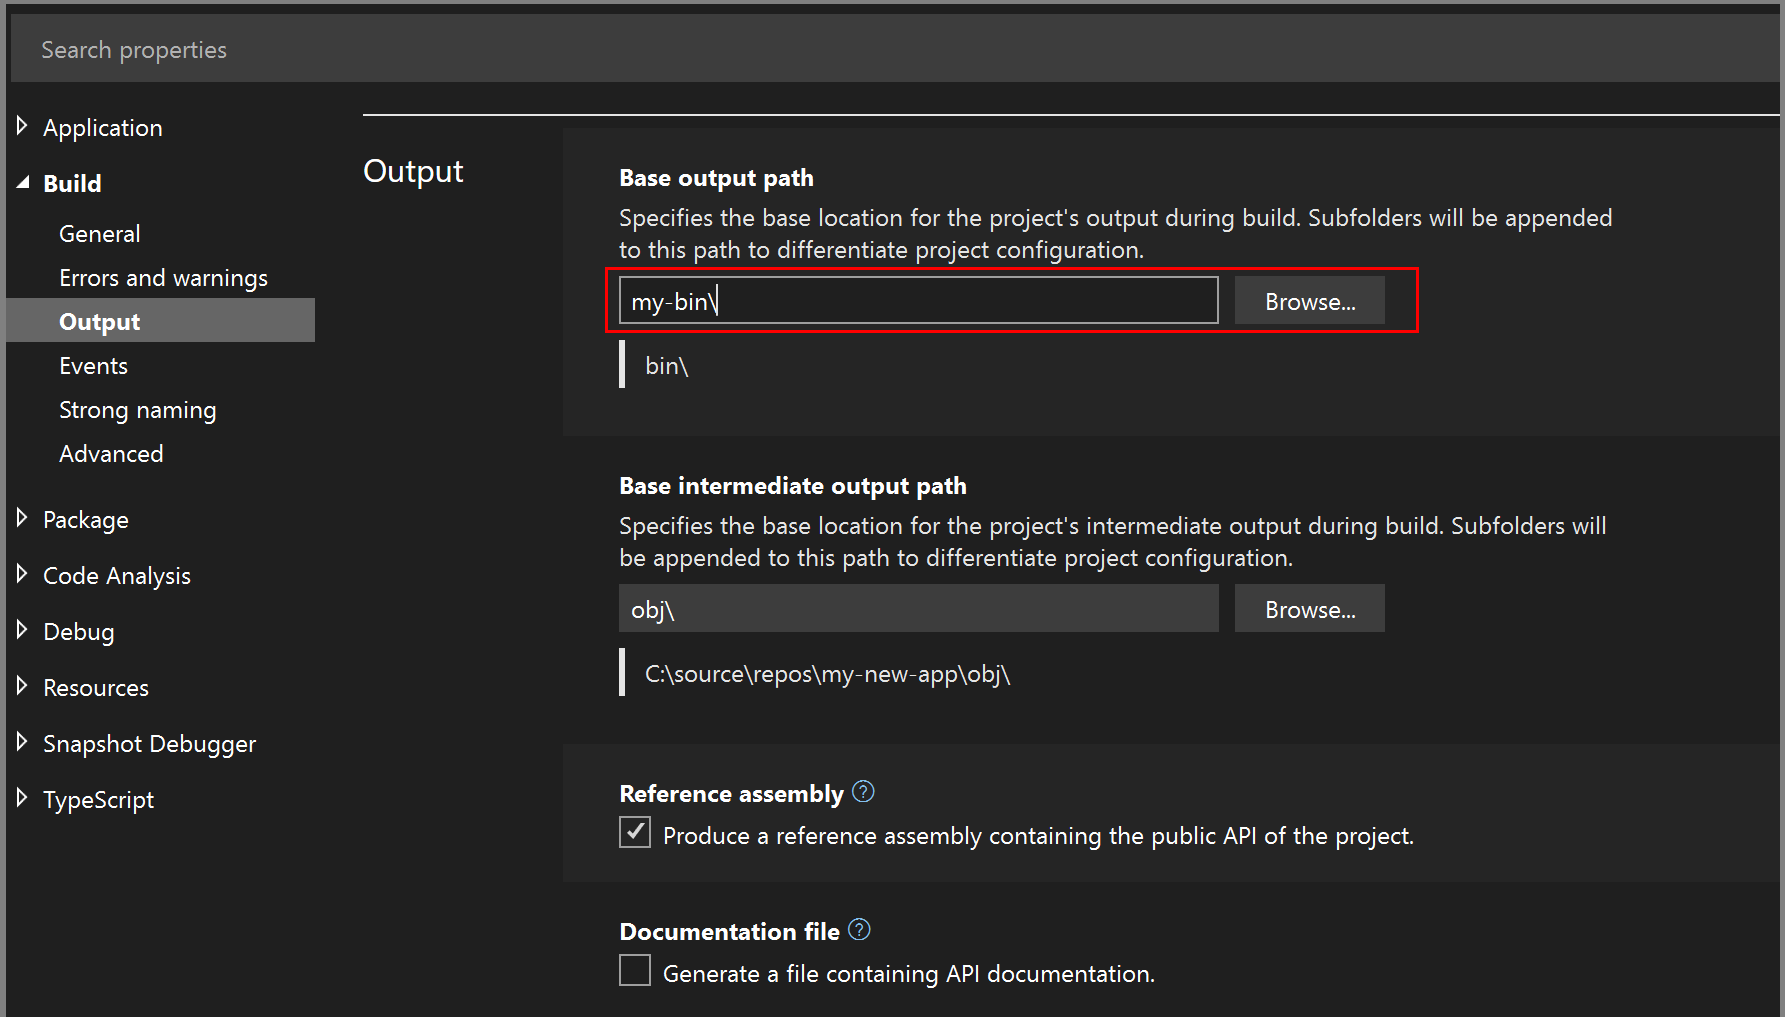
Expand the Build section, and select the Output subsection.
Find the Base output path for C#, and type in the path to generate output to (absolute or relative to the root project directory), or choose Browse to browse to that folder instead. Note that the configuration name is appended to the base output path to generate the actual output path.
Note
Some projects will by default include framework and runtime in the build path. To change this, right-click the project node in Solution Explorer, select Edit Project File, and add the following:
<PropertyGroup>
  <AppendTargetFrameworkToOutputPath>false</AppendTargetFrameworkToOutputPath>
  <AppendRuntimeIdentifierToOutputPath>false</AppendRuntimeIdentifierToOutputPath>
</PropertyGroup>
Tip
If the output is not being generated to the location that you specified, make sure you're building the corresponding configuration (for example, Debug or Release) by selecting it on the menu bar of Visual Studio.

Build to a common output directory
By default, Visual Studio builds each project in a solution in its own folder inside the solution. You can change the build output paths of your projects to force all outputs to be placed in the same folder.
To place all solution outputs in a common directory
Click on one project in the solution.
On the Project menu, click Properties.
In each project, depending on its type, select either Compile or Build, and set the Output path or Base output path to a folder to use for all projects in the solution.
Open the project file for the project, and add the following property declaration to the first property group.
<PropertyGroup>
  <!-- existing property declarations are here -->
  <UseCommonOutputDirectory>true</UseCommonOutputDirectory>
</PropertyGroup>
Setting
UseCommonOutputDirectorytotruetells Visual Studio and its underlying build engine (MSBuild) that you're putting multiple project outputs in the same folder, and so MSBuild omits the copying step that normally happens when projects depend on other projects.Repeat steps 1-4 for all projects in the solution. You can skip some projects if you have some exceptional projects that should not use the common output directory.
To set the intermediate output directory for a project (.NET projects)
Open the project file.
Add the following property declaration to the first property group.
<PropertyGroup>
  <!-- existing property declarations are here -->
  <IntermediateOutputPath>path</IntermediateOutputPath>
</PropertyGroup>
The path is relative to the project file, or you can use an absolute path. If you want to put the project name in the path, you can reference it by using the MSBuild properties
$(MSBuildProjectName),$(MSBuildProjectDirectory). For more properties you can use, see MSBuild reserved and well-known properties.Visual Studio still creates the obj folder under the project folder when you build, but it's empty. You can delete it as part of the build process. One way to do that is to add a post-build event to run the following command:
rd "$(ProjectDir)obj" /s /q
Related content
Atsiliepimai
Jau greitai: 2024 m. palaipsniui atsisakysime „GitHub“ problemų, kaip turiniui taikomo atsiliepimų mechanizmo, ir pakeisime jį nauja atsiliepimų sistema. Daugiau informacijos žr. https://aka.ms/ContentUserFeedback.
Pateikti ir peržiūrėti atsiliepimą, skirtą