Copy data from Azure Blob storage to a SQL Database by using the Copy Data tool
APPLIES TO:  Azure Data Factory
Azure Synapse Analytics
Azure Data Factory
Azure Synapse Analytics
Tip
Try out Data Factory in Microsoft Fabric, an all-in-one analytics solution for enterprises. Microsoft Fabric covers everything from data movement to data science, real-time analytics, business intelligence, and reporting. Learn how to start a new trial for free!
In this tutorial, you use the Azure portal to create a data factory. Then you use the Copy Data tool to create a pipeline that copies data from Azure Blob storage to a SQL Database.
Note
If you're new to Azure Data Factory, see Introduction to Azure Data Factory.
In this tutorial, you perform the following steps:
- Create a data factory.
- Use the Copy Data tool to create a pipeline.
- Monitor the pipeline and activity runs.
Prerequisites
- Azure subscription: If you don't have an Azure subscription, create a free account before you begin.
- Azure Storage account: Use Blob storage as the source data store. If you don't have an Azure Storage account, see the instructions in Create a storage account.
- Azure SQL Database: Use a SQL Database as the sink data store. If you don't have a SQL Database, see the instructions in Create a SQL Database.
Prepare the SQL database
Allow Azure services to access the logical SQL Server of your Azure SQL Database.
Verify that the setting Allow Azure services and resources to access this server is enabled for your server that's running SQL Database. This setting lets Data Factory write data to your database instance. To verify and turn on this setting, go to logical SQL server > Security > Firewalls and virtual networks > set the Allow Azure services and resources to access this server option to ON.
Note
The option to Allow Azure services and resources to access this server enables network access to your SQL Server from any Azure resource, not just those in your subscription. It may not be appropriate for all environments, but is appropriate for this limited tutorial. For more information, see Azure SQL Server Firewall rules. Instead, you can use Private endpoints to connect to Azure PaaS services without using public IPs.
Create a blob and a SQL table
Prepare your Blob storage and your SQL Database for the tutorial by performing these steps.
Create a source blob
Launch Notepad. Copy the following text and save it in a file named inputEmp.txt on your disk:
FirstName|LastName
John|Doe
Jane|Doe
Create a container named adfv2tutorial and upload the inputEmp.txt file to the container. You can use the Azure portal or various tools like Azure Storage Explorer to perform these tasks.
Create a sink SQL table
Use the following SQL script to create a table named
dbo.empin your SQL Database:CREATE TABLE dbo.emp ( ID int IDENTITY(1,1) NOT NULL, FirstName varchar(50), LastName varchar(50) ) GO CREATE CLUSTERED INDEX IX_emp_ID ON dbo.emp (ID);
Create a data factory
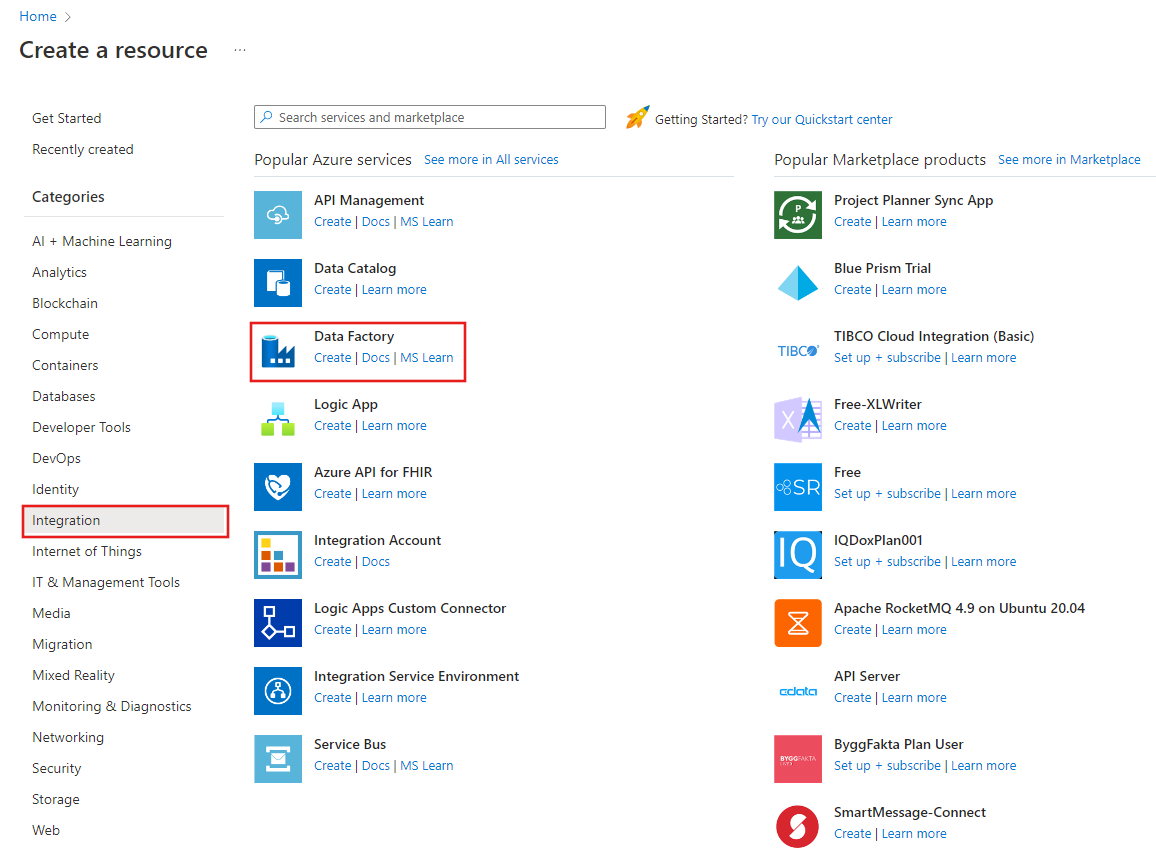
On the left menu, select Create a resource > Integration > Data Factory:
On the New data factory page, under Name, enter ADFTutorialDataFactory.
The name for your data factory must be globally unique. You might receive the following error message:
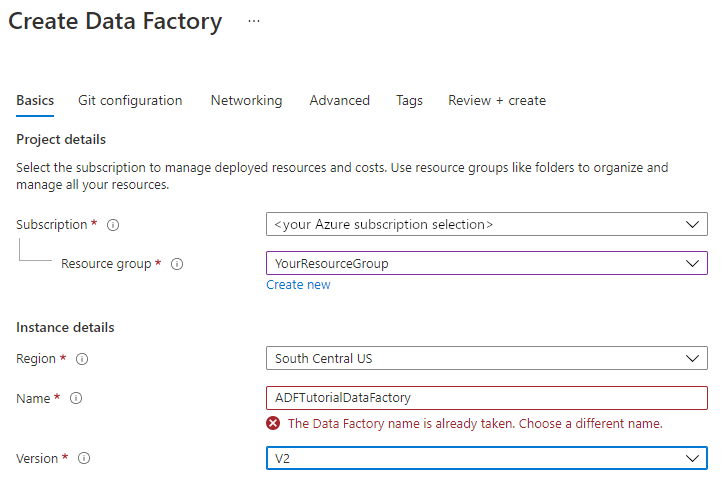
If you receive an error message about the name value, enter a different name for the data factory. For example, use the name yournameADFTutorialDataFactory. For the naming rules for Data Factory artifacts, see Data Factory naming rules.
Select the Azure subscription in which to create the new data factory.
For Resource Group, take one of the following steps:
a. Select Use existing, and select an existing resource group from the drop-down list.
b. Select Create new, and enter the name of a resource group.
To learn about resource groups, see Use resource groups to manage your Azure resources.
Under version, select V2 for the version.
Under location, select the location for the data factory. Only supported locations are displayed in the drop-down list. The data stores (for example, Azure Storage and SQL Database) and computes (for example, Azure HDInsight) that are used by your data factory can be in other locations and regions.
Select Create.
After creation is finished, the Data Factory home page is displayed.
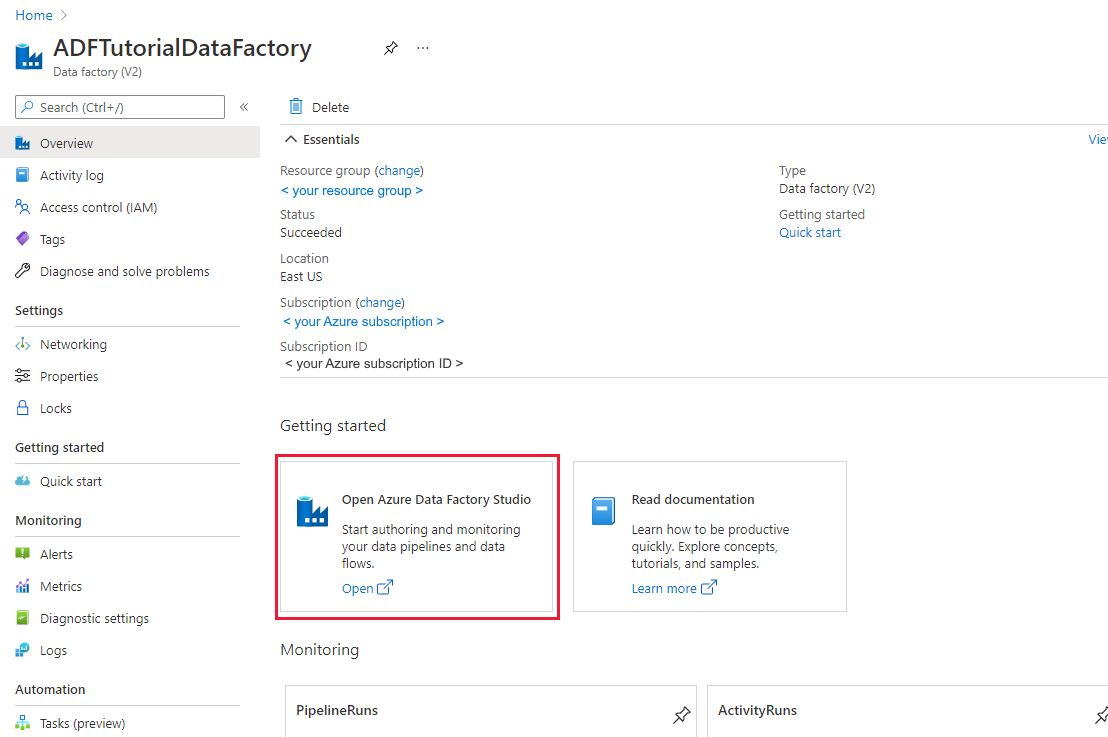
To launch the Azure Data Factory user interface (UI) in a separate tab, select Open on the Open Azure Data Factory Studio tile.
Use the Copy Data tool to create a pipeline
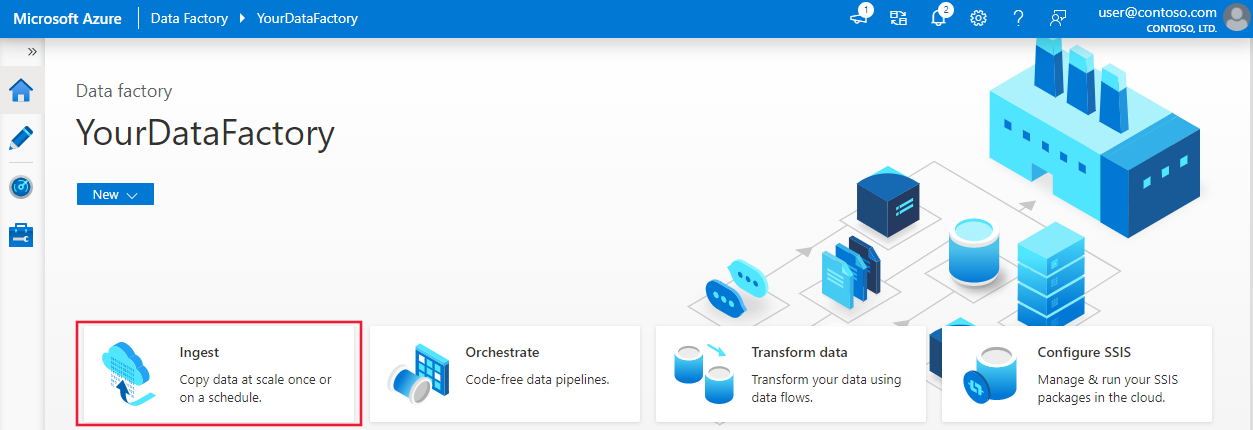
On the home page of Azure Data Factory, select the Ingest tile to launch the Copy Data tool.
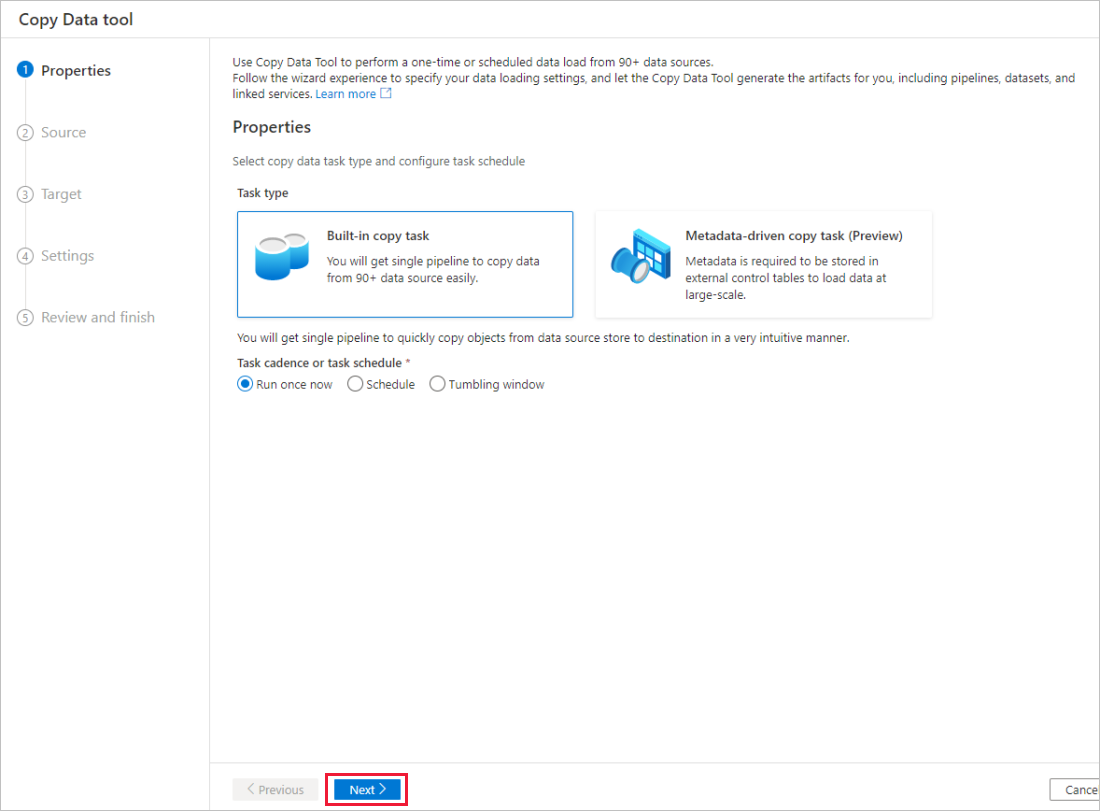
On the Properties page of the Copy Data tool, choose Built-in copy task under Task type, then select Next.
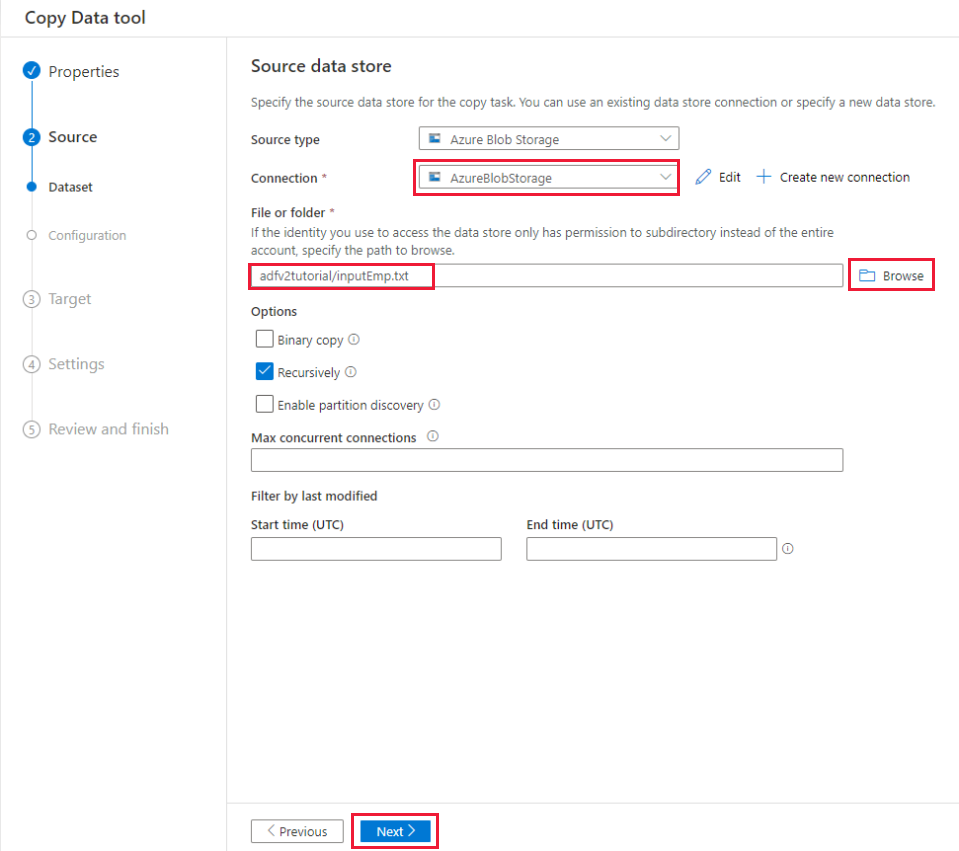
On the Source data store page, complete the following steps:
a. Select + Create new connection to add a connection.
b. Select Azure Blob Storage from the gallery, and then select Continue.
c. On the New connection (Azure Blob Storage) page, select your Azure subscription from the Azure subscription list, and select your storage account from the Storage account name list. Test connection and then select Create.
d. Select the newly created linked service as source in the Connection block.
e. In the File or folder section, select Browse to navigate to the adfv2tutorial folder, select the inputEmp.txt file, then select OK.
f. Select Next to move to next step.
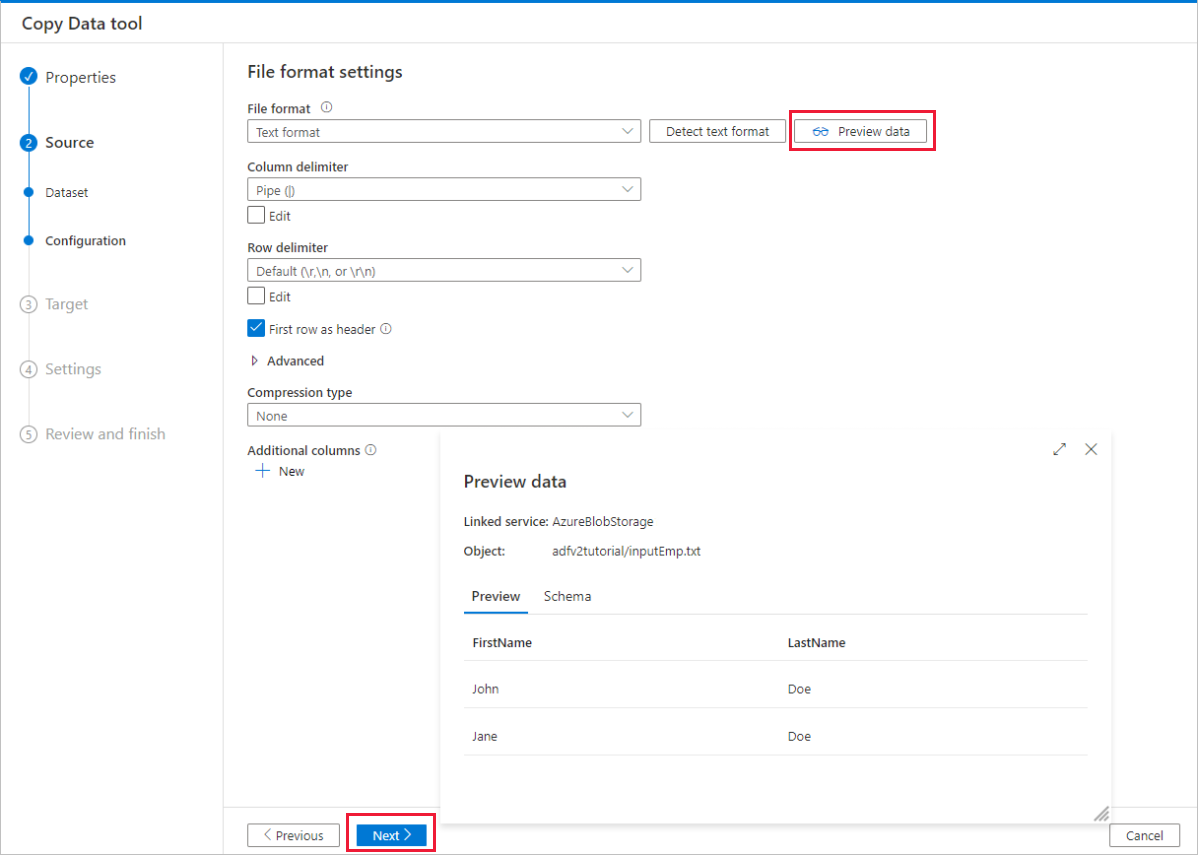
On the File format settings page, enable the checkbox for First row as header. Notice that the tool automatically detects the column and row delimiters, and you can preview data and view the schema of the input data by selecting Preview data button on this page. Then select Next.
On the Destination data store page, completes the following steps:
a. Select + Create new connection to add a connection.
b. Select Azure SQL Database from the gallery, and then select Continue.
c. On the New connection (Azure SQL Database) page, select your Azure subscription, server name and database name from the dropdown list. Then select SQL authentication under Authentication type, specify the username and password. Test connection and select Create.

d. Select the newly created linked service as sink, then select Next.
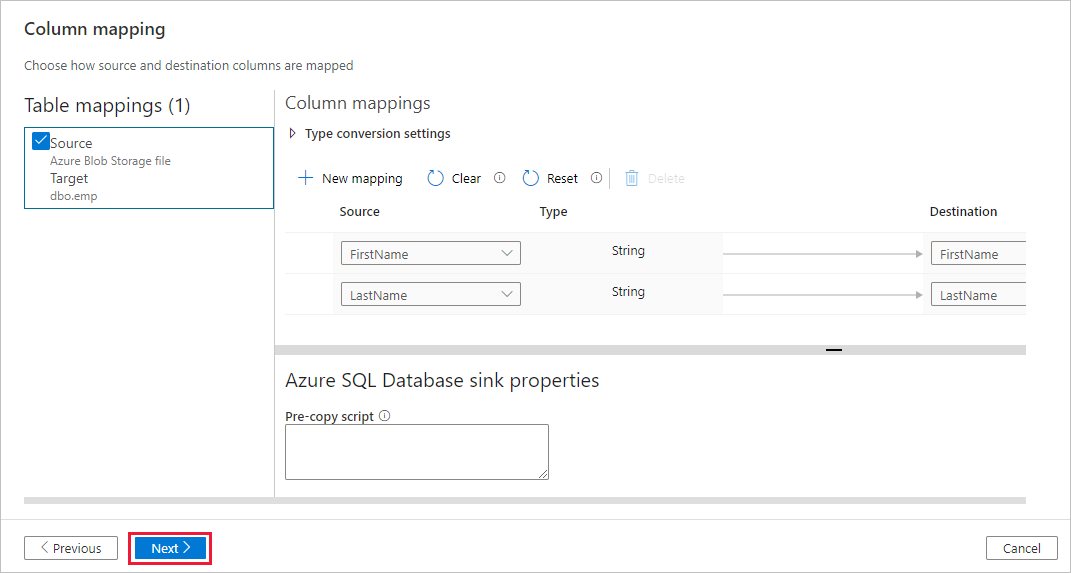
On the Destination data store page, select Use existing table and select the
dbo.emptable. Then select Next.On the Column mapping page, notice that the second and the third columns in the input file are mapped to the FirstName and LastName columns of the emp table. Adjust the mapping to make sure that there is no error, and then select Next.
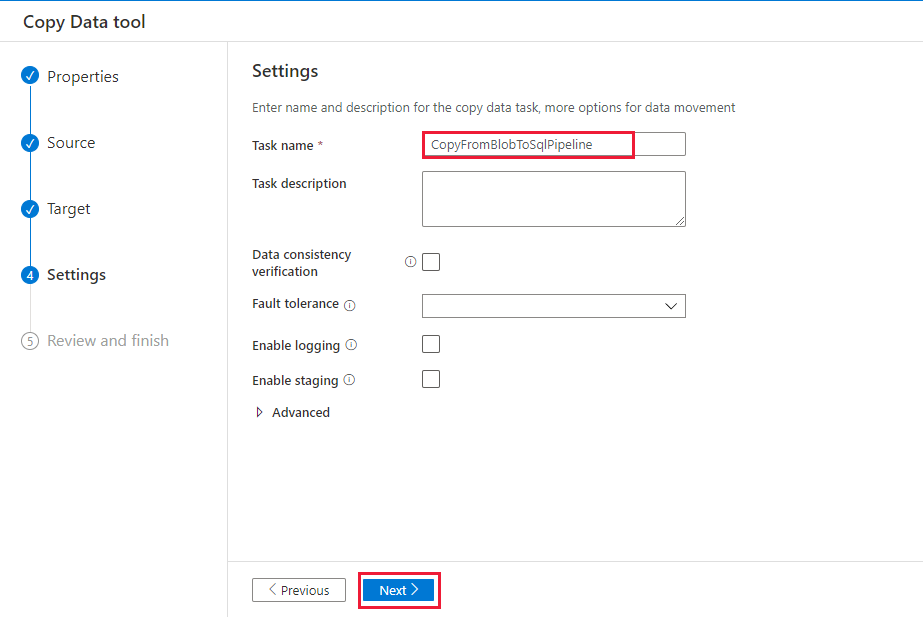
On the Settings page, under Task name, enter CopyFromBlobToSqlPipeline, and then select Next.
On the Summary page, review the settings, and then select Next.
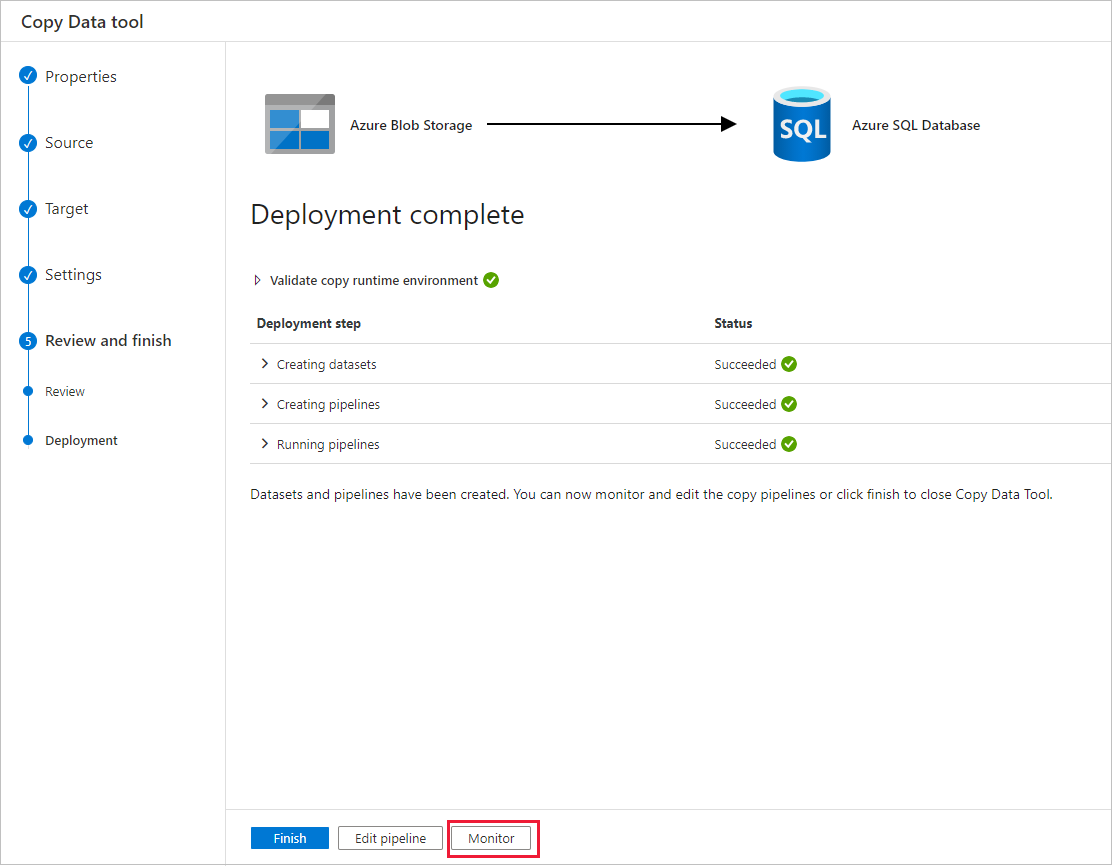
On the Deployment page, select Monitor to monitor the pipeline (task).
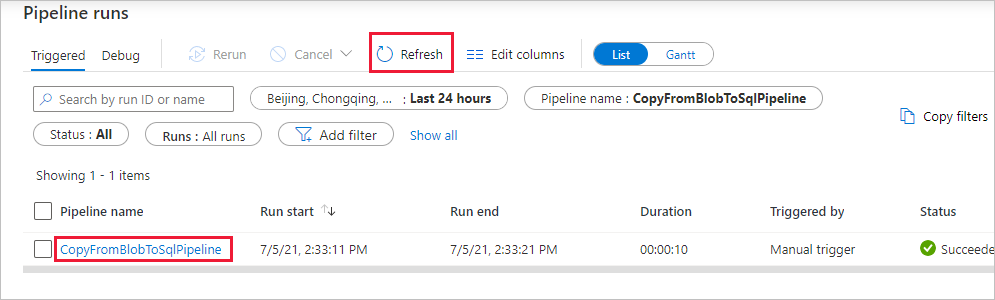
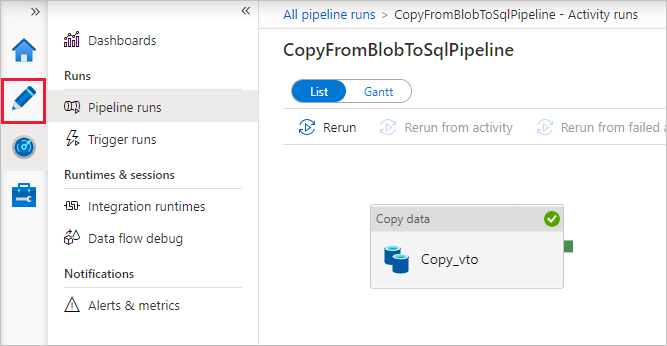
On the Pipeline runs page, select Refresh to refresh the list. Select the link under Pipeline name to view activity run details or rerun the pipeline.
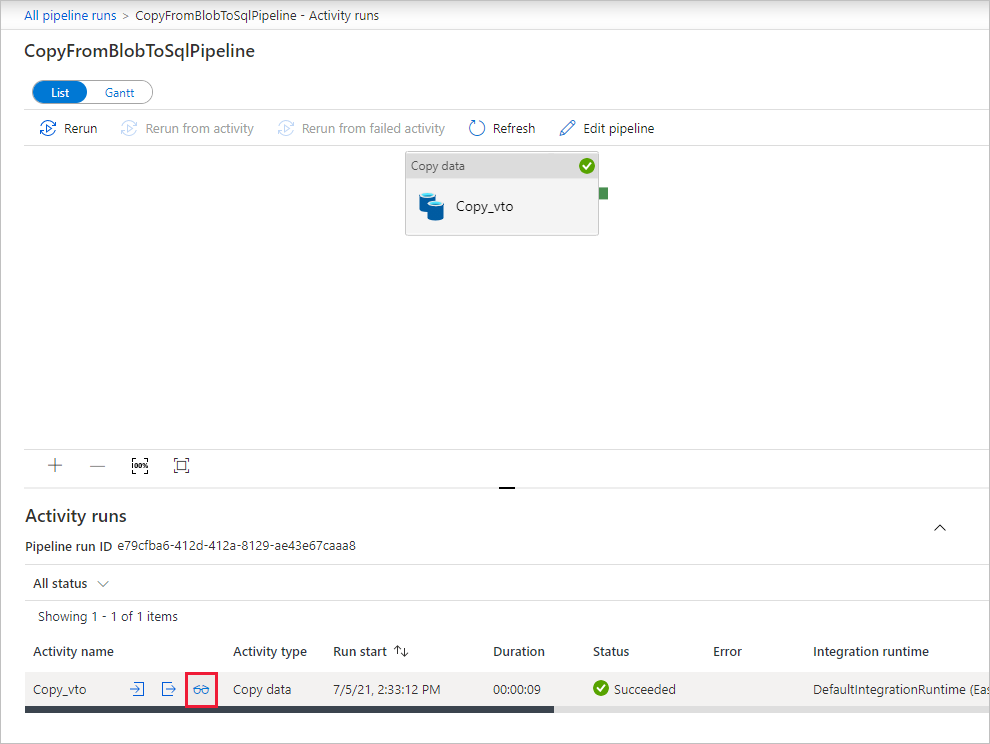
On the "Activity runs" page, select the Details link (eyeglasses icon) under Activity name column for more details about copy operation. To go back to the "Pipeline runs" view, select the All pipeline runs link in the breadcrumb menu. To refresh the view, select Refresh.
Verify that the data is inserted into the dbo.emp table in your SQL Database.
Select the Author tab on the left to switch to the editor mode. You can update the linked services, datasets, and pipelines that were created via the tool by using the editor. For details on editing these entities in the Data Factory UI, see the Azure portal version of this tutorial.
Related content
The pipeline in this sample copies data from Blob storage to a SQL Database. You learned how to:
- Create a data factory.
- Use the Copy Data tool to create a pipeline.
- Monitor the pipeline and activity runs.
Advance to the following tutorial to learn how to copy data from on-premises to the cloud:
Tilbakemeldinger
Kommer snart: Gjennom 2024 faser vi ut GitHub Issues som tilbakemeldingsmekanisme for innhold, og erstatter det med et nytt system for tilbakemeldinger. Hvis du vil ha mer informasjon, kan du se: https://aka.ms/ContentUserFeedback.
Send inn og vis tilbakemelding for