Copy data from a SQL Server database to Azure Blob storage by using the Copy Data tool
APPLIES TO:  Azure Data Factory
  Azure Synapse Analytics
Tip
Try out Data Factory in Microsoft Fabric, an all-in-one analytics solution for enterprises. Microsoft Fabric covers everything from data movement to data science, real-time analytics, business intelligence, and reporting. Learn how to start a new trial for free!
In this tutorial, you use the Azure portal to create a data factory. Then, you use the Copy Data tool to create a pipeline that copies data from a SQL Server database to Azure Blob storage.
Note
- If you're new to Azure Data Factory, see Introduction to Data Factory.
In this tutorial, you perform the following steps:
- Create a data factory.
- Use the Copy Data tool to create a pipeline.
- Monitor the pipeline and activity runs.
Prerequisites
Azure subscription
Before you begin, if you don't already have an Azure subscription, create a free account.
Azure roles
To create data factory instances, the user account you use to log in to Azure must be assigned a Contributor or Owner role or must be an administrator of the Azure subscription.
To view the permissions you have in the subscription, go to the Azure portal. Select your user name in the upper-right corner, and then select Permissions. If you have access to multiple subscriptions, select the appropriate subscription. For sample instructions on how to add a user to a role, see Assign Azure roles using the Azure portal.
SQL Server 2014, 2016, and 2017
In this tutorial, you use a SQL Server database as a source data store. The pipeline in the data factory you create in this tutorial copies data from this SQL Server database (source) to Blob storage (sink). You then create a table named emp in your SQL Server database and insert a couple of sample entries into the table.
Start SQL Server Management Studio. If it's not already installed on your machine, go to Download SQL Server Management Studio.
Connect to your SQL Server instance by using your credentials.
Create a sample database. In the tree view, right-click Databases, and then select New Database.
In the New Database window, enter a name for the database, and then select OK.
To create the emp table and insert some sample data into it, run the following query script against the database. In the tree view, right-click the database that you created, and then select New Query.
CREATE TABLE dbo.emp
(
    ID int IDENTITY(1,1) NOT NULL,
    FirstName varchar(50),
    LastName varchar(50)
)
GO

INSERT INTO emp (FirstName, LastName) VALUES ('John', 'Doe')
INSERT INTO emp (FirstName, LastName) VALUES ('Jane', 'Doe')
GO
Azure storage account
In this tutorial, you use a general-purpose Azure storage account (specifically, Blob storage) as a destination/sink data store. If you don't have a general-purpose storage account, see Create a storage account for instructions to create one. The pipeline in the data factory you that create in this tutorial copies data from the SQL Server database (source) to this Blob storage (sink).
Get the storage account name and account key
You use the name and key of your storage account in this tutorial. To get the name and key of your storage account, take the following steps:
Sign in to the Azure portal with your Azure user name and password.
In the left pane, select All services. Filter by using the Storage keyword, and then select Storage accounts.
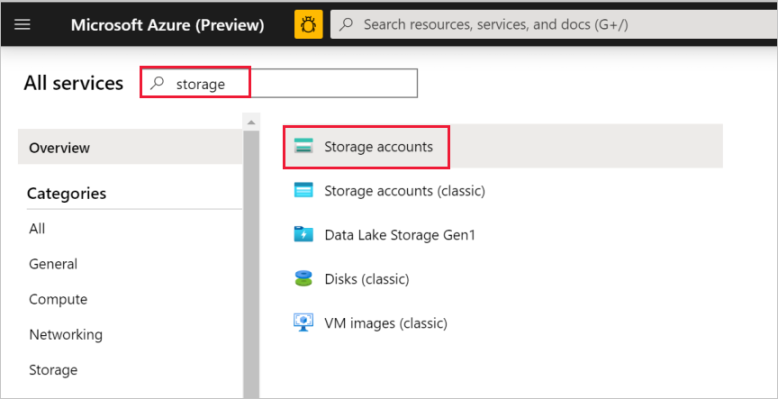
In the list of storage accounts, filter for your storage account, if needed. Then select your storage account.
In the Storage account window, select Access keys.
In the Storage account name and key1 boxes, copy the values, and then paste them into Notepad or another editor for later use in the tutorial.
Create a data factory
On the menu on the left, select Create a resource > Integration > Data Factory.
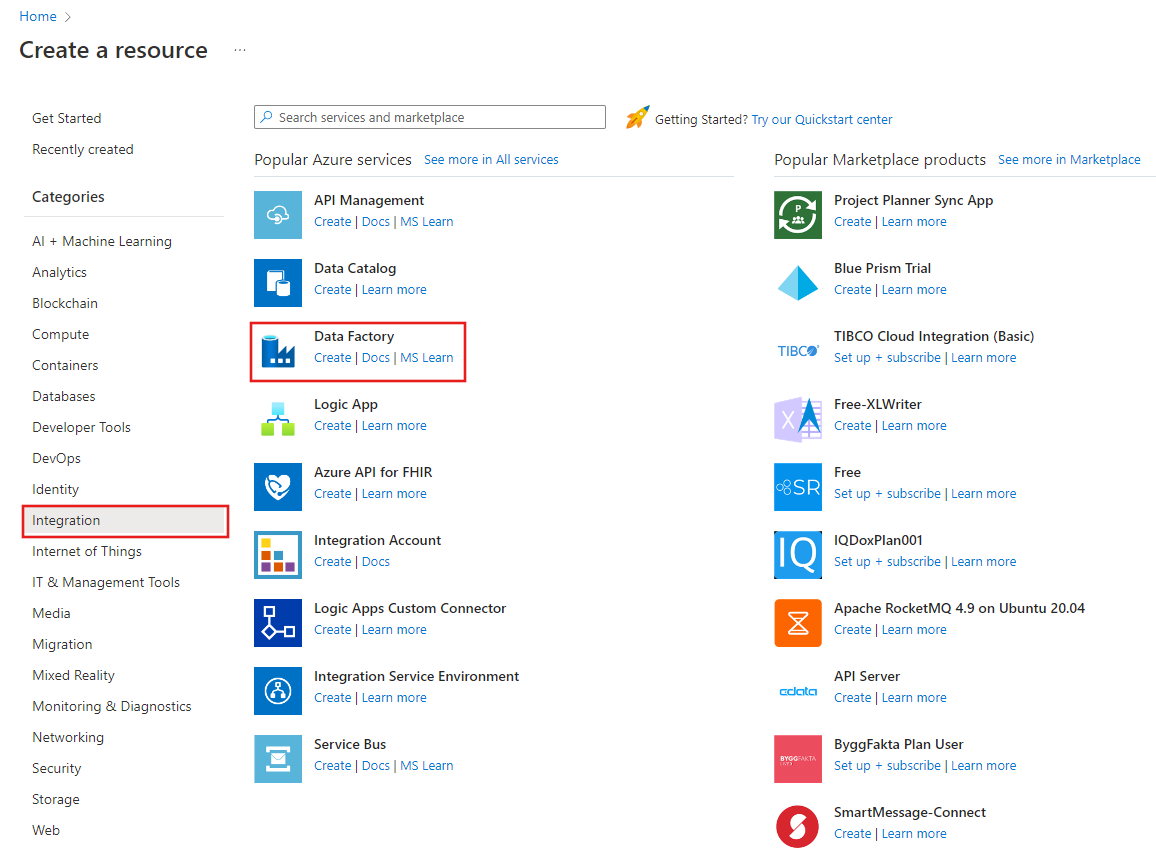
On the New data factory page, under Name, enter ADFTutorialDataFactory.
The name of the data factory must be globally unique. If you see the following error message for the name field, change the name of the data factory (for example, yournameADFTutorialDataFactory). For naming rules for Data Factory artifacts, see Data Factory naming rules.
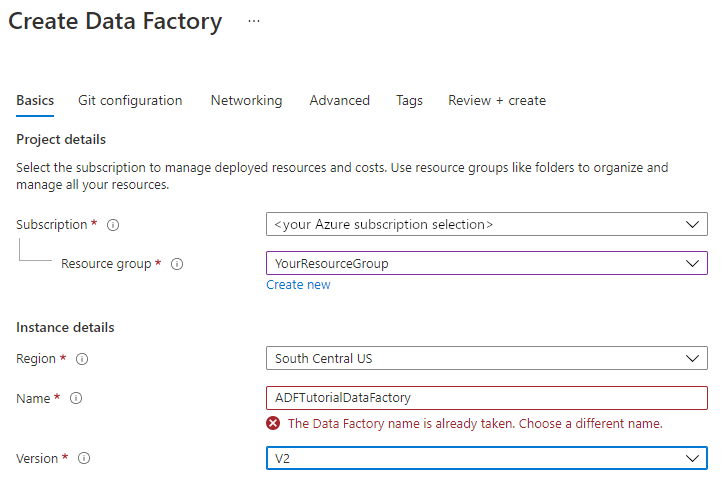
Select the Azure subscription in which you want to create the data factory.
For Resource Group, take one of the following steps:
Select Use existing, and select an existing resource group from the drop-down list.
Select Create new, and enter the name of a resource group.
To learn about resource groups, see Use resource groups to manage your Azure resources.
Under Version, select V2.
Under Location, select the location for the data factory. Only locations that are supported are displayed in the drop-down list. The data stores (for example, Azure Storage and SQL Database) and computes (for example, Azure HDInsight) used by Data Factory can be in other locations/regions.
Select Create.
After the creation is finished, you see the Data Factory page as shown in the image.
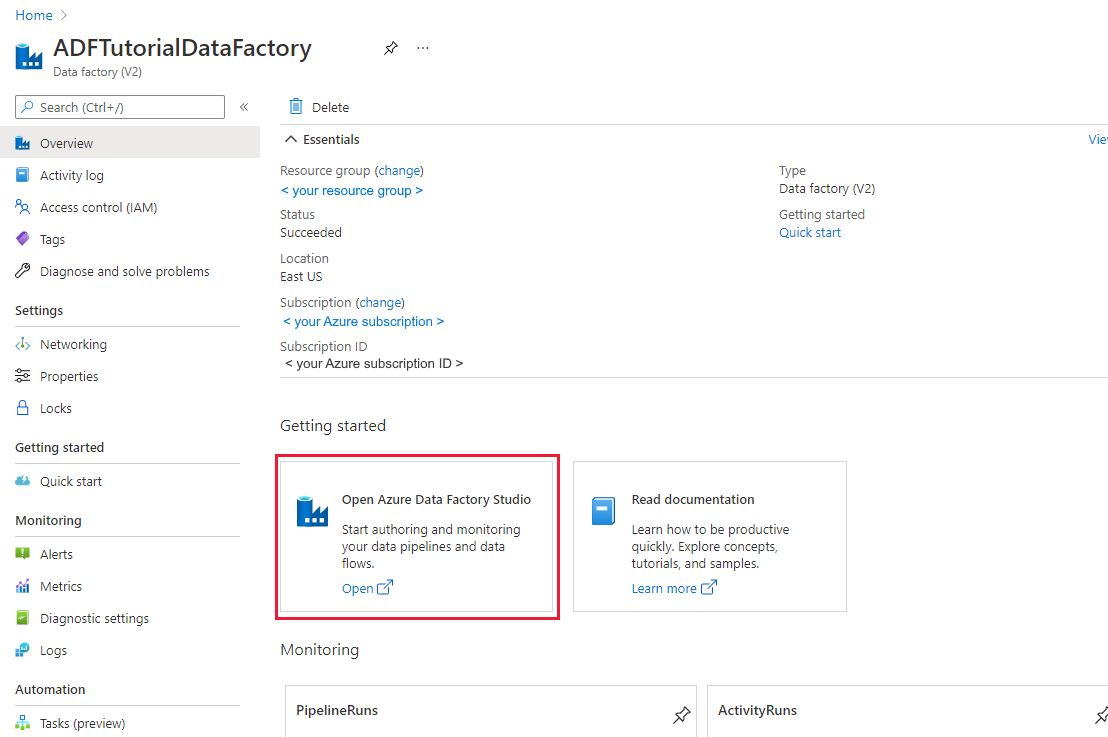
Select Open on the Open Azure Data Factory Studio tile to launch the Data Factory user interface in a separate tab.
Use the Copy Data tool to create a pipeline
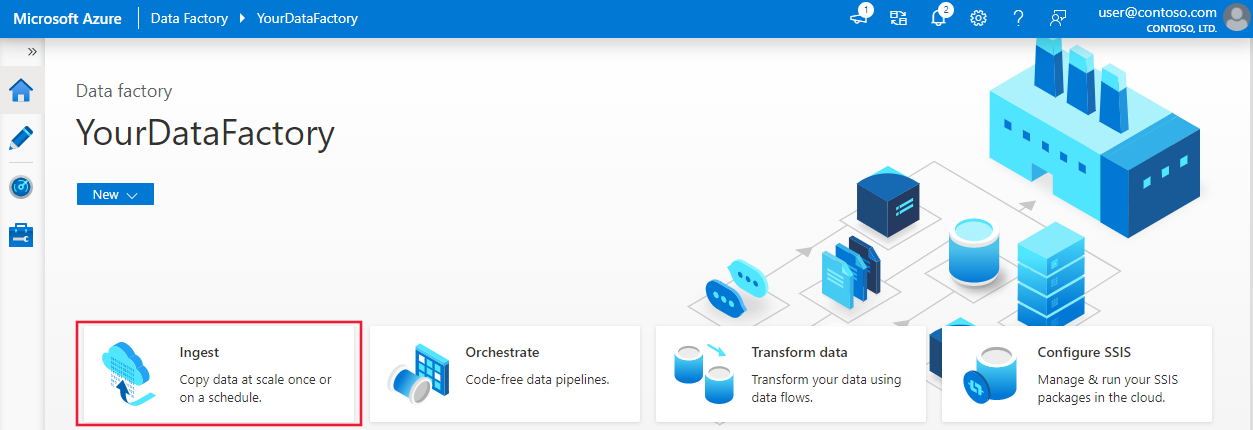
On the Azure Data Factory home page, select Ingest to launch the Copy Data tool.
On the Properties page of the Copy Data tool, choose Built-in copy task under Task type, and choose Run once now under Task cadence or task schedule, then select Next.
On the Source data store page, select on + Create new connection.
Under New connection, search for SQL Server, and then select Continue.
In the New connection (SQL server) dialog box, under Name, enter SqlServerLinkedService. Select +New under Connect via integration runtime. You must create a self-hosted integration runtime, download it to your machine, and register it with Data Factory. The self-hosted integration runtime copies data between your on-premises environment and the cloud.
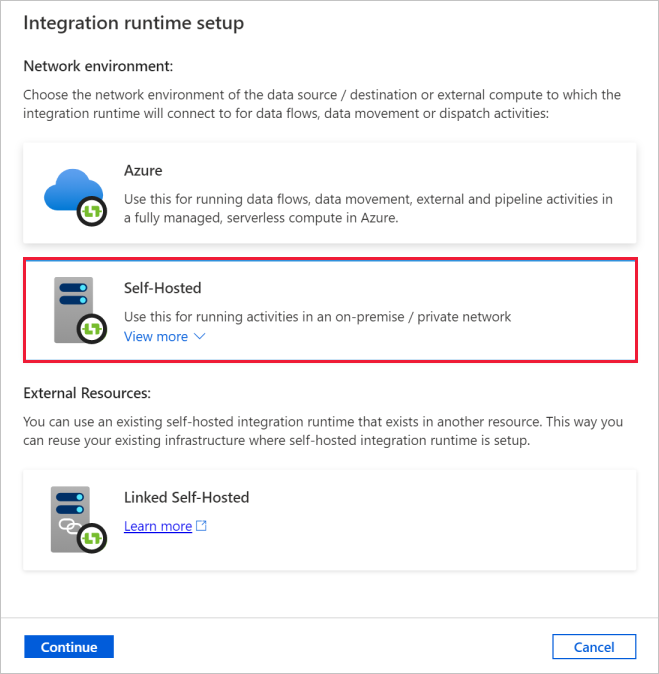
In the Integration runtime setup dialog box, select Self-Hosted. Then select Continue.
In the Integration runtime setup dialog box, under Name, enter TutorialIntegrationRuntime. Then select Create.
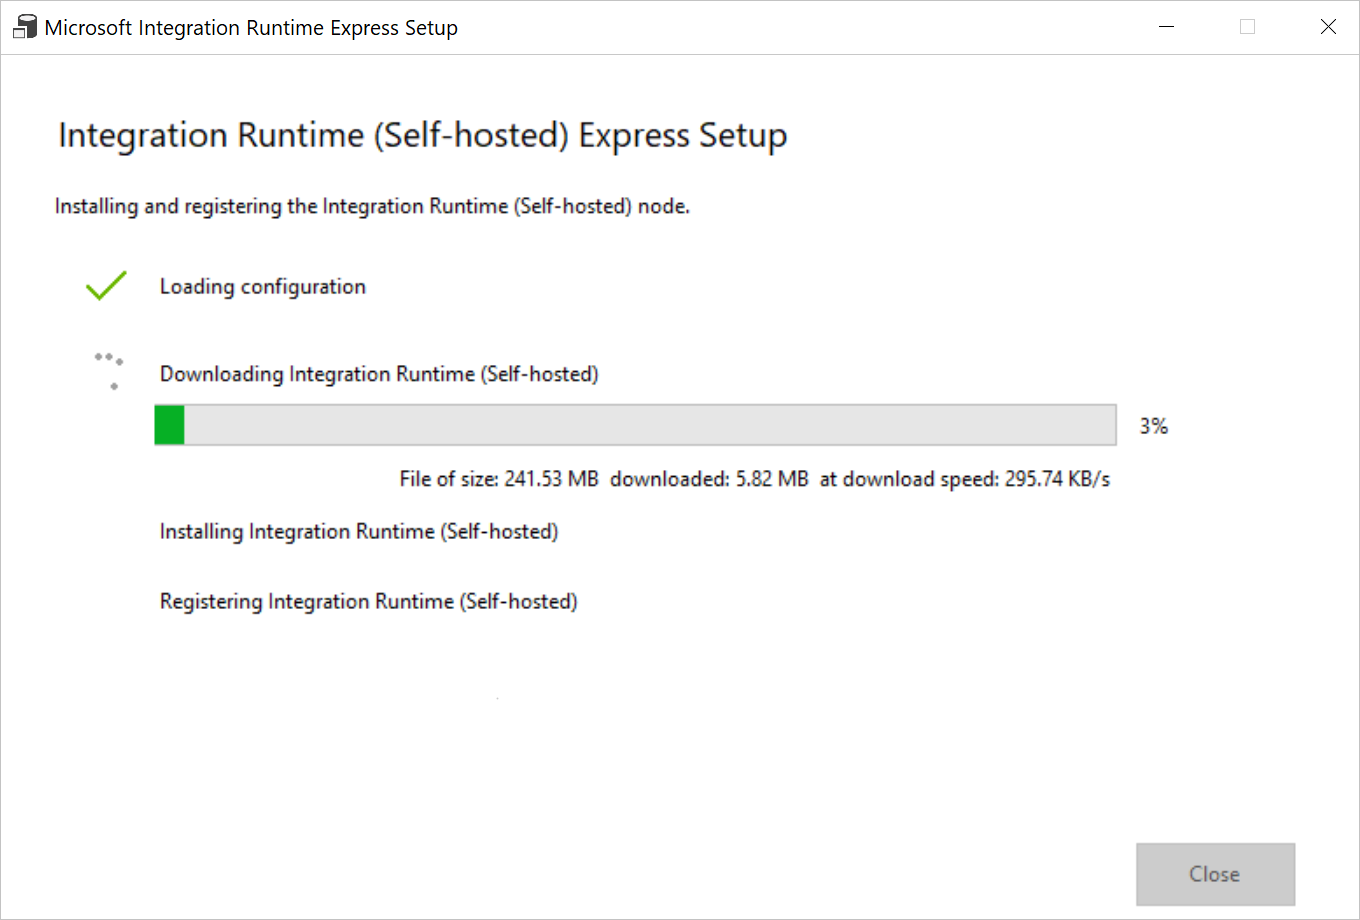
In the Integration runtime setup dialog box, select Click here to launch the express setup for this computer. This action installs the integration runtime on your machine and registers it with Data Factory. Alternatively, you can use the manual setup option to download the installation file, run it, and use the key to register the integration runtime.
Run the downloaded application. You see the status of the express setup in the window.
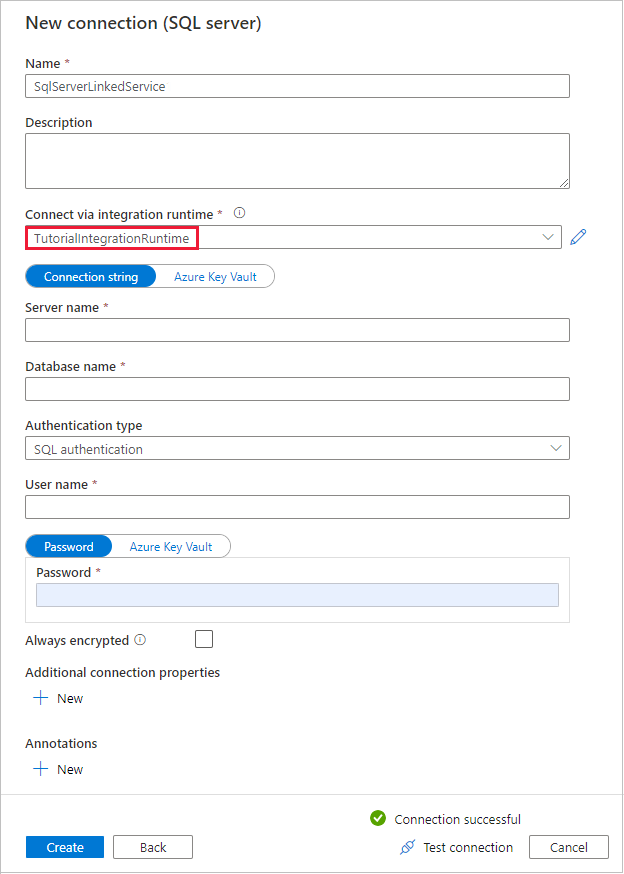
In the New Connection (SQL Server) dialog box, confirm that TutorialIntegrationRuntime is selected under Connect via integration runtime. Then, take the following steps:
a. Under Name, enter SqlServerLinkedService.
b. Under Server name, enter the name of your SQL Server instance.
c. Under Database name, enter the name of your on-premises database.
d. Under Authentication type, select appropriate authentication.
e. Under User name, enter the name of user with access to SQL Server.
f. Enter the Password for the user.
g. Test connection and select Create.
On the Source data store page, ensure that the newly created SQL Server connection is selected in the Connection block. Then in the Source tables section, choose EXISTING TABLES and select the dbo.emp table in the list, and select Next. You can select any other table based on your database.
On the Apply filter page, you can preview data and view the schema of the input data by selecting the Preview data button. Then select Next.
On the Destination data store page, select + Create new connection
In New connection, search and select Azure Blob Storage, and then select Continue.
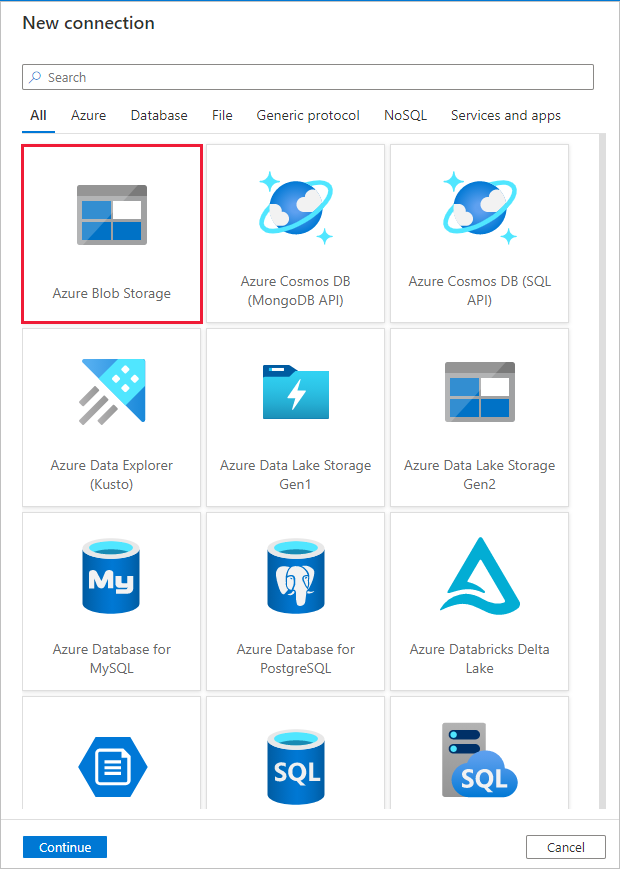
On the New connection (Azure Blob Storage) dialog, take the following steps:
a. Under Name, enter AzureStorageLinkedService.
b. Under Connect via integration runtime, select TutorialIntegrationRuntime, and select Account key under Authentication method.
c. Under Azure subscription, select your Azure subscription from the drop-down list.
d. Under Storage account name, select your storage account from the drop-down list.
e. Test connection and select Create.
In the Destination data store dialog, make sure that the newly created Azure Blob Storage connection is selected in the Connection block. Then under Folder path, enter adftutorial/fromonprem. You created the adftutorial container as part of the prerequisites. If the output folder doesn't exist (in this case fromonprem), Data Factory automatically creates it. You can also use the Browse button to browse the blob storage and its containers/folders. If you do not specify any value under File name, by default the name from the source would be used (in this case dbo.emp).
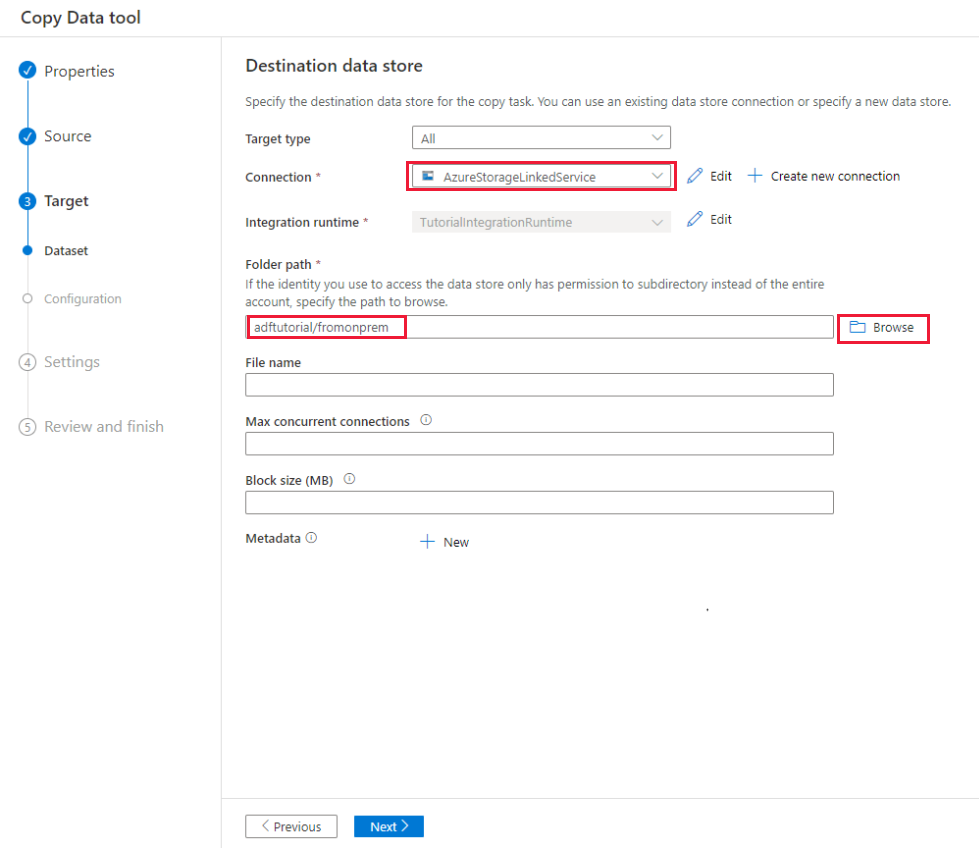
On the File format settings dialog, select Next.
On the Settings dialog, under Task name, enter CopyFromOnPremSqlToAzureBlobPipeline, and then select Next. The Copy Data tool creates a pipeline with the name you specify for this field.
On the Summary dialog, review values for all the settings, and select Next.
On the Deployment page, select Monitor to monitor the pipeline (task).
When the pipeline run completes, you can view the status of the pipeline you created.
On the "Pipeline runs" page, select Refresh to refresh the list. Select the link under Pipeline name to view activity run details or rerun the pipeline.

On the "Activity runs" page, select the Details link (eyeglasses icon) under the Activity name column for more details about copy operation. To go back to the "Pipeline runs" page, select the All pipeline runs link in the breadcrumb menu. To refresh the view, select Refresh.
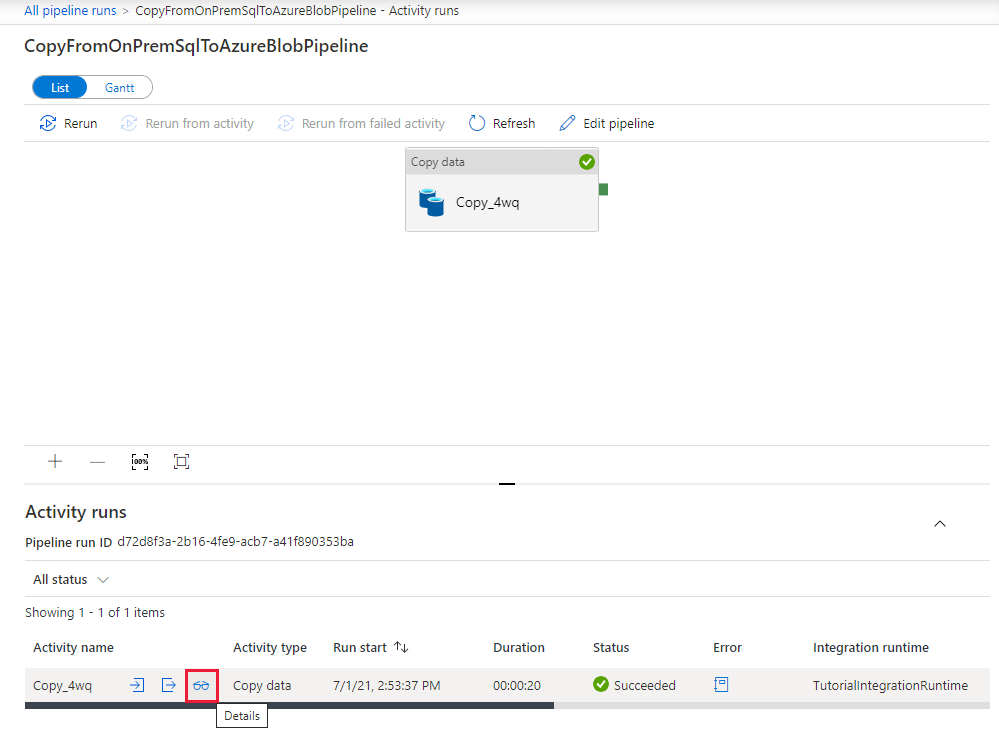
Confirm that you see the output file in the fromonprem folder of the adftutorial container.
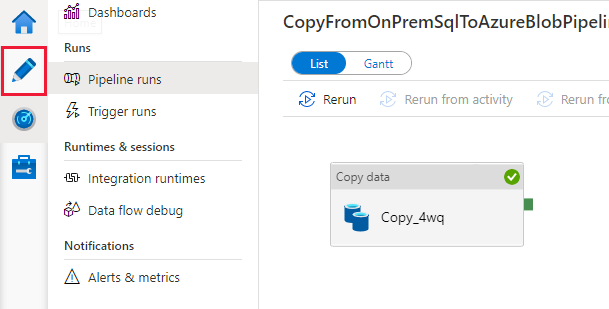
Select the Author tab on the left to switch to the editor mode. You can update the linked services, datasets, and pipelines created by the tool by using the editor. Select Code to view the JSON code associated with the entity opened in the editor. For details on how to edit these entities in the Data Factory UI, see the Azure portal version of this tutorial.
Related content
The pipeline in this sample copies data from a SQL Server database to Blob storage. You learned how to:
- Create a data factory.
- Use the Copy Data tool to create a pipeline.
- Monitor the pipeline and activity runs.
For a list of data stores that are supported by Data Factory, see Supported data stores.
To learn about how to copy data in bulk from a source to a destination, advance to the following tutorial:
Tilbakemeldinger
Kommer snart: Gjennom 2024 faser vi ut GitHub Issues som tilbakemeldingsmekanisme for innhold, og erstatter det med et nytt system for tilbakemeldinger. Hvis du vil ha mer informasjon, kan du se: https://aka.ms/ContentUserFeedback.
Send inn og vis tilbakemelding for