Manually configure your CI/CD workflow for running load tests
You can automate a load test in Azure Load Testing by creating a CI/CD pipeline. In this article, you learn how to manually configure GitHub Actions, Azure Pipelines, or other CI tools to invoke an existing test in Azure Load Testing. Automate a load test to continuously validate your application performance and stability under load.
To add an existing load test to a CI/CD pipeline:
- Configure service authentication to allow the CI tool to connect to your Azure load testing resource.
- Add load test input files to your repository, such as the JMeter test script and the load test YAML configuration.
- Update the CI/CD pipeline definition to invoke Azure Load Testing.
Prerequisites
- An Azure account with an active subscription. Create an account for free.
- An Azure Load Testing test. Create a URL-based load test or use an existing JMeter script to create a load test.
- An Azure DevOps organization and project. If you don't have an Azure DevOps organization, you can create one for free. If you need help with getting started with Azure Pipelines, see Create your first pipeline.
Configure service authentication
To run a load test in your CI/CD workflow, you need to grant permission to the CI/CD workflow to access your load testing resource. Create a service principal for the CI/CD workflow and assign the Load Test Contributor Azure RBAC role.
Create a service connection in Azure Pipelines
In Azure Pipelines, you create a service connection in your Azure DevOps project to access resources in your Azure subscription. When you create the service connection, Azure DevOps creates a Microsoft Entra service principal object.
Sign in to your Azure DevOps organization (
https://dev.azure.com/<your-organization>), and select your project.Replace the
<your-organization>text placeholder with your project identifier.Select Project settings > Service connections > + New service connection.
In the New service connection pane, select the Azure Resource Manager, and then select Next.
Select the Service Principal (automatic) authentication method, and then select Next.
Enter the service connection details, and then select Save to create the service connection.
Field Value Scope level Subscription. Subscription Select the Azure subscription that hosts your load testing resource. Resource group Select the resource group that contains your load testing resource. Service connection name Enter a unique name for the service connection. Grant access permission to all pipelines Checked. From the list of service connections, select the one you created earlier, and then select Manage Service Principal.
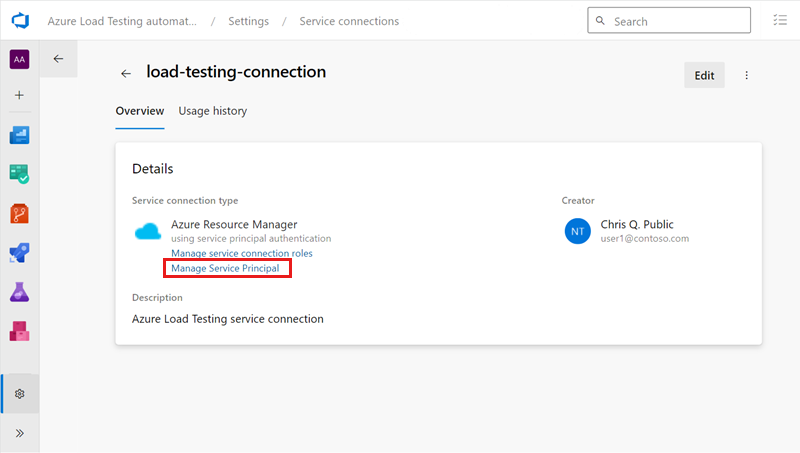
The Azure portal opens in a separate browser tab and shows the service principal details.
In the Azure portal, copy the Display name value.
You use this value in the next step to grant permissions for running load tests to the service principal.

Grant access to Azure Load Testing
Azure Load Testing uses Azure RBAC to grant permissions for performing specific activities on your load testing resource. To run a load test from your CI/CD pipeline, you grant the Load Test Contributor role to the service principal.
In the Azure portal, go to your Azure Load Testing resource.
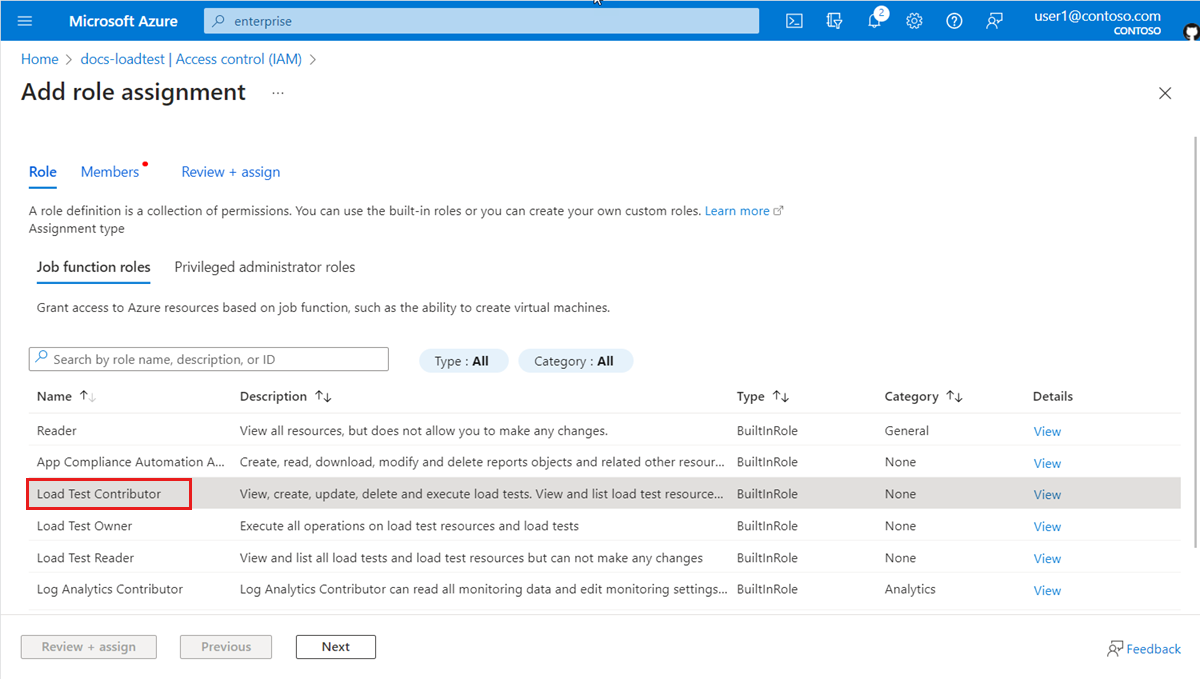
Select Access control (IAM) > Add > Add role assignment.
In the Role tab, select Load Test Contributor in the list of job function roles.
In the Members tab, select Select members, and then use the display name you copied previously to search the service principal.
Select the service principal, and then select Select.
In the Review + assign tab, select Review + assign to add the role assignment.

You can now use the service connection in your Azure Pipelines workflow definition to access your Azure load testing resource.
Add load test files in your repository
To run a load test with Azure Load Testing in a CI/CD workflow, you need to add all load test input files in your source control repository.
If you don't have an existing load test, add the following files to your source code repository:
- Load test configuration YAML file. Learn how you can create a load test configuration YAML file.
- Test plan file. For JMeter-based tests, add a JMeter test script (
JMXfile). For URL-based tests, add a requests JSON file. - Any JMeter user properties files.
- Any input data files that your test plan uses. For example, CSV data files.
If you have an existing load test, you can download the configuration settings and all input files directly from the Azure portal. Perform the following steps to download the input files for an existing load testing in the Azure portal:
In the Azure portal, go to your Azure Load Testing resource.
On the left pane, select Tests to view the list of load tests, and then select your test.
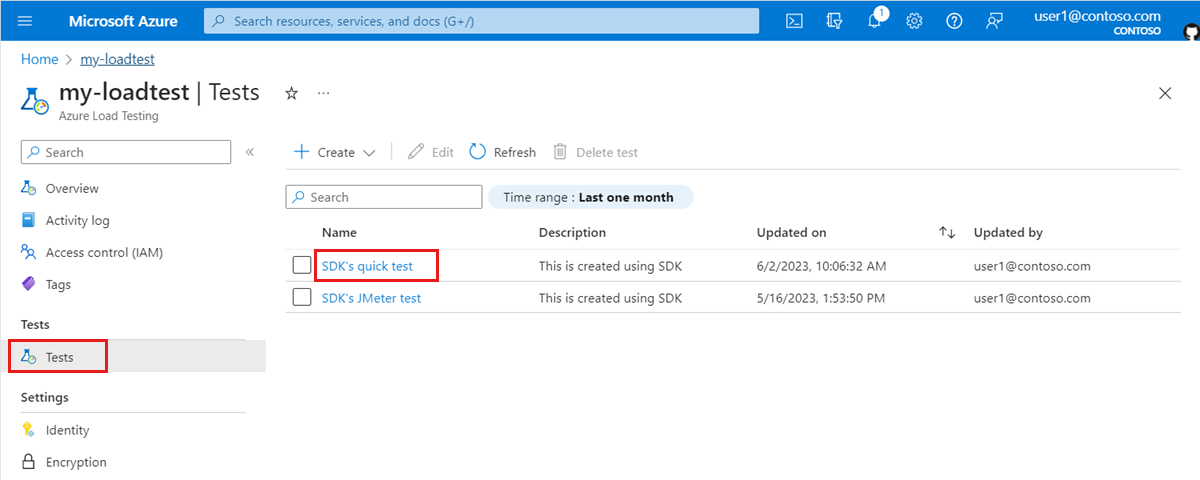
Selecting the ellipsis (...) next to the test run you're working with, and then select Download input file.
The browser downloads a zipped folder that contains the load test input files.

Use any zip tool to extract the input files.
The folder contains the following files:
config.yaml: the load test YAML configuration file. You reference this file in the CI/CD workflow definition..jmx: the JMeter test script- Any additional input files, such as CSV files or user properties files that are needed to run the load test.
Commit all extracted input files to your source control repository.
Use the source code repository in which you configure the CI/CD pipeline.
Update the CI/CD workflow definition
Azure Load Testing supports both GitHub Actions and Azure Pipelines for running load tests.
Install the Azure Load Testing extension for Azure DevOps
To create and run a load test, the Azure Pipelines workflow definition uses the Azure Load Testing task extension from the Azure DevOps Marketplace.
Open the Azure Load Testing task extension in the Azure DevOps Marketplace, and select Get it free.
Select your Azure DevOps organization, and then select Install to install the extension.
If you don't have administrator privileges for the selected Azure DevOps organization, select Request to request an administrator to install the extension.
Update the Azure Pipelines workflow
Update your Azure Pipelines workflow to run a load test for your Azure load testing resource.
Sign in to your Azure DevOps organization (
https://dev.azure.com/<your-organization>), and select your project.Select Pipelines in the left navigation, select your pipeline, and then select Edit to edit your workflow definition.
Alternately, select Create Pipeline to create a new pipeline in Azure Pipelines.
Use the
AzureLoadTesttask to run the load test.Specify the load test configuration file you exported earlier in the
loadTestConfigFileproperty.Replace the
<load-testing-resource>and<load-testing-resource-group>text placeholders with the name of your Azure load testing resource and the resource group.- task: AzureLoadTest@1 inputs: azureSubscription: $(serviceConnection) loadTestConfigFile: 'config.yaml' loadTestResource: <load-testing-resource> resourceGroup: <load-testing-resource-group>Optionally, you can pass parameters or secrets to the load test by using the
envorsecretsproperty.Use the
publishtask to publish the test results as artifacts in your Azure Pipelines workflow run.- publish: $(System.DefaultWorkingDirectory)/loadTest artifact: loadTestResults
View load test results
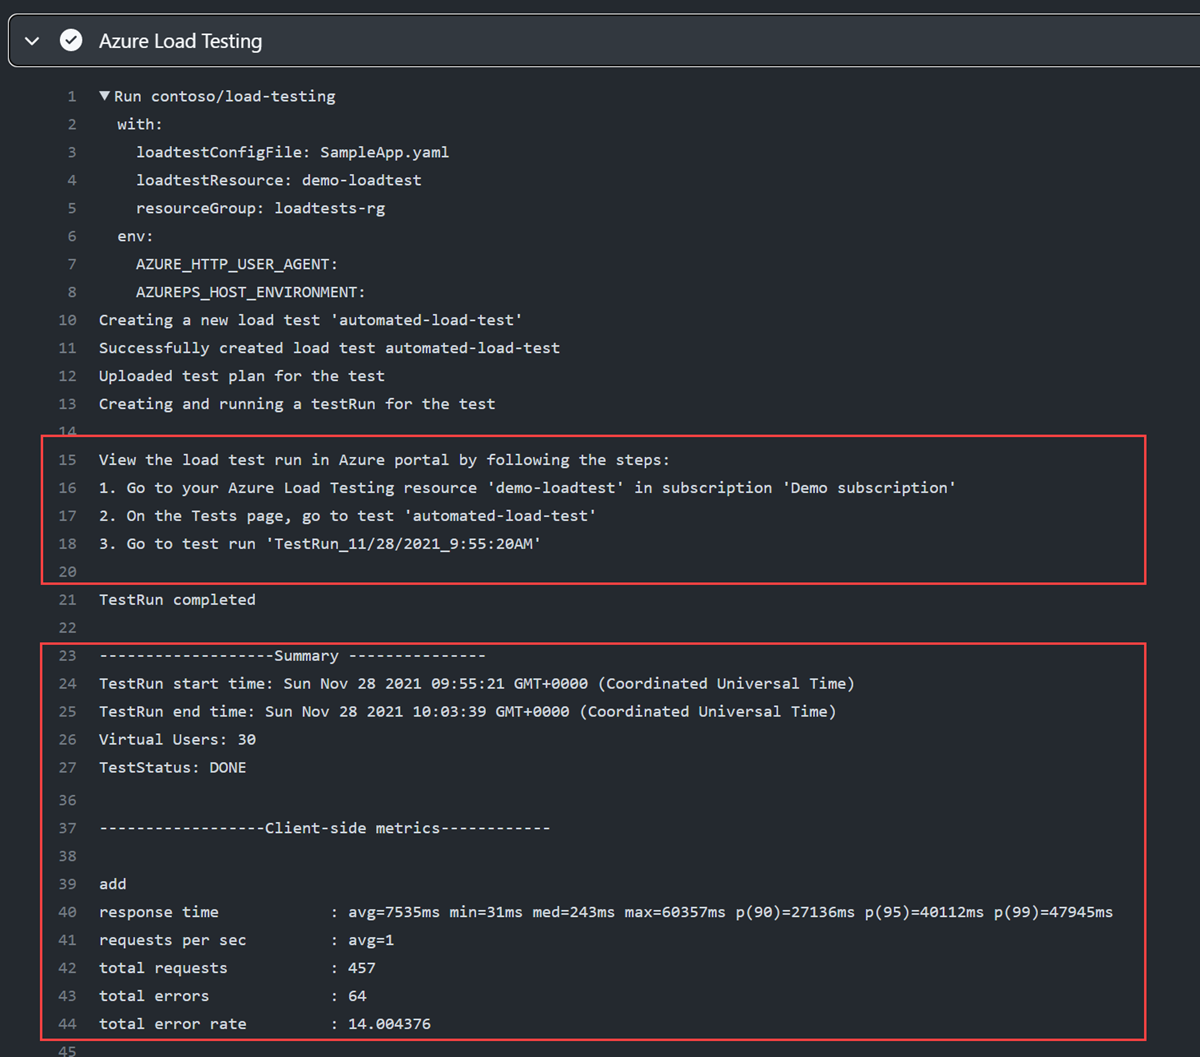
When you run a load test from your CI/CD pipeline, you can view the summary results directly in the CI/CD output log. If you published the test results as a pipeline artifact, you can also download a CSV file for further reporting.
Clean up resources
If you don't plan to use any of the resources that you created, delete them so you don't incur any further charges.
Remove Azure Pipelines changes:
Sign in to your Azure DevOps organization (
https://dev.azure.com/<your-organization>), and select your project.Replace the
<your-organization>text placeholder with your project identifier.If you created a new pipeline":
Select Pipelines, and then select your pipeline.
Select the ellipsis, and then select Delete.
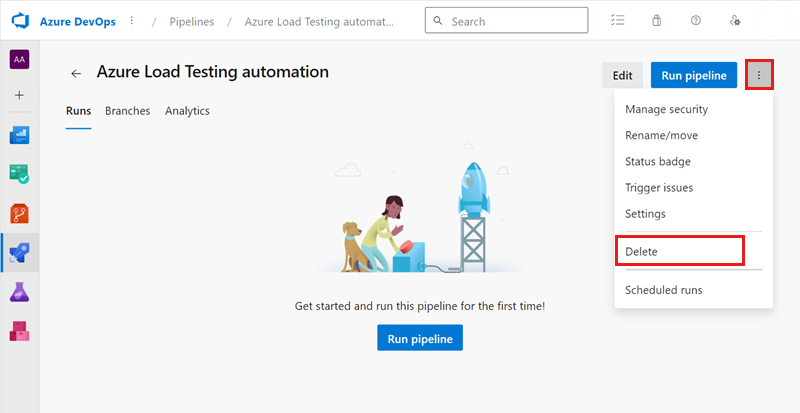
Enter the pipeline name, and then select Delete to delete the pipeline.
If you modified an existing workflow definition, undo the modifications for running the load test, and save the workflow.
Remove the service connection:
- Select Project settings > Service connections, and then select your service connection.
- Select Edit > Delete to remove the service connection.

Next steps
Advance to the next article to learn how to identify performance regressions by defining test fail criteria and comparing test runs.
Tilbakemeldinger
Kommer snart: Gjennom 2024 faser vi ut GitHub Issues som tilbakemeldingsmekanisme for innhold, og erstatter det med et nytt system for tilbakemeldinger. Hvis du vil ha mer informasjon, kan du se: https://aka.ms/ContentUserFeedback.
Send inn og vis tilbakemelding for