Getting Started - Sample Swift (macOS) App and Tutorials
Important
Visual Studio App Center is scheduled for retirement on March 31, 2025. While you can continue to use Visual Studio App Center until it is fully retired, there are several recommended alternatives that you may consider migrating to.
In this tutorial, you'll learn how to set up a sample Swift app with App Center for macOS. Both Objective-C and Swift are supported.
Prerequisites
Sign in to GitHub and fork the repository
Sign in to your GitHub account.
Access the sample app's GitHub repository.
Click Fork at the top-right hand corner of the page, and clone the repository.
Integrate CocoaPods
Open a terminal and go to the sample app's directory.
Run the command below to install CocoaPods:
sudo gem install cocoapodsThe included Podfile lists the dependencies in the source code. To install them, run the command below:
pod installOpen the
.xcworkspaceand press Run. The app should build without error.
Sign in to App Center
Open the App Center portal.
Click Connect with GitHub and sign in, or use another provider.
Create a new app in App Center
Click Add new app.
Name the app Sample macOS App.
Choose macOS and Objective-C / Swift.
Click Add new app at the bottom.
Replace the App Secret
In order for the sample app to send information to App Center, the app secret must be changed in Xcode.
Navigate to the Settings page in App Center.
Copy the App Secret at the top.
Open the
.xcworkspacefrom the sample app folder.In AppDelegate.swift, edit the
applicationDidFinishLaunchingdelegate method and paste your App Secret at the placeholder.Add, commit, and push changes to your forked repository. It can be done from the terminal, or a tool of your choice.
Codesign the project
Codesigning is optional, but recommended.
Codesigning assures users that the app is from a trustworthy developer, and hasn't been altered by someone else. In App Center, it's needed to distribute the app to users and send push notifications. Learn more from the Apple Developer Documentation.
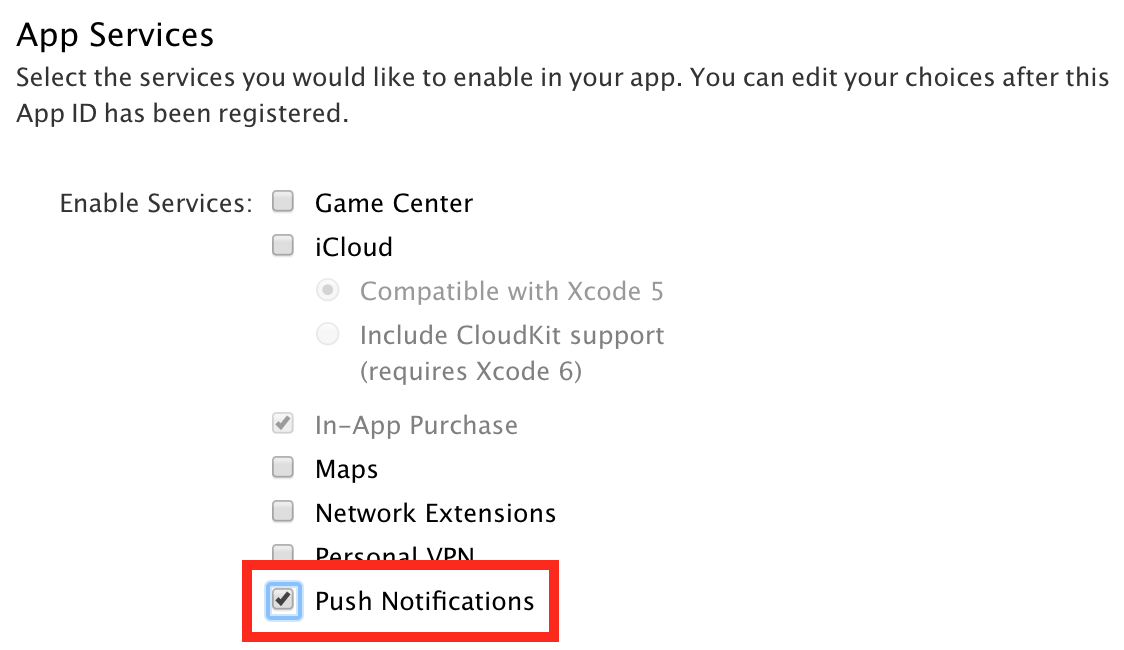
When creating a new App ID for this sample app, be sure to check the Push Notifications service under the App Services section.
Open
.xcworkspacefrom the sample app's folder.Go to General within the
.xcworkspacefile.Under Identity, edit the Bundle Identifier to match the app ID.
Import and select the provisioning profile under Signing (Debug) and Signing (Release).
Add, commit, and push changes to your forked repository. It can be done from the terminal, or a tool of your choice.
You're all set up to try out an App Center service. Not sure what to do next? Most people build their app next; check out the Build Tutorial for a short walkthrough.
Feedback
Binnenkort beschikbaar: In de loop van 2024 zullen we GitHub Issues geleidelijk uitfaseren als het feedbackmechanisme voor inhoud. Het wordt vervangen door een nieuw feedbacksysteem. Zie voor meer informatie: https://aka.ms/ContentUserFeedback.
Feedback verzenden en weergeven voor