Aan de slag met Azure Notification Hubs die gebruikmaken van Baidu
Baidu Cloud Push is een Chinese cloudservice waarmee u pushmeldingen naar mobiele apparaten kunt verzenden.
Aangezien Google Play en FCM (Firebase Cloud Messaging) niet beschikbaar zijn in China, moet u andere appstores en pushservices gebruiken. Baidu is er een van en deze wordt momenteel gebruikt door de Notification Hub.
Vereisten
Voor deze zelfstudie hebt u het volgende nodig:
- Android SDK (ervan uitgaande dat u Android Studio gebruikt) die u kunt downloaden van de Android-site
- Android SDK Baidu Push
Notitie
U hebt een actief Azure-account nodig om deze zelfstudie te voltooien. Als u geen account hebt, kunt u binnen een paar minuten een account voor de gratis proefversie maken. Zie Gratis proefversie van Azure voor meer informatie.
Ga als volgt te werk om aan de slag te gaan:
- Maak een Baidu-account.
- Maak een Baidu-cloudpushproject en noteer de API-sleutel en geheime sleutel.
Een nieuwe Notification Hub configureren
Meld u aan bij het Azure-portaal.
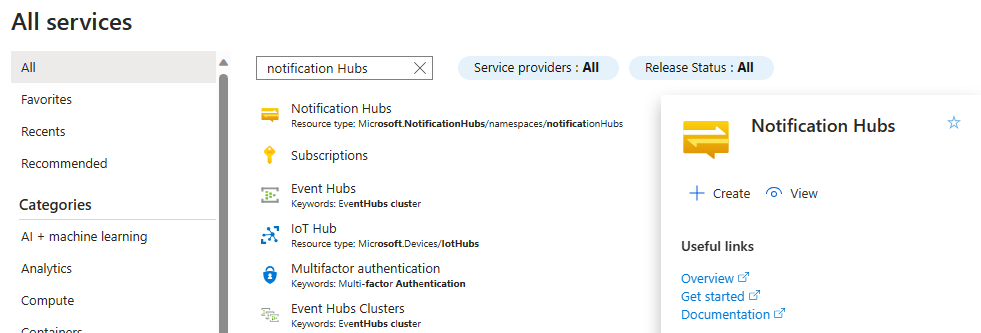
Selecteer Alle services in het linkermenu.
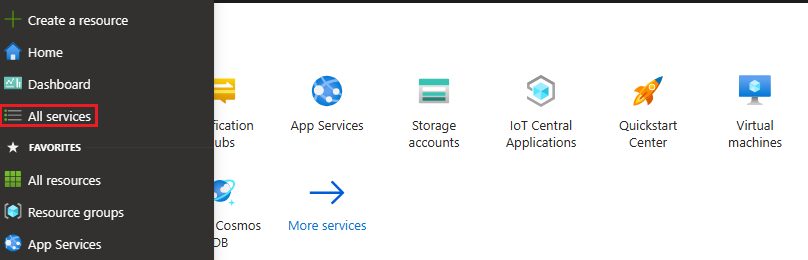
Typ Notification Hubs in het tekstvak Filterservices . Selecteer het sterpictogram naast de servicenaam om de service toe te voegen aan de sectie FAVORIETEN in het menu aan de linkerkant. Selecteer Notification Hubs.
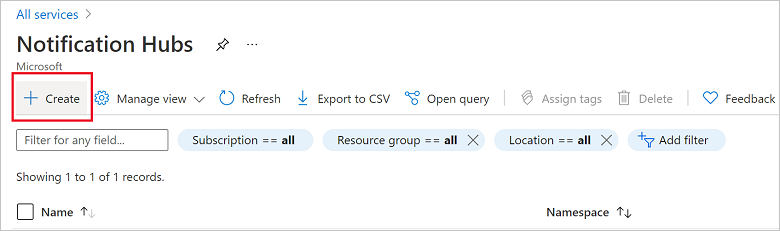
Selecteer Op de pagina Notification Hubs maken op de werkbalk.
Voer op het tabblad Basis op de pagina Notification Hub de volgende stappen uit:
Selecteer in Abonnement de naam van het Azure-abonnement dat u wilt gebruiken en selecteer vervolgens een bestaande resourcegroep of maak een nieuw abonnement.
Voer een unieke naam in voor de nieuwe naamruimte in Naamruimtedetails.
Een naamruimte bevat een of meer Notification Hubs, dus typ een naam voor de hub in Notification Hub Details.
Selecteer een waarde in de vervolgkeuzelijst Locatie. Deze waarde specificeert de locatie waar u de hub wilt maken.
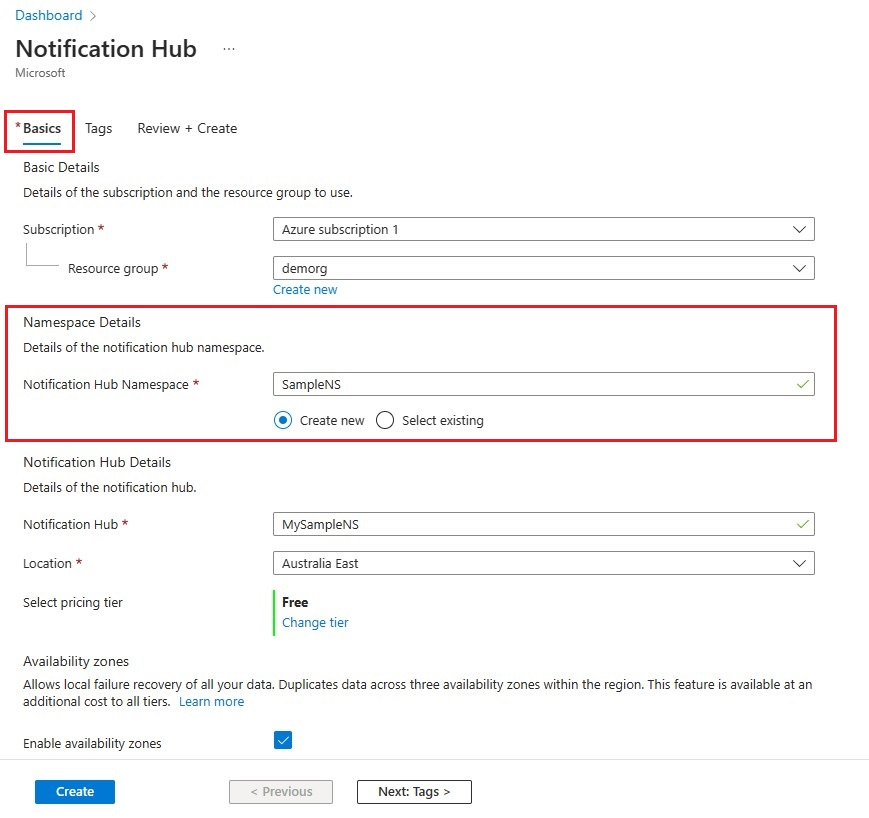
Controleer de optie Beschikbaarheidszones. Als u een regio met beschikbaarheidszones hebt gekozen, is het selectievakje standaard ingeschakeld. Beschikbaarheidszones is een betaalde functie, dus er worden extra kosten aan uw laag toegevoegd.
Kies een optie voor herstel na noodgevallen : Geen, Gekoppelde herstelregio of Flexibele herstelregio. Als u gekoppelde herstelregio kiest, wordt de failoverregio weergegeven. Als u Flexibele herstelregio selecteert, gebruikt u de vervolgkeuzelijst om te kiezen uit een lijst met herstelregio's.

Selecteer Maken.
Wanneer de implementatie is voltooid, selecteert u Ga naar de resource.


6. Selecteer Notification Services en vervolgens Baidu (Android China) in uw Notification Hub.
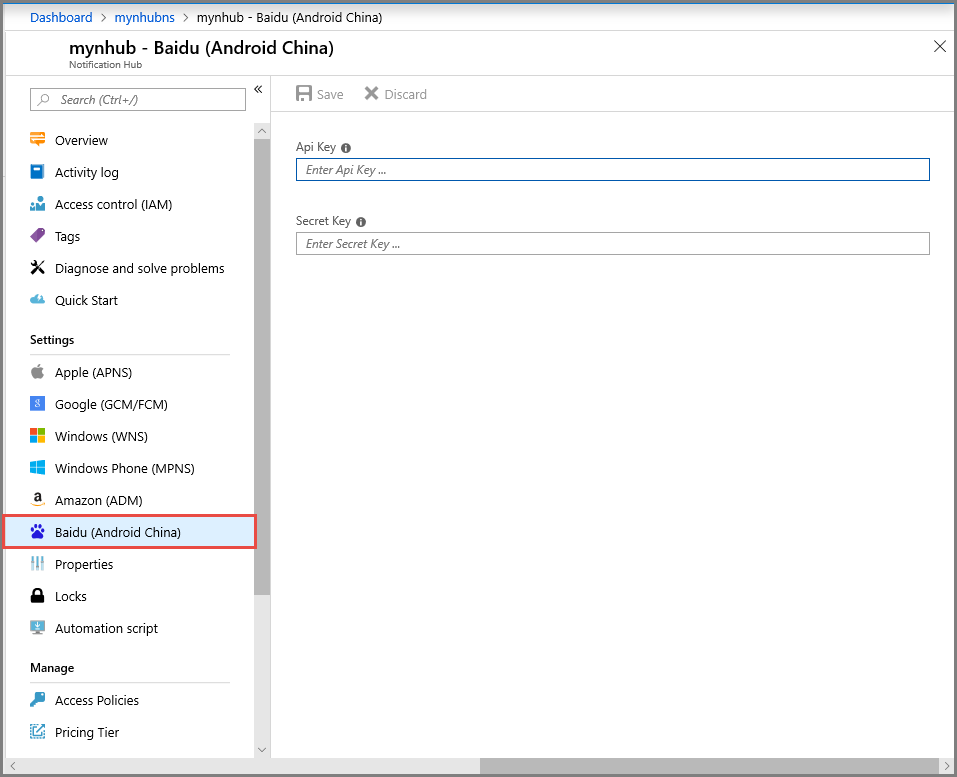
7. Schuif omlaag naar de sectie Baidu-meldingsinstellingen. Voer de API-sleutel en geheime sleutel die u hebt gekregen via de Baidu-console, in het Baidu Cloud Push-project in. Klik vervolgens op Opslaan.

De Notification Hub is nu geconfigureerd om met Baidu te kunnen werken. U hebt ook de verbindingsreeksen die u nodig hebt om uw app te registreren om pushmeldingen te verzenden en te ontvangen.
Noteer de DefaultListenSharedAccessSignature en DefaultFullSharedAccessSignature in het venster met verbindingsgegevens.
Uw app verbinden met de Notification Hub
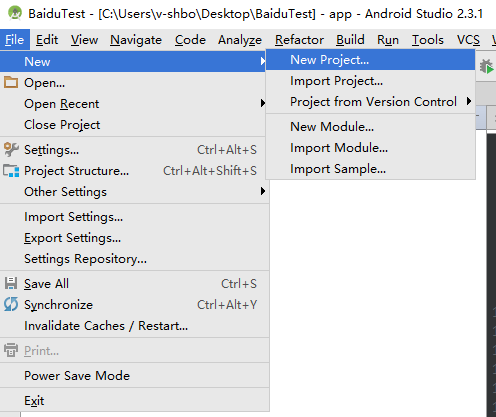
Maak in Android Studio een nieuw Android-project (Nieuw project bestand >> ).
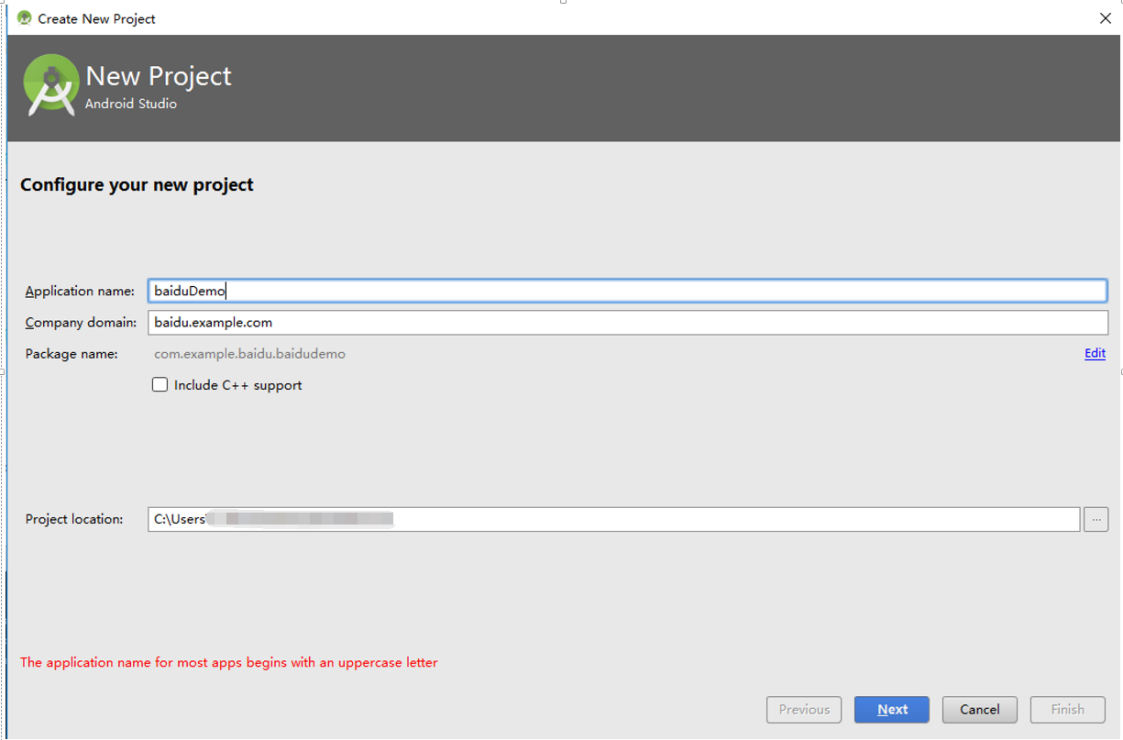
Voer een toepassingsnaam in en zorg ervoor dat de minimaal vereiste SDK-versie is ingesteld op API 16: Android 4.1. Zorg er ook voor dat de pakketnaam (应用包名) hetzelfde is als in de Baidu-cloudpush-portal

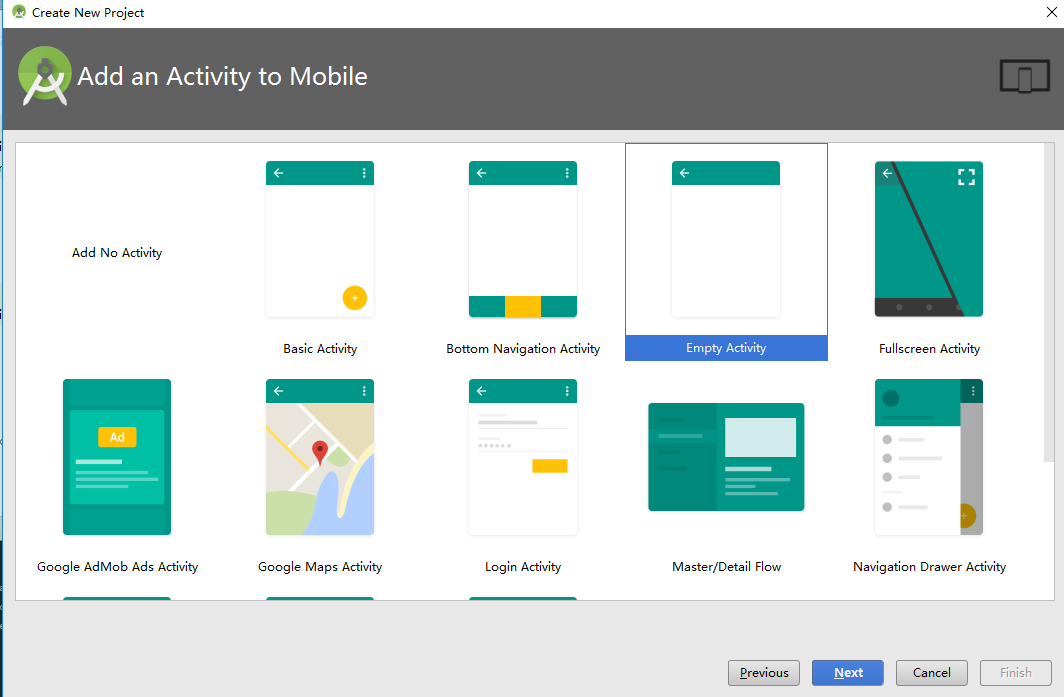
Klik op Next en doorloop de wizard totdat het venster Create Activity (Activiteit maken) wordt weergegeven. Zorg ervoor dat Empty Activity (Lege activiteit) is geselecteerd en selecteer daarna Finish (Voltooien) om een nieuwe Android-toepassing te maken.
Zorg ervoor dat het doel van de projectbuild juist is ingesteld.
Voeg daarna Azure Notification Hubs-bibliotheken toe. Voeg in het bestand
Build.Gradlevoor de app de volgende regels toe in het gedeelte met afhankelijkheden.implementation 'com.microsoft.azure:notification-hubs-android-sdk:0.6@aar' implementation 'com.microsoft.azure:azure-notifications-handler:1.0.1@aar'Voeg de volgende opslagplaats toe na het gedeelte met afhankelijkheden.
repositories {
    maven {
        url "https://dl.bintray.com/microsoftazuremobile/SDK"
    }
}
Als u het lijstconflict wilt voorkomen, kunt u de volgende code toevoegen in het bestand
Manifest.xmlvan het project:<manifest package="YOUR.PACKAGE.NAME" xmlns:tools="http://schemas.android.com/tools" xmlns:android="http://schemas.android.com/apk/res/android">en in de tag
<application/>:<application tools:replace="android:allowBackup,icon,theme,label">Download Baidu Push Android SDK en pak deze uit. Kopieer het bestand
pushservice-x.y.z jarin de map libs. Kopieer de.so-bestanden in de mappen insrc/main/jniLibs(maak een nieuwe map) van uw Android-toepassing.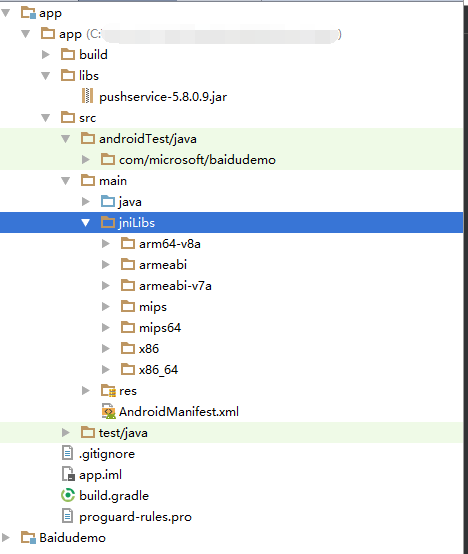
Klik in de map
libsvan het project met de rechtermuisknop op het bestandpushervice-x.y.z.jar. Selecteer Toevoegen als bibliotheek om deze bibliotheek in het project op te nemen.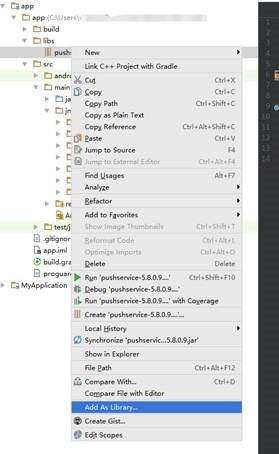
Open het bestand
AndroidManifest.xmlvan het Android-project en voeg de machtigingen toe die vereist zijn door de Baidu SDK. VervangYOURPACKAGENAMEdoor de pakketnaam.<uses-permission android:name="android.permission.INTERNET" /> <uses-permission android:name="android.permission.READ_PHONE_STATE" /> <uses-permission android:name="android.permission.ACCESS_NETWORK_STATE" /> <uses-permission android:name="android.permission.RECEIVE_BOOT_COMPLETED" /> <uses-permission android:name="android.permission.WRITE_SETTINGS" /> <uses-permission android:name="android.permission.VIBRATE" /> <uses-permission android:name="android.permission.WRITE_EXTERNAL_STORAGE" /> <uses-permission android:name="android.permission.DISABLE_KEYGUARD" /> <uses-permission android:name="android.permission.ACCESS_COARSE_LOCATION" /> <uses-permission android:name="android.permission.ACCESS_WIFI_STATE" /> <uses-permission android:name="android.permission.ACCESS_DOWNLOAD_MANAGER" /> <uses-permission android:name="android.permission.DOWNLOAD_WITHOUT_NOTIFICATION" /> <uses-permission android:name="android.permission.EXPAND_STATUS_BAR" /> !! <uses-permission android:name="baidu.push.permission.WRITE_PUSHINFOPROVIDER.YOURPACKAGENAME" /> !!<permission android:name="baidu.push.permission.WRITE_PUSHINFOPROVIDER.YOURPACKAGENAME" android:protectionLevel="normal" />Voeg de volgende configuratie toe aan het toepassingselement na het activiteitelement
.MainActivity, waarbij u yourprojectname vervangt (bijvoorbeeldcom.example.BaiduTest):<activity android:name="com.baidu.android.pushservice.richmedia.MediaViewActivity" android:configChanges="orientation|keyboardHidden" android:label="MediaViewActivity" /> <activity android:name="com.baidu.android.pushservice.richmedia.MediaListActivity" android:configChanges="orientation|keyboardHidden" android:label="MediaListActivity" android:launchMode="singleTask" /> <!-- Push application definition message --> <receiver android:name=".MyPushMessageReceiver"> <intent-filter> <!-- receive push message--> <action android:name="com.baidu.android.pushservice.action.MESSAGE" /> <!-- receive bind,unbind,fetch,delete.. message--> <action android:name="com.baidu.android.pushservice.action.RECEIVE" /> <action android:name="com.baidu.android.pushservice.action.notification.CLICK" /> </intent-filter> </receiver> <receiver android:name="com.baidu.android.pushservice.PushServiceReceiver" android:process=":bdservice_v1"> <intent-filter> <action android:name="android.intent.action.BOOT_COMPLETED" /> <action android:name="android.net.conn.CONNECTIVITY_CHANGE" /> <action android:name="com.baidu.android.pushservice.action.notification.SHOW" /> <action android:name="com.baidu.android.pushservice.action.media.CLICK" /> <action android:name="android.intent.action.MEDIA_MOUNTED" /> <action android:name="android.intent.action.USER_PRESENT" /> <action android:name="android.intent.action.ACTION_POWER_CONNECTED" /> <action android:name="android.intent.action.ACTION_POWER_DISCONNECTED" /> </intent-filter> </receiver> <receiver android:name="com.baidu.android.pushservice.RegistrationReceiver" android:process=":bdservice_v1"> <intent-filter> <action android:name="com.baidu.android.pushservice.action.METHOD" /> <action android:name="com.baidu.android.pushservice.action.BIND_SYNC" /> </intent-filter> <intent-filter> <action android:name="android.intent.action.PACKAGE_REMOVED" /> <data android:scheme="package" /> </intent-filter> </receiver> <service android:name="com.baidu.android.pushservice.PushService" android:exported="true" android:process=":bdservice_v1"> <intent-filter> <action android:name="com.baidu.android.pushservice.action.PUSH_SERVICE" /> </intent-filter> </service> <service android:name="com.baidu.android.pushservice.CommandService" android:exported="true" /> <!-- Adapt the ContentProvider declaration required for the Android N system, and the write permissions include the application package name--> <provider android:name="com.baidu.android.pushservice.PushInfoProvider" android:authorities="com.baidu.push.example.bdpush" android:exported="true" android:protectionLevel="signature" android:writePermission="baidu.push.permission.WRITE_PUSHINFOPROVIDER. yourprojectname " /> <!-- API Key of the Baidu application --> <meta-data android:name="api_key" !! android:value="api_key" /> </application>Voeg een nieuwe klasse genaamd
ConfigurationSettings.javatoe aan het project.public class ConfigurationSettings { public static String API_KEY = "..."; public static String NotificationHubName = "..."; public static String NotificationHubConnectionString = "..."; }Stel de waarde van de tekenreeks
API_KEYin op de API_KEY uit het Baidu-cloudproject.Stel de waarde van de
NotificationHubNametekenreeks in met de naam van uw Notification Hub vanuit Azure Portal en vervolgensNotificationHubConnectionStringvanuitDefaultListenSharedAccessSignatureAzure Portal.Open MainActivity.java en voeg het volgende toe aan de methode onCreate:
PushManager.startWork(this, PushConstants.LOGIN_TYPE_API_KEY, API_KEY );Voeg een nieuwe klasse genaamd
MyPushMessageReceiver.javatoe en voeg de volgende code eraan toe. Dit is de klasse die verantwoordelijk is voor de pushmeldingen die worden ontvangen van de Baidu-pushserver.package your.package.name; import android.content.Context; import android.content.Intent; import android.os.AsyncTask; import android.text.TextUtils; import android.util.Log; import com.baidu.android.pushservice.PushMessageReceiver; import com.microsoft.windowsazure.messaging.NotificationHub; import org.json.JSONException; import org.json.JSONObject; import java.util.List; public class MyPushMessageReceiver extends PushMessageReceiver { public static final String TAG = MyPushMessageReceiver.class .getSimpleName(); public static NotificationHub hub = null; public static String mChannelId, mUserId; @Override public void onBind(Context context, int errorCode, String appid, String userId, String channelId, String requestId) { String responseString = "onBind errorCode=" + errorCode + " appid=" + appid + " userId=" + userId + " channelId=" + channelId + " requestId=" + requestId; Log.d(TAG, responseString); if (errorCode == 0) { // Binding successful Log.d(TAG, " Binding successful"); } try { if (hub == null) { hub = new NotificationHub( ConfigurationSettings.NotificationHubName, ConfigurationSettings.NotificationHubConnectionString, context); Log.i(TAG, "Notification hub initialized"); } } catch (Exception e) { Log.e(TAG, e.getMessage()); } mChannelId = channelId; mUserId = userId; registerWithNotificationHubs(); } private void registerWithNotificationHubs() { new AsyncTask<Void, Void, Void>() { @Override protected Void doInBackground(Void... params) { try { hub.registerBaidu(mUserId, mChannelId); Log.i(TAG, "Registered with Notification Hub - '" + ConfigurationSettings.NotificationHubName + "'" + " with UserId - '" + mUserId + "' and Channel Id - '" + mChannelId + "'"); } catch (Exception e) { Log.e(TAG, e.getMessage()); } return null; } }.execute(null, null, null); } @Override public void onMessage(Context context, String message, String customContentString) { String messageString = " onMessage=\"" + message + "\" customContentString=" + customContentString; Log.d(TAG, messageString); if (!TextUtils.isEmpty(customContentString)) { JSONObject customJson = null; try { customJson = new JSONObject(customContentString); String myvalue = null; if (!customJson.isNull("mykey")) { myvalue = customJson.getString("mykey"); } } catch (JSONException e) { e.printStackTrace(); } } } @Override public void onNotificationArrived(Context context, String title, String description, String customContentString) { String notifyString = " Notice Arrives onNotificationArrived title=\"" + title + "\" description=\"" + description + "\" customContent=" + customContentString; Log.d(TAG, notifyString); if (!TextUtils.isEmpty(customContentString)) { JSONObject customJson = null; try { customJson = new JSONObject(customContentString); String myvalue = null; if (!customJson.isNull("mykey")) { myvalue = customJson.getString("mykey"); } } catch (JSONException e) { // TODO Auto-generated catch block e.printStackTrace(); } } } @Override public void onNotificationClicked(Context context, String title, String description, String customContentString) { String notifyString = " onNotificationClicked title=\"" + title + "\" description=\"" + description + "\" customContent=" + customContentString; Log.d(TAG, notifyString); Intent intent = new Intent(context.getApplicationContext(),MainActivity.class); intent.putExtra("title",title); intent.putExtra("description",description); intent.putExtra("isFromNotify",true); intent.addFlags(Intent.FLAG_ACTIVITY_NEW_TASK); context.getApplicationContext().startActivity(intent); } @Override public void onSetTags(Context context, int errorCode, List<String> successTags, List<String> failTags, String requestId) { String responseString = "onSetTags errorCode=" + errorCode + " successTags=" + successTags + " failTags=" + failTags + " requestId=" + requestId; Log.d(TAG, responseString); } @Override public void onDelTags(Context context, int errorCode, List<String> successTags, List<String> failTags, String requestId) { String responseString = "onDelTags errorCode=" + errorCode + " successTags=" + successTags + " failTags=" + failTags + " requestId=" + requestId; Log.d(TAG, responseString); } @Override public void onListTags(Context context, int errorCode, List<String> tags, String requestId) { String responseString = "onListTags errorCode=" + errorCode + " tags=" + tags; Log.d(TAG, responseString); } @Override public void onUnbind(Context context, int errorCode, String requestId) { String responseString = "onUnbind errorCode=" + errorCode + " requestId = " + requestId; Log.d(TAG, responseString); if (errorCode == 0) { // Unbinding is successful Log.d(TAG, " Unbinding is successful "); } } }
Pushmeldingen naar uw app verzenden
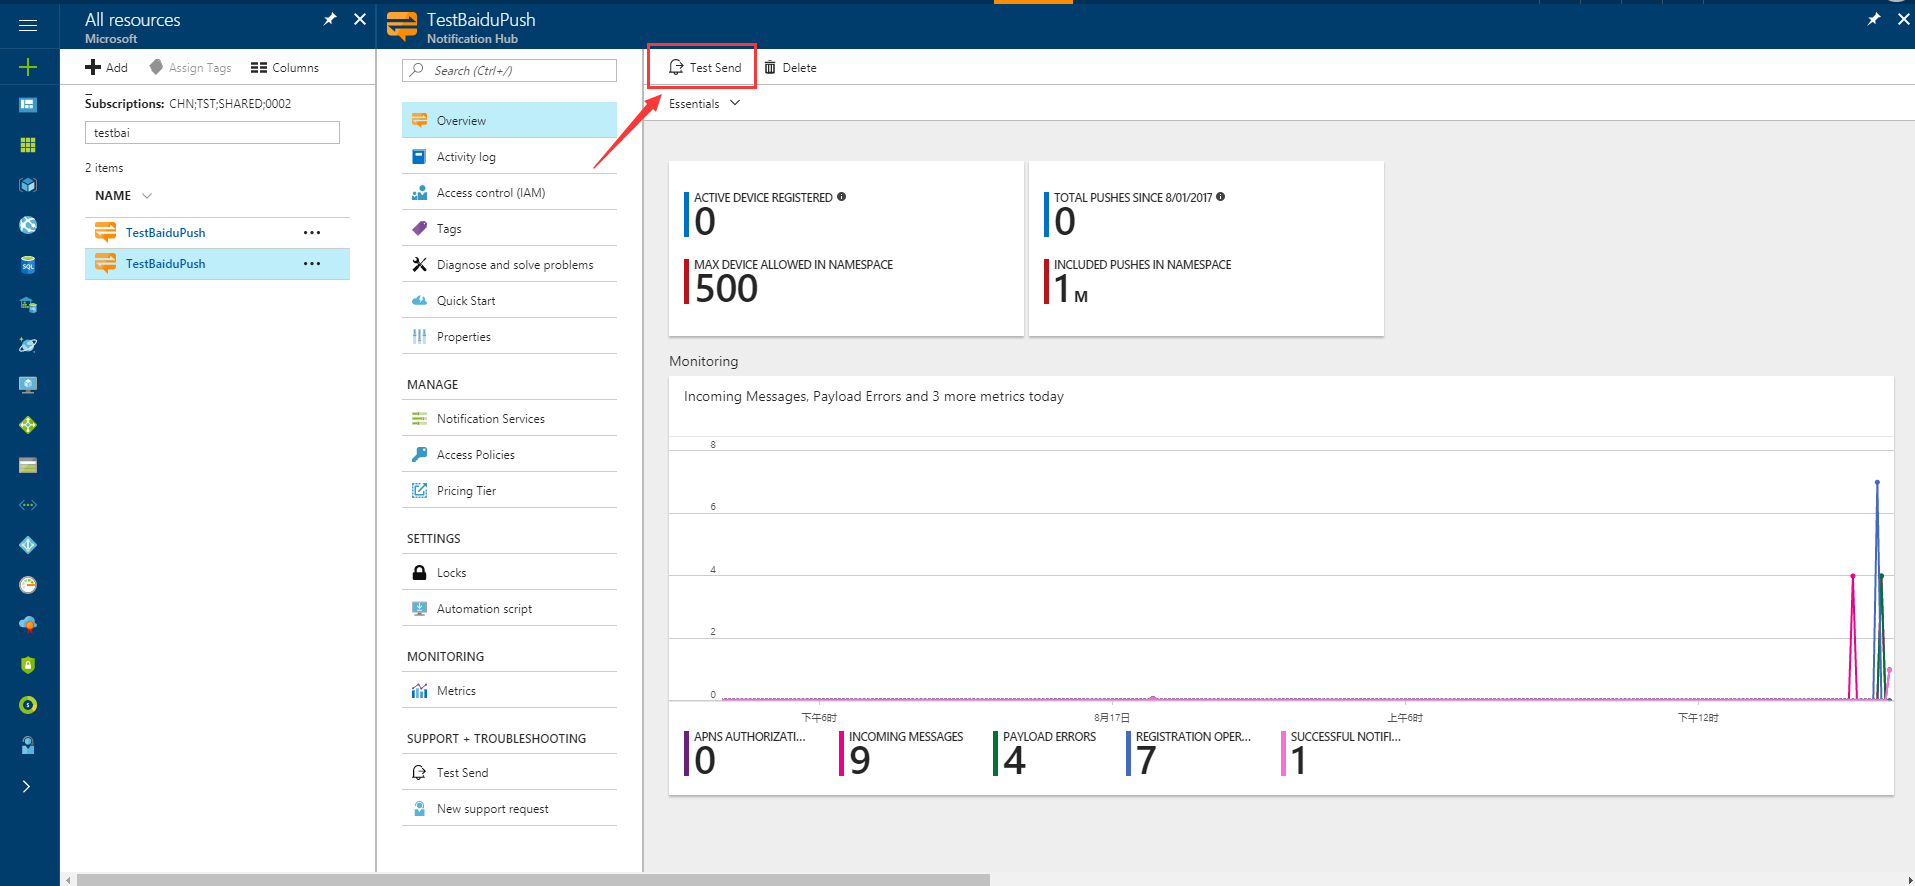
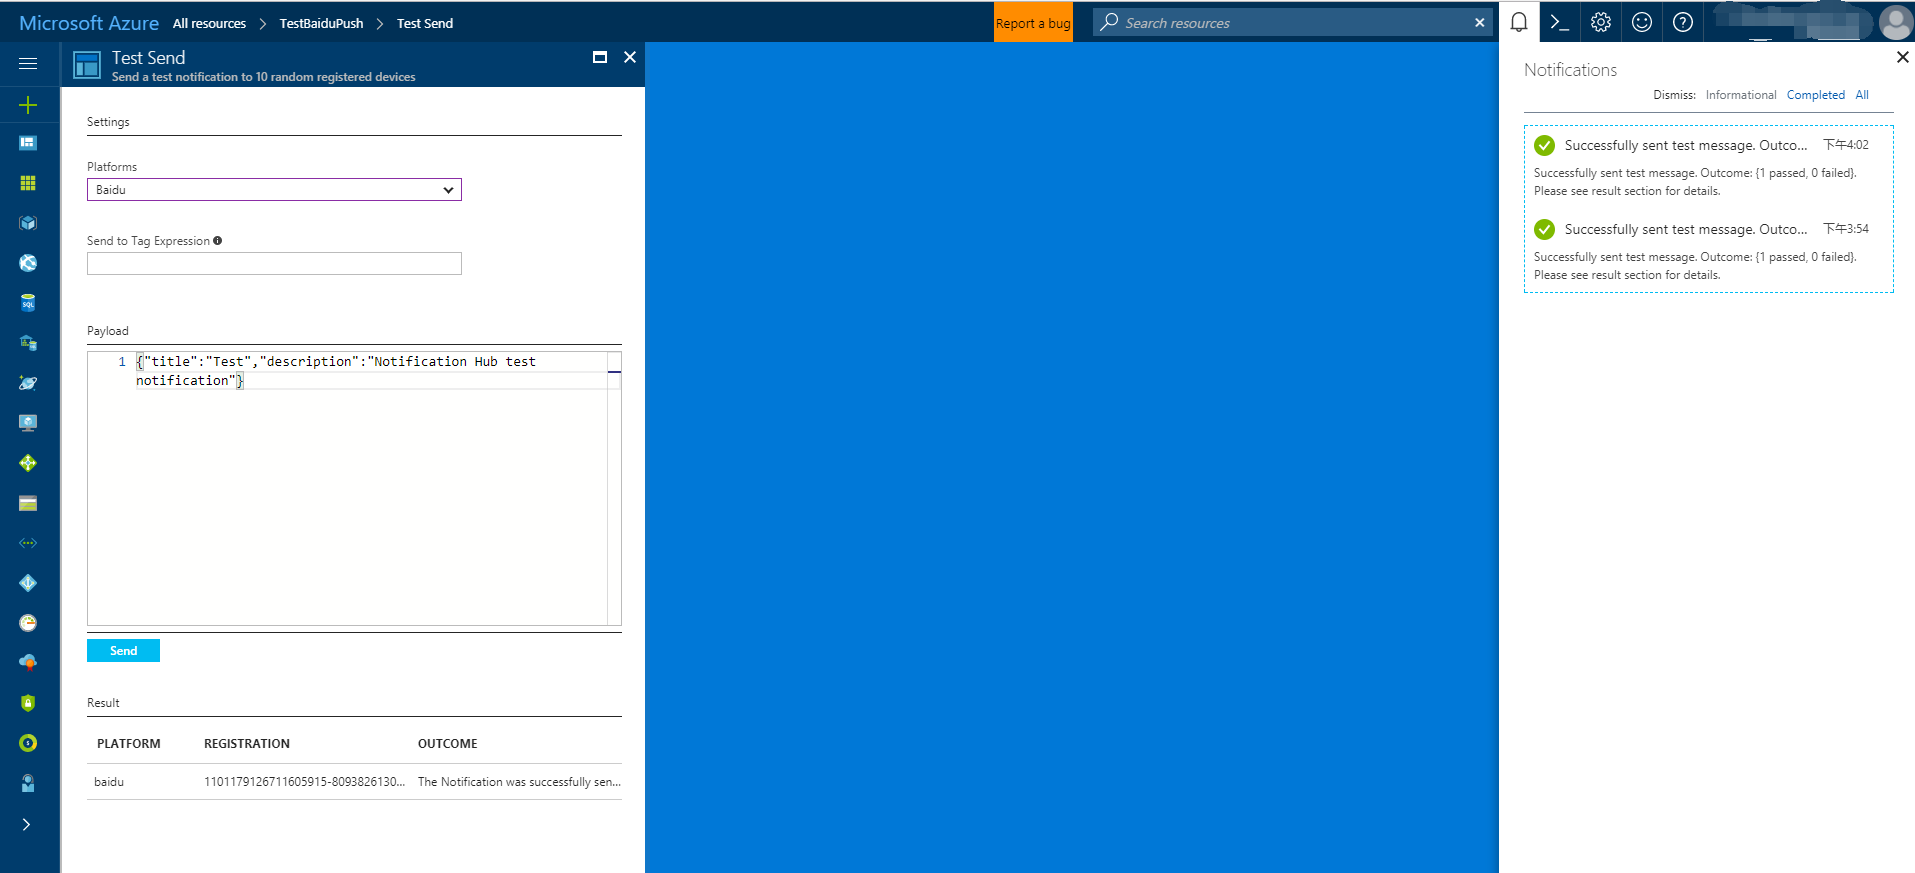
U kunt het ontvangen van meldingen vanuit Azure Portal snel testen via de knop Verzenden in het configuratiescherm van de Notification Hub, zoals wordt weergegeven in de volgende schermen:
Pushmeldingen worden gewoonlijk in een back-endservice zoals Mobile Services of ASP.NET verzonden met een compatibele bibliotheek. U kunt de REST API ook rechtstreeks gebruiken om meldingen te verzenden als er geen bibliotheek beschikbaar is voor uw back-end.
In deze zelfstudie wordt voor het gemak een console-app gebruikt om te laten zien hoe u een melding verzendt met de .NET-SDK. U kunt echter het beste de zelfstudie Notification Hubs gebruiken om pushmeldingen naar gebruikers te verzenden doornemen voor informatie over het verzenden van meldingen vanuit een ASP.NET-back-end.
Hier zijn verschillende methoden om meldingen te verzenden:
- REST-interface: u kunt meldingen op elk back-endplatform ondersteunen met de REST-interface.
- Microsoft Azure Notification Hubs .NET SDK: in NuGet Package Manager voor Visual Studio voert u Install-Package Microsoft.Azure.NotificationHubs uit.
- Node.js: Notification Hubs gebruiken vanuit Node.js.
- Mobile Apps: zie Pushmeldingen toevoegen voor mobiele apps voor een voorbeeld van hoe u meldingen verzendt vanuit een Azure App Service Mobile Apps-backend die is geïntegreerd met Notification Hubs.
- Java/PHP: zie 'Notification Hubs gebruiken vanuit Java/PHP' voor een voorbeeld van hoe u meldingen verzendt met de REST API's (Java | PHP).
(Optioneel) Meldingen verzenden vanuit een .NET-console-app
In dit gedeelte behandelen we hoe u een melding vanuit een .NET-console-app kunt verzenden.
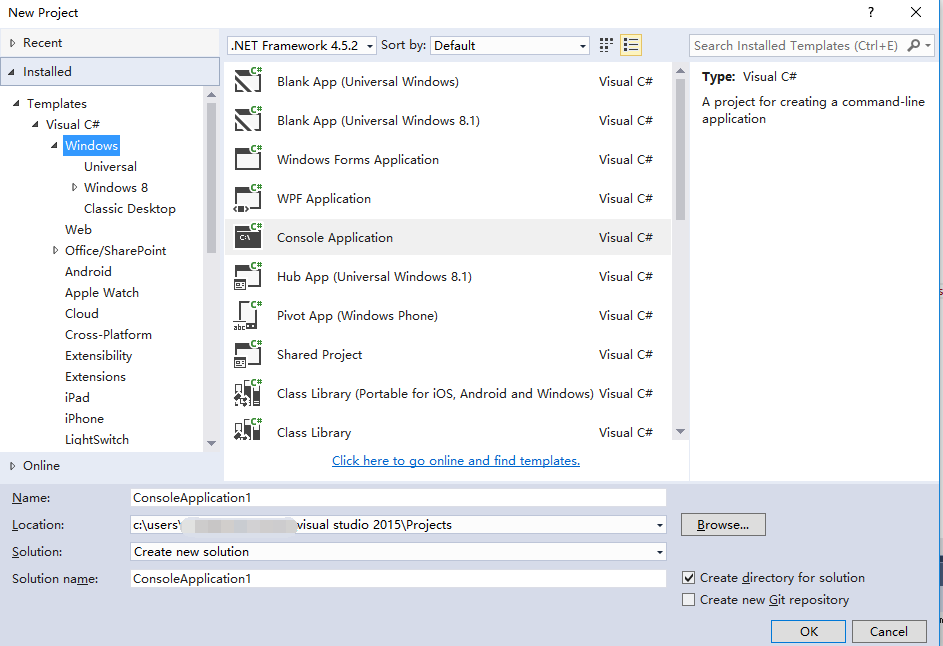
Maak een nieuwe Visual C#-consoletoepassing:
Stel in het venster Package Manager-console het standaardproject in op uw nieuwe consoletoepassingsproject en voer vervolgens in het consolevenster de volgende opdracht uit:
Install-Package Microsoft.Azure.NotificationHubsHiermee wordt een verwijzing toegevoegd aan de Azure Notification Hubs-SDK met het Microsoft.Azure.Notification Hubs NuGet-pakket.

Open het bestand
Program.csen voeg de volgende instructie toe:using Microsoft.Azure.NotificationHubs;Voeg in de klasse
Programde volgende methode toe en vervangDefaultFullSharedAccessSignatureSASConnectionStringenNotificationHubNamedoor de waarden die u hebt.private static async void SendNotificationAsync() { NotificationHubClient hub = NotificationHubClient.CreateClientFromConnectionString("DefaultFullSharedAccessSignatureSASConnectionString", "NotificationHubName"); string message = "{\"title\":\"((Notification title))\",\"description\":\"Hello from Azure\"}"; var result = await hub.SendBaiduNativeNotificationAsync(message); }Voeg de volgende regels in de
Main-methode toe:SendNotificationAsync(); Console.ReadLine();
Uw app testen
Als u uw app met een telefoon wilt testen, sluit u de telefoon met een USB-kabel op uw computer aan. Met deze actie wordt uw app naar de gekoppelde telefoon geladen.
Als u deze app wilt testen met de emulator, klikt u op de bovenste taakbalk in Android Studio op Run (Uitvoeren) en selecteert u uw app. De emulator wordt gestart en daarna wordt de app geladen en uitgevoerd.
De app haalt de userId en channelId op uit de Baidu-pushmeldingenservice en registreert zich bij de Notification Hub.
U kunt een testmelding verzenden vanaf het foutopsporingstabblad van Azure Portal. Als u de .Net-console-toepassing hebt gebouwd voor Visual Studio, drukt u in Visual Studio op F5 om de toepassing te starten. De toepassing verstuurt een melding. Deze verschijnt in het bovenste gedeelte voor meldingen op uw apparaat of in de emulator.