Export documents in a review set to an Azure Storage account
When you export documents from a review set in an eDiscovery (Premium) case, you have the option to export them to an Azure Storage account managed by your organization. If you use this option, the documents are uploaded to your Azure Storage location. After they're exported, you can access the documents (and download them to a local computer or other location) by using the Azure Storage Explorer.
This article provides instructions for how to export documents to your Azure Storage account and the use the Azure Storage Explorer to connect to an Azure Storage location to download the exported documents. For more information about Azure Storage Explorer, see Use Azure Storage Explorer.
Tip
If you're not an E5 customer, use the 90-day Microsoft Purview solutions trial to explore how additional Purview capabilities can help your organization manage data security and compliance needs. Start now at the Microsoft Purview compliance portal trials hub. Learn details about signing up and trial terms.
Before you export documents from a review set
You need to provide a shared access signature (SAS) token for your Azure Storage account and the URL for a specific container in the storage account to export documents from a review set. Be sure to have these at hand (for example, copied to a text file) when you perform Step 2
SAS token: Be sure to get the SAS token is for your Azure Storage account (and not for the container). You can generate an SAS token for your account in Azure Storage. To do this, go to the Azure Storage account, and select Share access signature under the Settings settings in the storage account blade. Make sure you've configured Add, Create, Delete, Read, and Write permissions and allow all resource types when you generate the SAS token.
Container URL: You need to create a container to upload the review set documents to, and then get a copy of the URL for the container; for example,
https://ediscoverydata.blob.core.windows.net/exportdata. To get the URL, go to the container in Azure Storage, and select Properties under the Settings section in the container blade.
Download and install the Azure Storage Explorer. For instructions, see Azure Storage Explorer tool. You use this tool to connect to the container in your Azure Storage account and download the documents that you exported in Step 1.
Step 1: Export the documents from a review set
The first step is to create an export job to export documents out of a review set. For more detailed instructions about all the export options, see Export documents from a review set. The following procedure highlights the settings to export documents to your organization's Azure Storage account.
In the Microsoft Purview compliance portal, open the eDiscovery (Premium) case, select the Review sets tab, and then select the review set that you want to export.
In the review set, select Action > Export.
On the Export options flyout page, type a name (required) and description (optional) for the export.
Configure the settings in the documents, metadata, content, and options sections. For more information about these settings, see Export documents from a review set.
In the Output options section, select the Condensed directory structure exported to your Azure Storage account option.
Paste the container URL and the SAS token for your storage account in the corresponding fields.

Important
If the container URL contains unsupported or invalid characters, you'll receive an error when creating the export job. For more information about these characters, see Keyword queries and search conditions for eDiscovery.
Select Export to create the export job.
Step 2: Obtain the SAS URL from the export job
The next step is to obtain the SAS URL that's generated after you create the export job in Step 1. You use the SAS URL to connect to the container in your Azure Storage account that you exported the review set documents to.
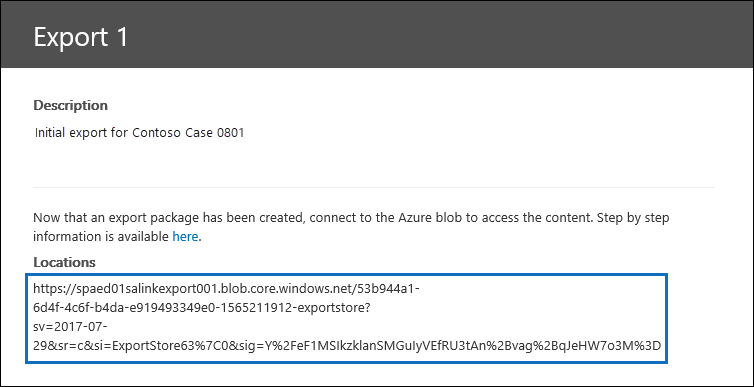
On the eDiscovery (Premium) page, go to the case, and then select the Exports tab.
On the Exports tab, select the export job that you want to download. This is the export job that you created in Step 1.
On the flyout page, under Locations, copy the SAS URL that's displayed. If necessary, you can save it to a text file so you can access it in Step 3.
Tip
The SAS URL that's displayed in the export job is a concatenation of the container URL and the SAS token for your Azure Storage account. You can copy it from the export job or create it yourself by combining the URL and the SAS token.
Step 3: Connect to the Azure Storage container
The final step is to use the Azure Storage Explorer and the SAS URL to connect to the container in your Azure Storage account and download the exported documents to a local computer.
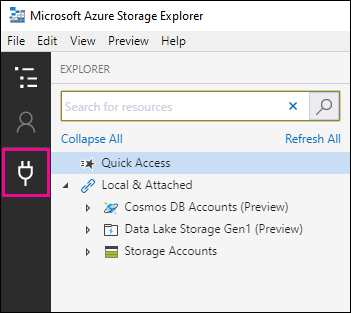
Start the Azure Storage Explorer that you downloaded and installed.
Select the Open Connect Dialog icon.
On the Connect to Azure Storage page, select Blob container.
On the Select Authentication Method page, select the Shared access signature (SAS) option and then select Next.
On the Enter Connection Info page, paste the SAS URL (that you obtained in the export job in Step 2) in the Blob Container SAS URL box.
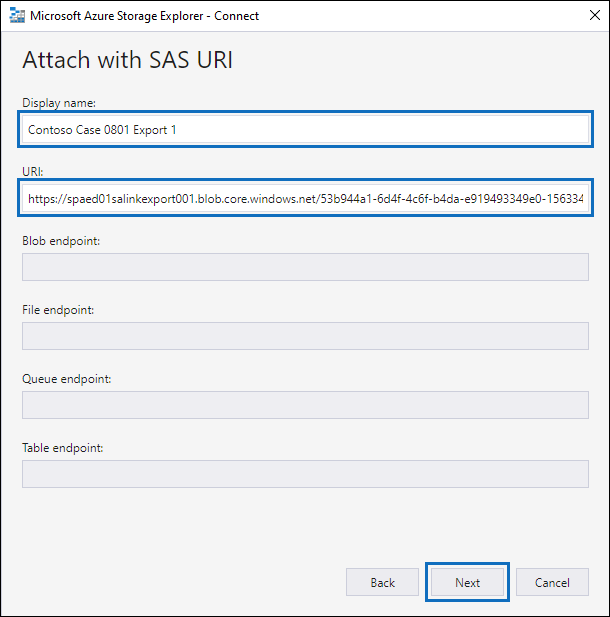
Notice that the container name is displayed in the Display name box. You can edit this name.
Select Next to display the summary page and then select Connect.
The Blob containers node (under Storage Accounts > (Attached Containers) > is opened.
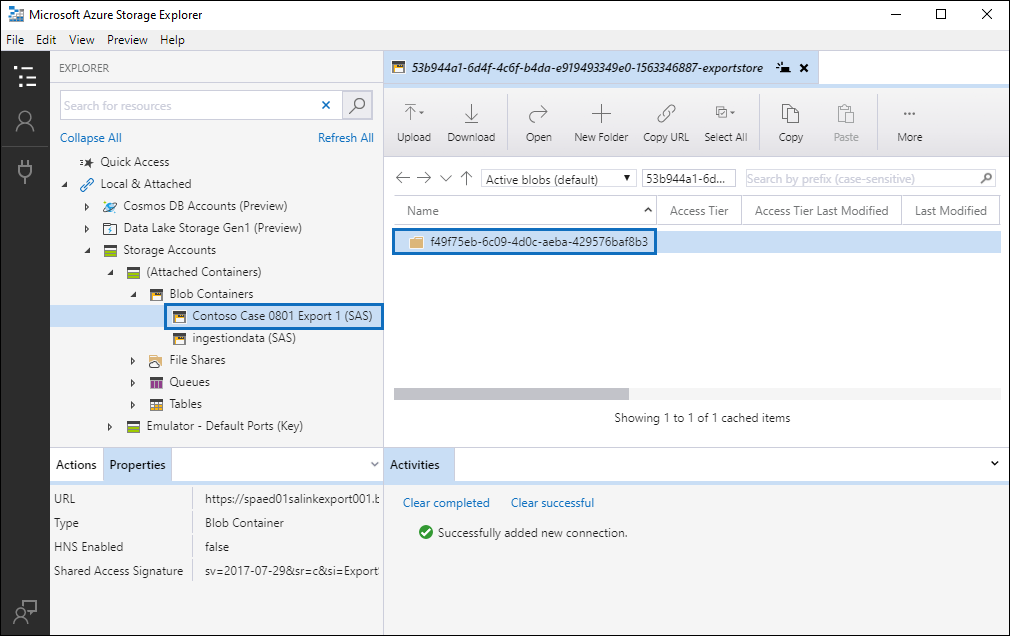
It contains a container named with the display name from step 5. This container contains a folder for each export job that you've downloaded to the container in your Azure Storage account. These folders are named with an ID that corresponds to the ID of the export job. You can find these export IDs (and the name of the export) under Support information on the flyout page for each Preparing data for export job listed on the Jobs tab in the eDiscovery (Premium) case.
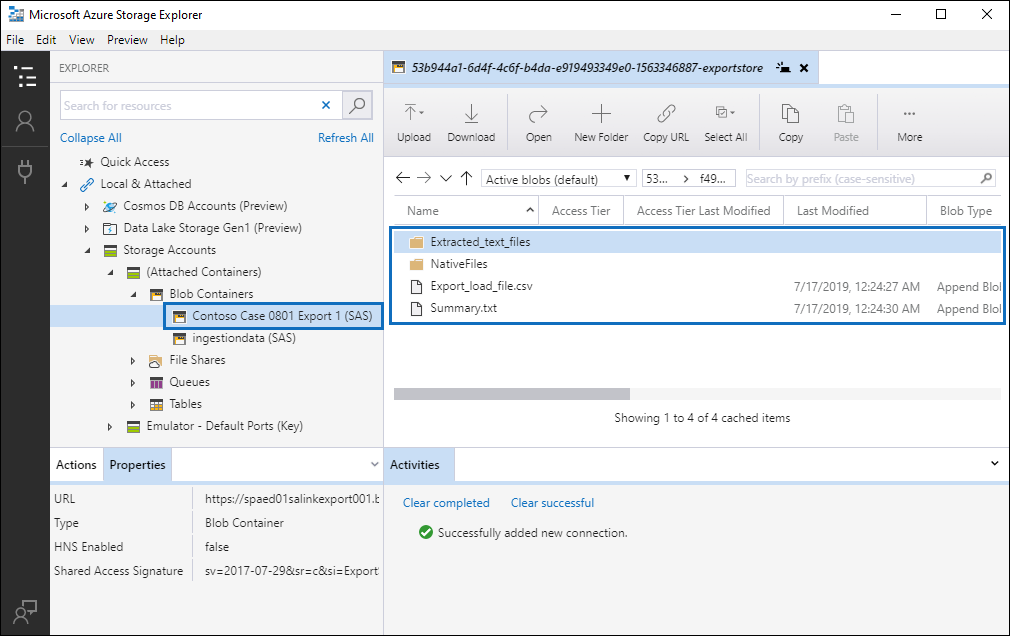
Double-click the export job folder to open it.
A list of folders and export reports is displayed.
To export all contents from the export job, select the Up arrow to go back to the export job folder, and then select Download.
Specify the location where you want to download the exported files, and then select Select folder.
The Azure Storage Explorer starts the download process. The status of the downloading the exported items is displayed in the Activities pane. A message is displayed when the download is complete.
Note
Instead of downloading the entire export job in Azure Storage Explorer, you can select specific items to download and view.
More information
The export job folder contains the following items. The actual items in the export folder are determined by the export options configured when the export job was created. For more information about these options, see Export documents from a review set.
Export_load_file.csv: This CSV file is a detail export report that contains information about each exported document. The file consists of a column for each metadata property for a document. For a list and description of the metadata that's included in this report, see the Exported field name column in the table in Document metadata fields in eDiscovery (Premium).
Summary.txt: A text file that contains a summary of the export including export statistics.
Extracted_text_files: This folder contains a text file version of each exported document.
NativeFiles: This folder contains a native file version of each exported document.
Error_files: This folder includes the following items when the export job contains any error files:
ExtractionError.csv: This CSV file contains the available metadata for files that weren't properly extracted from their parent item.
ProcessingError: This folder contains documents with processing errors. This content is at an item level, which means if an attachment had a processing error, the document that contains the attachment will also be included in this folder.
Feedback
Binnenkort beschikbaar: In de loop van 2024 zullen we GitHub Issues geleidelijk uitfaseren als het feedbackmechanisme voor inhoud. Het wordt vervangen door een nieuw feedbacksysteem. Zie voor meer informatie: https://aka.ms/ContentUserFeedback.
Feedback verzenden en weergeven voor