Deploy Microsoft Cloud for Financial Services
Organization administrators can use this article to deploy Microsoft Cloud for Financial Services solutions. At the end of this deployment process, you'll have one or more of the following financial services solutions or apps installed in your environment:
- Unified customer profile
- Customer onboarding - Loan onboarding
- Customer onboarding - Onboarding essentials
- Intelligent appointments
During the deployment process, you can configure more capabilities.
For information about the regions and languages available, see International availability of Microsoft Cloud for Financial Services.
Prerequisites
You must be a Microsoft Power Platform admin or a tenant admin to deploy the Microsoft Cloud for Financial Services solutions.
You must have licenses for various Dynamics 365 apps, depending on the solution to be deployed. If you're missing any licenses, you'll be notified during the deployment process. For more information, go to Licensing.
Learn more in Compliance in Microsoft Cloud for Financial Services and ensure you use services that match your requirements.
Step 1: Prepare environment
To deploy financial services solutions, you need a Dataverse environment with a database. It's possible to create a Dataverse environment when you deploy a financial services solution. However, we recommend that your environment is ready first, and that you've installed the prerequisite Dynamics 365 apps and features.
Sign in to Power Platform admin center.
If you don't already have a Dataverse environment where you want to install financial services solutions, create a Dataverse environment with a database.
When setting up your Dataverse environment, you must select Yes for Enable Dynamics 365 apps. Although you need not install any specific Dynamics app, however you must enable the option so that a CE environment is set up.
Open your new environment: go to
https://[myenv].crm.dynamics.com, where[myenv]is the name of your environment.Install any dependencies for the financial services solutions and capabilities that you want to deploy.
Solution dependencies
| Solution | Dependencies |
|---|---|
| Unified customer profile | Power Apps |
| Customer onboarding - Loan onboarding | Power Apps |
| Customer onboarding - Onboarding essentials | Power Apps Power Automate AI Builder |
| Banking customer engagement - Intelligent appointments | Power Apps Exchange Teams |
Note
The retail banking data model is a standalone option for partners and Dataverse customers. It is already included in Microsoft Cloud for Financial Services.
Important
The financial services data model has its own deployment process. For more information about deploying the financial services data model, go to Deploy the financial services data models.
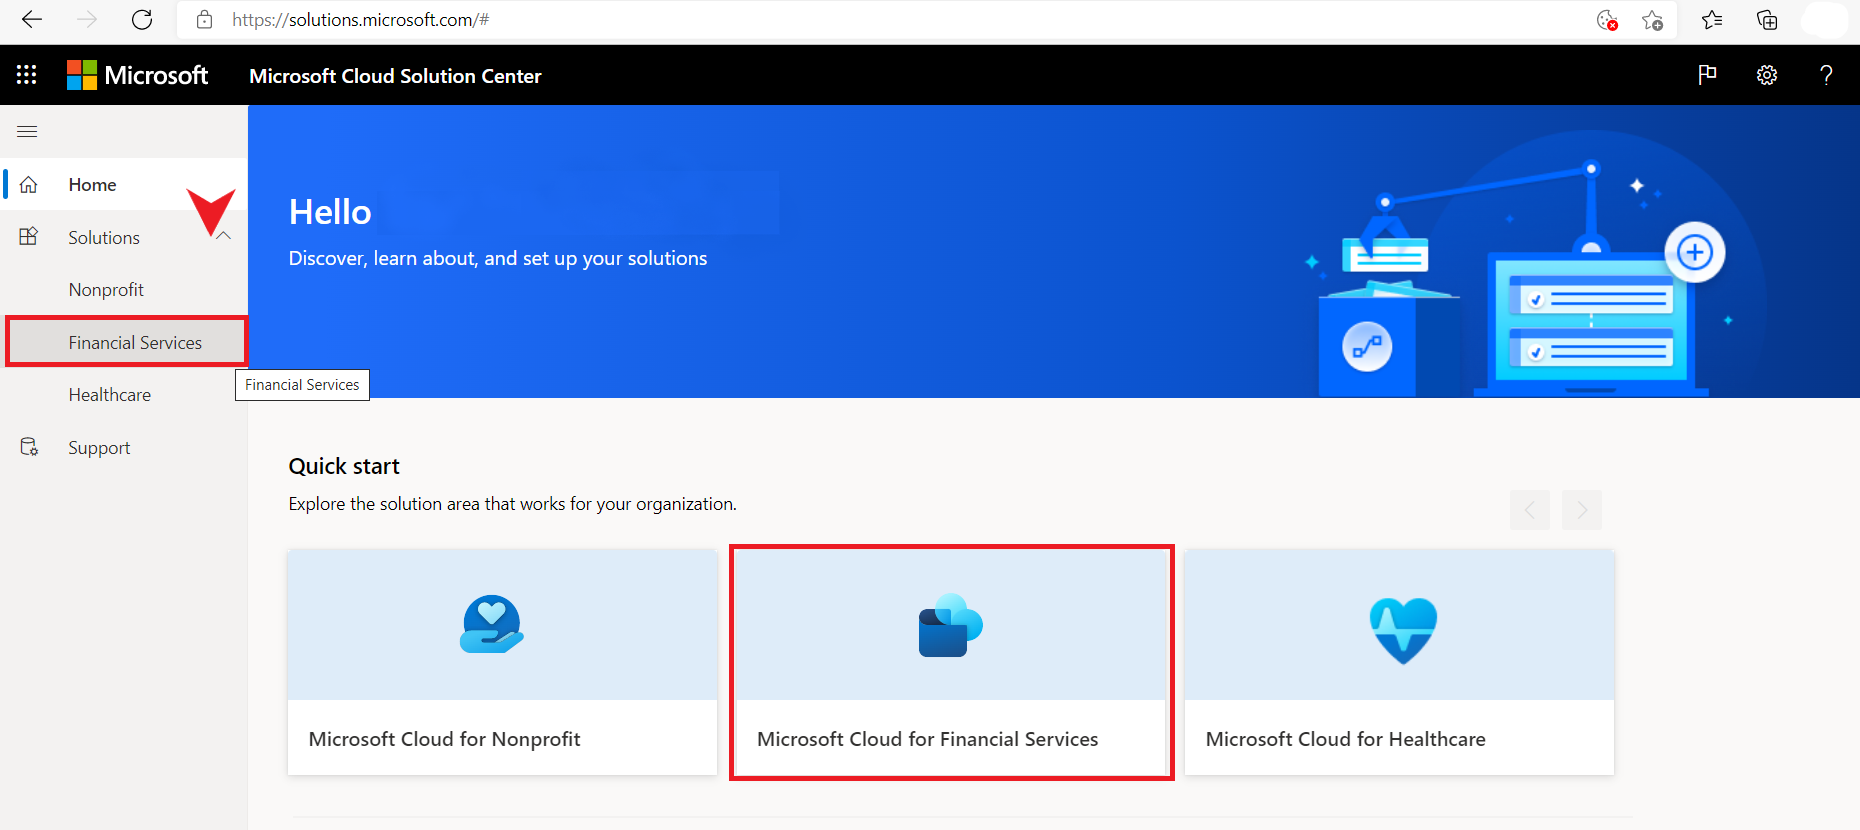
Step 2: Deploy financial services solutions
Sign in to Microsoft Cloud Solution Center. In addition to using the preceding link, here is another way to go there:
From the Microsoft 365 admin center, select the Financial Services collection under setup and the action called Enable financial services solutions powered by Dynamics 365.
Note
If you need help, select Support in the left pane to open the Help + Support experience in the Power Platform admin center and get self-help solutions in real time.
On the Home page, select the Microsoft Cloud for Financial Services tile to get started with the deployment, or select Solutions > Financial Services in the left pane.
On the Solutions page, you'll see cards displaying the available solutions to deploy.
For each solution on the page, you can:
- Select Quick view to learn more about the component and its dependencies.
- Select the solution, and then select Add on the solution tile that appears. To include all solutions, select Add all Financial Services solutions.
Important
The code bases of the following Financial Services solutions are open sourced and available on GitHub:
- Unified customer profile for retail banking
- Unified client profile for wealth management
- Loan onboarding application
- Onboarding essentials
To access the GitHub repository and deploy either of the solutions, select Go to setup on the required card in the Solution center. The Readme file available in the repository provides comprehensive steps for deploying the solutions.
After selecting the solutions you want, select Deploy in the upper-right corner to deploy them.
The Additional components page lets you install optional components for each solution you've selected.
Note
You'll see an option Configuration Data for each solution. If you're deploying the solution for the first time, select this option to enjoy an automated configuration process. If you don't select it, you'll have to configure the solution manually, or through FastTrack. At this time, no content is available to help you manually configure the solutions.However, if you have already deployed the solution with customizations and are performing an update, don't select the Configuration Data option—it will overwrite your customizations.
Select Install or Configure for a dependency to view the documentation on how to set it up. Make sure you install the dependency in the same environment as the solution that depends on it.
See Step 1 to review dependencies for each solution.
The Set up new deployment page lets you select the environment where you'll deploy the solutions.
- If you've already prepared an environment, select it from the list.
- Otherwise, select Create new to create an environment using the Power Platform admin center, and then come back to the Solution Center and select it. For more information, go to Create an environment in the Power Platform admin center.
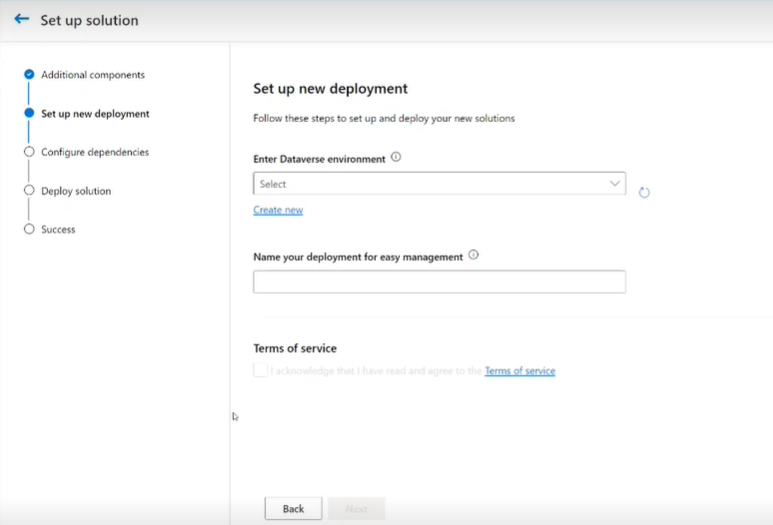
Agree to the terms of service, and then select Next.
The Configure dependencies page guides you to install and configure dependencies. The dependencies list reflects the solutions you've selected to deploy.
After you complete the dependency setup, return to the Microsoft Cloud Solution Center and select Recheck dependencies to refresh the Configure dependencies page.
You now have the options to include sample content.
After all the dependent apps have been installed and configured, and you selected any more components, select Deploy to continue.
Note
The solution deployment starts and will continue to run in the background. Depending on the solutions you have selected to install, it might take a while for them to be deployed in your environment. You will receive a notification through email when the deployment has been completed successfully.
- After the deployment is complete, links will be available in the Microsoft Cloud Solution Center to launch your solution. There might be some extra steps to finish configuring your solution. Select the View documentation link to learn more about post-deployment configuration or explore our ecosystem for other financial services applications.
For information about post-deployment configuration for each solution, go to Post-deployment configurations for financial services solutions.
Note
If you are deploying Customer onboarding, the custom document workflows are not activated and you need to configure them. See post-deployment configuration guidance to activate the workflows.
Note
If you want to update a particular financial services solution, you must deploy it again from the Solution Center to your deployment environment.
Step 3: Add users and assign security role
To access the financial services apps you deployed, users in your organization must be assigned the appropriate security roles.
Sign in to the Power Platform admin center.
Select your environment by selecting the environment name, and then under Users select See all.

On the Users page, add users to your environment and assign them the relevant roles.
Also, depending on the solution you deployed, you'll have to assign extra security roles to your users so they can access the individual apps:
Solution Security role Unified customer profile Basic user (or another core role with access to Power Platform)MC4FSI basic userRetail banking - contributorRelationship manager (be sure to allow the Relationship manager role access to Unified customer profile) Customer onboarding - Loan onboarding Basic user (or another core role with access to Power Platform)MC4FSI basic userLoan manager Customer onboarding - Onboarding essentials Basic user (or another core role with access to Power Platform) Onboarding agent (if deploying the application with no sample data) Banking customer engagement - Intelligent appointments Basic user (or another core role with access to Power Platform)MC4FSI basic userScheduling Admin and\or Scheduling Resource Manager (be sure to allow them access to Scheduling Administration app)Scheduling API user For users who test\trigger API Scheduling advisor - Advisor users don't necessarily need permissions to access the scheduling administration app, but do require mapping to this role to participate in meetings
Note
Users who access Unified customer profile without a role that allows editing rights on Contact records will see a message at the top of the application notification:Read-only: You don't have access to edit this record.With the above roles for Unified customer profile, users will be able to edit Life events, Relationships, and Groups. Add Contact editing rights to a user to remove this message.
Additional configurations
You need to perform additional configurations to enhance the capabilities of each of the financial services solutions. For more information, go to Getting started with configurations for the financial services solutions.
See also
International availability of Microsoft Cloud for Financial Services Post-deployment configuration for financial services solutions Support for Microsoft Cloud for Financial Services What is Microsoft Cloud for Financial Services?